Nexgrill 820-0084D User manual

12”Tabletop
Gas Pizza Oven
19001038A0
OWNER'S MANUAL
• This instruction manual contains important information necessary for the proper assembly
and safe use of the appliance.
• Read and follow all warnings and instructions before assembling and using the appliance.
• Follow all warnings and instructions when using the appliance.
• Keep this manual for future reference.
FOR OUTDOOR USE ONLY
Model: 820-0084D

Table of Contents
2
Safety Warnings ...................................................... 3
Safety
Package Parts List ................................................... 6
Assembly Instructions ............................................ 7
Gas Connection ...................................................... 12
Leak Testing ............................................................ 14
Lighting Instructions .............................................. 15
Operating Instructions ........................................... 16
Care and Maintenance ........................................... 18
Troubleshooting ...................................................... 20
Assembly
Setup
Use and Maintenance
Limited Warranty ..................................................... 21
Service..................................................................... 21
Exploded View ........................................................ 22
Parts List................................................................... 23
Warranty

Safety Warnings
DANGER
1. The installation must conform with local codes or, in the absence of local codes, with the National Fuel Gas Codes,
with the National Fuel Gas Code, ANSI Z223.1/NFPA 54, Storage and Handling of Liquefied Petroleum Gases, ANSI/
NFPA 58, or the Standard for Recreational Vehicles, ANSI A119.2/ NFPA 1192, and the Recreational Vehicle Code,
CSA Z240 RV, as applicable.
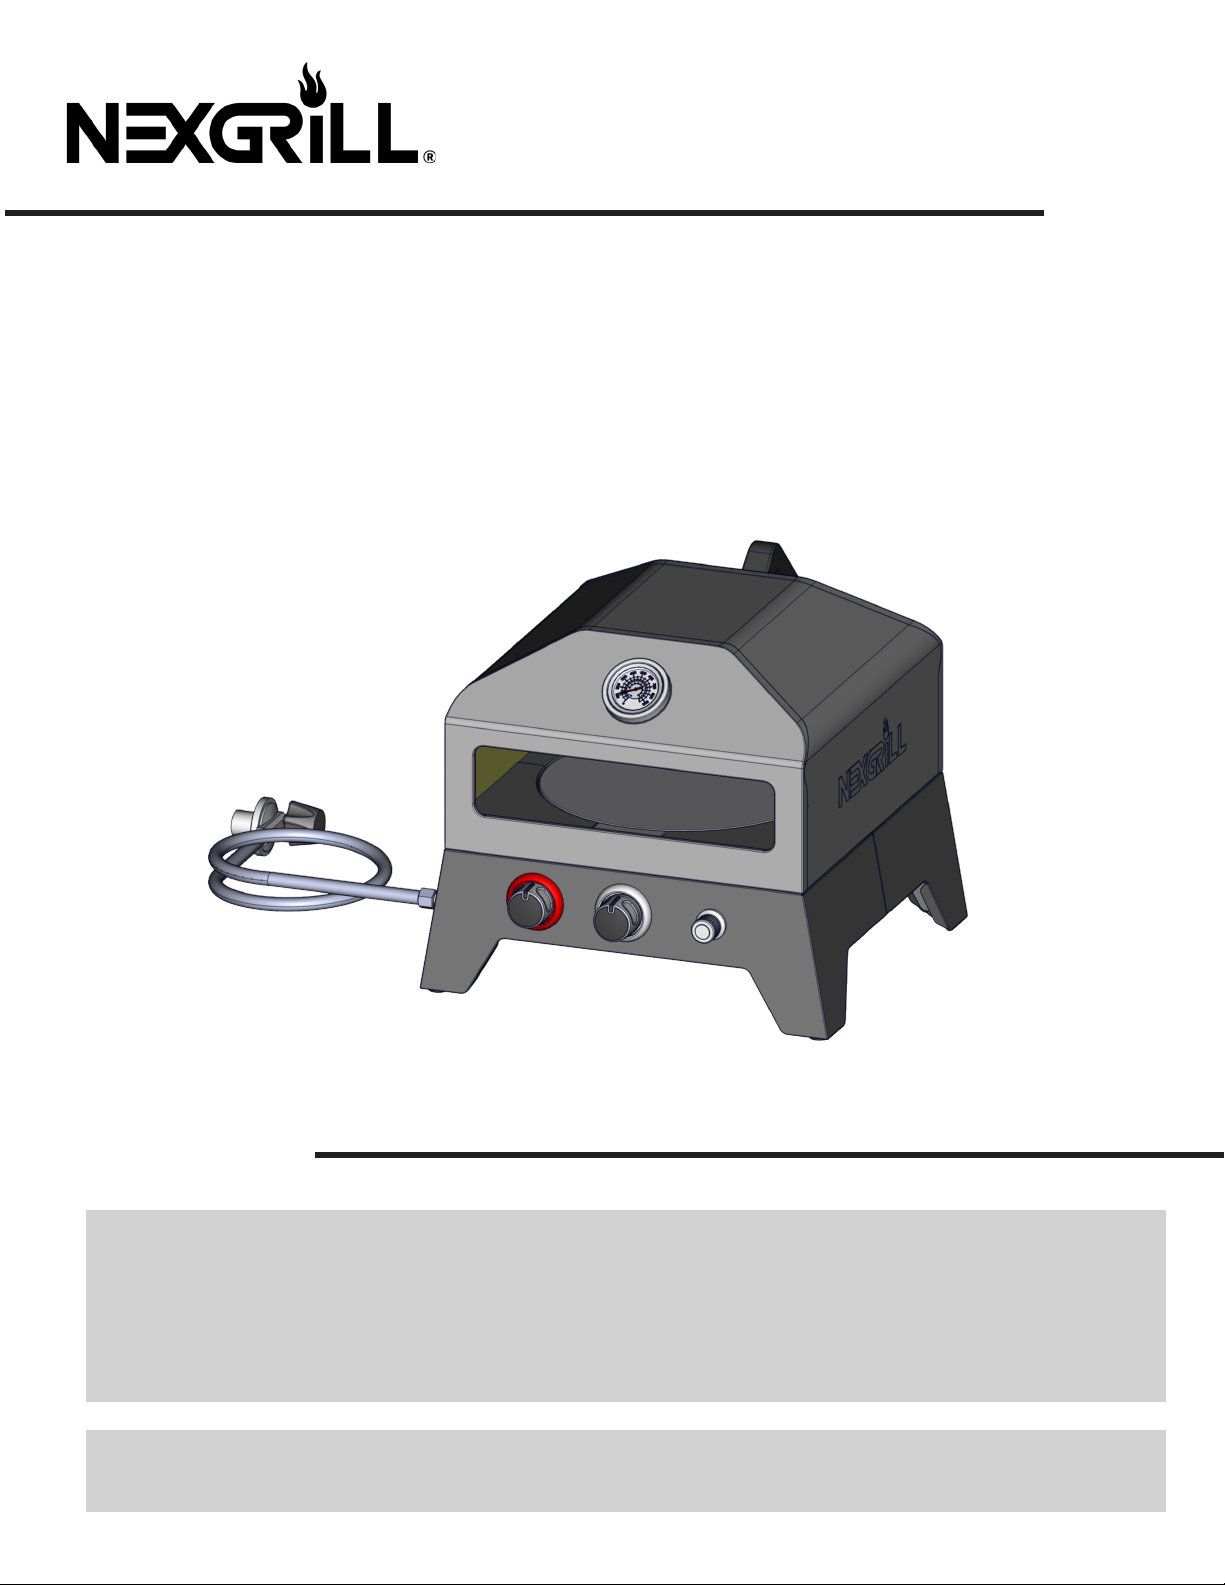
2. This tabletop pizza oven is for outdoor use only. The pizza oven should be operated in a well-ventilated space.
NEVER operate in an enclosed space, garage or building. Your pizza oven is not intended to be installed in or on
recreational vehicles and/or boats.
3. Heated liquids remain at scalding temperatures long after the cooking process. DO NOT touch the cooking
appliance until liquids have cooled to 115°F (45°C) or less.
4. DO NOT install or use pizza oven within 36” (92 cm) of combustible materials from back and sides of pizza oven.
Pizza oven shall not be located under overhead surfaces (closed carport, garage, porch, patio) that can catch fire.
5. NEVER attempt to attach this pizza oven to the self-contained LP gas system of a camper trailer or motor home.
6. It is the responsibility of the assembler/owner to assemble, install and maintain the gas pizza oven. DO NOT let
children operate or play near your pizza oven and keep pets away. Failure to follow these instructions could result
in serious personal injury and/or property damage.
7. When pizza oven is not in use, turn o control knob on the LP gas cylinder and disconnect.
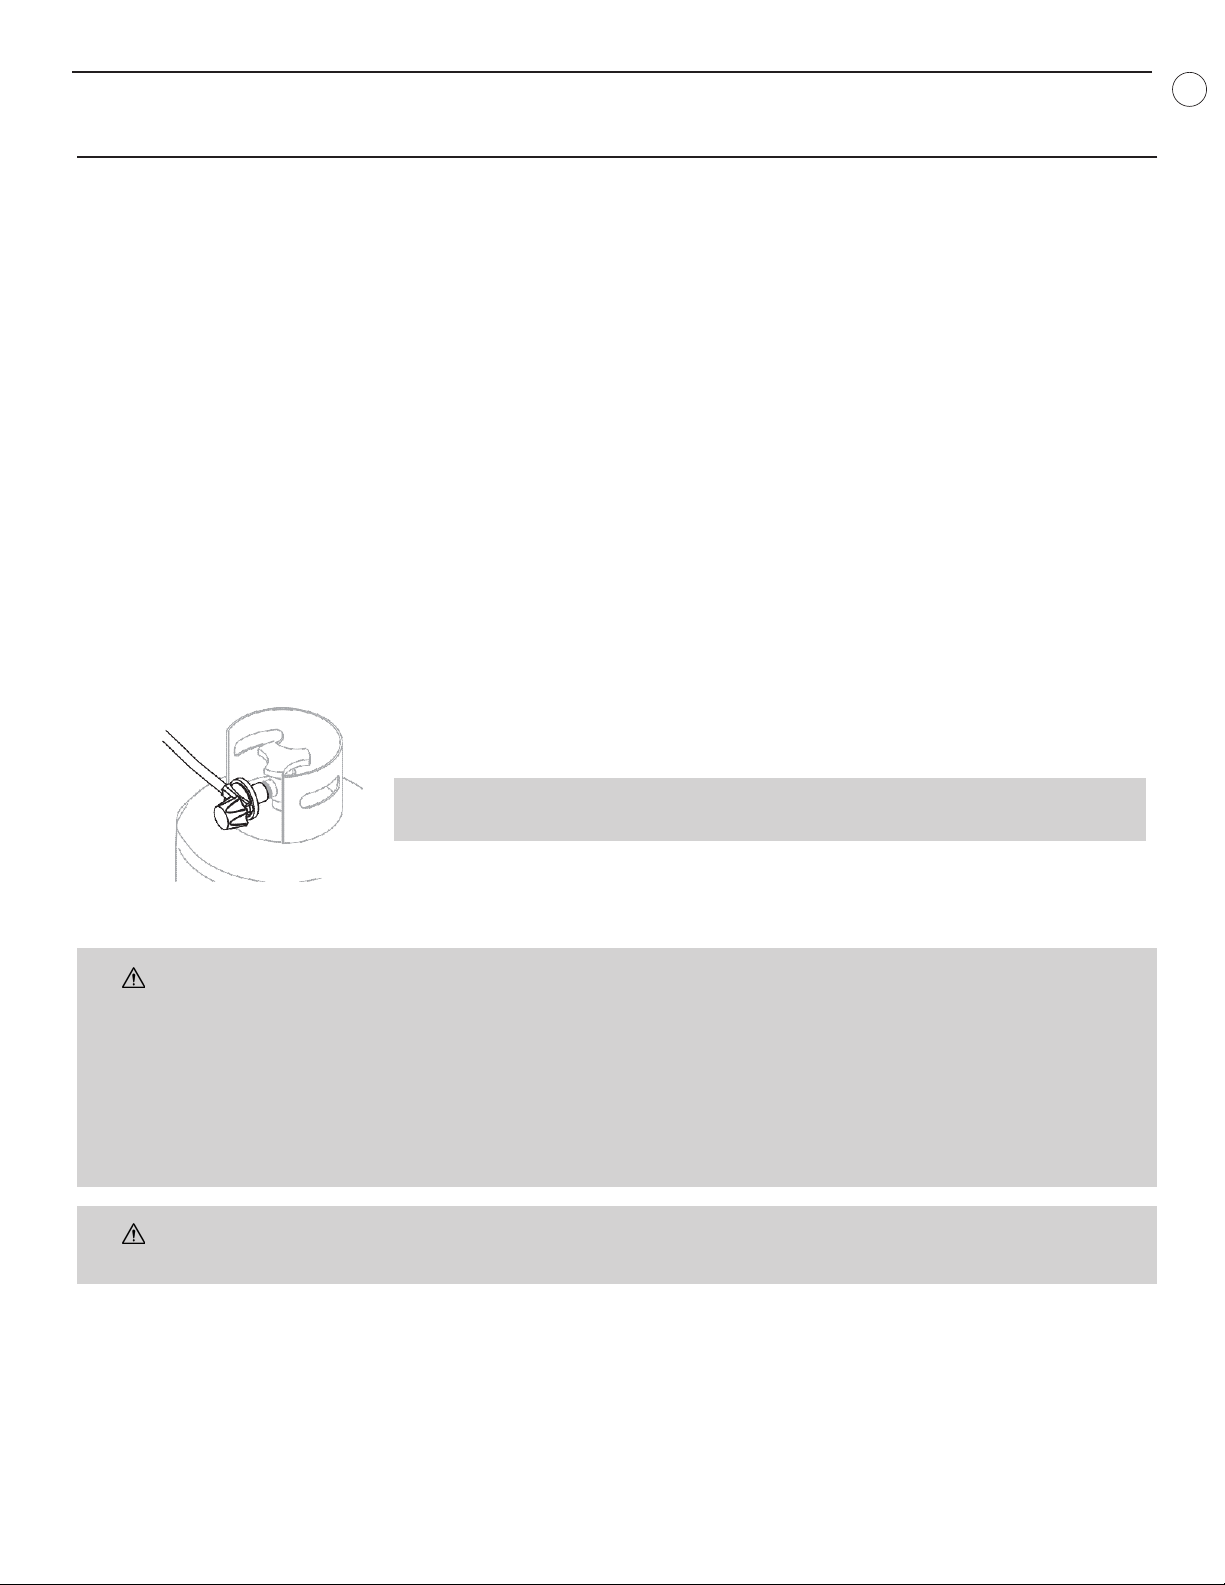
8. Carefully follow instructions in this manual for proper assembly and leak testing of your pizza oven.
9. DO NOT use pizza oven until leak checked. If a leak is detected at any time, it must be stopped and corrected
before using pizza oven further.
10. Appliance area should be kept clear and free from combustible materials, gasoline, bottled gas in any form and
other flammable vapours and liquids. DO NOT obstruct flow of combustion and ventilation air.
11. NEVER try to light pizza oven in an enclosed environment. Buildup of gases is very dangerous and could cause an
explosion.
12. Keep the fuel supply hose away from any heated surfaces.
3
DANGER
If you smell gas:
1. Shut o gas to the appliance.
2. Extinguish any open flame.
3. Ensure opening is not obstructed.
4. If odor continues, keep away from the appliance and immediately call your gas supplier or
your fire department.
Failure to follow these instructions could result in fire, explosion or burn hazard, which could
cause property damage, personal injury or death.
DANGER
• Never operate this appliance unattended.
• Never operate this appliance within 10’ (3 m) of any structure, combustible material or
other gas cylinder.
• Never operate this appliance within 25’ (7.2 m) of any flammable liquid.
• This appliance is not intended for, and should never be used as, a heater.
• If a fire should occur, keep away from the appliance and immediately call your fire
department. Do not attempt to extinguish an oil or grease fire with water.
Failure to follow these instructions could result in fire, explosion or burn hazard which could
cause property damage, personal injury or death.

Safety Warnings
Propane is a ammable gas and improper handling may result in explosion and/or re and serious
accident or injury.
This appliance will be hot during and after use. Use insulated oven mitts or gloves for protection from hot surfaces or
splatter from cooking liquids.
DO NOT leave your pizza oven unattended while in operation. Keep children and pets away from the appliance at all
times.
DO NOT move the appliance while in use.
DO NOT use while under the inuence of drugs or alcohol as this may impair the ability to properly
assemble or safely operate the appliance.
DO NOT store any spare LP (propane) cylinder, full or empty, under or near your pizza oven.
This appliance is not intended for commercial use or rental.
The cylinder must be disconnected when the appliance is not in use.
When cooking, the appliance must be on a level, stable, noncombustible surface in an area clear of combustible
material. An asphalt surface (blacktop) may not be acceptable for this purpose.
Sometimes spiders and other small insects climb into the burner tube. The spiders spin webs, build nests and lay
eggs. The webs or nests can be very small, but they are very strong and can block the ow of gas. Clean the burner
prior to use after storing, at the beginning of the outdoor cooking season or after a period of one month of not being
used.
THE FUEL SYSTEM
The items in the fuel system are designed for operation with this pizza oven. They must not be replaced with any
other brand. See parts list for replacement items.
GAS BURNER: The gas burner is constructed of stainless steel and should not require maintenance
other than inspection for insects/nests inside the air intake slots.
CAUTION
The gas pressure regulator provided with this appliance must be used. This regulator is equipped
with the required orice and is set for the required outlet pressure for this appliance. This
combination of orice size and pressure regulation specications provides the cooking
performance intended by the manufacturer. Substitution of regulator for any other device is
dangerous and could result in serious injury.
FUEL SUPPLY HOSE
The hose connected regulator provided with this appliance is 3’(0.9 m) long. Keep the fuel hose away from any heat-
ed surface(s).
CAUTION
DO NOT connect this pizza oven with any gas supply other than propane. Propane gas is heavier
than air and settles in lower areas. Make certain adequate ventilation is available when using the
pizza oven. The gas cylinder may be stored outside in a well-ventilated area out of the reach of
children when the oven is not in use.
4
WARNING
PROPANE FUEL: Propane is a flammable gas. Improper handling may result in an explosion and/or fire
and serious accident or injury. This pizza oven is designed to operate with propane (LP) gas only and
is equipped with the proper orifice for propane gas.

Safety Warnings
SAFETY INFORMATION
The LP gas cylinder shall be used only outdoors in a well-ventilated space and not in a building, garage, or any other
enclosed area. The gas must be turned o at the supply cylinder when the pizza oven is not in use. The LP gas cyl-
inder must be stored outdoors out of the reach of children and shall not be stored in a building, garage, or other
enclosed area. The tabletop pizza oven may be stored indoors if the LP gas cylinder is removed and stored outdoors.
The LP gas cylinder (not included) is threaded for connection directly to the gas regulator supplied with this appli-
ance. Care should be taken when threading the cylinder to the regulator to engage threads correctly to achieve the
proper and intended connection. When disconnecting or connecting the gas cylinder, be careful that the regulator
does not strike the pizza oven, the ground, or any other surfaces. Replace the protective cap over the threaded cyl-
inder connection when removed from the pizza oven. If any diculty occurs when connecting or disconnecting the
cylinder to the regulator assembly, contact your local gas supplier for assistance.
When re-connecting the LP gas cylinder to the regulator, be sure to hand-tighten until snug. This
connection should be inspected for damage and leak tested after each re-connection.
To do a leak test, make a soap solution of one part liquid detergent and one part water. You will need a spray bottle,
brush, or rag to apply the solution to the tting. Bubbles indicate leaks.
Check all gas supply ttings for leaks before each use. DO NOT use the pizza oven until
all connections have been checked and do not leak.
5
WARNING
ALWAYS operate the pizza oven on a tabletop, no higher than 32” (81 cm).
Place the propane tank on the ground immediately adjacent to the tabletop, no further than 24”
(61 cm) from the pizza oven.
Failure to follow these instructions could cause the propane tank to overheat and vent propane
which could ignite, causing serious personal injuries or property damage; and/or create a tripping hazard with the
gas hose or propane tank which could lead to the pizza oven being pulled o the tabletop, causing serious per-
sonal injuries or property damage.
CAUTION!
Let the appliance cool down before putting the cover on.

Package Parts List
6
7
5
3
2
8
6
4
1
x4

7
Assembly Step
1
2
!
!
!
12
a
aa
a
bb
b b
a>b
a
b
!
3

8
3
4
!
!
4
5
Assembly Step

9
5
6
6
7
8
Assembly Step

10
7
8
Assembly Step
+
-

11
9
Assembly Step

Gas Connection
LP TANK REQUIREMENT
A dented or rusty LP tank may be hazardous and should be checked by your LP supplier. Never use a cylinder
with a damaged valve. The LP gas cylinder must be constructed and marked in accordance with the specifica-
tions for LP gas cylinders of the U.S. Department of Transportation (DOT) or the
National Standard of Canada, CAN/CSA-B339, Cylinders, Spheres and Tubes for Transportation of
Dangerous Goods; and Commission, as applicable.
For use with a standard 20 lb LP cylinder: 18 1/4” (470 mm) high, 12 1/4” (305 mm) diameter. Overfilling preven-
tion device (OPD) shall be provided on cylinder and QCCI connection on the cylinder valve, ANSI/CGA-V-1. The
cylinder supply system must be arranged for vapour withdrawal. The cylinder must include a collar to protect
the cylinder valve. The cylinder must be provided with a shut o valve terminal in an LP gas supply cylinder
valve outlet specified, as applicable, for connection type QCC1 in the standard for compressed gas cylinder
valve outlet and inlet connection ANSI/CGA-V-1.
Manifold pressure: 11” water column (W.C.).
LP GAS HOOK-UP
Ensure that the black plastic grommets on the LP cylinder valve are in place and that the hose does not come
into contact with the pizza oven.
CONNECTION
Your pizza oven is equipped with gas supply orifices for use only with liquid propane gas. It is also equipped
with a hose/regulator assembly for connection to a standard 20 lb LP cylinder.
To connect the LP gas supply cylinder, please follow the steps below:
1. Make sure tank valve is in its full o position (turn clockwise to stop).
2. Check tank valve to ensure it has proper external male threads (type 1 connection per ANSI Z21.81).
3. Make sure the burner valve is in the o position.
4. Inspect valve connections, port, and regulator assembly. Look for any damage or debris. Remove any de-
bris. Inspect hose for damage. Never attempt to use damaged or obstructed equipment. See your local LP
gas dealer for repair.
5. When connecting regulator assembly to the valve, hand tighten the quick coupling nut clockwise to a com-
plete stop. Do not use a wrench to tighten. Use of a wrench may damage the quick coupling nut and result
in a hazardous condition.
6. Open the tank valve fully (counter-clockwise). Apply the soap solution with a clean brush to all gas connec-
tions. See below. If growing bubbles appear in the solution, the connections are not properly sealed.
7. Check each fitting and tighten or repair as necessary.
8. If you have a gas connection leak you cannot repair, turn gas OFF at supply tank, disconnect fuel line from
your pizza oven and call 1-800-913-8999 or your gas supplier for repair assistance. Also apply soapy solu-
tion to the tank seams. If growing bubbles appear, shut tank OFF and do not use or move it. Contact an LP
gas supplier or your fire department for assistance.
12

Gas Connection
DISCONNECTING LP GAS CYLINDER:
1. Turn the burner valves o.
2. Turn the tank valve o fully (turn clockwise to stop).
3. Detach the regulator assembly from the tank valve by
turning the quick coupling nut counter-clockwise.
13
CAUTION
a. Do not store a spare LP gas cylinder under or near this appliance;
b. Never ll the cylinder beyond 80 percent full; and
c. If the instructions in (a) and (b) are not followed exactly, a re causing death or serious injury may occur.

Leak Testing
GENERAL
Although all gas connections on the pizza oven are leak tested at the factory prior to shipment, a
complete gas leak test check must be performed at the installation site due to possible mishandling in shipment, or
excessive pressure unknowingly being applied to the unit. Periodically check the whole system for leaks following
the procedures listed below. If the smell of gas is detected at any time, you should immediately check the entire
system for leaks.
BEFORE TESTING
Make sure that all packing material is removed from the pizza oven including tie-down straps.
DO NOT SMOKE WHILE LEAK TESTING. NEVER PERFORM LEAK TEST WITH AN OPEN FLAME.
Make a soap solution of one part liquid detergent and one part water. You will need a spray bottle, brush, or rag to
apply the solution to the ttings.
TO TEST
1. Make sure the control valves are in the o position, and turn on the gas supply.
2. Check all connections from the LP gas regulator and supply valve up to and including the connection to the man-
ifold pipe assembly (the pipe that goes to the burners). Soap bubbles will appear where a leak is present.
3. If a leak is present, immediately turn o the gas supply and tighten the leaky ttings.
4. Turn the gas back on and recheck. Should the gas continue to leak from any of the ttings, turn o the gas supply
and contact customer service at 1-800-913-8999.
Only parts recommended by the manufacturer should be used on the pizza oven. Substitution will void the warranty.
Do not use the pizza oven until all connections have been checked and do not leak.
GAS FLOW CHECK
Each pizza oven burner is tested and adjusted at the factory prior to shipment; however, variations in the local gas
supply may make it necessary to adjust the burners. The ames of the burners should bevisually checked.
Flames should be blue and stable with no yellow tips, excessive noise or lifting. If any of these
conditions exist, check to see if the air shutter or burner ports are blocked by dirt, debris, spider webs, etc. If you have
any questions regarding ame stability, please call customer service at 1-800-913-8999.
14
Check all gas supply ttings for leaks before each use.
It is handy to keep a spray bottle of soapy water near
the shut-o valve of the gas supply line. Spray all the
ttings. Bubbles indicate leaks.
ALWAYS CHECK FOR LEAKS AFTER EVERY LP TANK
CHANGE

Lighting Instructions
WARNING: IMPORTANT!
BEFORE LIGHTING
Inspect the gas supply hose prior to turning the gas on. If there is evidence of cuts, wear, or abrasion, it must be
replaced prior to use. Do not use the pizza oven if the odour of gas is present. Only the pressure regulator and
hose assembly supplied with the unit should be used. Never substitute regulators and hose assembly for those
supplied with the pizza oven. If a replacement is necessary, contact the
manufacturer for proper replacement. The replacement must be that specified in the manual.
TO LIGHT THE MAIN BURNER
Make sure all knobs are o then turn on the gas supply from the LP (Liquid Propane) tank. Always keep your face and
body as far from the pizza oven as possible when lighting.
LIGHTING INSTRUCTIONS
1. Check control knobs are all o and then turn on the gas supply.
2. Push and turn the knob to its highest setting (sound of gas owing should be heard).
3. Press and hold on the electronic igniter button. The burner should ignite within 4 seconds.
4. If burner does not ignite, push and turn the gas knob completely o, wait 5 minutes and repeat from step 2.
MANUAL LIGHTING INSTRUCTIONS
If the ignition does not spark, the pizza oven can be lit with a match
using the following instructions.
1. Check that the control knob is o and then turn on the gas supply.
2. Push and turn the knob to its highest setting (sound of gas owing
should be heard).
3. Ignite a match and use the lighting rod to insert it though the hole
on the back of the rebox, as shown.
4. If burner does not ignite, push and turn the knob completely o,
wait 5 minutes and then repeat lighting instructions from step 2.
CAUTIONS
• Place dust cap on cylinder valve outlet when the cylinder is not in use. Only install the type of dust cap on the
cylinder valve outlet that is provided with the cylinder valve. Other types of caps or plugs may result in leakage of
propane.
• The gas must be turned o at the supply cylinder when the unit is not in use.
• If the appliance is stored indoors the cylinder must be disconnected and removed from the
appliance. Cylinders must be stored outdoors in a well-ventilated area out of the reach of children.
• Keep a spray bottle of soapy water near the gas supply valve and check the connections before each use.
15
WARNING
Always keep your face and body as far away from the burner as possible when lighting.
WARNING
Do not attempt to light the pizza oven if odour of gas is present. Call for service
1-800-913-8999.

Operating Instructions
PREHEATING
It is recommended to preheat the pizza oven for at least 15 minutes before beginning to cook so that the pizza stone
may reach an appropriate temperature. Aftewards, adjust burner knob as necessary depending on the food and the
cooking style. Most pizzas will be cooked at a medium temperature.
ROTATING PIZZA OVEN
Use and rotate the centre knob to control the rotating pizza stone as desired. Can be rotated in either clockwise or
counter-clockwise directions for as much or as little as desired. Two full turns of the knob will rotate the pizza stone
half way.
SMOKER BOX
Wood smoker chips or pellets may be added onto the smoker box, located in the rear of the pizza oven. Simply grab
by the handle to scoop up or add wood. Ensure the smoker box is not overlled past its opening. Afterwards, place
back into the pizza oven. It is recommeneded that the wood be sprayed or dampened with water in order to prolong
the smoke duration.
16
WARNING
Do not add fuel, gasoline, or lighter uid to the wood, as chemicals can be released that
are toxic to breathe or eat.
WARNING
Ensure all wood is fully extinguished or put out after turning the pizza oven o. Failing to do
so could lead to an unsupervised re.

Operating Instructions 17
PIZZA OVEN ACCESSORIES
A. Stainless Steel Pan is used to hold the Pizza.
B. Pizza Peel is used to take pizza.
C. Pizza Cutter is used to cut pizza.
PIZZA OVEN COVER
1. Allow the Pizza Oven cool down before putting the cover on.
2. Put the Gas Regulator under the Pizza Oven
3. After the Cover is put on, then tight up the Velcro Tape on
both side of the cover.
Pizza Peel Stainless Steel Pan
Pizza Cutter

Care and Maintenance
To ensure safe operation of your pizza oven, the area of cooking should always be kept free of combustible
materials of any type, such as gasoline or other flammable vapours or liquids. Ensure that the flow of
combustion and ventilation air is not obstructed.
Store the pizza oven out of direct sunlight and indoors whenever possible and when storing for an
extended period of time. The pizza oven should not be exposed to harsh weather conditions such as heavy
rain, strong winds, or snow. A cover is included to protect the pizza oven when not in use.
EXTERNAL PARTS
• These can be cleaned easily with warm, soapy water.
• Stainless steel parts can be cleaned using a stainless steel cleaner.
• It is recommended to always store the pizza oven with the included PVC cover to increase the life of the pizza
oven.
PIZZA STONE CARE
• Avoid applying an extreme temperature change to the stone. DO NOT place frozen foods on a hot stone, as doing
so could cause cracks to form.
• The stone is fragile and can break if bumped or dropped.
• The stone is very hot during use and stays hot for a long time after use. DO NOT cool the stone with water when
the stone is hot.
PIZZA STONE CLEANING
• A wire brush or stone brush is all that is needed to clean the pizza stone of remaning food and ash after use.
• If further cleaning is required, or some food remnants do not remove easily, then only applying warm water with a
damp rag across the surface of the pizza stone will suce. Proceed to thoroughly scrub the pizza stone.
• The pizza stone can be air dried or cleaned with a towel.
• Ensure the pizza stone is completely dried before turning on the pizza oven.
MAIN BURNER
Frequency of cleaning will depend on how often you use the pizza oven. Read the burner removal instructions on the
next page before attempting to service the main burner.
• Before cleaning, make sure the gas supply and control knobs are in the“OFF”position and the burners have
cooled.
• Clean the exterior of the burner with a wire brush. Use a metal scraper for stubborn stains or debris.
• Clear clogged ports with a straightened paper clip. Never use a wooden toothpick as it may break o and clog the
port.
• Check and clean burners/venturi tubes for insects and insect nests. A clogged tube can lead to a re beneath and
behind the main control panel.
18
WARNING
Wait for the pizza oven to be completely cool before moving or storing.

REMOVING THE MAIN BURNER
Extreme care should be taken when removing the burner. Make sure that the pizza oven is cool before handling any
pieces.
RE-INSTALLING THE MAIN BURNER
To re-install the main burner, re-attach all parts in reverse order
of the steps above.
• The main burner must be correctly centred on the orice
before any attempt is made to relight the pizza oven.
• Failure to properly place the burner over the orice could
cause a re to occur behind and beneath the valve panel,
thereby damaging the pizza oven and making it unsafe to
operate.
• Refer to the image to the right for proper orice placement
within the burner opening.
19
Care and Maintenance
1 2 3
4 5 6

20
Troubleshooting
Problem Potential Cause Corrective Action
Burner will not light. 1. No gas ow
2. Igniter battery is empty or no
battery installed.
3. Gas ow obstruction
4. Gas hose is incorrectly assembled
or not connected.
5. Gas hose is damaged or cut.
1. Check to see if propane tank is
empty.
2. Check to see if battery is installed
in the electronic igniter. If so, then
replace with new battery.
3. Wipe the tube burner clean.
4. Ensure gas hose coupling nut is
fully connected to gas tank.
5. Order a replacement part by
contacting customer service at
1-800-913-8999.
Noticeable drop in gas ow or low
ame
1. Out of gas 1. Check for gas in propane tank.
Flame blows out. 1. High or strong gusting winds
2. Low or out of gas
1. Carefully turn the pizza oven away
from wind.
2. Check for gas in propane tank.
Flare-ups 1. Grease build up
2. Excessive fat in meat
3. Excessive our on pizza stone
1. Clean the pizza oven.
2. Trim fats from meat before
cooking.
3. Brush excess our from pizza
stone.
Flashback (re in burner tube or
roaring sound from the burner)
1. Burner and/or burner tubes are
blocked.
2. Pressure drop during ignition
1. Turn gas control knob o. Clean
and wipe down the burner.
2. Turn o the gas. Ensure the tank
valve is fully opened, and re-ignite
the pizza oven.
Burner ame is yellow or orange in
conjunction with gas odour.
1. Spiders or insects are in or near
the burner.
1. Carefully remove all spiders or
insects and clean the burner.
2. Contact customer service at
1-800-913-8999.
Table of contents
Languages:
Other Nexgrill Kitchen Appliance manuals
Popular Kitchen Appliance manuals by other brands

Zojirushi
Zojirushi Mr.Bento SL-JAE14 instruction manual

Beko
Beko HDCG 32221 F user manual

Kitchen Monkey
Kitchen Monkey KMCHM instruction manual

Braun
Braun Multiquick 5 G 1500 black manual

CASO DESIGN
CASO DESIGN VacuChef 40 instruction manual

Roller Grill
Roller Grill CFE 400 Instructions for use and installation