NEXIQ Technologies WVL2 User guide
WVL2™
Installation and
Setup Manual

WVL2™ Installation and Setup Manual
IDSC Holdings LLC retains all ownership rights to the Wireless Vehicle Link 2 (WVL2) and its documentation. The
WVL2 source code is a confidential trade secret of IDSC Holdings LLC. You may not decipher or decompile WVL2,
develop source code for WVL2, or knowingly allow others to do so. The WVL2 and its documentation may not be
sublicensed or transferred without the prior written consent of IDSC Holdings LLC.
This manual, as well as the software it describes, is furnished under license and may only be used or copied in
accordance with the terms of such license. The content of this manual is furnished for informational use only, is
subject to change without notice, and should not be construed as a commitment by IDSC Holdings LLC. IDSC
Holdings LLC assumes no responsibility or liability for any errors or inaccuracies that may appear in this book.
Except as permitted by such license, no part of this publication may be reproduced, or transmitted, in any form or by
any means, electronic, mechanical, or otherwise, without the prior written permission of IDSC Holdings LLC.
Windows is a registered trademark of the Microsoft Corporation. All other trademarks mentioned herein are the
property of their respective owners.
NEXIQ Technologies is a trademark of IDSC Holdings LLC.
2010 IDSC Holdings LLC. All Rights Reserved.
www.nexiq.com
Part No. 1400-381 Revised 12/06/2011

WVL2™ Installation and Setup Manual ii
Chapter 1:
Introducing the Wireless Vehicle Link 2 ....................1
WVL2 Components .......................................................................2
Component Checklist ...........................................................................3
Product Specifications ...................................................................4
System Requirements ...................................................................5
WVL2 Device .................................................................................6
Chapter 2:
Setting Up Wireless Communication ........................9
Installation Process Flowchart (Wireless) ....................................10
Outline of Installation and Setup Process ....................................11
Step 1: Install the WVL2 Drivers and Utilities ..............................12
Step 2: Configure the Wireless Network Card .............................22
Windows XP (Service Pack 2/3) .........................................................23
Windows 7 ..........................................................................................33
Step 3: Connect to a Vehicle .......................................................45
Chapter 3:
Setting Up Wired Communication .........................47
Overview ......................................................................................48
Installation Process Flowchart (Wired) ........................................49
Setting Up the WVL2 for Wired Communication .........................50

iii WVL2™ Installation and Setup Manual
Chapter 4:
The WVL2 Explorer ..............................................55
Overview: Using the WVL2 Explorer ...........................................56
Configuration ......................................................................................57
Firmware ............................................................................................59
The File Menu .............................................................................62
The Tools Menu ..........................................................................63
Ping ....................................................................................................63
Options ...............................................................................................65
Application Feature .........................................................................65
Connection Manager Feature .........................................................66
Discovery Feature ...........................................................................69
The Help Menu ............................................................................71
Chapter 5:
WVL2 Troubleshooting Information .......................73
LED Issues ..................................................................................74
Configuration Issues ....................................................................75
Wireless Communication Issues .................................................76
Vehicle Application Issues ...........................................................78
Appendix A:
Setting Up a Second WVL2 ...................................79
Overview .....................................................................................80
Setting Up a Second WVL2 .........................................................81
Two Conditions to Watch For ......................................................85
Firmware Conflict ...............................................................................85
IP Address Conflict .............................................................................87

WVL2™ Installation and Setup Manual 1
1
Introducing the
Wireless Vehicle Link 2
WVL2 Components, page 2
Product Specifications, page 4
System Requirements, page 5
WVL2 Device, page 6
The wireless Vehicle Link 2 (WVL2) is a hardware device that enables your PC/laptop
to retrieve vehicle information wirelessly via the 802.11 b/g specification. Once configured,
the WVL2 interfaces with your PC, enabling you to use specific PC applications to perform
vehicle diagnostics.
This chapter introduces the WVL2 and provides details regarding the communication
modes available to you to interface with your PC/laptop.

2 WVL2™ Installation and Setup Manual
Chapter 1• Introducing the Wireless Vehicle Link 2
WVL2 Components
The following illustration details the WVL2 components:
Figure 1.1 WVL2 Components

- WVL2 Components
WVL2™ Installation and Setup Manual 3
Component Checklist
The following components are included with your WVL2 kit. Be sure you have all
the items before installing and setting up the WVL2 on your PC/laptop.
Carrying Case
Wireless Vehicle Link 2 (WVL2)
WVL2 Drivers and Utilities Installation CD
6 & 9-pin Deutsch Y Cable (PN 405048)
15 ft. USB Cable
WVL2 Installation and Setup Manual
Adapter Guide for the WVL2

4 WVL2™ Installation and Setup Manual
Chapter 1• Introducing the Wireless Vehicle Link 2
Product Specifications
The WVL2 is configured with the following specifications:
Feature Data
Physical Dimensions 1.25” H x 4.0” W x 6.75” L
(32 mm x 102 mm x 171 mm)
Weight .42 lb. (0.19 kg)
Power Requirements 6.5 to 32 VDC, 5 Watts Max
Operating Temperature 0to 70C (32to 158F)
Vehicle Protocols Supported • ALDL (9600-baud systems)
• J1708/J1587
• J1939/J2284 CAN
• J1850 (VPW and PWM)
• ISO 9141
• KWP2000
• ISO-15765
•ATEC1
Wireless Communication TCP/IP over 802.11 b/g
Wired Communication USB
PC Drivers TMC RP1210A compliant
TMC RP1210B compliant
J2534
Vehicle Connector DB15F

- System Requirements
WVL2™ Installation and Setup Manual 5
System Requirements
Be aware of the following system requirements:
NOTE:
iIf your PC/laptop does not have an internal wireless network card, you will
need to purchase an external wireless network card.
Component Requirement
IBM PC Compatible Computer • Pentium M 4 1.7GHz processor
• RAM: 512MB
• 300 MB available hard drive
storage space
• Internal wireless network card, or
wireless network slot available
• CD drive
• USB port
• 1024x768screenresolutionand
a display setting of “normal” size
(96 dpi)
Operating System Windows®:
• XP (Service Pack 2/3)
• Windows 7

6 WVL2™ Installation and Setup Manual
Chapter 1• Introducing the Wireless Vehicle Link 2
WVL2 Device
The following illustration details the features of the WVL2 diagnostic device:
Legend
A—Vehicle Port
Connects the WVL2 to a vehicle.
B—Power LED
Lights up green when the WVL2 receives power.
Figure 1.2 Wireless Vehicle Link 2 (WVL2)

- WVL2 Device
WVL2™ Installation and Setup Manual 7
C—Data LED
Lights up yellow when the WVL2 receives data from the vehicle.
D—Wireless LED
Blinks yellow whenever the WVL2 is connected wirelessly. The LED blinks
faster for a strong connection, and slower for a weak connection.
E—Fault LED
Lights up red when a problem is detected.
With a wireless connection, the Fault LED and the Wireless LED work together
in the following way:
F—USB Port
Connects the WVL2 to your PC/laptop.
NOTE:
iFor additional information on trouble shooting LED behavior, refer to
Chapter 5: WVL2 Troubleshooting Information, later in this manual.
LED Behavior Fault Condition
Both LEDs off No access point or other ad hoc card
found
Both LEDs blinking at a one
second rate No SSID found
Both LEDs blinking alternately at a
one second rate. No IP address found

Wireless Vehicle Link 2 Installation and Setup Manual
9
2
Setting Up Wireless
Communication
Installation Process Flowchart (Wireless), page 10
Outline of Installation and Setup Process, page 11
Step 1: Install the WVL2 Drivers and Utilities, page 12
Step 2: Configure the Wireless Network Card, page 22
Windows XP (Service Pack 2/3), page 23
Windows 7, page 33
Step 3: Connect to a Vehicle, page 45
This chapter provides information you need to get started, including instructions on
installing all necessary software files.

10
Wireless Vehicle Link 2 Installation and Setup Manual
Chapter 2• Setting Up Wireless Communication
Installation Process Flowchart (Wireless)
Figure 2.1 Wireless Installation Process Flowchart
Install the WVL2
Drivers and
Utilities
Install an External
Wireless Network
Card
NO
Internal
Wireless
Network Card
Available?
YES
Operating
System?
Configure the
Wireless Network
Card
for Windows 7
Configure the
Wireless Network
Card
for Windows XP
XPWindows 7
Connect WVL2 to
Vehicle
Connect WVL2 to
Vehicle

- Outline of Installation and Setup Process
Wireless Vehicle Link 2 Installation and Setup Manual
11
Outline of Installation and Setup Process
Step 1: Install the WVL2 Drivers and Utilities.
Step 2: Configure the Wireless Network Card and setup a peer-to-peer (ad
hoc) network to connect to the WVL2.
Depending on your operating system, choose one of the following:
• Windows®XP (Service Pack 2/3)
• Windows®7
Step 3: Connect the WVL2 to a Vehicle.
NOTE:
iFor assistance in setting up encryption, please contact Customer Support
at 1-800-639-6774.

12
Wireless Vehicle Link 2 Installation and Setup Manual
Chapter 2• Setting Up Wireless Communication
Step 1: Install the WVL2 Drivers and Utilities
This section provides instructions for installing the WVL2 drivers and utilities.
NOTE:
iIf you have previously installed a WVL2, you must close the WVL2
Explorer. Right-click on the WVL2 icon in your laptop’s system tray and
select “Exit WVL2 Explorer.”
To install the WVL2 drivers and utilities:
1Close any programs that are currently running, and place the WVL2 Drivers
& Utilities CD in your PC’s CD/DVD-ROM drive.
IMPORTANT:
äIf your network has a firewall (i.e., a system designed to prevent unautho-
rized access to or from a private network), contact your local IT manager
and request that he or she assist you in opening Port 9294 UDP.
If you are not sure if you have a firewall installed, contact your local IT
manager prior to installing this product.
If you do not have a firewall installed, you don’t need to do anything.
- Step 1: Install the WVL2 Drivers and Utilities
Wireless Vehicle Link 2 Installation and Setup Manual
13
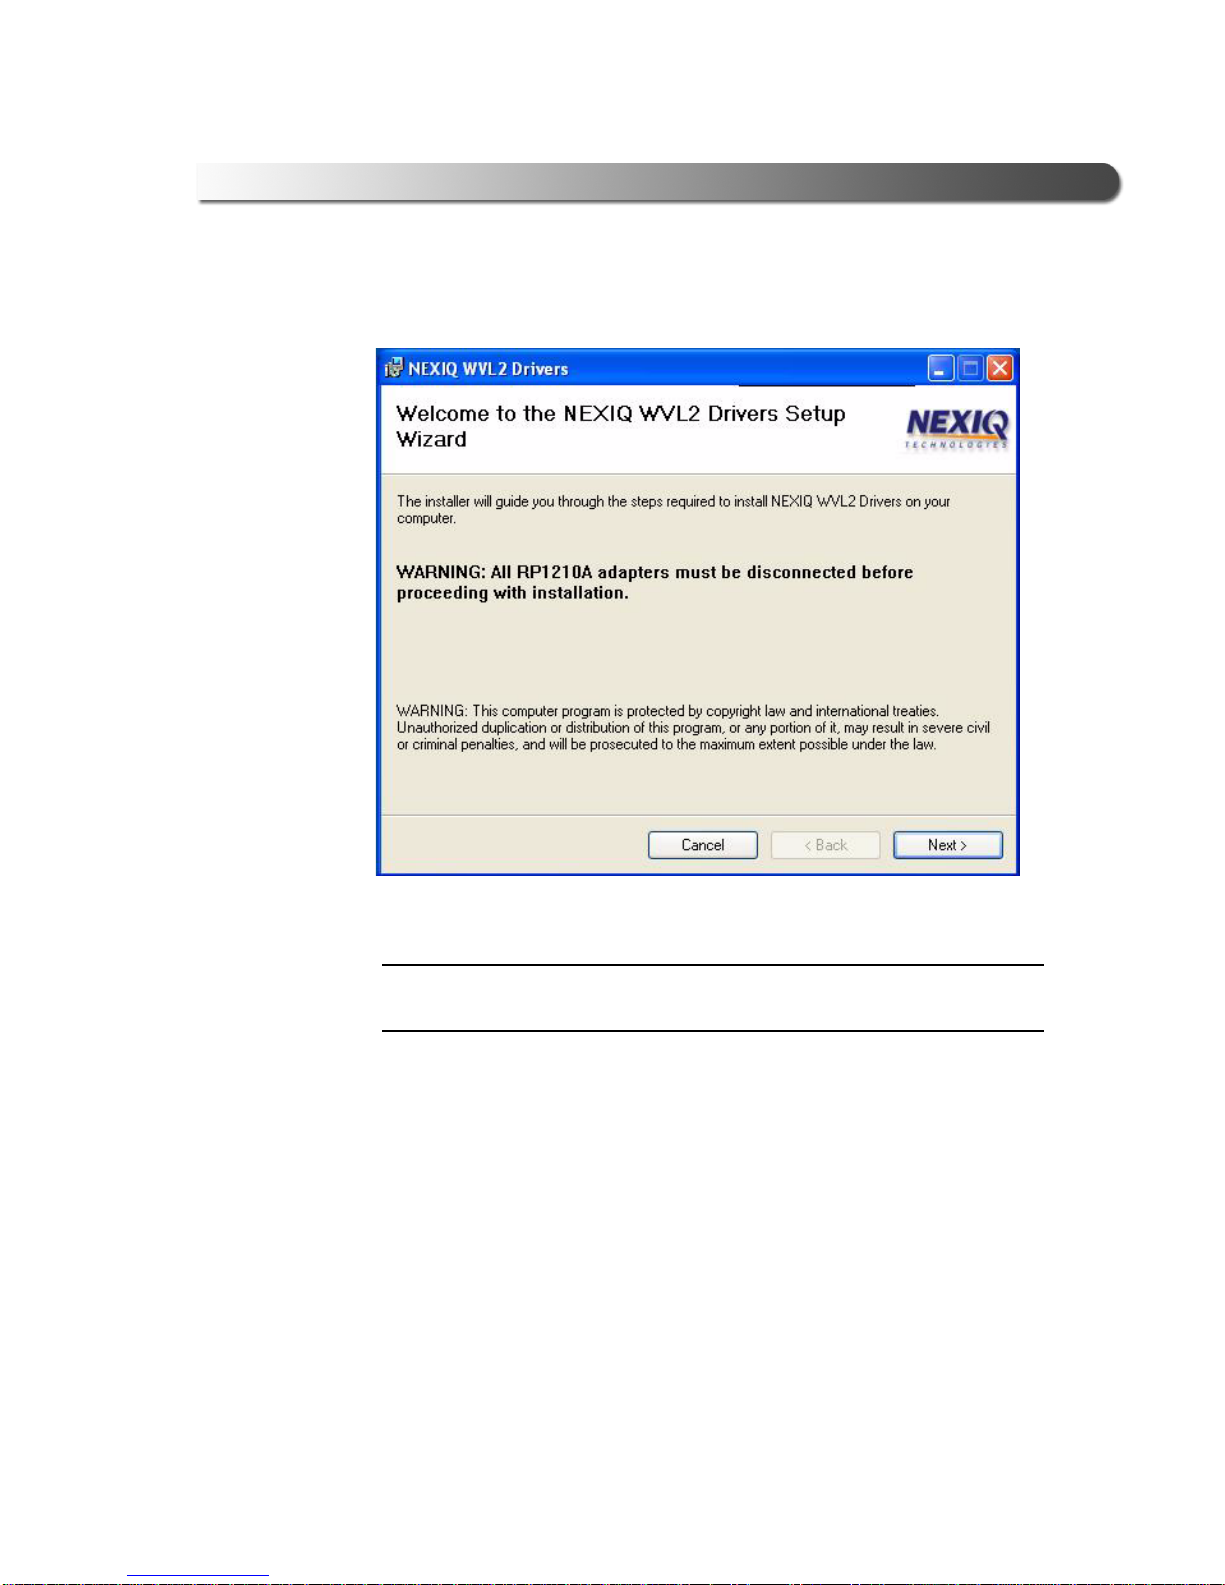
The WVL2 Drivers Setup Wizard Welcome screen is displayed.
WARNING:
äYou must disconnect all RP1210A adapters prior to proceeding with the
installation.
Figure 2.2 Setup Wizard Welcome Screen

14
Wireless Vehicle Link 2 Installation and Setup Manual
Chapter 2• Setting Up Wireless Communication
2Click Next.
3Read the information displayed on the License Agreement screen (using
the scroll bar to view the entire display).
4Click the I Agree radio button.
5Click Next.
Figure 2.3 WVL2 License Agreement

- Step 1: Install the WVL2 Drivers and Utilities
Wireless Vehicle Link 2 Installation and Setup Manual
15
The Select Installation Folder screen is displayed, indicating the location
where the drivers will be installed.
NOTE:
iIf you want to install the drivers in a location other than the default, click
the Browse button. The default is recommended.
You can also view available disk space and compare that to the space
required for the drivers, by clicking the Disk Cost button.
6To accept the default location, click Next.
Figure 2.4 Select Installation Folder

16
Wireless Vehicle Link 2 Installation and Setup Manual
Chapter 2• Setting Up Wireless Communication
The Confirm Installation screen is displayed.
7Click Next to continue.
Figure 2.5 Confirm Installation
- Step 1: Install the WVL2 Drivers and Utilities
Wireless Vehicle Link 2 Installation and Setup Manual
17
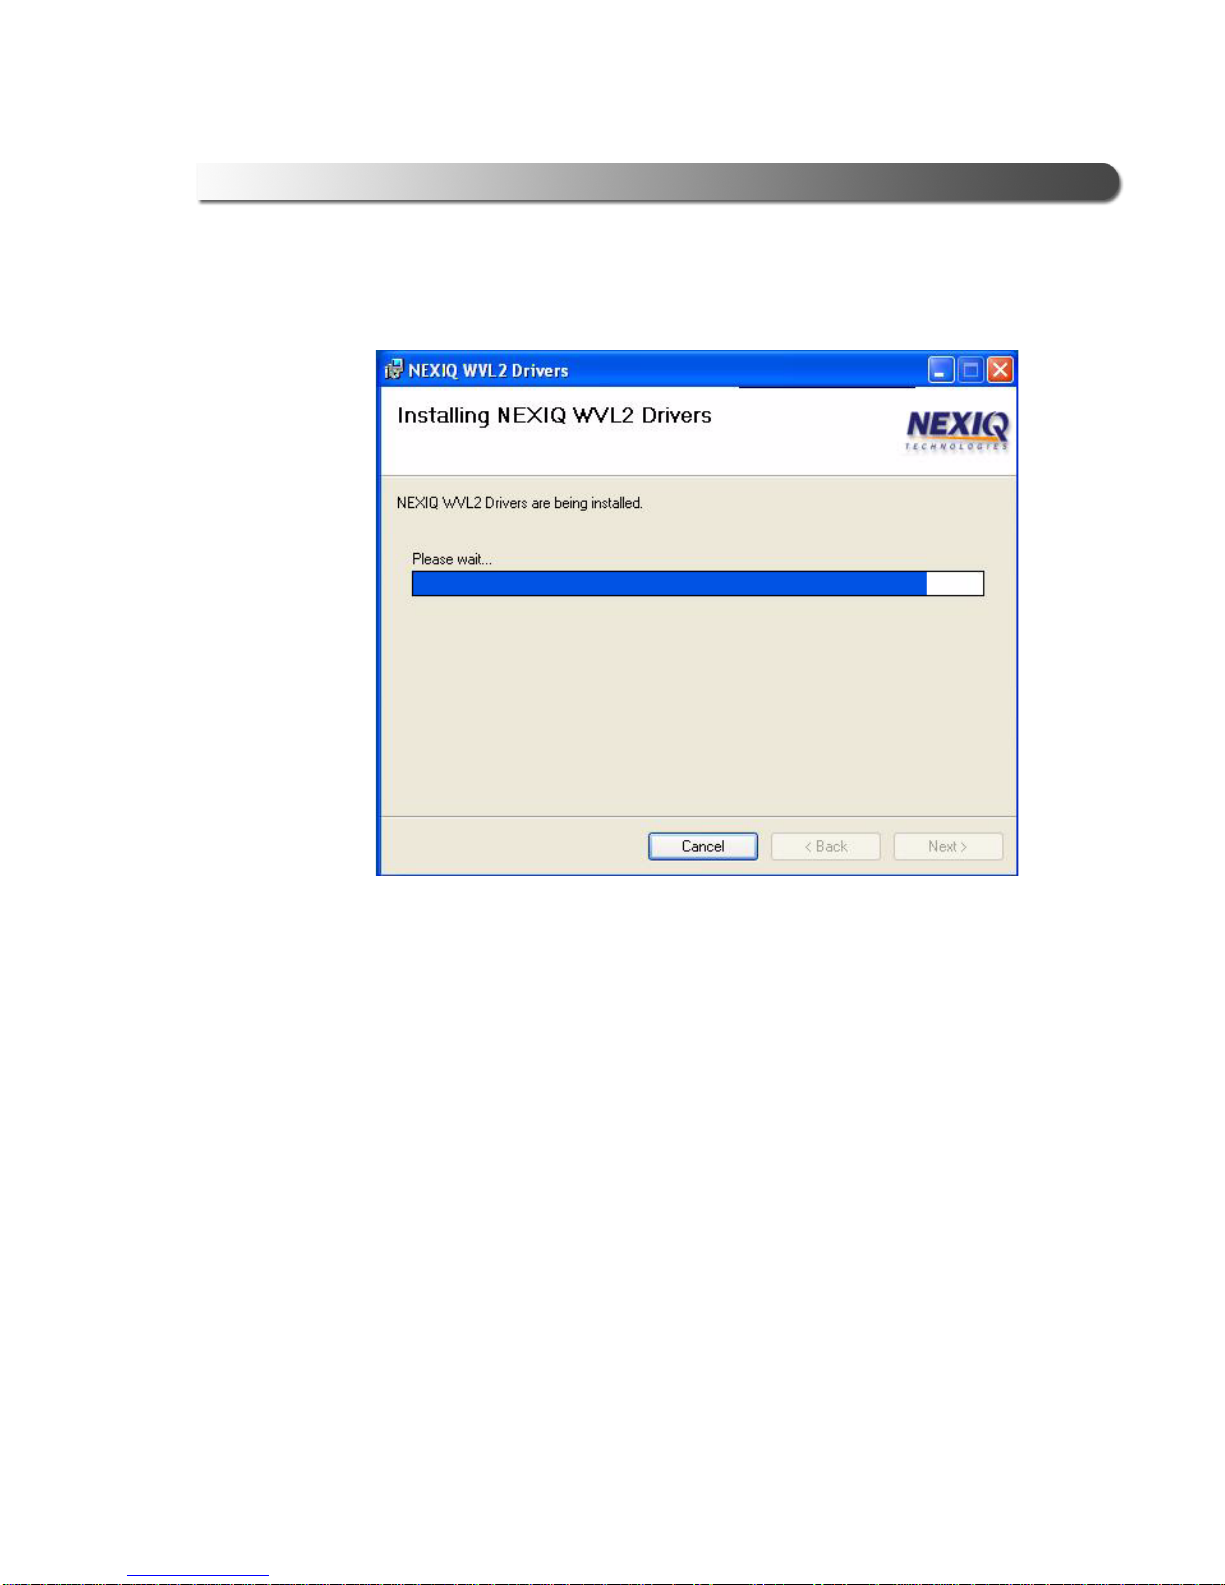
The installation process continues.
This may take a few seconds; a status bar keeps you informed of installation
progress.
Figure 2.6 Installing WVL2 Drivers
This manual suits for next models
1
Table of contents


