Nexxt Solutions Smart Wi-Fi Galaxy Star Projector User manual
WARRANTY
nexxtsolutions.com/warranty
YEAR
1
Smart Wi-Fi Galaxy
and Star Projector
English
User guide
Thank you for purchasing the Smart Wi-Fi Star Projector
from Nexxt Solutions. We are excited to be part of making
your life easier, safer and bringing peace of mind inside and
outside your home.
Carefully read this manual prior to setting up and using this
product.
Package content
• Smart Wi-Fi galaxy and star projector
• AC adapter
• Power cable
• User guide
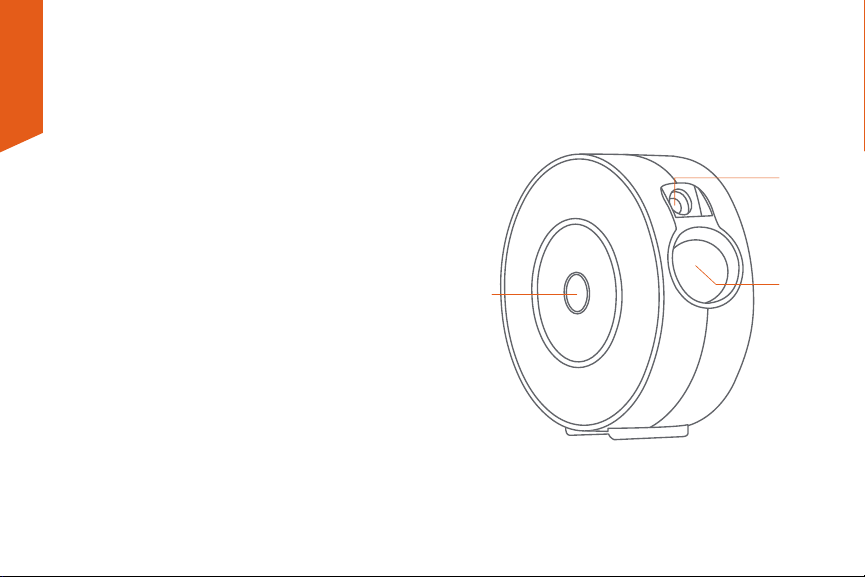
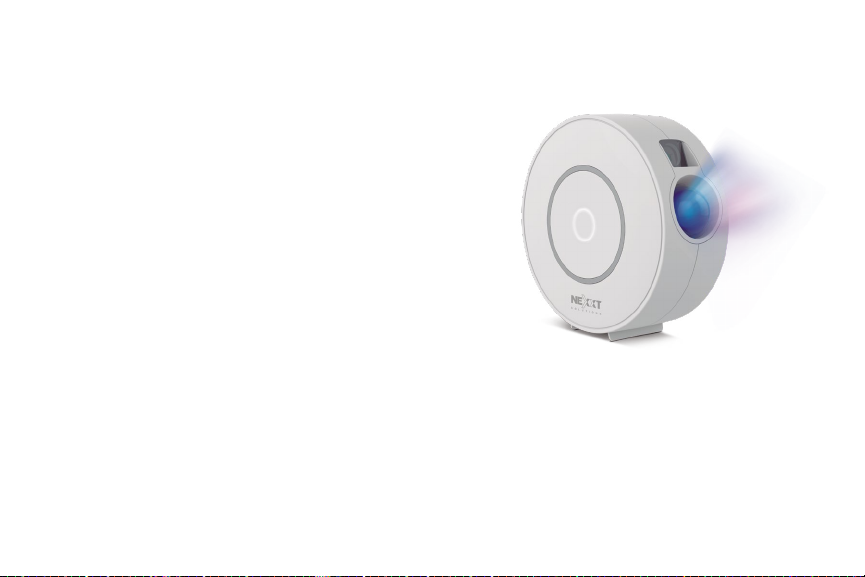
Product overview
1. Laser light
2. Projector light
3. Multifunction button, On/O, mode, color
32
1

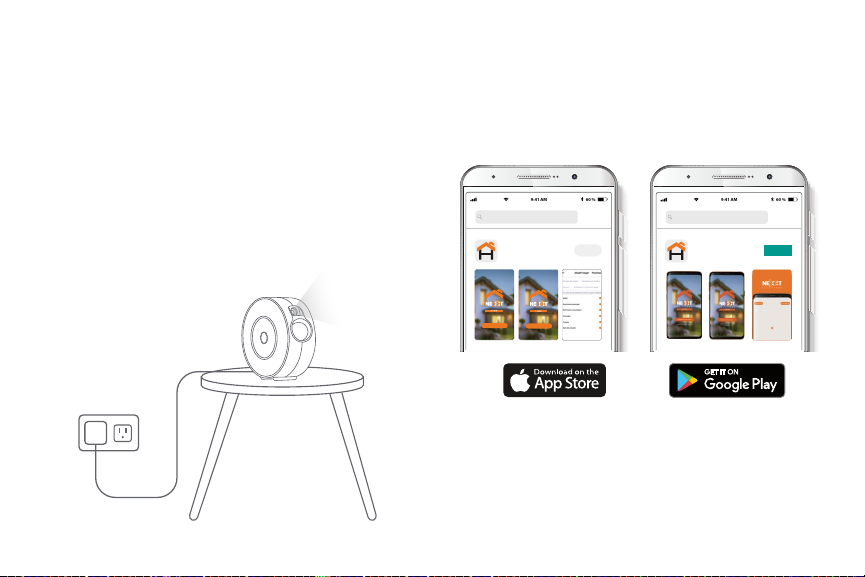
Installing the Nexxt Solutions
Home App
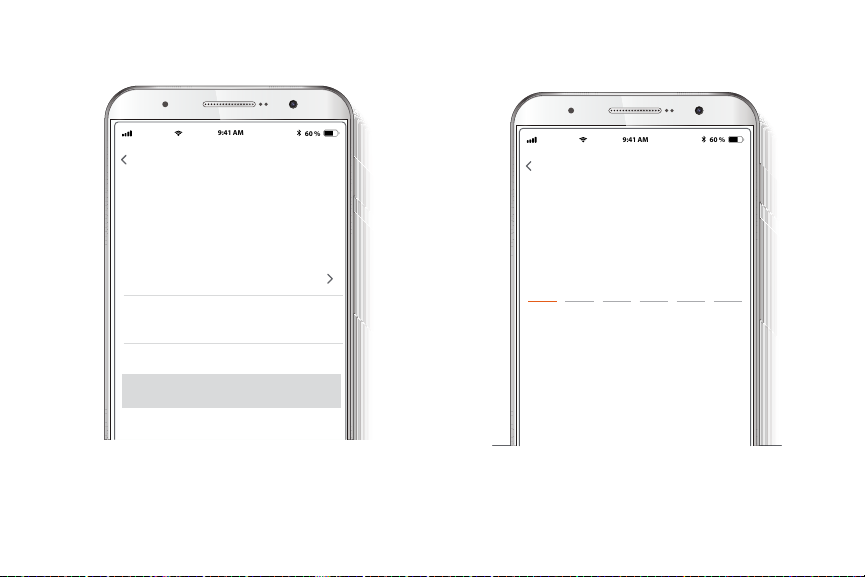
Download Nexxt Home app from Google Play or Apple App
Store.
60 %
9:41 AM
Nexxt Home
Nexxt Solutions Home App
Cancel
GET
Accvent LLC
Login with existing account
Create New Account
SOLUTIONS
Iniciarsesión con cuenta existente
Crear Cuenta Nueva
SOLUTIONS
60 %
9:41 AM
Nexxt Home
Nexxt Solutions Home App
Cancel
INSTALL
Accvent LLC
Initial setup
1. Remove the protective lm sticker from laser light.
2. Plug the projector’s power supply into an available
standard electrical outlet.
3. The smart star projector will automatically turn on and
enter into the pairing mode (Blue LED blinking). Otherwise,
press and hold the multifunction button for ve seconds to
enter into pairing mode manually.
Step 2
Enter the verication code you received.
60 %
9:41 AM
Enter verication code
Verication code has been sent to your
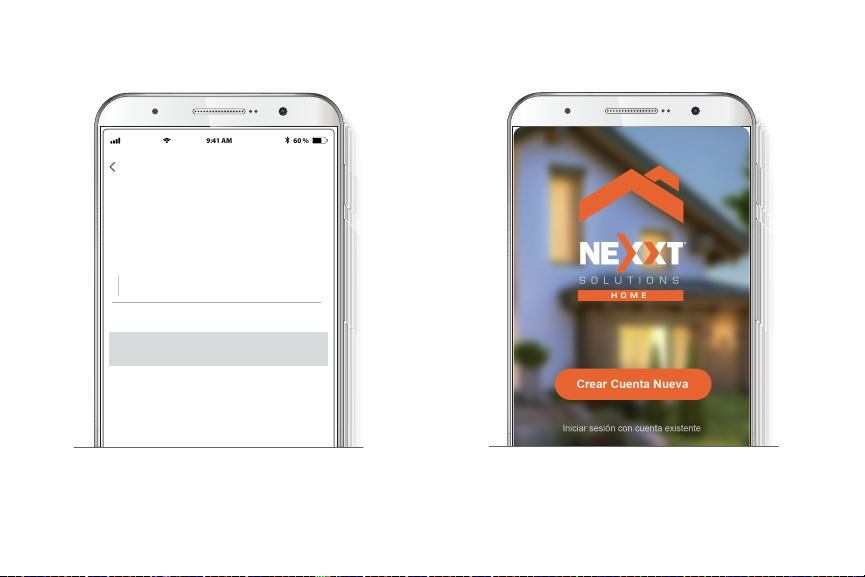
Step 1
Register by email. Fill in the required elds.
60 %
9:41 AM
Register by email
United States of America
Email
Get authentication code

Step 4
The Nexxt Solutions Home account has been successfully
set up.
Step 3
Create a new password and then select Completed.
60 %
9:41 AM
Set Password
Completed
6-20 characters, including letters and numbers
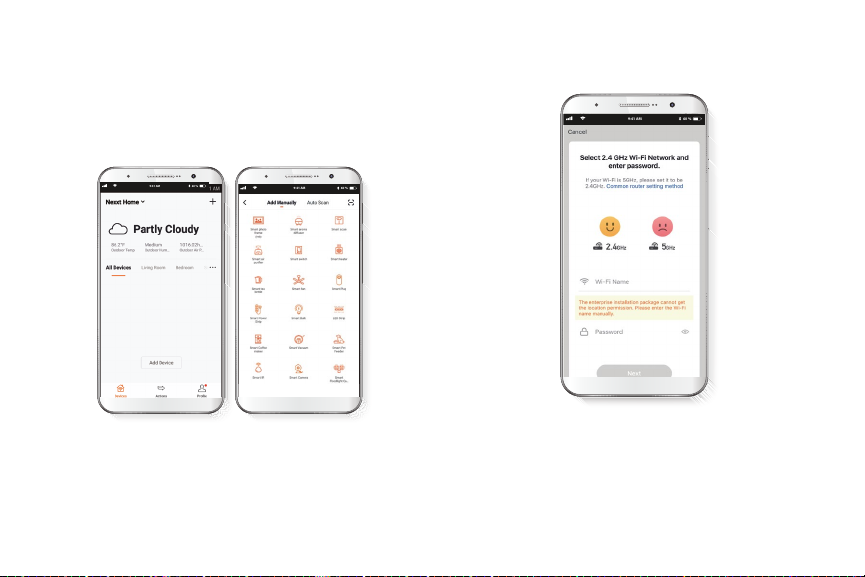
Add device
Step 1
Select Add device, followed by the smart star projector.
60 %
9:41 AM
60 %
9:41 AM
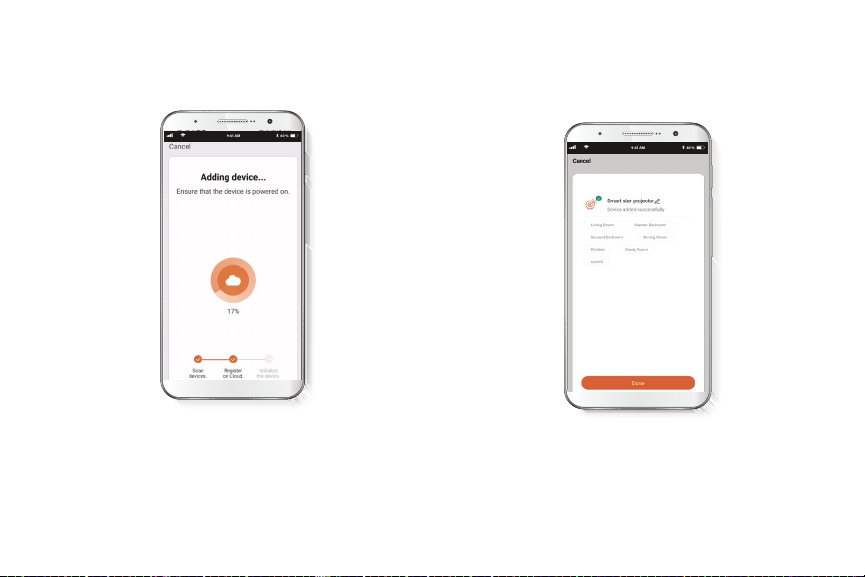
Step 2
You must connect to a 2.4GHz Wi-Fi network. Enter your
network password. Make sure you enter the correct
password, otherwise the device will not connect.
60 %
9:41 AM
Step 3
Important: During this process, make sure to maintain the
router and the projector as close as possible, and free from
any obstructions not to degrade the quality of the signal.
Step 4
Device added successfully will be displayed. Click on the
pencil icon to change the device name if desired.
60 %
9:41 AM
60 %
9:41 AM
Main settings
On/O
In the center of the screen, the app displays the On/O
button to turn On/O the device.
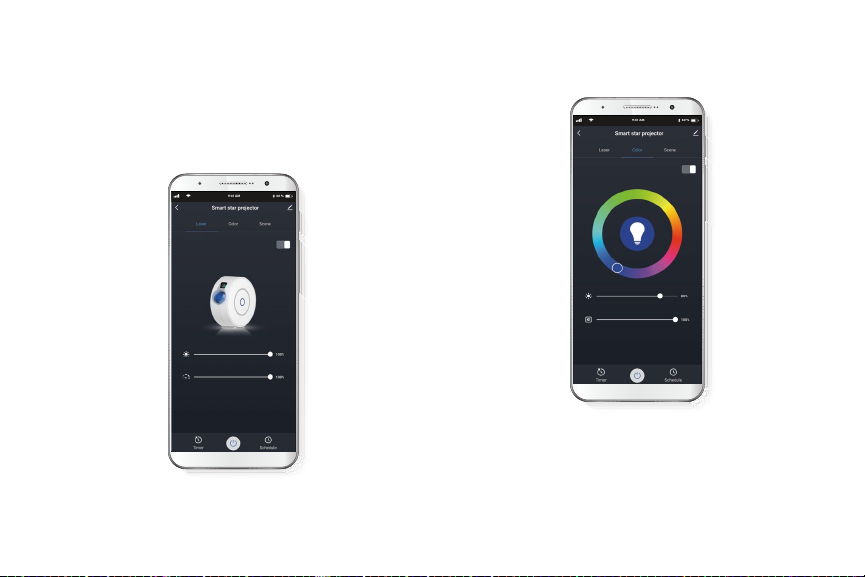
Turn on or o the button located on the upper right to
activate the laser. Choose the laser’s brightness and
rotation speed.
Laser
Color
Turn on or o the button located on the upper right to
activate the galaxies.
Select the galaxy color that you would like to project with
the color wheel. Then, slide the nger in the contrast line to
regulate the color intensity.
60 %
9:41 AM
60 %
9:41 AM
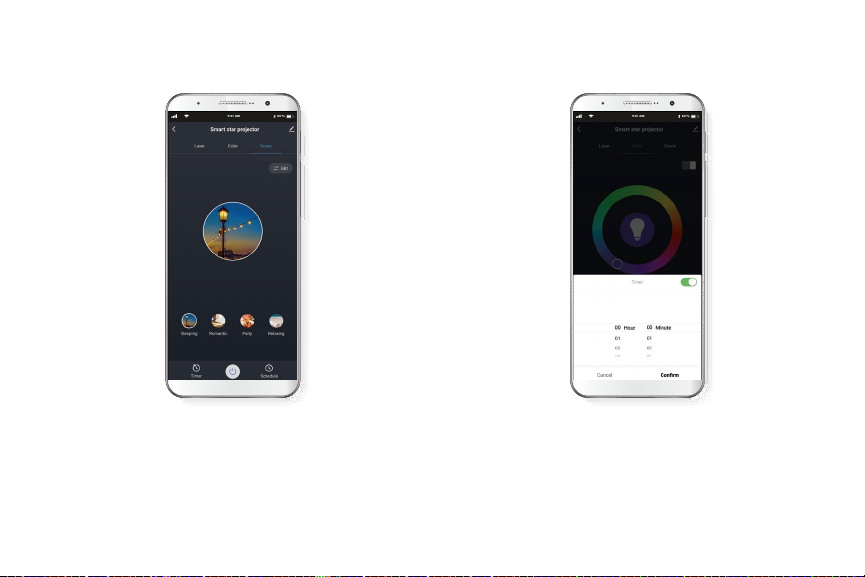
To schedule the timer, click on the timer icon at the bottom
left of the screen. Set the time as desired and enable or
disable the timer.
60 %
9:41 AM
Scene Timer
Select from four predetermined scenes to set the desired
ambiance. You can customize galaxies’color and speed to
set the mood.
60 %
9:41 AM
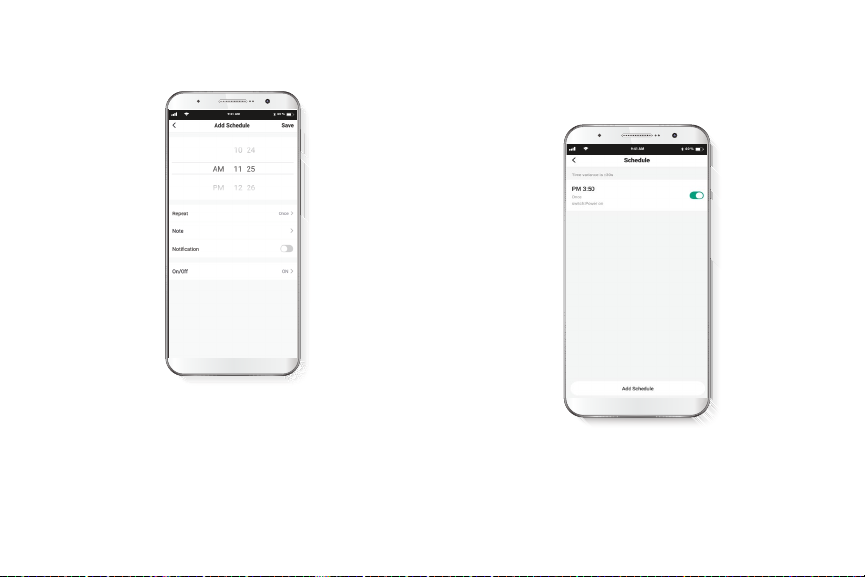
Schedule setup
Click on Add Schedule to set the time you wish to
program. Select Repeat to set the frequency. Select Note
to add a description of the schedule. Enable the
Notication button to receive an alert on a scheduled
activity on the smart star projector. Select On/O to enable
or disable the schedule. Press Save on the upper
right-hand corner.
60 %
9:41 AM
Delete setup
To remove a schedule on iOS, slide item to the left, and for
Android, press and hold on the selected Schedule,
followed by Delete.
60 %
9:41 AM

Device information: will show the data related to the
smart star projector.
Tap-To-Run and automation: links the smart star
projector with other smart products to automatically
control them through a customized command.
Offline notification: selection button designed to
enable/disable this feature.
Share device: allows sharing the smart star projector with
family and friends.
Create group: makes management of devices easier by
selecting and arranging multiple components under a
single group.
Feedback: let us know if you have any issues setting up the
product.
Check for firmware upgrade: we will sometimes add new
features or provide updates with a new firmware upgrade.
Remove device: allows you to delete the smart star
projector from the application.
Settings
Click on the pencil icon on the upper right-hand corner.
Device name: changes the name of the smart star
projector.
60 %
9:41 AM

Delete user
To remove a user, on Android press and hold the name you
want to eliminate. On iOS slide to the left the user you want
to remove. Click on Delete. A notication conrming you
don’t want to share the device with this user will be
displayed. Click on Conrm to nish.
60 %
9:41 AM
60 %
9:41 AM
Share device
Click on Share devices then tap Add sharing. Enter the
e-mail address of family and friends. Tap on Done. The
newly configured users will now have access to your smart
frame.
Note: family or friends will need their own Nexxt Solutions
Home account to access the device.
60 %
9:41 AM
60 %
9:41 AM
Nexxt Solutions® is a registered trademark. All rights reserved.
Amazon, Alexa and all related logos are trademarks of Amazon.com,
Inc. or its aliates. Google, Android and Google Play are trademarks
of Google Inc. All other brand names and trademarks are the
property of their respective owners. Made in China.
NHA-G100
FCC ID#: X4YHAGP100
FAQ
1. What should I do if I can’t turn on or off the smart star
projector?
Make sure your smartphone and the smart star projector
are connected to the same Wi-Fi network.
2. What should I do when the configuration fails?
Ensure that the smart star projector is within a short
distance of your router. Check whether the available
internet network has a frequency of 2.4GHz. Check that
your internet connection is working properly.

Español
Guía del usuario
Gracias por adquirir el Proyector de estrellas inteligente
con conexión Wi-Fi de Nexxt Solutions. Nos complace no
solo simplicar tu vida sino poder brindar más seguridad y
tranquilidad al interior de tu hogar.
Lee este manual detenidamente antes de instalar y utilizar
este producto.
Contenido del empaque
• Proyector de galaxias y estrellas inteligente
• Adaptador de CA
• Cable de alimentación
• Guía del usuario
Descripción del producto
1. Luz láser
2. Luz del proyector
3. Botón multifunción, encender/apagar, modo, color
32
1
60 %
9:41 AM
Nexxt Home
Nexxt Solutions Home App
Cancel
GET
Accvent LLC
Login with existing account
Create New Account
SOLUTIONS
Iniciarsesión con cuenta existente
Crear Cuenta Nueva
SOLUTIONS
60 %
9:41 AM
Nexxt Home
Nexxt Solutions Home App
Cancel
INSTALL
Accvent LLC
Instalación de la aplicación
Nexxt Solutions Home App
Descarga directamente la aplicación
Nexxt Home de Google Play o de Apple App Store.
Configuración inicial
1. Remueve la cinta protectora de la luz láser.
2. Enchufa el adaptador a un tomacorriente estándar en la
pared.
3. El proyector de estrellas inteligente se encenderá
automáticamente y entrará en modo de emparejamiento
(luz LED azul parpadea). De lo contrario, mantén presionado
el botón multifunción por cinco segundos para entrar
manualmente en modo de emparejamiento.

Paso 1
Regístrate por correo electrónico. Completa los campos
requeridos.
60 %
9:41 AM
Enter verication code
Verication code has been sent to your
Paso 2
Ingresa el código de vericación que recibas.
60 %
9:41 AM
Register by email
United States of America
Email
Get authentication code
60 %
9:41 AM
Set Password
Completed
6-20 characters, including letters and numbers
Paso 3
Crea una contraseña nueva y selecciona Completo a
continuación.
Paso 4
La cuenta Nexxt Solutions Home ha sido congurada
satisfactoriamente.

Agregar dispositivo
Paso 1
Selecciona Agregar dispositivo y a continuación, el
proyector de estrellas inteligente.
60 %
9:41 AM
Paso 2
Debes conectarte a una red Wi-Fi de 2.4GHz. Ingresa tu
clave. Asegúrate de digitar la contraseña correcta o de lo
contrario el dispositivo no se conectará.
60 %
9:41 AM

Paso 3
Importante: Durante este proceso, asegúrate de mantener
el router y el proyector de estrellas lo más cerca entre sí, en
un área donde no existan interferencias con el n de evitar
degradar la calidad de la señal.
Paso 4
Aparecerá en la pantalla que se agregó el dispositivo con
éxito. Oprime en el ícono del lápiz para cambiar al nombre
del dispositivo si lo deseas.
60 %
9:41 AM
60 %
9:41 AM

Funciones principales
Encendido/apagado
En el centro de la pantalla, la app muestra el botón de
encendido/apagado para prender o apagar el dispositivo.
Enciende o apaga el botón ubicado en la parte superior
derecha para activar el láser. Escoge el brillo del láser y la
velocidad de rotación.
Láser
Color
Enciende o apaga el botón ubicado en la parte superior
derecha para activar la galaxia.
Selecciona el color de la galaxia en la rueda de colores que
te gustaría proyectar. Luego desliza el dedo en la línea de
contraste para regular la intensidad de colores.
60 %
9:41 AM
60 %
9:41 AM
This manual suits for next models
1
Table of contents
Languages:
Other Nexxt Solutions Lighting Equipment manuals

Popular Lighting Equipment manuals by other brands


Qtx
Qtx LUX-LD01 user manual

Protocol
Protocol READY FOR MY CLOSE UP! instruction manual

Vaughan
Vaughan Sherborne installation guide

Hatco
Hatco GLO-RITE HL-18 Installation & operating manual

Tranberg
Tranberg TEF 2441 user manual

Clevertronics
Clevertronics LP Argonaut PLUS Installation & maintenance instructions


