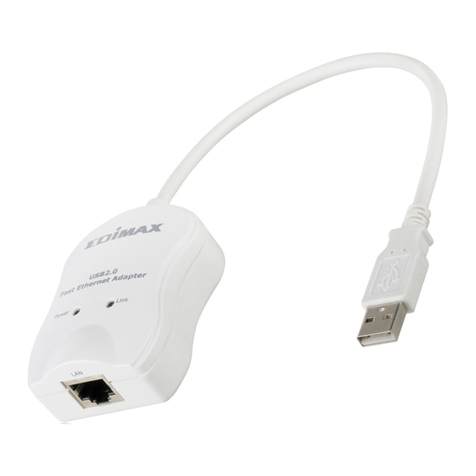
NexxTech 1511217 User manual

1511217
USB to HDMI®Adapter
User’s Manual

1
Table of Contents
Important Safety Instructions .......................................2
Precautions......................................................3
1. Introduction ...................................................4
Features.......................................................4
Package Contents ...............................................4
System Requirements ............................................5
LED Status .....................................................5
2. Installation ....................................................6
Hardware Connection.............................................6
Driver Installation . . . . . . . . . . . . . . . . . . . . . . . . . . . . . . . . . . . . . . . . . . . . . .7-13
On Windows 7® (32/64 bit) ......................................7-8
On Windows Vista®...........................................9-10
On Windows XP®............................................. 11
On Mac (10.7) .............................................12-13
3. Using the Adapter..............................................13
On Windows...................................................13
Display Properties ............................................13
Extend Your Windows Desktop to Secondary Monitor (Default) .......14-16
Mirror Your Windows Desktop ...................................17
Set as Primary Monitor.........................................18
CongurimgtheComponents..................................19-20
Fit to TV Function ...........................................21-22
StandbyandHibernate,ShutDownandRestart .....................23
Inferred Modes ...............................................23
DisconnectingtheAdapter ......................................24
UsingDualAdapters...........................................24
On Mac.......................................................25
Managing Multiple Displays .....................................25
SettingtheDisplayResolutionsandRotation .......................25
SettingthePositionofDisplays ..................................25
Display Positions .............................................26
SettingtheDisplaytoMirror/ExtendMode.........................26
ChangingtheMainDisplay .....................................27
ConguringtheDisplayfromtheMenuBar .........................27
VerifyingtheDriverInstallation...................................28
UninstalltheAdapterandDriver..................................29
4. Troubleshooting ...............................................30
5. Specications ...............................................31-32
7. FCC/Warranty .................................................33

2
• Readtheseinstructions.Allthesafetyandoperatinginstructionsshouldbereadbeforethisproductisoperated.
• Keeptheseinstructions.Thesafetyandoperatinginstructionsshouldberetainedforfuturereference.
• Heedallwarnings.Allwarningsontheapplianceandintheoperatinginstructionsshouldbeadheredto.
• Followallinstructions.Alloperatinganduseinstructionsshouldbefollowed.
• Donotusethisapparatusnearwater.Theapplianceshouldnotbeusednearwaterormoisture,forexample,inawetbasement
or near a swimming pool.
• Cleanonlywithdrycloth.
• Donotblockanyventilationopenings.Installinaccordancewiththemanufacturer’sinstructions.
• Donotinstallnearanyheatsourcessuchasradiators,heatregisters,stoves,orotherapparatus(includingampliers)that
produceheat.
• Donotdefeatthesafetypurposeofthepolarizedorgroundingplug.Apolarizedplughastwobladeswithonewiderthantheother.
Agroundingplughastwobladesandathirdgroundingprong.Thewidebladeorthethirdprongisprovidedforyoursafety.Ifthe
providedplugdoesnottintoyouroutlet,consultanelectricianforreplacementoftheobsoleteoutlet.
• Protectthepowercordfrombeingwalkedonorpinchedparticularlyattheplugs,conveniencereceptacles,andatthepointwhere
theyexitfromtheapparatus.
• Onlyuseattachments/accessoriesspeciedbythemanufacturer.
• Useonlywiththecart,stand,tripod,bracket,ortablespeciedbythemanufacturer,orsoldwiththeapparatus.
Whenacartorrackisused,usecautionwhenmovingthecart/apparatuscombinationtoavoidinjuryfromtip-over.
• Unplugtheapparatusduringlightningstormsorwhenunusedforlongperiodsoftime.
• Referallservicingtoqualiedpersonnel.Servicingisrequiredwhentheapparatushasbeendamagedinanyway,
suchaspowersupplycordorplugisdamaged,liquidhasbeenspilledorobjectshavefallenintotheapparatushasbeenexposed
torainormoisture,doesnotoperatenormally,orhasbeendropped.
• Pleasekeeptheunitinawell-ventilatedenvironment.
• WARNING:Toreducetheriskofreorelectricshock,donotexposethisapparatustorainormoisture.
Theapparatusshallnotbeexposedtodrippingorsplashingandthatobjectslledwithliquids,suchasvases,shallnotbeplaced
ontheapparatus.
• WARNING:Themainpowerplugisusedasadisconnectdevice,thedisconnectdeviceshallremainreadilyoperable.
• WARNING:Toreducetheriskofelectricshock,donotremovecover(orback)astherearenouser-serviceablepartsinside.Refer
servicingtoqualiedpersonnel.
• WARNING:Thebatteriesshallnotbeexposedtoexcessiveheatsuchassunshine,reorthelike.
• Theapparatusshouldbeconnectedtoapoweroutletwithaprotectivegroundingconnection.
CAUTION
RISKOFELECTRICSHOCK
DO NOT OPEN
Thelightningashwitharrowheadsymbol,withinan
equilateraltriangleisintendedtoalerttheusertothe
presenceofuninsulated“dangerousvoltage”withinthe
productsenclosurethatmaybeofsufcientmagnitude
toconstituteariskofelectricshocktothepersons.
Theexclamationpointwithinanequilateral
triangleisintendedtoalerttheuserto
thepresenceofimportantoperatingand
maintenance(servicing)instructionsinthe
literatureaccompanyingtheappliance.
Important Safety Instructions
Important Safety Instructions

3
Pleasereadtheseprecautionsbeforeoperatingtheunit.
Placement
Avoidplacingtheunitinareasof:
• Directsunlightorheatingradiators,orclosedautomobiles.
• Hightemperature(over35˚C)orhighhumidity(over90%).
• Dustastheinternalpartsmaybeseriouslydamaged.
Non-use periods
Turntheunitoffwhennotinuse.Whenleftunusedforalongperiodoftime,theunitshouldbe
unpluggedfromthehouseholdACoutlet.
No ngers or other objects inside
• Touchinginternalpartsoftheunitisdangerousandmaycauseseriousdamagetotheunit.Do
notattempttodisassembletheunit.
• Donotputanyforeignobjectsonthedisctray.
Keep away from water/magnet
• Keeptheunitawayfromowervases,tubs,sinks,etc.Ifliquidsarespilledintotheunit,serious
damage could occur.
• Neverbringamagnetormagnetizedobjectneartheunit.
Stacking
• Placetheunitinahorizontalposition,anddonotplaceanythingheavyonit.
Condensation
Moisturemayformonthelensinthefollowingconditions:
• Immediatelyafteraheaterhasbeenturnedon.
• Inasteamyorveryhumidroom.
• Whentheunitissuddenlymovedfromacoldenvironmenttoawarmone.Ifmoistureformsinside
theunit,itmaynotoperateproperly.Inthiscase,turnonthepowerandwaitaboutonehourfor
themoisturetoevaporate.
If there is noise interference on the TV while a broadcast is being received
DependingonthereceptionconditionoftheTV,interferencemayappearontheTVmonitorwhile
youwatchaTVbroadcastandtheunitislefton.ThisisnotamalfunctionoftheunitortheTV.To
watchaTVbroadcast,turnofftheunit.
Precautions

4
1. Introduction
ThisUSBtoHDMI®Adapterenablesyoutoconnectmorethanonemonitor,LCDorprojectortoa
computerwithaUSB2.0port.FordesktopusersaddinganextramonitorviaUSBconnectioniseasier
thaneverwithouthavingtoinstallaninternalvideocard.Enjoythebenetsofanadd-onmonitor,
suchasmorevisibleapplicationsandalargerdisplayarea.Theadaptersupportshot-swappingandis
energy-efcient.
Features
• Add-onmonitor,LCDorprojectorthroughasingleUSB2.0port
• Hot-plug;addorremovemonitorwithoutsystemreboot
• Smallinsize,workswithallHDMI®displays
• Supportshighresolutionupto1920x1080
• ExtendandMirrormodesupport
• Resumesfromhibernationandsuspendmodes
• Supportsupto6USBdisplayadapterssimultaneously
Package Contents
Beforeinstallation,pleasechecktheitemsinthepackage.Thepackageshouldcontainthefollowing
items:
• USBtoHDMI®Adapterx1
• CD(DriverandUser’sManual)x1
• 1mUSBCablex1
• QuickInstallationGuidex1

5
System Requirements
TheminimumrequirementsforthePCare:
• SingleCoreCPU1.2GHzorhigher.Intel Pentium/Celeron,AMD K6/AthlonTM/DuronTM, or compatible
processor
• 512MBmemory
• AtleastoneUSB2.0port
• 30MBofavailablediskspace
• Windows®XP Home or Professional (including Table edition) SP2 or SP3, Windows Vista®SP1 or
SP2 (32-bit or 64-bit), and Windows®7 (32-bit or 64-bit).
• SupportsallIntel-basedMacs(includingSnowLeopard10.6.2,Leopard10.5.8,Tiger10.4.11).
• SuperVGA(800x600)orhigherresolutionmonitor
ToplayDVDsontheadapter-attachedmonitor,inadditiontotherequirementsabove,thefollowing
requirementsshouldalsobemet:
• DualcoreCPU2.0GHzprocessor
IfthePCspecicationisbelowthis,performancewillbelower(orCPUloadinghigherthanacceptable).
Windows®XP
For 1-2 monitors
ThismaynotprovidefullframerateDVDplaybackatfullscreen.
• 1.2GHzSingleCoreCPU
• 512MBmemory
For 3 monitors(1DVDvideowithotheropenapplications)
Willsupportonly1videoofDVDresolutionatfullscreen:
• 1.8GHzCPU
• 1GBmemory
For 6 screens(1DVDvideo):
• 1.6GHzCoreDuo
• 1GBmemory
LED Status
LED Colour Description
Link Green On for power on
Off for power off

6
2. Installation
Hardware Connection
Power LED HDMI®Connector
DC Power Jack
MiniUSBConnector
PowerButton
Optional - some
devices do not provide
thestandardpower
(0.5A)forUSB2.0
ports, and will require an
external power supply.

7
Driver Installation
On Windows®7 (32/64 bit)
Caution: DO NOT connect the USB to HDMI®Adapter to your computer before you install the
provided driver.
Followtheproceduresbelowtoinstallthedriverandthenconnecttheadapter:
1. InserttheprovidedCDintoyourdiscdriveand
installer program will run automatically. Please click
on Run Setup.exetoexecutetheinstallprogram.
Note:
Iftheinstallerprogramdoesn’trunautomatically,
pleaselocateanddouble-clickontheSetup.exelein
theDriverfoldertolaunchthesetupprogram.
If you encounter a User Account Control dialog
boxwhenattemptingtoinstallaprogram,enter
an administrator password or click Yestostartthe
installation.
2. WhenyouseetheLicense Agreement
screen prompted as below, click on
I AccepttoinstallthesoftwareforUSB
display adapter.

8
3. PleasewaitwhileWindowscongures
DisplayLink Core Software.
Your screens may temporarily go black or
ashduringthisprocess.
4. Whennished,theinstallationscreenwill
disappear and you will return
to your desktop.
5. ConnecttheUSBtoHDMI®Adapterto
your computer and monitor.
6. Whenyoupressthepowerbuttonondevice,the
following window will appear.
PleasewaitwhileDisplayLinksoftware
isconguredforrstuse.Yourscreensmay
temporarilygoblackorashduringthisprocess.
Please click “OK”tostarttouseUSBtoHDMI®
Adapter.
7. Youcanchangetheappearanceofyour
displayswiththeWindowskey.Additional
controls are available in Windows®7:
Orientation (portrait, landscape, rotated
portrait, and rotated landscape).
8. Tocontrolthebehaviourofanattached
DisplayLink device (or screen), it
is possible to use Windows Key+P
todisplayamenu(andcyclethroughit)
toallow:
DisconnectProjector,Duplicate,Extend,
ProjectorOnly.
*Actual strings depend on your
operation system. These screen shots
are from Windows®7 and might vary
slightly for each operation system.

9
On Windows Vista®(32/64 bit)
Caution: DO NOT connect the USB to HDMI®Adapter to your computer before you install the
provided driver.
Followtheproceduresbelowtoinstallthedriverand
thenconnecttheadapter:
1. InserttheprovidedCDintoyourdiscdriveand
installer program will run automatically. Please
click on Run Setup.exetoexecutetheinstall
program.
Note:
Iftheinstallerprogramdoesn’trunautomatically,
pleaselocateanddouble-clickontheSetup.exele
intheDriverfoldertolaunchthesetupprogram.
If you encounter a User Account Control dialog
boxwhenattemptingtoinstallaprogram,enteran
administrator password or click Allowtostartthe
installation.
2. WhenyouseetheLicense Agreement
screen prompted as below, click on
I AccepttoinstallthesoftwareforUSB
display adapter.

10
3. PleasewaitwhileWindowscongures
DisplayLink Core Software.
Yourscreensmaytemporarilygoblackorash
duringthisprocess.
4. Whennished,theinstallationscreenwilldisappearandyouwillreturntoyourdesktop.
5. ConnecttheUSBtoHDMI®Adapterto your computer and monitor.
6. Whenyoupressthepowerbuttonondevice,
thefollowingwindowwillappear.
PleasewaitwhileDisplayLinksoftware
isconguredforrstuse.Yourscreensmay
temporarilygoblackorashduringthisprocess.
Please click “OK”tostarttouseUSBtoHDMI®
Adapter.
Notice: If prompting to restart your computer,
click Yes to restart or No to manually restart later.
7. YouwillseetheDisplayLinkManagerIconinsystemtraythatlookslikeamonitorasbelow.
Clickontheicontobringupthemenu.
*Actual strings depend on your operation system. These screen shots are from Windows®7 and
might vary slightly for each operation system.
- Extend Mode:Thescreenispart
oftheextendeddesktop.
- Mirror Mode:Thescreencopies
thecontentsoftheprimaryscreen.
- Off Mode: Thescreenisblack.
- Set as Main Monitor: Thescreen
istheprimaryscreen.

11
- Extend Mode:Thescreenispart
oftheextendeddesktop.
- Mirror Mode:Thescreencopies
thecontentsoftheprimaryscreen.
- Off Mode: Thescreenisblack.
- Set as Main Monitor: Thescreen
istheprimaryscreen.
On Windows XP®
Caution: DO NOT connect the USB to HDMI®Adapter to your computer before you install the
provided driver.
Followtheproceduresbelowtoinstallthedriverandthenconnecttheadapter:
1. InserttheprovidedCDintoyourdiscdrive.YoumayseetheLicense Agreement screen prompted
as below. Please click on I AccepttostarttheDriverinstallation.
Note:
Iftheinstallerprogramdoesn’trunautomatically,pleaselocateanddouble-clickontheAutorun.exe
leintheCDtolaunchtheinstallprogram.
2. PleasewaitwhileWindowscongures
DisplayLink Core Software. Your screens may
temporarilygoblackorashduringthisprocess.
*Actual strings depend on your operation system.
These screen shots are from Windows® XP and
might vary slightly for each operation system.
3. Youmustrestartyourcomputerbeforethenewsettingwilltakeeffect.
4. Whennished,theinstallationscreenwilldisappearandyouwillreturntoyourdesktop.
5. ConnecttheUSBtoHDMI®Adaptertoyourcomputerandmonitor.
6. PressthePowerbuttonondevice,youwillseetheDisplayLink
ManagerIconinsystemtray.Clickontheicontobringupthemenu.

12
On Mac (10.7)
Caution: DO NOT connect the USB to HDMI®Adapter to your computer before you install the
provided driver.
Followtheproceduresbelowtoinstallthe
driverandthenconnecttheadapter:
1. InserttheprovidedCDintoyourdiscdrive.
Locateanddouble-clicktheDriver folder
> Mac folder > DisplayLink Installer
1.8.dmgtolaunchthesetupprogram.
2. Select “DisplayLink Software Installer” to
begininstallingtheDisplayLinkDriveron
your Mac.
3. WhenthefollowingWindowappears,
please click Continuetoinstallthedriver.
4. Click Continuetoinstallthissoftware.

13
5. Please click Continue reading Software
License Agreement.
6. Click Agreetocontinuetheinstallationandquit
theinstaller.
7. Click Install to perform a standard installation of
thissoftwareonthedisk“Macintosh HD”.
8. TypeyourpasswordtoallowInstallertomakechanges.ClickContinue Installation to install.
9. Theinstallationwassuccessful,pleaseclick
Restarttonishinstallingthesoftware.
10. ConnecttheUSBtoHDMI®Adaptertoyour
computer and monitor.

14
3. Using the Adapter
On Windows
Display Properties
DisplayPropertiesallowsyoutocongurethedisplaymode,screenresolution,andphysical
arrangement of your monitors.
Quick Set-up
ClickontheDisplayLink Device
icon and select Advanced to
conguretheDisplay Properties
asshownorManualSetUpas
described below.
On Windows®7,theDisplayLink
Deviceiconwillbehidden.Please
clickthearrow signandrightclick
theDisplayLink Device icon to
select Advanced.
Manual Set-up
Positionthemouseanywhereonyourcomputerdesktop,right-clickandselectScreen Resolution on
Windows®7, Personalize > Display Settings on Vista®or Properties > Settings on Windows®X P.
Extend Your Windows Desktop to a Secondary
Monitor (Default)
Intheextendedmode,yourdisplaywillbespreadoverthesecondarymonitor(s).
Thismodeallowsyoutoperformmultipletasksmoreeffectivelywithoutoverlappingwindows.
Quick Set-up
ClickontheDisplayLink
Device icon and select
Extend to Right; Left;
Above; Belowtocongure
thesettingasabove.
Note:ThefullDisplayLink
User Interface as above is
not supported on Windows®
7.DisplaysConguration
on Windows®7shouldbe
carriedoutusingtheimproved
WindowsDisplayPropertiesdialogbox(Figure1),andusingtheWindows-Pkeycombination(Figure2).

15
Manual Set-up
Extendedmodeisthedefaultsetting.Tosetuptheadaptertouseorrestoreextendedmode,follow
thesesteps:
1. Positionthemouseanywhereonyourcomputerdesktop,right-clickandselectScreen Resolution
on Windows®7, Personalize > Display Settings on Windows Vista®or Properties > Settings on
Windows®X P.
2. IntheDisplaydrop-downmenu,selecttheoptionwiththestring“DisplayLink Graphics Adapter”.
3. ChecktheMultiple Displays> Extend these displays on Windows® 7, Extend the desktop onto
this monitor box on Windows Vista®or Extend my Windows desktop onto this monitor box on
Windows®X P.
Figure 2

16
4. Dragtheiconsinthewindowatthetopofthescreento
matchthephysicalarrangementofyourprimarymonitor
and secondary monitor.
Thesecondarymonitorconnectedtotheadaptermay
beidentiedaseither“2”or“3”,dependingonyour
computer,althoughtheremaynotbeatotalof3screens
connected.
5. Click OKtoclosethesettingsscreen.
Oncethesettingisdone,touseyourextendeddesktop,
simply drag and drop your open windows over to your
secondmonitor.However,notethatsomeapplications
maynotsupportdisplayontheextendeddesktop.
a.
b.
Cursor disappeared?
Ifyou’reinextendedmodebutthesecondarymonitorisnotconnected,thedesktopstillpansto
thesecondarymonitorandit’spossiblethatyourcursorhasmovedtotheextendeddesktopso
thatyoucannotnditontheprimarydisplay.Tosolvetheprobleminsuchacase,connectthe
secondarymonitortotheadapterrsttorestorethecursor.
Video and DVD Playback in Extended Mode
OnWindowsVistawithextendedmode,it’ssuggestedthatyourunvideoorDVDplayback
programsonyourprimarymonitorinsteadofthesecondarymonitortoensuretheplayback
performance.

17
Mirror Your Windows Desktop
Thismodeisreferredtoas“mirror”or“clone”mode.Inthismode,themonitorattachedtotheUSBto
HDMI®Adapterduplicateswhatisontheprimarydisplay.
Quick Set-up
ClickontheDisplayLink Device icon and select Mirrortocongurethesetting.OnWindows®7,the
DisplayLink Deviceiconwillbehidden.Pleaseclickthearrow signandrightclicktheDisplayLink
Device icon to select Advanced.Or,positionthemouseanywhereonyourcomputerdesktop,right-
click and select Screen Resolution.
It is possible to use Windows Key+Ptodisplayamenu(andcyclethroughit)onWindows®7 to
allow:DisconnectProjector,Duplicate,Extend,ProjectorOnly.
Manual Set-up
Inmirrormode,theadapterwillautomaticallyselectthesettings(screenresolution,colourquality
andrefreshrate)forthesecondarymonitor,butyoucanmanuallyadjustthesettingsasrequired.
However,thesettingsofthesecondarymonitorarelimitedbythatoftheprimarymonitor.For
example,eventhoughyoursecondarymonitorsupportsaresolutionofupto1920x1080,you
canonlycongureittouse1280x1024iftheprimarymonitoronlysupportsaresolutionofupto
1280x1024.

18
Set as Primary Monitor
Tomakethesecondarymonitortheprimarydisplay:
1. Positionthemouseanywhereonyourcomputerdesktop,right-clickandselectScreen Resolution
on Windows®7, Personalize > Display Settings on Windows Vista®or Properties > Settings on
Windows®X P.
2. IntheDisplaydrop-downmenu,selecttheoptionwiththestring“DisplayLink Graphics Adapter”.
3. ChecktheThis is my main monitor box on Windows®7/ Windows Vista®or Use this device as the
primary monitor box on Window®X P.
OnsomePCsandlaptopsitisnecessarytodisablethemaindisplay(i.e.unchecktheExtend the
desktop onto this monitor or Extend my Windows desktop onto this monitor boxforthemain
display)aspartofthesamesettingschange.
4. Click OKtoclosethesettingsscreen.
Theadd-onmonitorstaysprimaryifthePCentershibernateorsuspendmodeorisrebooted.Ifthe
add-onmonitorisunplugged,themaindisplaybecomesprimaryagain.
Thesoftwaresupportsthemodeslistedbelow.
Colour
Depth
Resolution
Name
Refresh rates available at
16-bit colour quality
Refresh rates available at
32-bit colour quality
640x480 VGA 60 72 75 85 60 72 75 85
800x600 SVGA 56 60 72 75 85 56 60 72 75 85
1024x768 XGA 60 70 75 85 60 70 75 85
1280x720 720p 60 60
1280x768 WXGA+ 60 75 85 60 75 85
1280x800 WXGA 60 60
1280x1024 SXGA 60 75 85 60 75
1366x768 WXGA+ 60 60
1400x1050 SXGA+ 60 75 85 60 75 85
1600x1200 UXGA 60 60
1680x1050 WSXGA+ 60 60
1920x1080 1080p 60 60
*Note that interlaced modes and reduced blanking modes are not supported.
If cloning the primary display, the video component will try to use the preferred monitor mode. In some
cases, this may not be the most appropriate mode for the cloned desktop. It is recommended that the
primary display resolution be changed to closer match the default resolution of the secondary monitor.

19
Conguring the Components
Tocongurethethreecomponents(resolutionandrefreshrate)ofascreenmode,followthesesteps:
Quick Set-up
ClickontheDisplayLink Device icon and select Screen Rotation; Screen Resolutiontocongure
thesettings.
Screen Rotation:Thereare
fouroptionsforscreenrotation:
Normal, Rotated Left, Rotated
RightandUpside-Down.
Screen Resolution:The
resolution will depend on your
computer settings, resolution
supportedbythemonitor,etc.
Table of contents
