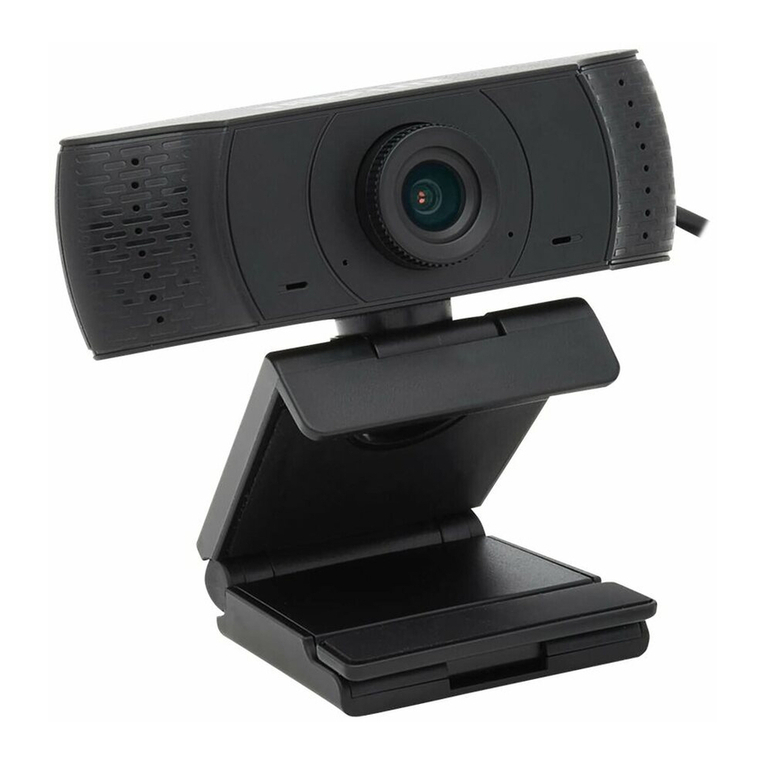
NexxTech USB WEB CAMERA User manual

USB Web Camera
User’s Guide
Version 2.0
2516505/6506
All trademarks and brand names mentioned in this publication are property of their respective owners.
2005 ORBYX Electronics. All rights reserved. No portion of this document may be reproduced without permission. All items, product features
and information in this manual are subject to change without notice.
For Nexxtech
Web Camera

Chapter I. Introduction…………………………………………………………………………1
Box Contents........................................................................................................1
Product Components..............................................................................................1
System Requirements..............................................................................................2
Warning...............................................................................................2
Chapter II. Product Features......................................................................................................3
Video Quality.......................................................................................................3
Image Quality.......................................................................................................3
Internet Capability.................................................................................................3
Chapter III. Installation...............................................................................................................4
Get Ready To Install Your USB Web Camera..................................................................4
Install Your USB Web Camera...................................................................................4
Chapter IV. Using the USB Web Camera...................................................................................5
Software.......................................................................................................5
View Your First Image..................................................................................5
Meet People Over The Internet........................................................................5
Camera Settings....................................................................................................6
Video Format.............................................................................................6
Video Source or Video Settings........................................................................7
Light Sources........................................................................................................8
Lighting Settings.........................................................................................8
Chapter V. Troubleshooting and Maintenance........................................................................9
Problems and Solutions...........................................................................................9
Frequently Asked Questions......................................................................................9
Maintenance Tips.................................................................................................10
Lens Cleaning...........................................................................................10
Outdoor Use............................................................................................10
Appendix A: Product Specifications..........................................................................................10
Appendix B: FCC Statement......................................................................................................11
Warranty....................................................................................................................................12
Table of Contents

1
Chapter I. Introduction
The USB Web Camera also comes with a snapshot button allowing you to take still pictures. Your computer will
treat still images taken by the USB Web Camera in the same way as images from scanners. The USB Web Camera is
TWAIN compliant and can thus be used as an image source for most image-editing software and graphics
applications that conform to TWAIN compliance.
State-of-the-art features include instant live video at high frame rates making your conversations feel more natural.
It is easy to install, consumes little power, produces photographs in 1.6 million colours and has a versatile clamp.
The video and images captured by your USB Web Camera can be saved for later viewing and printing with the same
ease as taking normal photos.
USB Web Camera
USB Web Camera Setup/Application CD-ROM
USB Web Camera Quick Installation Guide
Snapshot Button
LED Indicator
Adjustable Focus
Built-in Microphone* (For VGA version only)
Note: 1. The power supply for the camera is provided through the USB cable.
2. Illustrations may appear different from your USB Web Camera.
Snapshot Button
Adjust. Focus Ring
Led Indicator
USB Connector
Built-in Microphone*
(* For VGA model only)
USB Web Camera Setup/Application CD-ROM
Quick Guide
This USB Web Camera will display real time video on your PC screen, enabling you to have live video-conferences
and interactive video conversations* with people over the internet. Your new USB Web Camera can also create still
images for applications that produce greeting cards, photo albums and video mails. Your USB Web Camera will
also become a watch-dog while the security software is activated.

2
♦IBM-compatible PC computer
♦Intel Pentium 233MHz compatible PC or faster
♦Windows 98SE, 2000, ME & XP
♦32MB RAM (64MB recommended)
♦160MB free hard disk space (260MB recommended)
♦CD-ROM drive
♦One available USB port
♦A VGA or SVGA video card capable of displaying at least 32,768 colours (15-bit) with 800 X 600
resolution
♦Modem, microphone & Internet access for videophone
Warning
Do not attempt to modify this camera.
Do not place this camera in extremely damp or dusty locations.
Do not place this camera in places subject to extremely high temperatures, such as in a closed vehicle
or direct sunlight. Exposure to high temperatures may adversely affect the camera case and internal
components.
Do not remove the camera casing. Internal inspection, maintenance and repairs should be carried out
by an authorized service facility.
Do not use the camera if any foreign objects have entered the casing. Disconnect the camera from your
computer and contact your local dealer or an authorized service facility. Do not continue to use the
camera.
Do not use the camera if any water has entered the casing. Disconnect the camera from your computer,
and contact your local dealer or an authorized service facility. Do not continue to use the camera.
Do not use this camera if it is emitting smoke, is unusually hot to touch, is emitting any unusual odour
or is in any other abnormal state.
Take care not to bump or drop your camera as this may cause the camera to malfunction. If your
camera has been dropped or the casing has been damaged, disconnect it from your computer and
contact your local dealer or an authorized service facility. Do not continue to use the camera.
* Tele-conferencing and video-conferencing also require a sound card, microphone and an Internet connection.
System Requirements

3
Chapter II. Product Features
Video Quality
Nexxtech VGA Webcam
•Up to 12 FPS (Frames Per Second) at VGA (640x480 pixels) mode
•Up to 30 FPS (Frames Per Second) at CIF/SIF (352x288/320x240 pixels) modes
Nexxtech CIF Webcam
•Up to 30 FPS (Frames Per Second) at CIF/SIF (352x288/320x240 pixels) modes
Note: The frame rates (speed) of the camera are affected by the bandwidth available in the particular USB
configuration being used, the speed of your CPU, and when using the Internet, the speed of your network connection.
As a general rule, the smaller the frame size and the lower the resolution, the faster the video frame rates
will be.
Image Quality
•Up to 24-bit RGB color (16 million colors)
The snapshot button on the top of the USB Web Camera allows you to take still pictures. These images can be used by
all TWAIN compliant graphics software and image-editing applications. The image resolution can be adjusted to suit
virtually any requirements.
Internet Compatibility
The USB Web Camera was designed to be used primarily to send videos over the Internet for applications such as
video-conferencing. It can be used with all current video applications such as video-conferencing, CU-SeeMe,
NetMeeting (MSN Messenger) and Yahoo! Webcam (Yahoo! Messenger).
Your USB Web Camera comes with a variety of software allowing you to instantly begin sending videos over the
Internet and build your own web site.

4
Chapter III. Installation
Get Ready To Install Your USB Web Camera
1. USB Web Camera
2. USB Web Camera Setup/Application CD-ROM
Install Your USB Web Camera
1. Turn on your computer or Notebook PC. Close all the programs that run under the Windows system.
2. Load the USB Web Camera Setup/Application CD-ROM into your CD-ROM drive.
3. Follow the on-screen instructions given by the installation program to complete the USB Web Camera installation.
(If the auto-run program has not started, choose Start and Run, type ‘E:/Setup.exe’ at the Open column to start
installation.)
4. After the ‘USB CAM’ application has been installed successfully, connect the end of the USB cable of your PC
Camera into the USB port of your computer or Notebook PC.
Connect Your USB Web Camera to Your Computer
Your USB Web Camera is now set up and ready to use. At this point, you may wish to run ‘USB CAM’, the USB Web
Camera software to begin using the USB Web Camera. Please refer to the next chapter Using the USB Web Camera for
more information.

5
Chapter IV. Using the USB Web Camera
Before using the USB Web Camera, make sure the required Setup software is installed from the USB Web Camera
Setup/Application CD-ROM and it is properly connected to the USB Port, as described in the previous chapter.
Software
A variety of TWAIN compliant image editing, graphics application and video editing software can be used with the
USB Web Camera to view, edit, record and send videos and pictures. To use TWAIN compliant software, you will need
to choose the correct driver, usually found under the File, Acquire (or Scan) menu. After the driver is selected, choose
File, Acquire (Scan) from within the graphics application to begin viewing videos from the USB Web Camera. With
the USB Web Camera and either Yahoo! Messenger or MSN Messenger, you will be able to call and see people face-to-
face over the Internet.
Note: Only one software application can use the USB Web Camera at a time.
In the explanations below, we will use the Imaging (for Windows 98SE, 2000 & ME users) and Windows Movie
Maker (for Windows XP users) applications with Windows operating system as an example for setting configurations.
View Your First Image
After you have installed your USB Web Camera, start the image editing or video software to ensure everything is
properly set up.
For Windows 98SE, 2000 and ME users:
1. Click on the Start menu button.
2. Click on the Programs menu item.
3. Click on the Accessories menu item.
4. Click on Imaging to open Imaging program.
5. Click on File/Select to choose ‘USB Web Camera’.
6. Click on File/Acquire
The Imaging program will launch and live pictures will begin to be shown in the viewing window in a few seconds.
For Windows XP users:
1. Click on the Start menu button.
2. Click on the All Programs menu item.
3. Click on the Accessories menu item.
4. Click on Windows Movie Maker to open Windows Movie Maker program.
5. Click on File/Record
6. From the Record menu bar, choose Video and Audio or Video Only.
The Windows Movie Maker program will launch and live pictures will begin to be shown in the viewing window in a
few seconds.
If the video image from the viewing window is not clear, adjust the focus. If you cannot see an image on your computer
screen, consult the Troubleshooting section at the end of this manual.
Meet People Over The Internet
Yahoo! Messenger and MSN Messenger (NetMeeting) are widely used to Internet Video Chat for free. You may try
either of them with your USB Web Camera to see people face-to-face over the Internet.

6
To use Yahoo! Messenger:
1. Apply an Yahoo! ID from the web site: www.yahoo.com
2. Download ‘Yahoo! Messenger’ from messenger.yahoo.com and install it.
3. Invite your friend to get a Yahoo! ID, download and install ‘Yahoo! Messenger’
4. After both you and your friend install ‘Yahoo! Messenger’, you will be able to call and see each other using
‘Yahoo! Messenger’.
For detailed information, check http://help.yahoo.com/help/mesg/ about ‘Yahoo! Messenger’ and
http://help.yahoo.com/help/us/mesg/webcams/index.html for ‘Yahoo! Messenger Webcams’.
To use MSN Messenger:
1. Apply an MSN ID from the website: www.msn.com
2. Download ‘MSN Messenger’ from messenger.microsoft.com and install it
3. Invite your friend to get an MSN ID, download and install ‘MSN Messenger’
4. After both you and your friend install ‘MSN Messenger’, you will be able to call and see each other from
‘MSN Messenger’.
For detailed information, check on http://messenger.microsoft.com/support/helphome.asp
Camera Settings
The following section will explain the procedures for fine-tuning your USB Web Camera to receive an optimal image.
There are many factors that may affect videos and still image quality including, light source – fluorescent, incandescent
or natural sunlight, resolution, colour depth, frame rate, USB configuration, etc.
Video Format
The Video Format dialog box in Live Express allows you to control the size and color of the image provided by your
camera. The following dialog box will appear when you select ‘Video Format Settings’from within Live Express.
Please note, other graphic applications should also have a settings window with similar controls.
Items in the above Video Format window are described as follows:
•Output Size – this setting controls the size of the image or video that will be shown by the software. Larger
images contain more data, so the frame rate might be slower than for smaller resolutions.
•Color Depth/Compression – this setting controls how many colors will be shown. The higher the number,
the more colors that can be shown. High pixel depth allows your videos and images to show realistic colors.

7
Various color formats can be selected, but 24-bit RGB color is recommended unless your PC can display
only 256 colors. As with resolution, the higher the pixel depth, the more data the video or image will contain.
Frame Rate – this setting controls the frame rate of the image or video. The higher the frame rate, the larger
the file size.
Since these settings directly control the amount of data in a video or still image, they are very important when
transmission speed or file size are at a premium. High resolution and pixel depth can generate very large amounts of
data. If sending a video over the Internet or recording a video to a file, you may wish to lower the frame rate and color
depth to achieve greater transmission speeds or smaller file sizes, respectively.
Other factors may affect video quality include:
CPU – the faster your CPU, the faster your computer can process data. A 300MHz Intel ® Pentium® CPU
will show videos (especially those with higher resolutions and pixel depth) at higher frame rates.
Graphics Display Card – Fast display cards and graphics accelerators can greatly increase the quality of
videos shown on your screen.
USB Configuration – When the USB Web Camera is the only USB device connected to your computer, it
will be able to send image data to your computer faster than if there are other USB devices present.
Video Source or Video Settings
The video source dialog box allows you to control the image quality provided by your camera. Most applications allow
you to access a ‘Video Source’ or ‘Video Setting’ window similar to the one shown below.
Items in the above Video Source windows are described as follows:

8
Saturation – this setting controls the richness of colors shown by the camera.
Brightness – this setting controls how bright an image or video will appear.
Contrast – this setting adjusts the tonal range of an image by lowering mid-tone values and increasing
values for high and low tones. For example, use contrast to eliminate noise or shading on black & white and
grayscale videos or images or to clean-up color ones.
Sharpness - the higher the sharpness, the sharper the image. The lower the sharpness, the more blurry an
image will be.
Auto Exposure – this setting lets you change the electronic shutter speed.
Light Source – this setting allows you to select the type of light source you are using.
Auto White Balance – this setting allows you to adjust how much white will be in the Red, Green and Blue
color channels. Checking the Auto box sets the amount of white for each color to predefined settings based
on the type of light source.
Light Frequency – this setting allows you to select the correct light frequency used in your country, you
will either choose 50Hz or 60Hz.
Please note that many of the above settings operate the same as those on a normal color TV or computer monitor.
Proper room lighting is critical for correct functioning of the USB Web Camera. Your camera requires a certain light
level to produce good pictures. If you are getting dull or dark images, or if the color is poor, try increasing the ambient
light in the room or turn off the light behind the subject, or try lighting the subject directly. Using the camera in a sunlit
room will also produce good results. If you cannot use your camera in a naturally well-lit setting, then a desk lamp or
some other artificial light source must be used.
Lighting Settings
Some applications may also allow you to adjust light settings other than those shown above. We have defined some
commonly used terms which may appear in software programs you are using:
Lighting Modes - Your camera normally operates in normal mode; however, you can switch it to dark mode
when there is too much light or bright mode when light is dim.
Banding Filter - If you are in a room lit by fluorescent lighting, then please check that the Banding Filter is
being used, if present. Depending on the fluorescent lighting system used in your country, you will either
choose a filter type of 50Hz (Europe, Asia) or 60Hz (North America).
Color Temperature - The USB Web Camera’s default is normal mode, but you can switch it to cool when
your light source tends to be red or switch it to warm when your light source tends to be blue.
Compression Control - Compression control lets you adjust the frame rate. The USB Web Camera is
initially set to use the lowest compression setting, but choosing high compression mode may help speed up
the rate of transmission.
Audio Source and Settings (VGA Only)
Your camera comes with a built-in microphone which allows you to talk without an additional microphone. To allow
it to work on your computer, follow the settings below:
1. In “Control Panel” of “My Computer”, select “Sounds and Multimedia”, change the “Default device” from
“Sound recording” to “PC Camera” for XP users or USB (VGA) Camera for 98, 2000, and ME users.

9
2. After selecting the video device, click on “Volume” of “Sound Recording”, adjust the “Volume” until the
microphone sounds well.

10
Important: When running the camera software application for the first time, increase the audio volume by sliding
the bar in “Audio Property” menu. In the “Pin Line” box, select “Microphone”.

11
Chapter V. Troubleshooting and Maintenance
This section discusses basic problems with the USB Web Camera, frequently asked questions and provides some
maintenance tips.
Ensure the USB cable is correctly and securely attached.
Ensure that your video software has been properly installed.
Make sure your lens is free from obstructions, and that it is pointing in the appropriate direction.
Check that there is sufficient light for the camera. Alternatively, you may wish to adjust the Brightness or Contrast
settings in the software you are using.
Ensure there is no strong light source behind the object or person being viewed by the PC Camera.
Ensure that the lens is clean.
Q. Can I use my USB Web Camera with software applications other than those included with the camera?
A. Yes. A V ideo for Windows device driver and a TWAIN driver are supplied with your camera and are
automatically installed on your computer during the setup process. These drivers allow the USB Web Camera to
be used as a general video and/or still image input device with other Windows applications.
Q. How do I use my USB Web Camera with other video capture devices?
A. The best way is to disable all other video capture devices and ensure the USB Web Camera is the default device.
To do this:
Click on the Start menu button and choose Settings, and then Control Panel. In the Windows Control
Panel, double click on the “Multimedia” icon.
Select the Devices tab at the top to view a list of all multimedia devices installed on your computer.
Double click on the driver name. This will open a dialog box showing your camera’s properties.
Enable or disable the driver as required.
Note:Some applications (e.g. CU-SeeMe) allow you to select a device from within the application. If this is the
case, disabling other devices in the Windows Control Panel is not necessary.
Q. The video on my screen appears too light or too dark. What should I do?
A. Proper room lighting is critical for the correct functioning of the USB Web Camera. Your camera requires a
certain light level to produce good pictures. If you are getting dull or dark images, or if the color is poor, try
increasing the ambient light in the room, or lighting the subject directly. Using the camera in a sunlit room will
also produce good results. If you cannot use your camera in a naturally well-lit setting, then a desk lamp or
some other artificial light source must be used.
You may also wish to adjust the Brightness or Contrast settings usually located in a Video Source
(or similarly named) settings window in the software you are using.

12
Maintenance Tips
Lens cleaning
If your lens becomes dirty, wipe lightly with a dry, lint-free cloth.
Outdoor Use
Your USB Web Camera is not designed for outdoor use and should not be exposed to the elements without suitable
protection. In general, you should not expose it to extreme temperatures or humidity.
Appendix A: Product Specifications
Nexxtech VGA Webcam
Nexxtech CIF Webcam
Image Sensor
Sensor Size
Effective Pixels
Focus Distance
Number of Colors
Frame Rate
Manual Focus
Auto White Balance
Auto Exposure Control
Snapshot Button
LED Indicator
Built-in Microphone
Dimensions
USB Cable Length
Interface
Power Consumption
During Operation
During Standby
VGA CMOS Sensor
1/4 in. (6 mm)
Up to 640x480
7-7/8 in. (20 cm) to infinity
Up to 24 bits
Up to 12 FPS at VGA Mode
Up to 30 FPS at CIF Mode
Yes
Yes
Yes
Yes
Yes
Yes
2-9/16 x 3 x 3 in. (WxHxD)
(6.6 x 7.6 x 7.6 cm WxHxD)
6 ft. (180 cm)
USB1.1
< 30 mA
< 15 mA
CIF CMOS Sensor
1/5 in. (8 mm)
Up to 320x240
7-7/8 in. (20 cm) to infinity
Up to 24 bits
Up to 30 FPS at CIF Mode
Yes
Yes
Yes
Yes
Yes
No
2-9/16 x 3 x 3 in. (WxHxD)
(6.6 x 7.6 x 7.6 cm WxHxD)
6 ft. (180 cm)
USB1.1
< 30 mA
< 15 mA

13
Appendix B: FCC Statement
This equipment has been tested and found to comply with the limits for a Class B digital device, pursuant to Part
15 of the FCC rules. These limits are designed to provide reasonable protection against harmful interference in a
residential installation. This equipment generates, uses, and can radiate radio frequency energy, and if not installed and
used in accordance with the instructions, may cause harmful interference to radio communications. However, there is
no guarantee that interference will not occur in a particular installation.
If the unit does cause harmful interference to radio or television reception, which can be determined by turning the
equipment off and on, the user is encouraged to try to correct the interference by one or more of the following
measures:
Reorient or relocate the receiving antenna.
Increase the separation between the equipment and receiver.
Connect the equipment into an outlet on a circuit different from that to which the receiver is connected.
Consult the dealer or any experienced TV/radio technician for help.
Caution
In order to maintain compliance with FCC regulations, shielded cables must be used with this equipment. Operation
with non-approved equipment or unshielded cables is likely to result in interference to radio and TV reception.
To comply with the limits for a Class B digital device, pursuant to part 15 of the FCC rules, this device must only be
installed on computer equipment certified to comply with the Class B limits. In addition, only the supplied power
cables should be used with the product. Operation with non-certified computers, use of a cable other than that supplied,
or modification of the device may result in interference to radio or television reception and could void the user’s
authority to operate this device.

14
LIMITED WARRANTY
Who is Providing This Warranty?
• Orbyx Electronics, LLC (”Orbyx”), as the distributor of
this NexxtechTM product (your “Product”).
What Does This Warranty Cover?
• This warranty covers defects in materials or
workmanship in your Product under normal use and
conditions.
What is the Period of Coverage?
• This warranty covers your Product for 90 days from the
original purchase date.
Who Is Covered?
• This warranty covers the original consumer purchaser.
Coverage terminates if you sell or otherwise transfer
your Product.
What Will We Do To Correct Problems?
• We will repair your Product or replace your Product with
a new or reconditioned equivalent product, at our option.
How Do You Get Service?
• Call Orbyx TOLL FREE at 1-866-363-3059 for
instructions for obtaining warranty service from Orbyx’s
authorized service providers.
• Or, return your Product directly to the retail store from
which you purchased the Product.
• When you obtain service for your Product, you must
provide a purchase receipt (or other proof of the original
purchase date) and a description of the defect(s).
What Does This Warranty Not Cover?
• This warranty DOES NOT COVER:
• damage due to misuse, abuse, alteration, unauthorized
repair, or accident (such as improper electrical current);
• damage due to “acts of God” (such as lightning) or other
contingencies beyond our control;
• cosmetic damage;
• externally generated static, signal reception or antenna
problems not caused by your Product; or batteries.
• This warranty also DOES NOT COVER, and in no case
will we be liable for, any incidental damages (such as
transportation costs to and from an authorized service
provider, or loss of time) or consequential damages
(such as costs of repairing or replacing other property
which is damaged, including tapes, discs, speakers not
included with your Product or other accessories, or
external electrical systems) resulting from the use of
your Product. Some states do not allow the exclusion or
limitation of incidental or consequential damages, so the
above limitation or exclusion may not apply to you.
• Defacing the serial number, or using your Product for
commercial or institutional purposes, voids this
warranty.
Are There Other Warranties?
• There are no express warranties other than those
expressed herein. Neither the sales personnel nor any
other person is authorized to make any other warranties
or to extend the duration of any warranties.
• ANY IMPLIED WARRANTIES, INCLUDING ANY
IMPLIED WARRANTY OF MERCHANTABILITY (AN
UNWRITTEN WARRANTY THAT A PRODUCT IS FIT
FOR ORDINARY USE), ARE LIMITED TO 90 DAYS.
Some states do not allow limitations on how long an
implied warranty lasts, so the above limitation may not
apply to you.
How Does State Law Apply?
• This warranty gives you specific legal rights, and you
may also have other rights which vary from state to
state.
ORBYX ELECTRONICS WARRANTY
ORBYX Electronics warrants that this product will be free
from defects in materials and workmanship for a period of
ninety (90) days from the date of purchase. Within this
period, simply take the product and your proof of purchase
to any ORBYX Electronics store or dealer and the product
will be repaired without charge for parts and labour. ORBYX
Electronics reserves the right to charge for transportation.
Any product which has been subject to misuse or accidental
damage is excluded from this warranty.
This warranty is only applicable to a product purchased
through ORBYX Electronics' company owned stores and
dealers and to a product that is presented for repair in a
country where ORBYX Electronics offers the product for
sale. While this warranty does not confer any legal rights
other than those set out above, you may have additional
statutory rights which will vary under the laws of the various
countries, states, province and other governmental entities
in which ORBYX Electronics operates. This warranty is
subject to all statutory rights you may have in the country of
purchase.
LIMITED WARRANTY
Limited Warranty/Garantie Limitée
U.S.A & Canada
© 2005 ORBYX Electronics. All Rights Reserved.
Distributed exclusively in the U.S. by
Orbyx Electronics, LLC
501 South Cheryl Lane,
Walnut, CA 91789
Imported in Canada for/Importé au Canada pour
Orbyx Electronics,
Concord, Canada, L4K 4M3
Manufactured in China
For product support please contact www.orbyxelectronics.com
or 1-866-363-3059
Table of contents
Other NexxTech Webcam manuals
