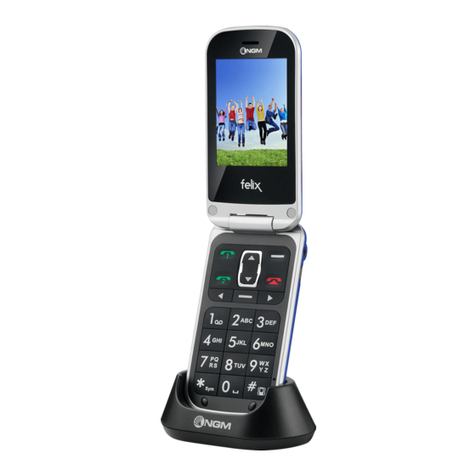
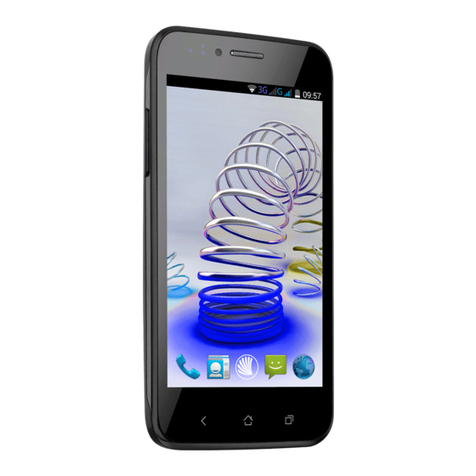
NGM C3 User manual

1

2 3
Guida rapida - Italiano..........................4
Quick guide - English ..........................17

4 5ITA ITA
Inserire una scheda di
memoria:
per poter utilizzare
le funzioni di fotocamera e
lettore multimediale di
NGM
C3, è necessaria una micro-
SD
(
non compresa nella
confezione)
: la scheda va
collocata nella parte
posteriore del telefono
sopra
lo slot delle SIM
. Inserite la
scheda micro-
SD, come in
figura, con i contatt
i dorati rivolti verso il basso
: aprite prima lo sportellino metallico
spingendolo in direzione “open” e
bloccatelo nuovamente dopo aver inserito la scheda
,
spingendolo
nella direzione opposta (“lock”).
Slot SIM1
Slot SIM2
Slot micro SD
Benvenuti nel mondo di NGM. Grazie per aver acquistato NGM C3. Con questo dispositivo
potrete
facilmente effettuare telefonate, mandare e ricevere SMS, MMS e Email. C
3 è infatti
un dispositivo facile, economico, intuitivo, ma anche
tecnologico
grazie alla possibilità di
collegarsi in 3G, che vi permetterà di mettervi in contatto con il vostro mondo, esplorare la
rete Internet,
ampliare le vostre possibilità di comunicazione.
Visitando il sito ufficiale
www.ngm.eu
potrete conoscere l’intera gamma di telefoni NGM, provare il nostro pratico e
funzionale servizio di e
-commerce per acquistare telefoni ed accessori, ric
hiedere assistenza,
accedere al forum di assistenza tecnica e scaricare aggiornamenti software.
Inserire l
e SIM card: le SIM card contengono i vostri numeri telefonici, codici
PIN, i
collegamenti ai servizi
dell’operatore, contatti e messaggi
. Per accedere al vano contenente
gli slot delle SIM
, spegnete il telefono e sollevate la cover
a partire dalla fessura in basso a
destra
. Rimuovete la batteria. Inserite le schede SIM nello
slot con i contatti dorati rivolti
verso il basso.

6 7ITA ITA
Caricare la batteria:
c
aricate la batteria
prima di iniziare ad
utilizzare l’apparecchio.
Connettete il caricatore
ad una presa della rete
elettrica e quindi
inserite
lo spinotto
del cavo di
alimentazione
nell’apposito ingresso micro USB sul lato destro del telefono.
Attendere che
sul display esterno compaia l’animazione di ricarica.
Quando la carica sarà
completata
l’animazione
si interromperà, un popup comunicherà che la carica è completa e il
telefono
p
otrà essere rimosso dalla carica.
Collocamento della cover
Inserimento batteria
Accensione, spegnimento e blocco tasti: per accendere e spegnere il telefono, tenete
premuto il tasto rosso di fine chiamata. La tastiera si blocca chiudendo
il flip.
Con il flip chiuso
anche i tasti laterali sono disattivati.
Inserire la batteria
: Il vostro apparecchio è fornito di
una batteria a ioni di litio ed è progettato
per l’uso esclusivo di batterie e accessori originali NGM. La batteria va collocata nella parte
posteriore del telefono. Inserite la batteria nel vano batteria con i contatti rivolti verso
l’alto
,
in corrispond
enza di
quelli del telefono. Successivamente, ripristinate la cover posteriore del
telefono, come mostrato qui di seguito.
Attenzione:
Per preservare la corretta funzionalità
del prodotto e l'integrità della garanzia si raccomanda l'utilizzo di
caricabatte
rie originali
NGM. Procedete alla ricarica esclusivamente al coperto e in luoghi asciutti. Un leggero
riscaldamento del telefono durante il processo di ricarica è del tutto normale. La batteria
raggiungerà la sua piena efficienza funzionale solo dopo alcun
i cicli completi di ricarica.

8 9ITA ITA
Menu principale
Per accedere al
Menu Principale del telefono, premete il tasto di selezione in alto a sinistra.
-
Rubrica: per gestire e salvare contatti
-
Chiamate: registro chiamate e impostazioni
-
Profili Audio: per gestire e attivare i Profili audio
-
Multimedia: fotocamera, radio, galleria…
-
Messaggi: per scrivere e leggere SMS
-
Strumenti: con Calendario, Bluetooth, Calcolatrice, Sveglia…
-
FM Radio: per attivare la radio
-
Servizi: per connettersi a Internet e ai servizi SIM
-
Impostazioni: per personalizzare il telefono, impostare gli APN per navigare….
Rispondere ad una chiamata:
rispondete ad una chiamata semplicemente aprendo il flip.
Il
display esterno visualizzerà il numero di chi chiama quando il flip è chiuso (o il nome nel caso
in cui il contatto sia memorizzato in Rubrica).
Per modific
are la modalità di risposta
selezionate
Chiamate > Impostazioni > Avanzate > Risposta.
Fotocamera
Connettore
USB
Tasti fine
chiamata e
on/off
Tasto
vibrazione
Tasto
Messaggi
Tasti
chiamata
Schermo
LCD
Microfono
Tasto Media
Player
Speaker
Tasto
Registratore
audio
Speaker
Display
Esterno
Tasti di
navigazione e
collegamenti
rapidi
Tasti
Volume
+/-
Tasto
Fotocamera
Jack
Audio

10 11ITA ITA
Composizione rapida: in Menù > Rubrica > Opzioni > Impostazioni > Chiamata rapida >
Imposta Numeri
> OK si possono assegnare ai tasti 2-
9 dei numeri telefonici che verranno
chiamati automaticamente tenendo premuto il tasto corrispondente.
L’opzione può essere attivata/disattivata dall’opzione
Stato.
Stato memoria:
questa f
unzione situata tra le Impostazioni della Rubrica, permette di vedere
quante posizioni di archiviazione libere si trovano nel telefono e
nelle SIM.
Impostare le suonerie:
selezionate Menù > Profili > Generale > Opzioni >
Personalizza >
Suoneria SIM1/2
e impostate il tono desiderato tra quelli disponibili.
Attivare/disattivare la vibrazione
Per disattivare velocemente la suoneria ed attivare la
vibrazione, tenete premuto il tasto
#. Premendo nuovamente #
, si riattiverà la modalità
precedente.
Inviare e leggere
SMS Inviare SMS: dalla schermata principale, scegliete Menu >
Messaggi >
Scrivi nuovo
e scrivete il messaggio. Premete Opzioni > Invia a > Numero
ed inserite il numero
con la tastiera numerica oppure
Da Rubrica per selezionare il contatto
a cui inviare il
Effettuare una chiamata: per effettuare una chiamata, dalla schermata principale componete
il numero desiderato con la tastiera e poi premete il tasto verde di chiamata
relativo al
la SIM
con cui desiderate chiamare. Per terminare la chiamata, premete il tasto rosso di fine
chiamata.
Chiamare un numero dalla rubrica:
dalla schermata principale, premete il tasto di selezione
in alto a destra; verrà aperta la rubrica. Scorrete i contatti con i tasti SU e GIÙ e premete il
tasto verde per chiamare il contatto desiderato dopo aver scelto la SIM con cui chiamare.
Richiamare un numero dal registro chiamate:
dalla schermata principale, premete
uno dei
due tasti verdi
di chiamata; verranno visualizzate in automatico le
chiamate perse, ricevute
ed
in uscita. Scorretele con i tasti SU e GIÙ e premete nuovamente il tasto verde di chiamata
relativo alla SIM con cui desiderate chiamare.
Aggiungere contatti in rubrica
Selezionate
Menù > Rubrica > Aggiungi Nuovo > Seleziona
, scegliendo se memorizzare il
numero sulle SIM o su Telefono. Inserite il nome ed il nuovo numero ed alla fine confermate
con
Opzioni > Salva.

12 13ITA ITA
Inviare Email: grazie alla connessione 3G del vostro C3 potete facilmente ricevere e inviare
Email. Da
Messaggi > Email
sarete guidati nella configurazione di un account (Gmail, Yahoo,
Hotmail, Altro) inserendo indirizzo Email e password. Una volta impostato il vostro account,
selezionando “Scrivi Email” dalle opzioni potrete inserire indirizzo del destinatario, testo e
eve
ntuali allegati e confermare l’invio tramite Opzioni > Invio
. Per effettuare l’invio o la
ricezione di e
-mail, occorre aver precedentemente impostato il corretto APN da
Opzioni >
Account Email > Opzioni > Modifica > Avanzate > Account > Account dati
,
selezionando il
relativo APN internet che permetterà l’invio e la ricezione delle Email. In ogni momento, da
Opzioni > Account Email > Opzioni
potrete modificare, aggiungere o rimuovere account.
Inviare MMS
: da Menu > Messaggi > Scrivi nuovo > Opzioni è
possibile aggiungere un
allegato multimediale al messaggio (audio, video o foto) e convertirlo in MMS
. Il vostro C
3
riconosce in automatico i parametri per connessione e MMS a seconda degli operatori
utilizzati, tuttavia per effettuare l’invio del messaggio multimediale occorre prima impostare
il corretto APN per l’invio. Per farlo dovete accedere a Messaggi > Impostazioni > MMS >
Account dati
e scegliere per ogni SIM il relativo APN MMS.
messaggio dalla rubrica. Una volta aggiunto il/i destinatario/i confermate l’invio con Opzioni
> Invia
, selezionando la SIM con la quale inviare il messaggio.
Leggere SMS:
quando ricevete un nuovo SMS, viene visualizzata una icona a forma di busta
da lettere nella barra in alto (fino a quando il messaggio non viene letto)
e
un pop up di
notifica
viene ricevuto sia sul display esterno che in quello interno. Premete il tasto d
i
selezione in alto a sinistra per accedere alla cartella
Ricevuti.
Connettersi a Internet:
NGM C
3 vi permette di navigare in Internet con la connessione 3G.
L’unico slot abilitato alla connessione è lo slot 1
, quindi prestate attenzione
ad inserire la
SIM
prescelta per la connessione dati in tale
slot. Prima di procedere alla navigazione
assicuratevi di avere impostato il giusto APN da Impostazioni > Connettività > Account dati >
SIM1
, e di aver attivato la connessione dati da Impostazioni > Connettività >
Connessione
dati
> ON. Da questo momento potete iniziare a navigare da Menu > Servizi > Opera mini.

14 15ITA ITA
Radio FM: Per ascoltare la Radio è necessario utilizzare l’auricolare come antenna. Per
accendere
e spegnere la radio, dal menù principale accedete Radio FM
, oppure premete il
tasto di
navigazione sinistro. Premendo Opzioni avete accesso alle seguenti funzioni:
-
Elenco canali:mostra le stazioni radio salvate
-
Manuale: per la ricerca manuale delle stazioni radio
-
Ricerca: per ricercare in automatico stazioni radio
-
Impostazioni: per attivare/disattivare l’altoparlante e la riproduzione in background
Utilizzat
e i tasti Volume per regolare il volume, i tasti di navigazione destro e sinistro
per
scorrere tra le stazioni
e il tasto di navigazione giù per accendere e spegnere la Radio.
Collegamenti rapidi:
I tasti di navigazione rappresentati dalle 4 frecce
permettono di aprire
dei collegamenti rapidi; in particolare con il tasto di
navigazione Su
potete accedere alla lista
delle Sveglie,
con il tasto di navigazione Giù accedete alla
Fotocamera, a sinistra potete
trovare la Radio, mentre a destra accedete ai Profili Audio
.
Tutti i collegamenti sono
comunque personalizzabili in
Impostazioni > Telefono > Tasti dedicati
Impostazioni del Telefono:
dal Menù > Impostazioni,
avrete accesso alle impostazioni di Data
e Ora, Lingua e
Display. Selezionate Ripristina per ripristinare le impostazioni di fabbrica
di
NGM
C3: inserite la password del telefono 1122 per confermare il ripristino.
Fotocamera:
per attivare la fotocamera, a partire dal
menu principale premete l’apposito
tasto sul lato sinistro del dispositivo
. Scattate la fotografia premendo lo stesso tasto
oppure
il tasto di navigazione centrale, mentre con i tasti di navigazione su/giù potrete alternare tra
Fotocamera e Videocamera. Una volta scattata la foto, o registrato il video, con il tasto
centrale potrete rapidamente condividere il file via MMS, mentre per altre opzioni di
condivisione selezionate il tasto di selezione in alto a sinistra.
Tramite Opzioni
(Tasto di
selezione sinistro)
accedete a varie impostazioni della fotocamera
Bluetooth:
in Strumenti > Bluetooth > Accensione potete attivare il B
luetooth e ricercare altri
dispositivi (auricolari o telefoni). Selezionate
Associa per il d
ispositivo desiderato e
confermate su entrambi i dispositivi.

16 17ITA ENG
Welcome to the NGM world. Thank you for purchasing NGM C3. With this device you can
easily make phone calls, send and receive SMS, MMS and Email. C3 is an easy, economic and
intuitive device, but it is technological as well, thanks to its 3G connection, which will allow
you to get in touch with your own wor
ld, na
vigate on Internet, and get wider communication
possibilities.
By visiting the official website www.ngm.eu
you can appreciate the whole range
of NGM mobile phones, ask for after sales assistance, access the forum for technical
assistance and download software updates.
Inserting the SIM cards:
The SIM cards contain your phone numbers, PIN codes, links to
operator services, contacts and SMS. To access the compartment containing the SIM slots,
turn off the phone and lift up the cover starting from the slit on the bottom right corner.
Remove the battery. Insert the SIM cards into the slots with their gold contacts facing down.
Avvertenza:
il produttore non si assume alcuna responsabilità per qualsiasi inadempienza delle linee di condotta
sopra stabilite o per ogni uso improprio del telefono cellulare. Il produttore si riserva il diritto di modificare senza
preavviso le informazioni contenute in questa guida. Il contenuto di questo manuale pot
rebbe differire dal
contenuto effettivamente mostrato nel telefono cellulare. In tale caso, il secondo prevale.
Copyright © 2017 NGM
Nessuna parte di questo manuale può essere riprodotta, distribuita, tradotta trasmessa in alcuna forma o
tramite alcun mezzo, elettronico o meccanico, compresi fotocopie, registrazione o salvataggio in qualsiasi
archivio di informazioni o sistema di recupero, senza previa autorizzazione scritta da parte di NGM.

18 19ENG ENG
Turn ON, Turn OFF and keypad lock: To turn on and turn off the phone, press and hold the
red end call key. Keypad
locks closing the flip. With closed flip lateral keys are deactivated
too.
Inserting the Battery:
Your device is provided with a lithium-
ion battery and is designed to be
used exclusively with original NGM batteries and chargers. The battery must be inserted into
the backside of the phone. Insert the battery into the battery compartment with the contacts
facing up, matching those of the phone. When done, put the hind cover back into position as
shown in the following illustrations.
Attention:
To preserve the functionality of the product
and the integrity of the warranty, we recommend the use of
original NGM chargers.
Please
charge the battery indoors, in a dry and favorable environment. It’s normal for the battery to
get slightly warm during the charging process. The battery will reach its full capacity when
cycled several times.
Inserting a memory card: In
order to use camera and
media player functions of
NGM C3, a micro-
SD memory
card is required (not included
in the package): the card must
be placed on the backside of
the phone, over the SIM slots.
Insert the micro-
SD card, as
shown, with the gold contacts
facing downwards: open
the
metal shutter by pushing it towards "open" and lock it again after inserting the card, by
pushing it into the opposite direction ("lock").
SIM1 Slot
SIM2 Slot
SD card slot

20 21ENG ENG
Camera
USB
Connector
End call and
ON/OFF key
Vibration
Key
Messages key
Call keys
LCD screen
Microphone
Media Player
Key
Speaker
Audio
Recorder key
Speaker
External
display
Navigation key
and shortcuts
Volume +
and -
Camera key
Jack
Audio
Charging the battery:
Charge the battery
before starting to use
the device. Connect the
charger to a wall socket
and then insert the
micro-
USB plug of the
cable into the
appropriate micro USB port on the right side of the phone. Wait for the external display to
show the charging animation. When charging will be completed, the animation will stop, a
popup will notificate that charging is completed and the phone could be removed from USB
cable.
Placement of the cover
Inserting the battery

22 23ENG ENG
Making a call: To make a call from the home screen, type the desired number with the keypad
and then press the green call key of the SIM you want to use to make the call. To end the call,
press the red end call key.
Call a number from phonebook:
from the main screen, press the upper right selection key;
this will automatically open the Phonebook.
Scroll through the contacts with the UP and
DOWN keys and press the green button to call the desired contact choosing the SIM to call
with.
Call a numbe
r from the call log: From the main screen, press the green call key, the
missed,
received
, and outgoing
calls will be automatically displayed. Scroll them with UP and DOWN
keys and press the green call button of the selected SIM when you found the number you
want to call.
Add contacts to the Phonebook
Select
Menu > Phonebook > Add new > Select
, choose the storage between one of the SIM
cards or Phone. Enter the name and the new number, then press
Options > Save.
Main menu
To access the
Main Menu on your phone, press the selection key on the top left.
-
Phonebook to manage and save contacts
-
Calls: call log and settings
-
Audio Profiles: to set and change audio profiles
-
Multimedia: camera, radio, gallery…
-
Messaging to write and read SMS text messages
-
Tools: with Calendar, Bluetooth, Calculator, Alarms...
-
FM Radio: to activate FM Radio
-
Services: to connect to Internet and SIM Toolkit
-
Settings: to customize your phone, set APNs...
Answer an incoming call:
Take an incoming call simply by ope
ning the flip. External display
will show caller number when flip is closed (or caller name if the contact has been saved on
Phonebook). To set up the answer mode select Settings > Call settings > Advanced > Answer
mode

24 25ENG ENG
Sending and reading SMS Sending SMS: From the main screen, choose Menu > Messaging >
Write message
and write your message. Press Options > Send to > Number
and enter the
number using the numeric keypad or
Add from phonebook
to select from the Phonebook the
contact you want to text. Once added the recipients, confirm the sending with Options >
Send
, selecting one of the SIM.
Read SMS:
when you receive a new text message, the phone displays an envelope icon on
the top bar (as long as the message is unread) and a notification pop up appears on the main
screen. Press LSK to access
Received folder.
Browsing on Internet:
NGM C3 will allows you to navigate with 3G connection.
Only slot 1
can connect to Internet, so make sure to insert the data SIM on the right slot. Before starting
to connect you have to select the right APN from
Sett
ings > Connectivity > Data Account >
SIM1
and activate data connection from Settings > Connectivity > Data connection > ON
.
Now you can start browsing from
Menu > Tools > Opera mini.
Speed dial: in Menu > Phonebook > Options > Settings > Speed Dial > Set Numbers > OK,you
can assign to keys 2
-
9 some numbers that will be called automatically if you press and hold
the related button.
The option can be activated and deactivated from
Status.
Memory status:
this feature within t
he phonebook settings allows you to see how much free
storage there is on the phone and SIM cards.
Set Ringtones:
Select Menù > Profiles > General > Options > Customize > SIM1/2 Ringtone
and set the desired tone from the list
.
Activate/deactivate vibrat
ion: t
o quickly turn off incoming calls ringtone and messages tone,
and activate vibration, press and hold
#. Pressing again #,
the phone will enter in previous
mode.

26 27ENG ENG
Phone settings: from Menu > Settings, you will access to various settings such as Date and
Time, Language, and Display.
Select Restore to reset the factory settings
of NGM C3: enter
the phone password
1122 to confirm the restoring.
Camera: to activate the camera, in the main menu press the related key on the upper left
part of the keypad. Take the picture pressing the same key, or with the central navigation key,
while with up/down navigation keys you can switch between camera and camcorder. With
central key you can easily share the multimedia file as MMS, while to view the other sharing
options, press the upper left selecting key. With
Options (LSK) you can access t
o several
camera settings.
Bluetooth:
On Organizer > Bluetooth > Power on
you can turn on Bluetooth and search for
other devices (headsets, phones…). Select the device you would like to associate with and
confirm it on both devices.
Send Email: thanks to 3G connection you can easily receive or send Emails. From Messaging
> Email
you can create your own account (Gmail, Yahoo, Hotmail, Others) inserting Email
address and password. Once your account has been set, selecting "Write Email" from Options
you can insert receiver address, text body and potential attachments, and confirm with
Options > Send
.To send or receive emails, you have to set the right APN from
Options > Email
account > Options > Edit > Advanced > Account > Data account
, selecting th
e related internet
APN for email sending and receiving. Whenever you want, from
Options > Account Email >
Options
you can edit, add or remove accounts.
Send MMS:
from Menu > Messages > Write new > Options
you can add a multimedia
attachment to a text message (audio, photo or video), which will be converted to MMS. C3 is
able to automatically recognize Internet and MMS parameters, according to SIM operators
inserted on device, however to send MMS, you have to choose and set APN for sending. To
do it, access
to Messages > Settings > MMS > Data account
and choose the related MMS APN
for each SIM

28 29ENG ENG
Warning:
The manufacturer assumes no responsibility for any failure of the policies set out above, or for any
misuse of the phone. NGM reserves the right to modify any of the content in this user guide without previous
public announcement. The content of this man
ual may vary from the actual content displayed in the mobile
phone. In such case, the latter shall govern.
Copyright © 2017 NGM
No part of this manual may be reproduced, distributed, translated, or transmitted in any form or by any
means, electronic or mechanical, including photocopying, recording, or storing in any information storage
and retrieval system, without the prior written permission of NGM.
FM radio: To listen to the Radio you have to plug in earphones as antenna. To power ON/OFF
FM Radio, from the main menu access to
FM Radio or press the left navigation key.
By
selecting
Options you have access to the following functions:
-
Channel list: to manually browse saved channels
-
Manual: for the manual search of radio channels
-
Automatic Search: to automatic search radio stations
-
Settings: to activate/deactivate speaker and background play
Use
Volume keys to adjust the volume, right and left navigation keys
to browse FM radio
stations and down navigation key to power ON/OFF the radio.
Dedicated keys: The four navigation keys, represented with the 4 arrows can open dedicated
shortcuts: with Up navigation key you can access to alarms list, with the down
na
vigation key
you can open Camera, to the left you can find FM Radio and to the right the audio profiles
list.
Anyway you can customize all shortcuts from Settings > Phone > Dedicated keys

www.ngm.eu
C3 V1
Table of contents
Languages:
Other NGM Cell Phone manuals
NGM
NGM YOU COLOR P551 User manual
NGM
NGM YOU COLOR P503 User manual

NGM
NGM facile sempre User manual

NGM
NGM facile subito User manual
NGM
NGM Elvis User manual
NGM
NGM Facile top User manual
NGM
NGM Vanity touch User manual
NGM
NGM FORWARD ENDURANCE User manual
NGM
NGM FACILE LOOP User manual
NGM
NGM dynamic time User manual
