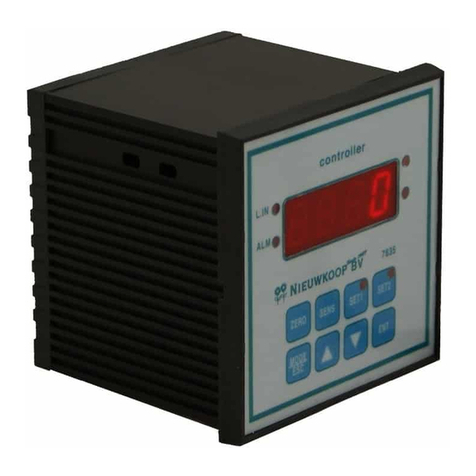
NIEUWKOOP EC3020 User manual

USER MANUAL
EC3020
CONDUCTIVITY CONTROLLER
MICROPROCESSOR BASED

EC3020
CONDUCTIVITY CONTROLLER, MICROPROCESSOR BASED
_____________________________________________________________________________________________
1
Conductivity scales : from 0/0.2000 µS tot 0/40.00 S
Temperature scale : -10/110 ˚C
Power supply : 110/220 Vac
Software
: R 2.1x
Valid also for option : P/N 091.3713
Cod. 28003763
Rev. D –10/18
INDEX
1 GENERAL WARNINGS AND INFORMATION FOR ALL USERS.............................................................................................................................3
1.1 WARRANTY.......................................................................................................................................................................................................................................3
1.2 AFTER SALES SERVICE............................................................................................................................................................................................................3
1.3 CE MARKING ...................................................................................................................................................................................................................................3
1.4 SAFETY WARNINGS..................................................................................................................................................................................................................3
2 GENERAL..............................................................................................................................................................................................................................................................4
3 SPECIFICATIONS.........................................................................................................................................................................................................................................5
3.1 FUNCTIONAL SPECIFICATIONS.........................................................................................................................................................................................5
3.2 PHYSICAL SPECIFICATIONS................................................................................................................................................................................................8
3.3 TECHNICAL SPECIFICATIONS...........................................................................................................................................................................................8
4 INSTALLATION..............................................................................................................................................................................................................................................12
4.1 PHYSICAL INSTALLATION.......................................................................................................................................................................................................12
4.2 ELECTRICAL INSTALLATION................................................................................................................................................................................................ 12
5 OPERATING THE SYSTEM..................................................................................................................................................................................................................15
6 SOFTWARE DESCRIPTION ...............................................................................................................................................................................................................15
6.1 KEYBOARD.......................................................................................................................................................................................................................................15
6.2 READOUT SEQUENCES.......................................................................................................................................................................................................16
6.3 CALIBRATION SEQUENCES...........................................................................................................................................................................................20
6.3.1 Manual automatic operating selection ...............................................................................................................................20
6.3.2 Indirect measuring calibration........................................................................................................................................................ 21
6.3.3 Zero and Sensitivity calibration......................................................................................................................................................23
6.3.4 Temperature calibration....................................................................................................................................................................... 25
6.3.5 Set-point A/B parameter calibration......................................................................................................................................27
6.3.6 Alarm parameter calibration ..........................................................................................................................................................38
6.4 CONFIGURATION ...................................................................................................................................................................................................................30
6.4.1 Keyboard lock/unlock..................................................................................................................................................................................30
6.4.2 LCD display contrast.....................................................................................................................................................................................31
6.4.3 New access number.....................................................................................................................................................................................31
6.4.4 Conductivity sensor type........................................................................................................................................................................31
6.4.5 Cell constant .........................................................................................................................................................................................................32
6.4.6 Measuring scale................................................................................................................................................................................................32

EC3020
CONDUCTIVITY CONTROLLER, MICROPROCESSOR BASED
_____________________________________________________________________________________________
2
6.4.7 Autorange..................................................................................................................................................................................................................32
6.4.8 Software filter.......................................................................................................................................................................................................32
6.4.9 Indirect measure............................................................................................................................................................................................. 33
6.4.10 Reference Temperature...........................................................................................................................................................................37
6.4.11 Thermocompensation type...................................................................................................................................................................37
6.4.12 Table of thermocompensation.......................................................................................................................................................37
6.4.13 Thermocompensation coefficient .............................................................................................................................................45
6.4.14 Input related to the analog output n°1 (091.3713 option).................................................................................45
6.4.15 Analog output N°1 range.........................................................................................................................................................................46
6.4.16 Input related to the analog output n°2 (091.3713 option) .............................................................................46
6.4.17 Analog output N°2 range.........................................................................................................................................................................47
6.4.18 Set point A function........................................................................................................................................................................................47
6.4.19 Set point B function .......................................................................................................................................................................................48
6.4.20 Alarm on set-point A..................................................................................................................................................................................48
6.4.21 Alarm on set-point B....................................................................................................................................................................................49
6.4.22 Relay alarm status........................................................................................................................................................................................49
6.4.23 Type of alarm......................................................................................................................................................................................................50
6.4.24 Flashing alarm frequency ..................................................................................................................................................................50
6.4.25 New access number..................................................................................................................................................................................50
7 NORMAL OPERATION......................................................................................................................................................................................................................... 52
7.1 MANUAL OPERATION............................................................................................................................................................................................................... 52
7.2 MANUAL TEMPERATURE COMPENSATION.........................................................................................................................................................52
7.3 TEMPERATURE COEFFICIENT .......................................................................................................................................................................................... 52
8 CALIBRATION .............................................................................................................................................................................................................................................53
8.1 ELECTRICAL CALIBRATION.................................................................................................................................................................................................53
8.2 CHEMICAL CALIBRATION..................................................................................................................................................................................................53
8.3 STANDARD CONDUCTIVITY SOLUTIONS..........................................................................................................................................................54

EC3020
CONDUCTIVITY CONTROLLER, MICROPROCESSOR BASED
_____________________________________________________________________________________________
3
1 GENERAL WARNINGS AND INFORMATION FOR ALL USERS
1.1 WARRANTY
This product is guaranteed for all manufacturing defects.
Please take a look at the terms and conditions described on the Warranty certificate at the end of the
manual.
1.2 AFTER SALES SERVICE
Nieuwkoop B.V./B&C offers to all of its Customers the following services:
-a free of charge technical assistance over the phone for problems regarding installation,
calibration and regular maintenance;
-a repairing service in our Aalsmeer (Netherlands) headquarter for all types of damages,
calibration or for a scheduled maintenance.
Please take a look at the technical support data sheet at the end of the manual for more details.
1.3 CE MARKING
This instrument is manufactured according to the following European Community directives:
- 2011/65/EU “Restriction of the use of certain hazardous substances in electrical and
electronic equipment”
- 2014/35/EU “Low Voltage” LV
- 2014/30/EU “Electromagnetic compatibility” EMC
- EN 61010-1/2011 “Low Voltage” LV
- EN 61326-1/2013 "Electromagnetic compatibility" EMC
- Controlled electromagnetic environment
- EN 55011/2009 “Radio-frequency disturbance characteristics”
- Class A (devices for usage in all establishment other than domestic)
- Group 1 (Industrial equipment that do not exceed 9kHz)
The marking is placed on the packaging and on the S/N label of the instrument.
1.4 SAFETY WARNINGS
It is important to underline the fact that electronic instruments are subject to accidents. For this, it is
important to take all necessary precautions to avoid damages caused by malfunctions.
All types of operations must be performed by authorized and trained staff.

EC3020
CONDUCTIVITY CONTROLLER, MICROPROCESSOR BASED
_____________________________________________________________________________________________
4
2 GENERAL
The Conductivity meter is used to detect specific Conductivities of liquids and to control the
contents of the salt or the ionic concentrations of liquids.
In the case of low concentrations, all salts break into ions and the measurement of
Conductivity
indicates the salt contents or ionic concentration. There is a linear dependence
of the Conductivity
on the concentration or on the salt contents.
In the case of higher concentrations the linearity is disturbed by incomplete dissociation.
The
concentration is achieved by the Conductance curve.
The measuring of Conductivity is done by means of two electrodes completely surrounded
by the
liquid. The electrodes must have definite dimensions and arranged locations.
During the measurement of Conductivity the anions and the cations undertake the necessary
transport of the Current.
In order to prevent the polarization, measuring is done by alternating Current.
The Temperature of the test solution may cause considerable error in this measurement, since,
as
a result of the rising Temperature, the activity of the ions increases, while the contents of
the ionic
concentration remains constant.
A reference Temperature of 20 °C was selected in order to compare various measurements.
The effects of varying Temperatures on Conductivity may be compensated by a RTD
immersed in
the test solution, connected to the meter.
Each solution has its own Temperature variation, therefore the automatic Temperature
compensation of our Conductivity meter is continuously variable in the range between 0.0 /
3.5
%/°C.
By means of this automatic Temperature compensation the measured value of Conductivity
which the solution has at 20 °C is indicated.
The meter supplies the measurement cell with the required alternating Current and shows the
measured value on the display. All indicating scales are linear, while the readings are
determined
by selecting the various measuring ranges and the various constants K of the
cells.
The adjustment of the cell constant value provides a correct reading of the Conductivity.
A 4-Electrode Conductivity System or an Electrodeless Conductivity System is suggested for
measuring range over 20 mSiemens.

EC3020
CONDUCTIVITY CONTROLLER, MICROPROCESSOR BASED
_____________________________________________________________________________________________
5
3 SPECIFICATIONS
3.1
FUNCTIONAL SPECIFICATIONS
Additional functions of the software R2.1x
-Possibility to select the continuous or flashing alarm.
-Possibility to select the frequency of the flashing alarm. During the flashing cycle the
relay’s
activation is 50% of the duty cycle.
-Dual filter software for small or large signal.
Input
The unique characteristics of this instrument are:
-the automatic selection of the Frequency as a function of the scale
-the possibility to connect E.Conductivity cells for µS measuring range, preamplified
4-electrode or electrodeless cells for mS measuring range.
A second input is provided for 2 or 3 wires Pt100 RTD Temperature sensor.
Temperature compensation
The unit is supplied with Automatic or manual Temperature compensation and Temperature
information may be displayed on the LCD.
The instrument detects of the absence or malfunctioning of the Temperature sensor and
automatically switches to manual operation mode.
The choice of the Reference Temperature allows the operator to read on the display the
E.Conductivity value referred to a selected Temperature from 10°C to 99°C.
A special software allows the unit to store manually or automatically the
Conductivity/Temperature response table of the liquid, for an accurate Temperature
compensation.
Measuring ranges
Scales are selectable as function of cell K (see the table on the next page)
The autoranging function, when activated by user, selects the lower/higher scale, maintaining
the
set point and the output parameters.

EC3020
CONDUCTIVITY CONTROLLER, MICROPROCESSOR BASED
_____________________________________________________________________________________________
6
Input from 2-electrode cell
Input from 080310 or 080315 microtransmitters
Indirect measuring
The unit provide a readout in % - gr/lt - Bé according to a conversion table manually stored
into
the microcomputer.
Analog output
Either a 0/20 mA or 4/20 mA isolated output may be selected, for use as an interface with
computers or data loggers.
The output Current may be set anywhere from 0 to full scale.
Control relays
The E. Conductivity monitor is equipped with two SPDT control relays.
Each control relay may be programmed for set-point, high/low, hysteresis or delay time
actuation. The full display indicates the current settings and current status of each relay.
Alarm relay
The unit contains a third SPDT relay designated as an alarm relay.
This relay may be used to warn of conditions that may indicate operational problems.
The
relay will activate on either high or low value conditions, or on failure of the control
relays to
maintain proper control.
In addition this relay may be programmed for either normal or fail-safe operation.
The alarm type can be selected continuous or flashing. The frequency of the flashing alarm
can
also be selected.
K
0.1
0.2
0.5
1.0
2.0
5.0
10.0
SCALES
.2000µS .4000µS 1.000µS 2.000µS 4.000µS 10.00µS 20.00µS
2.000µS 4.000µS 10.00µS 20.00µS 40.00µS 100.0µS 200.0µS
20.00µS 40.00µS 100.0µS 200.0µS 400.0µS 1000µS 2000µS
200.0µS 400.0µS 1000µS 2000µS 4000µS 10.00mS 20.00mS
2000µS 4000µS 10.00mS 20.00mS 40.00mS 100.0mS 200.0mS
K
0.1
0.2
0.5
1.0
2.0
5.0
10.0
SCALES .2000mS .4000mS 1.000mS 2.000mS 4.000mS 10.00mS 20.00mS
2.000mS 4.000mS 10.00mS 20.00mS 40.00mS 100.0mS 200.0mS
20.00mS 40.00mS 100.0mS 200.0mS 400.0mS 1000mS 2000mS
200.0mS 400.0mS 1000mS 2000mS 4000mS 10.00 S 20.00 S
2000mS 4000mS 10.00 S 20.00 S 40.00 S 100.0 S 200.0 S

EC3020
CONDUCTIVITY CONTROLLER, MICROPROCESSOR BASED
_____________________________________________________________________________________________
7
Operating mode
The instrument is provided with 2 programmable modes of operations:
-Automatic operation
The Automatic mode is the normal operation mode of the unit.
-Manual operation
This mode of operation would normally be used for control system troubleshooting.
The
unit will allow the relays to be manually actuated by pushing up/down keys.
The letter "M" flashing on the display, indicates the instrument is in manual operation mode.
Software filter
The unit is provided with a dual programmable software filter, to be inserted when the
readout is
not stable. It is possible to select a different response time for small or large signal
variations.
Configuration
A number of programming functions are provided in the Configuration menu and are
protected by
a selectable access number, which must be entered to allow changes in this setting.
Keyboard lock
The keys on the front panel of the monitor can be used for both changing the display and
for
calibrations and set-point adjustments.
When the monitor is shipped, all functions are accessible.
However, the adjustment and calibration functions may be locked in order to prevent
unauthorized
adjustments to the instrument.
Options
The following options are available:
091.3713 Dual analog programmable and isolated output.
The operator may select an output for Temperature.
091.701 RS232 isolated output.
The output sends the data (E.C., °C) to the serial port of the computer.
091.404 24 VAC power supply
091.4143 9/36 VDC power supply.

EC3020
CONDUCTIVITY CONTROLLER, MICROPROCESSOR BASED
_____________________________________________________________________________________________
8
3.2 PHYSICAL SPECIFICATIONS
The controller enclosure consists of an anodized aluminium case built according to DIN 43700,
with
a panel coated with a polycarbonate membrane.
A transparent (IP65) waterproof front door SZ 7601 can be added to the housing, in order to
protect
the unit from moisture or corrosive fumes.
Connections are made by two extractable terminal blocks.
This makes wiring and general maintenance.
The package is supplied with fixing clamps for panel-mounting.
3.3 TECHNICAL SPECIFICATIONS
The Default values are correspondent to the factory calibration values.
Parameters marked by "*" can be modified in the Configuration procedures.
Default values
CONDUCTIVITY
*
Input: from E.C Cell/Microt. 080310 /Microtr. 080315
2 electrodes cell
* Cell K: 0.1/0.2/0.5/1/2/5/10
*
Input scale:
080310 and 080315 microtransmitters
* Cell K: 0.1/0.2/0.5/1/2/5/10
*
Input scale:
Autoranging: On/Off
Software
filter 90% RT
*
LARGE signal variations: 0.4/20.0 s
*
SMALL signal variations: 0.4/20.0 s
*
Indirect measuring: ON/OFF
*
Indirect measuring unit: % g/l Bè
*
ATC Temperature reference: 10°/99°C
*
ATC: Table/Coefficient
*
Temperature coefficient: 0/5.00 %/°C
Sensitivity: 60/160 %
Zero adjustment: +/-
10%
Display resolution at 20°C: 1/1000
E.C.Cell
1.0/cm
2000µS
1.0/cm
2000mS
Off
2.0 s
10.0 s
OFF
%
20°C
Coeff
2.2%
100 %
0 %
OPERATING MODE
Automatic/Manual Auto

EC3020
CONDUCTIVITY CONTROLLER, MICROPROCESSOR BASED
_____________________________________________________________________________________________
9
TEMPERATURE
Input: RTD Pt100 2/3 wires
Measuring and compensation range: -10/+110 °C
Resolution: 0.1 °C
Zero adjustment: +/- 2°C
Manual Temperature compensation: -10/110°C
0°C
20°C
SET-POINT A/B
Set point value: 0/2000 (1000/4000)
Hysteresis: 0/20 (10/40)
Delay: 0.0/99.9 Sec.
* Function: H/L (Max/Min)
Relay contacts: SPDT 220V 5Amp. Resistive load
0
0
0 Sec.
L
ALARM (C-D contacts)
Low:0/2000(1000/4000)
High:0/2000(1000/4000)
Delay: 0.0/99.9 Sec.
-
Alarm on max. activation time of SA/SB: ON/OFF
-
Max. activation SA/SB: 0/60 minutes
Relay contacts: SPDT 220V 5Amp. Resistive load
-
Relay activation: ACT/DEA
-
Alarm type: CONT./FLASH
-
Alarm flashing frequency:
(approx. 0.3 Hz D.C. 50%)
ME (approx. 0.6 Hz D.C. 50%)
(approx. 1.2 Hz D.C. 50%)
0
2000
0 Sec.
OFF
60 min.
ACT
CONT.
ME
ANALOG OUTPUT Nr. 1
-
Input related to the output (option 091.3713): EC/°C
-
Output range: 0-20/4-20 mA
-
Point corresponding to 0 or 4 mA: 0/2000 (1000/4000)
-10/110°C
-
Point corresponding to 20mA: 0/2000 (1000/4000)
-10/110°C
Response time: 2.5 Sec. for 98 %
Isolation: 250 Vca
Load: 600 Ohm max
E.C.
0/20 mA
0
-10.0°C
0
-10.0°C

EC3020
CONDUCTIVITY CONTROLLER, MICROPROCESSOR BASED
_____________________________________________________________________________________________
10
CONFIGURATION PARAMETERS(*)
Keyboardlocked/unlocked unlocked
LCD contrast (0/7) 4
Access number: 0
Sensor type CELL
Cell K 1.0
Input scale 2000µS
Autoranging
OFF
RT software filter Large: 2.0 s
RT software filter Small: 10.0 s
Indirect measuring display OFF
Indirect measuring unit %
ATC Temperature reference 20 °C
ATC type Coeff
ATC table parameters
Starting Temperature (0/100°C) 0°C
Temperature step (-20/20°C) 10°C
Overtime (1/60') 15'
Temperaturecoefficient 2,2 %/°C
Input related to output Nr. 1 Cond.
Analog output range 0/20 mA
Point 1 (x mA min) 0µS
Point 2 (x mA max) 2000µS
Input related to output Nr. 2 Cond.
Analog output range 0/20 mA
Point 1 (x mA min) 0µS
Point 2 (x mA max) 2000µS
A relay function LO
B relay function LO
Alarm on max. activation time for SA OFF
Max. activation time for SA 60 m
Alarm on max. activation time for SB OFF
Max. activation time for SB 60 m
Alarm relay status ACT
Alarm type Cont.
Alarm flashing frequency ME
Access number to configuration (0/999) 0
ANALOG OUTPUT Nr. 2 (option 091.3713)
Input related to the output: EC/°C
Output range: 0-20/4-20 mA
Point corresponding to 0 or 4 mA: 0/2000 (1000/4000)
-10/110°C
Point corresponding to 20mA: 0/2000 (1000/4000)
-10/110°C
Response time: 2.5 Sec. for 98 %
Isolation: 250 Vca
Load: 600 Ohm max
E.C.
0/20 mA
0
-10.0°C
0
-10.0°C

EC3020
CONDUCTIVITY CONTROLLER, MICROPROCESSOR BASED
_____________________________________________________________________________________________
11
GENERAL SPECIFICATION
Alphanumeric display: 1 line x 16 characters
Acquisition time: 0,4 sec. approx.
Operating Temperature: 0/50 °C
Humidity: 95% without condensation
Power supply: 110/220 Volt ac +/- 10% 50/60 Hz
Isolation: 4000 Volt between primary and secondary (IEC 348)
Power consumption: 5 VA max.
Terminal blocks: extractable
Net weight: 850 gr.
Housing: DIN 43700 96 x 96
Dimensions: 96 x 96 x 155 mm.

EC3020
CONDUCTIVITY CONTROLLER, MICROPROCESSOR BASED
_____________________________________________________________________________________________
12
4 INSTALLATION
4.1 PHYSICAL INSTALLATION
Controller
The controller may be installed close to the points being monitored, or it may be located
some distance away in a control area.
The enclosure is designed for panel-mounting.
It should be mounted on a rigid surface, in a position protected from the possibility of
damage or excessive moisture or corrosive fumes.
The cable from the probe must be protected by a sheath and not installed near to power
cables.
Interruption on cables must be avoided or carried out by high insulation terminals.
Cell
The Conductivity cell must be mounted properly if the system is to operate accurately and
efficiently.
It must meet the following requirements:
-the sample in the cell must be representative of the whole solution
-the solution must circulate continuously through the cell
-the flow velocity in the cell must not be so high as to cause cavitation
-the position and orientation of the cell must not trap air-bubbles near the electrode
area.
-sediments must not accumulate within the electrode area.
-in all dip cell installations the water must be continuously agitated.
-electrodeless cell must be installed in 100 mm pipes minimum.
Keep the cable away from power wires on the overall length.
This cable too must not be interrupted
on overall length.
If interruption is necessary, the extension cable must be fastened to the high insulation terminal
strip.
4.2 ELECTRICAL INSTALLATION
The electrical installation consists of:
-connecting the power supply to the meter
-connecting the electrode or the probe to the meter
-connecting alarms, pumps, valves if necessary
-connecting the monitor output to the recorder or similar devices if required
-connecting other optional accessories (RTD P.I.D. regulators)
All connections within the controller are made on detachable terminal strips located on
the
rear side. ( Fig. 2 )
All power and output-recorder connections are made at the 13 pin terminal strip, while
input
signal connections are made at the 12 pin terminal strip.

EC3020
CONDUCTIVITY CONTROLLER, MICROPROCESSOR BASED
_____________________________________________________________________________________________
13
Connecting the power
-connect ground to terminal 4
-connect ac power to 1 - 2 terminals if power voltage is 110 V
-connect ac power to 1 - 3 terminals if power voltage is 220 V
-if 091.404 option is installed, connect 24 VAC to 1 - 3 terminals
WARNINGS
-power the device by means of an isolation transformer
-avoid mains-voltage from an auto-transformer
-avoid mains voltage from a branch point with heavy inductive loads
-separate power supply wires from signal ones
-control the mains voltage value
The unit is automatically turned off by an overload protection which comes back into
operation
after 2 or 3 minutes.
Connecting the cell
In this operation the input must be selected in mode CELL
(see Conductivity parameters calibration section)
Cell cabling is a critical part of the whole system.
-use a low noise coax cable on overall length between sensor and input terminals of
the meter
-avoid interruption on the cable. If interruption is necessary, the extension cable
must
be fastened to the high insulation terminal strip.
-keep the cable away from power wires on the overall length
-connect the 2-electrodes cell to the terminals 20-22.
-connect the eventual shield to the terminal 21
Connecting microtransmitter
In this operation the input must be selected in mode MICROTRANSMITTER
(See
Input Calibration section and the instruction for this special probe).
Connecting alarms, pumps, valves
The output connections referred to set-point 1 and set-point 2 are made at terminal strip
and
they consist of two independent SPDT free voltage relays corresponding to Regulator A
and
Regulator B . The output connection referred to alarm consists of SPDT free voltage relay
corresponding to Alarm C/D
Regulator "A"
terminal 6 marked C : common contact
terminal 5 marked NO : normal open contact
terminal 7 marked NC : normal closed contact
Regulator "B"
terminal 9 marked C : common contact
terminal 8 marked NO : normal open contact
terminal 10 marked NC : normal closed contact

EC3020
CONDUCTIVITY CONTROLLER, MICROPROCESSOR BASED
_____________________________________________________________________________________________
14
Alarm "C/D"
terminal 12 marked C : common contact
terminal 11 marked NO : normal open contact
terminal 13 marked NC : normal closed contact
Connecting a recorder
A current output for a remote recorder or P.I.D. regulators is available on terminals 14-16.
Connect the recorder high to terminal 14 and connect the recorder low to terminal 16.
Series
connection is required for driving more loads having a total input Resistance lower
than 300
Ohm.
If the 091.3713 dual output option is installed, a second isolated and programmable output is
available between 15-16 terminals.
Output N°1 and output N°2 are isolated and selectable 0/20 or 4/20 mA.
Connecting the RTD
The instrument has the automatic Temperature compensation carried out by means of
RTD
Pt100. The Temperature sensor has to be installed in the same solution being
measured, close
to the cell in the pipe-line or in the tank.
To operate the automatic Temperature compensation, connect the RTD as shown in the
"connection" figure.
3-wire connection
-Connect the terminal of RTD to terminal 23 of the meter
-Connect the common terminal of RTD to terminals 24 - 25 of the meter
-The 3-wire cable must not be interrupted on the overall length.
-If an extension is needed, the cable must be fastened to the high insulation terminal
strip.
-Keep the cable away from power wires.
The RTD connection as above described allows the controller to provide a digital readout
of
Temperature.
If the Temperature sensor is not connected or damaged, the unit will operate in manual
Temperature compensation automatically.
2-wire connection
-connect the Pt100 to terminals 23 - 24
-install a jumper to terminals 24 - 25.
Checking:
Before connecting the system to the power supply:
-check that all cables are properly fastened to prevent strain on the connections
-check that all terminal-strip connections are mechanically and electrically sound
-check that the fuse value is right

EC3020
CONDUCTIVITY CONTROLLER, MICROPROCESSOR BASED
_____________________________________________________________________________________________
15
5 OPERATING THE SYSTEM
The system's controls and indicators are all located on the front panel (see fig. 1). The meter
has a LCD display 1 indicating that unit is on.
The cards of the controllers are adjusted at the factory.
If sensors and probes have been connected correctly, as described in the above sections,
the system should function correctly needing only the start up and the parameters
calibrations as described in the following section.
6 SOFTWARE DESCRIPTION
6.1 KEYBOARD
KEY
FUNCTION
-it allows the operator to go to the next Display
-it allows to go back to the main Display. The eventual new parameter
values will not be memorized
- itallows the access of calibration sequences
-it allows to increase the displayed parameters
-it allows to choose between different functions
-it allows to increase the displayed parameters
-it allows to choose between different functions
- it allows to enter the selected data and to return to the main Display D0

EC3020
CONDUCTIVITY CONTROLLER, MICROPROCESSOR BASED
_____________________________________________________________________________________________
16
6.2 READOUTSEQUENCES
Applying the power to the instrument the display will show the following display for 3 seconds
then will show the main display ·D0·.
Press to visualizethe following Displays:
D0
Current E.C. values, set-point status and
function
D1
Indirect measuring value (if selected)
D2
Current E.C. and Reference Temperature
values
D3
Current Temperature value
D4
A set-point parameters
D5
B set-point parameters
D6
Alarm parameters
D7
Current input/output N°1 values
D7BIS
Current input/output N°2 values
D8
Configuration
D9
P/N and Software release

EC3020
CONDUCTIVITY CONTROLLER, MICROPROCESSOR BASED
_____________________________________________________________________________________________
17
ì
❖
----------------------------------
·D0·
EC current value, A/B relays status and
min/max function
:
relay activated
:
relay deactivated
:
relay activation delayed
A/B : relay A and B
L/H : Low/High (min/max)
MESSAGE
MEANINGS
" >>>>> " the present value is over range
"flashing"
the present value is in alarm
toactivatetheoperatingmodeselection(manual/automatic)
to go to
----------------------------------
·D1·
g/l, Bè, % display
MESSAGE
MEANINGS
">>>>> " the present value is over range
"----- " EC scale is not related to the conversion table
to activate the indirect measuring Sensitivity calibration sequences
to go to
----------------------------------
·D2·
EC and reference Temperature display
to activate the Zero and Sensitivity calibration sequences

EC3020
CONDUCTIVITY CONTROLLER, MICROPROCESSOR BASED
_____________________________________________________________________________________________
18
to go to
----------------------------------
·D3·
Temperature display or manual value for
compensation
M:
manual value selected
toactivate the Temperature calibration sequences or to
program themanual temperaturecompensationvalue
to go to
----------------------------------
·D4·
Display of Set-point A value, relay status
and min/max relay function
* : timer alarm activated on set-point A
to activate the programming sequences of set-point value, hysteresis and
delaytimefor relay A.
to go to
----------------------------------
·D5·
Display of Set-point B value, relay status
and min/max relay function
*:
timer alarm activated on set-point B
to activate the programming sequences of set-point value, hysteresis and
delaytimefor relay B.
to go to

EC3020
CONDUCTIVITY CONTROLLER, MICROPROCESSOR BASED
_____________________________________________________________________________________________
19
----------------------------------
·D6·
Min/max alarm values display
to activate the programming sequences of min/max value alarm and delay time
for relay C.
to go to
----------------------------------
·D7·
Display of analog output N°1 value and the
related Conductivity value
to go to
----------------------------------
Display valid only for 091.3713 option
·D7BIS·
Display of analog output N°2 value and
the
related Conductivity or Temperature
values
to go to
----------------------------------
·D8·
Configuration display
to activate the programming sequences of keyboard lock/unlock, display
contrast and instrument configuration
to go to
----------------------------------
·
D9·
Display of instrument code and Software
release
to go back to ·D0·
Table of contents
Other NIEUWKOOP Controllers manuals