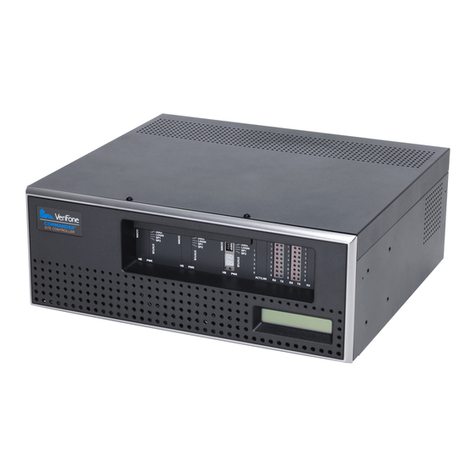
VeriFone Commander Site Controller Firmware update

CommanderTM Site Controller
Software Installation Guide
P/N: DOC149-004-01-B
Revision: A00


Commander™ Site Controller Software Installation Guide
July 25, 2013
VeriFone®, Inc.
2099 Gateway Place
Suite 600
San Jose, CA 95110
Telephone: 408-232-7800
http://www.verifone.com
Printed in the United States of America.
© 2013 by VeriFone, Inc.
No part of this publication covered by the copyrights herein may be reproduced or
copied in any form or by any means — graphic, electronic, or mechanical, including
photocopying, taping, or information storage and retrieval systems — without written
permission of the publisher.
The contents of this document and all features and specifications are subject to
change without notice. The information contained herein does not represent a
commitment on the part of VeriFone, Inc.
Publications are not stocked at the address given above. Requests for VeriFone
publications should be made to your VeriFone representative.
VeriFone, the VeriFone logo, and Ruby SuperSystem are registered trademarks of
VeriFone, Inc. Sapphire, Topaz, HPV-20, Ruby Manager, Everest, EASY ID, Electronic
Journal On-site, and Ruby Card are trademarks of VeriFone, Inc. in the U.S. and/or
other countries. All other trademarks or brand names are the properties of their
respective holders.

Before We Start
Congratulations on your purchase of the VeriFone Commander Site Controller.
Before we start, please read the following important information:
CHANGES OR MODIFICATIONS NOT EXPRESSLY APPROVED BY VERIFONE, INC.
COULD VOID THE USER’S AUTHORITY TO OPERATE THIS EQUIPMENT.
THIS EQUIPMENT IS NOT INTENDED TO BE REPAIRED BY THE USER.
Regulatory Compliance
1. THIS EQUIPMENT COMPLIES WITH THE REQUIREMENTS IN PART 15 OF FCC RULES
FOR A CLASS A DIGITAL DEVICE. OPERATION OF THIS EQUIPMENT IN A
RESIDENTIAL AREA MAY CAUSE UNACCEPTABLE OR HARMFUL INTERFERENCE TO
RADIO AND TV COMMUNICATIONS REQUIRING THE USER TO TAKE WHATEVER
STEPS NECESSARY TO CORRECT THE INTERFERENCE.
2. THE COMMANDER SITE CONTROLLER COMPLIES WITH PART 68 OF THE FCC RULES.
LOCATED ON THE BOTTOM PANEL OF THIS UNIT IS A LABEL THAT CONTAINS,
AMONG OTHER INFORMATION, THE FCC REGISTRATION NUMBER AND RINGER
EQUIVALENCE NUMBER (REN) FOR THIS UNIT. IF REQUESTED, THIS INFORMATION
MUST BE PROVIDED TO THE TELEPHONE COMPANY. REGISTERED EQUIPMENT
USOC: RJ11C.
3. IF EQUIPPED WITH A MODEM, THIS EQUIPMENT IS DESIGNED TO CONNECT TO THE
TELEPHONE NETWORK WIRING USING THE TELEPHONE CORD AND MODULAR
PLUG PROVIDED.
4. THE REN DETERMINES THE QUANTITY OF DEVICES THAT MAY BE CONNECTED TO
THE TELEPHONE LINE. CONTACT THE LOCAL TELEPHONE COMPANY TO
DETERMINE THE TOTAL RENs THAT MAY BE CONNECTED TO A LINE.
5. THIS CLASS A DIGITAL APPARATUS COMPLIES WITH CANADIAN ICES-003.
6. CET APPAREIL NUMÉRIQUE DE LA CLASSE A EST CONFORME À LA NORME NMB-003
DU CANADA.

Battery Charging Notification
The unit should be powered up for at least 24 hours prior to initial application
download. This is to prevent loss of data and to ensure that the battery pack is
fully charged.


July 25, 2013
Contents
1. Introduction. . . . . . . . . . . . . . . . . . . . . . . . . . 1
Hardware and Software Requirements. . . . . . . . . . . . . . . . 2
2. Diagrams . . . . . . . . . . . . . . . . . . . . . . . . . . . . 3
Front Panel . . . . . . . . . . . . . . . . . . . . . . . . . . . . . . . . . 3
CPU A Indicators and Controls . . . . . . . . . . . . . . . . . . . 4
CPU A Device Port LEDs (RX/TX) . . . . . . . . . . . . . . . . . 6
Rear Panel . . . . . . . . . . . . . . . . . . . . . . . . . . . . . . . . . . 7
3. Software Installation . . . . . . . . . . . . . . . . . . . . 9
Before you begin. . . . . . . . . . . . . . . . . . . . . . . . . . . . . . 9
Download Software . . . . . . . . . . . . . . . . . . . . . . . . . . 9
Connections. . . . . . . . . . . . . . . . . . . . . . . . . . . . . . . 9
Installing Commander Site Controller Software . . . . . . . . . 10
4. Troubleshooting and Service . . . . . . . . . . . . . . 23
Troubleshooting . . . . . . . . . . . . . . . . . . . . . . . . . . . . . 23
Service . . . . . . . . . . . . . . . . . . . . . . . . . . . . . . . . . . . 24
Index . . . . . . . . . . . . . . . . . . . . . . . . . . . . . . . . 25

ii Commander™ Site Controller Software Installation Guide
July 25, 2013

July 25, 2013
1 INTRODUCTION
The VeriFone Commander™ Site Controller is a high-powered server that
increases the capacity and functionality of VeriFone’s Ethernet-capable Point of
Sale (POS) workstations by extending the processing and communications
bandwidth for managing peripherals.
Future needs are designed into the hardware to provide support for additional
serial ports and PCI boards along with additional fan and/or power connections
that may be needed as a result. Use of these expansion capabilities will be
determined by VeriFone.
System peripherals, such as fuel dispensers, dispenser card readers (DCRs), and
car wash controllers connect directly to the Commander Site Controller.
Site Management Suite (SMS) provides additional functionality with four
separate software modules:
■Journal Browser
■Configuration Client (for browser-based configuration)
■Transaction Manager
■Report Navigator
Figure 1: Commander Site Controller and Workstations
Workstation
Workstation
SS
s
Commander Site Controller

2Commander™ Site Controller Software Installation
July 25, 2013
The Commander Site Controller contains the functionality of a V950™ to perform
on-site upgrades. The addition of a router allows the Commander Site Controller
to:
■Receive configurations remotely using available Internet protocols and
tools, including a Web browser interface.
■Connect with VeriFone Technical Support Center computers for software
downloads and diagnostics.
Hardware and Software Requirements
The minimum hardware and software requirements are as follows:
■Commander Site Controller Unit (M149-101-00-NAA)
■Ethernet Cable
■Computer/Laptop with Ethernet port
■VeriFone Approved Router
■Software Installation CD
■Java 6 or JavaTM Runtime Environment 1.6 or higher installed on the PC
■Internet Browser on the Laptop must have one of the following:
–IE8
–Chrome
– Safari 5.0.5
– Opera 11.10
– FireFox 13.0.1

July 25, 2013
2 DIAGRAMS
Front Panel
■System Status Display —The backlit, rectangular display on the front
panel of the Site Controller.
■CPU A Indicators and Controls — The indicators and controls in this
section of the front panel are specific to CPU A. A detailed description
follows in the next section.
■CPU A Device Port LEDs (RX/TX) — Displays activity for devices
connected to serial ports of CPU A.
Figure 2: Commander Site Controller - Front Panel
System Status Display
CPU A Indicators and Controls
CPU A Device Port LEDs (RX/TX)

4Commander™ Site Controller Software Installation Guide
July 25, 2013
CPU A Indicators and Controls
Figure 3: Indicators and Controls for CPU A
■Reset Switch — For emergency use only and should never be touched
unless instructed by the VeriFone Technical Support Center.
■Service Console Port — This port is for use by a VeriFone Authorized
Service Contractor. It connects the PC/Laptop to the Site Controller. The
connection communicates at 19200 bps 8N1. It provides access to a serial
diagnostic connection and boot-up functions.
■Switch Bank
–DIAG — Toggles between normal boot mode and
Diagnostic Kernel (DK) boot mode (normal = UP, DK
= DOWN). This MUST be in the down position.
–LOGIN — Used for remote support by the VeriFone
Technical Support Center.
–SP1 — Not used at this time.
–SP2 — Not used at this time.
Reset Switch
CPU Indicator
Service Console Port
Switch Bank
Dual 7-Segment Status Display
System Heartbeat LED
Power Indicator

Commander™ Site Controller Software Installation Guide 5
July 25, 2013
■Dual 7-Segment Status Display — Displays codes showing the current
state of the system. (See the “Status Display Code List” in the Site
Controller Software Installation Guide.)
■System Heartbeat LED — Pulsing red on and off indicates that the Site
Controller is operational
■Power LED — Steady Green indicates that the Site Controller is powered.

6Commander™ Site Controller Software Installation Guide
July 25, 2013
CPU A Device Port LEDs (RX/TX)
Figure 4: Transmit/Receive Indicators for CPU A Serial Ports
Device Port LEDs (RX/TX) — Shows the status of Site Controller software polling
of peripherals connected at the rear panel through the Device Port Banks A1 and
A2. The following are the LED descriptions:
■Red ON = receive data
■Green ON = transmit data.
A1 Device Port LEDs for Serial Ports
A2 Device Port LEDs for Serial Ports
A3 Device Port LEDs for Serial Ports
(For Future Use)

Commander™ Site Controller Software Installation Guide 7
July 25, 2013
Rear Panel
Figure 5: Commander Site Controller - Rear Panel
■Device Ports for CPU A — Serial Port Connections
for CPU A, Banks A1 and A2
■Activity LEDS for CPU A — LEDs flicker to show
LAN activity
■USB Port — One USB 2.0 Port
■LAN — For Card Processing Network
■Modem Port — Connection used for dedicated
telephone line.
Note: Actual modem may not be present in all
configurations. Only UL listed USB Modem
permitted.
■Ethernet Port — Ethernet port for POS and
external connectivity (WAN, VPN)
■Power Connector — Connector for applying power
to the Site Controller
Device Ports for CPU A
LAN
Activity LEDs for CPU A USB Port Modem Port
Power Connector
Ethernet Port

8Commander™ Site Controller Software Installation Guide
July 25, 2013

July 25, 2013
3 SOFTWARE INSTALLATION
Before you begin
The following is required near the end of the installation.
■Make sure to have a piece of paper and writing utensil to record the user
name, secure user ID, and password that will be displayed on the screen.
■Name of the Installer
■IP address for the Security Log Server. Up to 4 may be defined (or enter
‘none’).
■Make note of the time zone
Download Software
Download the Commander Site Controller Suite Software file from the VASC
portal. The Commander Site Controller software is installed from a PC with the
appropriate software stored on its hard drive or on a CD.
The Commander Site Controller software suite contains three files:
■Executable Jar File (Petro_Suite_Installer.jar)
■ZIP File (overlay.zip)
■Signature File (overlay.sig)
■Import/Export Utility
Connections
When installing the software on the Commander Site Controller from the PC,
both must be connected to the LAN side of the same router via Ethernet cables
(both should be connected within the “VeriFone zone”).
The Ethernet cable should be connected to the Net LAN port on the Commander
Site Controller in the slot labeled “N”.

10 Commander™ Site Controller Software Installation
July 25, 2013
Installing Commander Site Controller Software
Note: The “red” boxes are displayed only in this guide to bring attention to the
details in these steps. They are not displayed on the screen.
1. On the PC, browse to the Commander Site Controller Suite Software
folder and open it.
2. Double-click on the Petro_Suite_Installer file.
3. Reboot the Commander Site Controller by removing power cord from the
back of the unit or from the outlet.
4. After the Commander Site Controller has completely shutdown, plug in
the power cord. The Commander Site Controller permits installation of
software only within the first five minutes after a reboot.
5. Allow the Commander Site Controller to come up fully. “A9” displays in
the LED window.
6. On the PC, click Install. Do not powercycle or reboot the system during
installation. Also, it is normal for the Commander Site Controller to
reboot during the various installation steps.

Commander™ Site Controller Software Installation Guide 11
July 25, 2013
7. Browse to the directory where the files are stored.
8. Click and open the “overlay.zip” file. The installer package is unzipped
and the installation begins. The following windows display during the
installation.

12 Commander™ Site Controller Software Installation
July 25, 2013
Other manuals for Commander Site Controller
1
Table of contents
Other VeriFone Controllers manuals