manuals.online logo
Brands
  1. Home
  2. •
  3. Brands
  4. •
  5. Night Stick
  6. •
  7. Flashlight
  8. •
  9. Night Stick FORGE NSP-4640B User manual

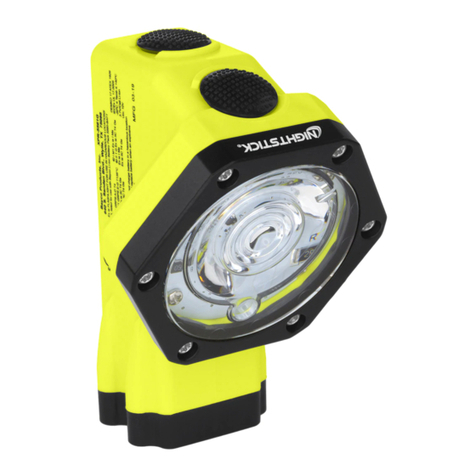
Night Stick FORGE NSP-4640B User manual

Bayco Products, Inc. • 640 South Sanden Blvd. • Wylie, TX 75098 • 1-800-233-2155 • 1-469-326-9400 • www.nightstick.com
INS-NSP-4640-20
SCAN FOR
MOUNTING
INSTRUCTION
VIDEO
https://youtu.be/Ta0i7U-92hM
SETTING THE ANGLE OF THE LIGHT
yTwist the light left or right on the vertical pivot until beam pattern is in an ideal position.
yThe tension on the mount is meant to be  rm to maintain the aim.
yOnce aimed, the mount allows the user to position light above or below the brim by
rotating up or down as needed.
OPERATION
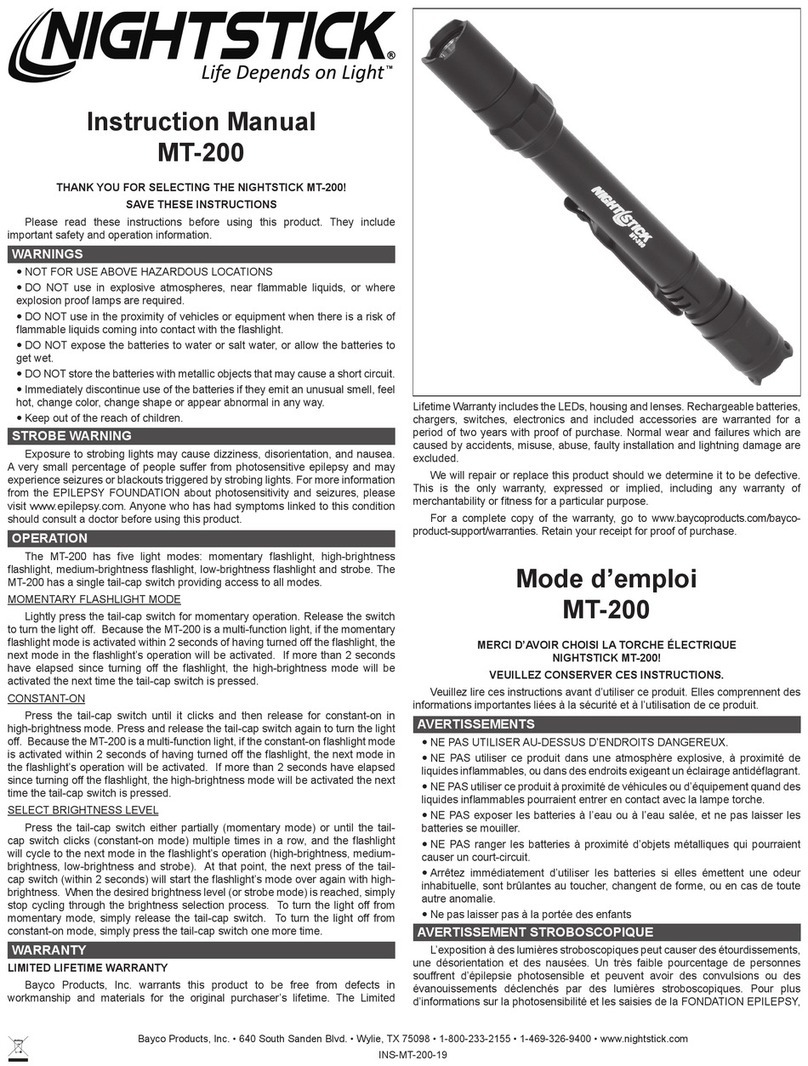
The 4640 has a  ashlight push button tail switch with the following lighting modes:
CONSTANT-ON FLASHLIGHT
Press the  ashlight switch until it clicks and then release for constant-on in high-
brightness mode. Press and release to turn the light off.
SELECT FLASHLIGHT BRIGHTNESS LEVEL
Press and hold down the  ashlight switch. The  ashlight will cycle from high to
medium to low and then back up again at a rate of approximately one mode per second.
The light will continue to cycle through the modes as long as the  ashlight switch is held
down. When the desired brightness level is reached, release the  ashlight switch, and
the light will remain in that mode. Press and hold from any mode to start the cycle again.
Press and release to turn the light off.
Rear Green Safety LED
The rear green safety LED will remain lit while  ashlight is on in any mode.
WARRANTY
LIMITED LIFETIME WARRANTY
Bayco Products, Inc. warrants this product to be free from defects in workmanship
and materials for the original purchaser’s lifetime. The Limited Lifetime Warranty
includes the LEDs, housing and lenses. Rechargeable batteries, chargers, switches,
electronics and included accessories are warranted for a period of two years with proof
of purchase. Normal wear and failures which are caused by accidents, misuse, abuse,
faulty installation and lightning damage are excluded.
We will repair or replace this product should we determine it to be defective. This
is the only warranty, expressed or implied, including any warranty of merchantability or
 tness for a particular purpose.
For a complete copy of the warranty, go to www.baycoproducts.com/nightstick-
product-support/warranties. Retain your receipt for proof of purchase.
Mode d’emploi
FORGE™ NSP-4640B
AVERTISSEMENTS
yNE PAS UTILISER AU-DESSUS D’ENDROITS DANGEREUX.
yNE PAS utiliser ce produit dans une atmosphère explosive, à proximité de liquides
in ammables, ou dans des endroits exigeant un éclairage antidé agrant.
yNE PAS utiliser ce produit à proximité de véhicules ou d’équipement quand des
liquides in ammables pourraient entrer en contact avec la lampe torche.
yNE PAS exposer les batteries à l’eau ou à l’eau salée, et ne pas laisser les batteries
se mouiller.
yNE PAS ranger les batteries à proximité d’objets métalliques qui pourraient causer
un court-circuit.
yArrêtez immédiatement d’utiliser les batteries si elles émettent une odeur inhabituelle,
sont brûlantes au toucher, changent de forme, ou en cas de toute autre anomalie.
yNe pas laisser pas à la portée des enfants
IINSTALLATION DES PILES
yPour installer les piles au lithium CR-123 dans la lampe 5465, commencer par
dévisser la vis de la porte du compartiment à piles. (Image 1)
yInsérer les deux piles dans le compartiment à piles en vous assurant de porter
une attention particulière à l’orientation des bornes inscrites au verso de la porte du
compartiment à piles. (Image 2)
yInstaller de nouveau la vis du compartiment à piles en appuyant sur la porte
complètement fermée puis en serrant la vis jusqu’à ce qu’elle soit serrée à la main.
AVERTISSEMENT : Ne pas fausser le  letage ou briser les  lets de la vis.
yTester par la suite le fonctionnement de votre lampe de poche (Voir
FONCTIONNEMENT ci-dessous)
INSTALLATION DE LA LAMPE SUR LE CASQUE
y Choisissez le côté du casque sur lequel vous souhaitez  xer la lampe.
yFaites pivoter le support pour que la vis de serrage de la pince soit vers le haut
yOuvrez complètement la pince et placez-la bien à plat sur le bord du casque en
veillant à ce qu’elle dépasse complètement le bord en caoutchouc du casque, le cas
échéant. (Image 3)
ySerrez fermement la pince avec la clé Allen fournie. (Image 4)
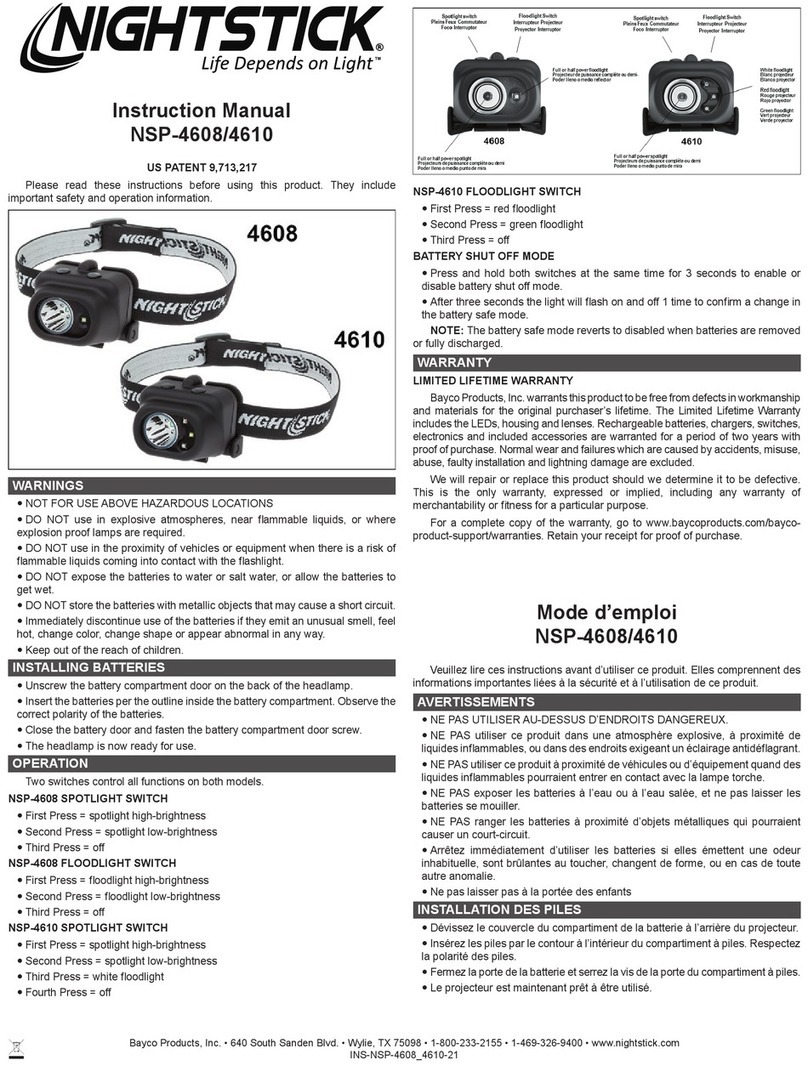
Instruction Manual
FORGE™ NSP-4640B
US PATENT 9,713,217
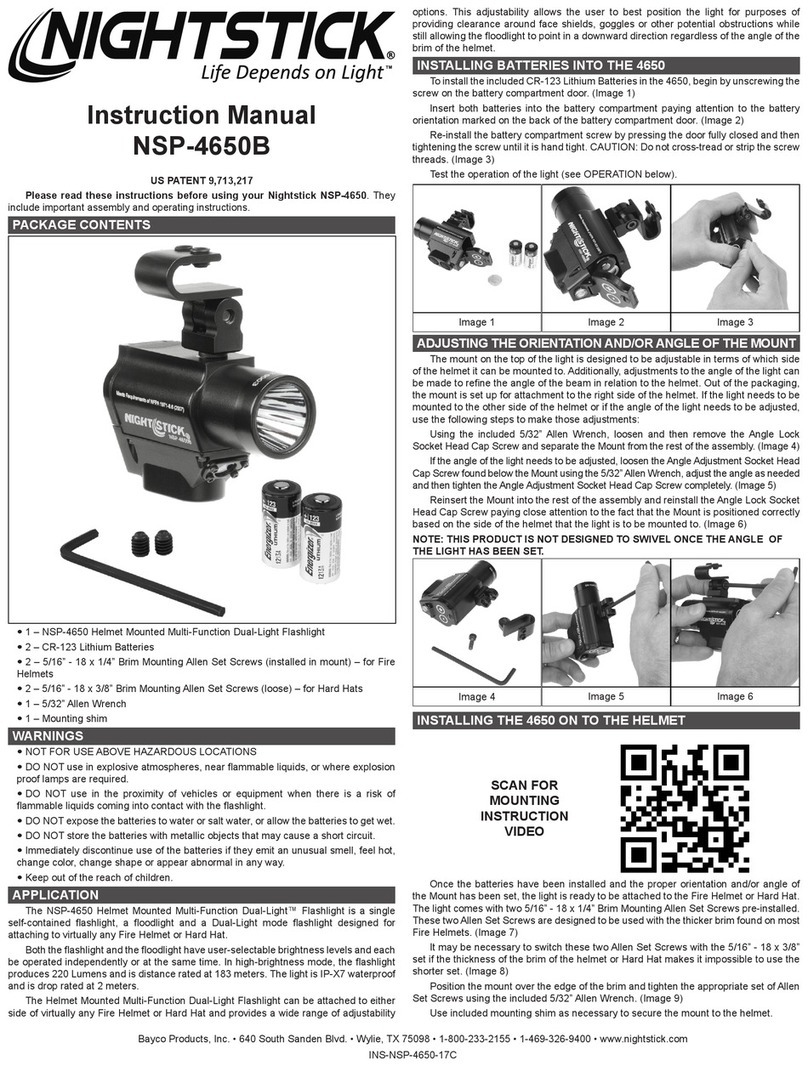
PACKAGE CONTENTS
WARNINGS
yNOT FOR USE ABOVE HAZARDOUS LOCATIONS
yDO NOT use in explosive atmospheres, near  ammable liquids, or where explosion
proof lamps are required.
yDO NOT use in the proximity of vehicles or equipment when there is a risk of
 ammable liquids coming into contact with the  ashlight.
yDO NOT expose the batteries to water or salt water, or allow the batteries to get wet.
yDO NOT store the batteries with metallic objects that may cause a short circuit.
yImmediately discontinue use of the batteries if they emit an unusual smell, feel hot,
change color, change shape or appear abnormal in any way.
yKeep out of the reach of children.
INSTALLING BATTERIES
Image 1 Image 2
yLoosen the screw on the battery compartment door. (Image 1)
yInsert batteries using the orientation markings on the back of the battery
compartment door. (Image 2)
yClose the battery door fully, then tightening the screw until it is hand tight. CAUTION:
Do not cross-thread or strip the screw threads.
yTest the operation of the light (see OPERATION below).
INSTALLING THE FORGE ON A HELMET
Image 3 Image 4
yChoose the side of the helmet you wish to mount the light on.
yRotate the mount to orient the clamp with thumbscrew on top.
yOpen the clamp completely and fully seat over helmet brim, ensuring the clamp
clears any rubber helmet trim. (Image 3)
yTighten the clamp  rmly with included Allen wrench. (Image 4)
Bayco Products, Inc. • 640 South Sanden Blvd. • Wylie, TX 75098 • 1-800-233-2155 • 1-469-326-9400 • www.nightstick.com
INS-NSP-4640-20
SCANNER
POUR LA VIDÉO
D’INSTRUCTION DE
MONTAGE
https://youtu.be/Ta0i7U-92hM
RÉGLAGE DE L’ANGLE DE LA LAMPE
yTournez la lampe vers la gauche ou la droite sur le pivot vertical jusqu’à ce que le
faisceau soit dans la position idéale.
yLe pivot du support est plutôt ferme an de maintenir l’angle de la lampe.
yUne fois l’angle de la lampe ajusté, le support permet à l’utilisateur de positionner la
lampe au-dessus ou au-dessous du bord du casque en la faisant pivoter vers le haut
ou le bas, au besoin.
FONCTIONNEMENT
La lampe 4640 a un bouton-poussoir lampe de poche avec les modes d’éclairage
suivants:
LAMPE DE POCHE À LUMINOSITÉ CONSTANTE
Appuyer sur l’interrupteur lampe de poche jusqu’au déclic et puis relâcher pour un
éclairage constant et à haute luminosité. Relâcher le bouton interrupteur pour éteindre
la lumière.
CHOISIR LES NIVEAUX DE LUMINOSITÉ DU MODE LAMPE DE POCHE
Appuyer et maintenir vers le bas l’interrupteur du mode lampe de poche. La lampe
de poche a un cycle allant du mode haute luminosité à moyenne luminosité et à basse
luminosité pour recommencer de nouveau à un taux d’approximativement un mode par
seconde. La lampe continuera son cycle à travers les différents modes aussi longtemps
que l’interrupteur du mode lampe de poche est maintenu vers le bas. Lorsque vous
avez atteint le niveau de luminosité désiré, relâcher simplement l’interrupteur du mode
lampe de poche et l’éclairage restera dans ce mode. Si vous appuyez et maintenez
l’interrupteur lampe de poche le cycle commencera de nouveau à partir du mode
d’éclairage présent. Relâcher le bouton interrupteur pour éteindre la lumière.
LED de sécurité verte
Le voyant de sécurité vert situé à l’arrière reste allumé tant que la lampe de poche
est allumée.
GARANTIE
GARANTIE À VIE LIMITÉE
Bayco Products, Inc. garantit que ce produit est exempt de défauts de matériaux
et de fabrication à l’acheteur original durant toute sa vie. La garantie à vie limitée inclut
les DEL, les boîtiers et les lentilles. Les batteries rechargeables, les chargeurs, les
interrupteurs, les électroniques et les accessoires compris sont garantis pour une
période de deux ans avec une preuve d’achat. L’usure normal et les défaillances qui
sont causés par des accidents, une mauvaise utilisation, un abus, une installation
défectueuse et un système d’éclairage endommagé sont exclus.
Ce produit sera réparé ou remplacé si nous déterminons qu’il est défectueux. Ceci
est la seule garantie explicite ou implicite, y compris toute garantie de qualité marchande
ou d’adéquation à un usage particulier.
Pour une copie détaillée de la garantie, vous rendre sur le site www.baycoproducts.
com/nightstick-product-support/warranties. Gardez ce reçu comme preuve d’achat.
Manual de Instrucción
FORGE™ NSP-4640B
ADVERTENCIAS
yNO PARA USO SOBRE ZONAS PELIGROSAS
yNO utilizar en atmosferas explosivas, cerca de líquidos inamables o donde se
requieran lámparas a prueba de explosión.
yNO utilizar en la proximidad de vehículos o equipo cuando hay riesgo de que
líquidos inamables hagan contacto con la linterna.
yNO exponga las baterías al agua ni al agua salada, ni permita que las baterías se mojen.
yNO guarde las baterías con objetos de metal que pudieran causar un corto circuito.
yDescontinúe inmediatamente el uso de las baterías si estas emiten un olor inusual,
se sienten calientes, cambian de color, cambian de forma o parecen anormal de
cualquier manera.
yMantener fuera del alcance de los niños.
INSTALACIÓN DE LAS BATERIAS
yPara instalar las Baterías de Litio ya incluidas CR-123 en el 5465, comience
aojando el tornillo de la tapa del compartimento de la batería. (Imagen 1)
yInserte las dos baterías en el compartimiento de la batería prestando atención a
la orientación de la misma que está marcado en la parte posterior de la puerta del
compartimiento de la batería. (Imagen 2)
yVuelva a instalar el tornillo del compartimiento de la batería presionando la puerta
completamente cerrada y luego dándole vuelta al tornillo hasta que quede apretado.
PRECAUCIÓN: No cruce la banda de rodadura o dañe las roscas de los tornillos.
yPrueba del funcionamiento de la luz (ver FUNCIONAMIENTO abajo).
INSTALAR EL FORGE EN EL CASCO
yElija el lado del casco en el que desea montar el bastón de luz.
yGire el soporte para orientar la abrazadera con el tornillo de mariposa en la parte
superior.
yAbra la abrazadera por completo y colóquela sobre el borde del casco, asegurándose
de que la abrazadera no toque ningún borde de goma (Imagen 3).
yApriete rmemente la abrazadera con la llave Allen incluida (Imagen 4).
ESCANEE PARA
VER EL VIDEO DE
INSTRUCCIONES
DE MONTAJE
https://youtu.be/Ta0i7U-92hM
AJUSTAR EL ÁNGULO DE LA LUZ
yGire la luz hacia la izquierda o hacia la derecha en el pivote vertical hasta que el
patrón del haz de luz esté en una posición ideal.
yLa tensión en el soporte debe ser rme para mantener el objetivo.
yUna vez apuntado, el soporte permite al usuario colocar la luz por encima o por
debajo del borde girando hacia arriba o hacia abajo según sea necesario.
FUNCIONAMIENTO
El 4640 tiene un botón de linterna con los siguientes modos de iluminación:
LINTERNA CONSTANTE
Pulse el interruptor de la linterna hasta que haga clic y suelte para el modo constante
de la linterna de alto brillo. Presione y suelte este mismo interruptor de nuevo para
apagar la luz.
SELECCIONAR EL NIVEL DE BRILLO DE LA LINTERNA
Pulse y mantenga pulsado el interruptor de la linterna. La linterna cambiará de ciclo
de alto a medio a bajo y luego volverá a subir a un ritmo de aproximadamente un modo
por segundo. La luz continuará en ciclo de arriba a abajo a través de los distintos modos
mientras el interruptor de la linterna se mantiene pulsado. Cuando se alcanza el nivel de
brillo deseado, simplemente suelte el interruptor de la linterna y la luz permanecerá en
ese modo de brillo. Si mantiene pulsado el interruptor de la linterna hará que la luz vaya
a un ciclo diferente al que se encuentra actualmente. Pulse y suelte el interruptor de la
linterna para apagar la luz.
LED trasero de seguridad verde
El LED de seguridad verde trasero permanecerá encendido mientras la linterna esté
encendida en cualquier modo.
GARANTÍA
GARANTIA LIMITADA DE POR VIDA
Bayco Products, Inc. garantiza que este producto está libre de defectos de mano
de obra y materiales durante la vida del comprador original. La garantía de por vida
limitada incluye los LED, la carcasa y los lentes. Las pilas recargables, los cargadores,
los interruptores, la electrónica y los accesorios incluidos están garantizados por un
período de dos años con un comprobante de compra. Se excluyen el desgaste y
los fallos normales, que son causados por accidentes, mal uso, abuso, instalación
defectuosa y daños por rayos.
Repararemos o reemplazaremos este producto si lo determinamos como
defectuoso. Esta es la única garantía, expresa o implícita, incluyendo cualquier garantía
de comerciabilidad o idoneidad para un propósito particular.
Para obtener una copia completa de la garantía, visite www.baycoproducts.com/
nightstick-product-support/warranties. Conserve su recibo para comprobar la compra.

Other Night Stick Flashlight manuals

Night Stick NSR-9614XL User manual

Night Stick

Night Stick NSR-9614XL User manual

Night Stick XPP-5418GX User manual

Night Stick

Night Stick XPP-5418GX User manual

Night Stick TAC-400 User manual

Night Stick

Night Stick TAC-400 User manual

Night Stick NSR-9614XLLB User manual

Night Stick

Night Stick NSR-9614XLLB User manual

Night Stick NSP 1162 User manual

Night Stick

Night Stick NSP 1162 User manual

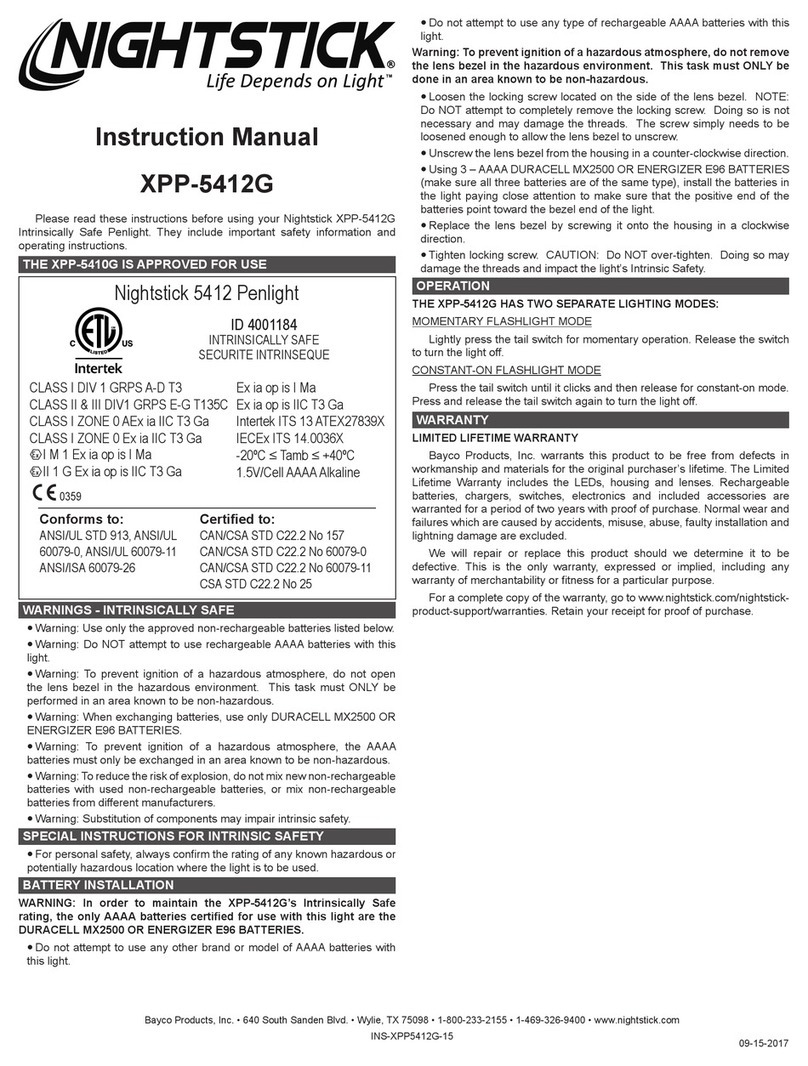
Night Stick XPP-5412G User manual

Night Stick

Night Stick XPP-5412G User manual

Night Stick NSR-9940XL User manual

Night Stick

Night Stick NSR-9940XL User manual

Night Stick XPR-9864 User manual

Night Stick

Night Stick XPR-9864 User manual

Night Stick NSR-2070 User manual

Night Stick

Night Stick NSR-2070 User manual

Night Stick XPR-5522GMX User manual

Night Stick

Night Stick XPR-5522GMX User manual

Night Stick TAC-540XL User manual

Night Stick

Night Stick TAC-540XL User manual

Night Stick TAC-410 User manual

Night Stick

Night Stick TAC-410 User manual

Night Stick TAC-500 User manual

Night Stick

Night Stick TAC-500 User manual

Night Stick NSR-9612 User manual

Night Stick

Night Stick NSR-9612 User manual

Night Stick MT-200 User manual

Night Stick

Night Stick MT-200 User manual

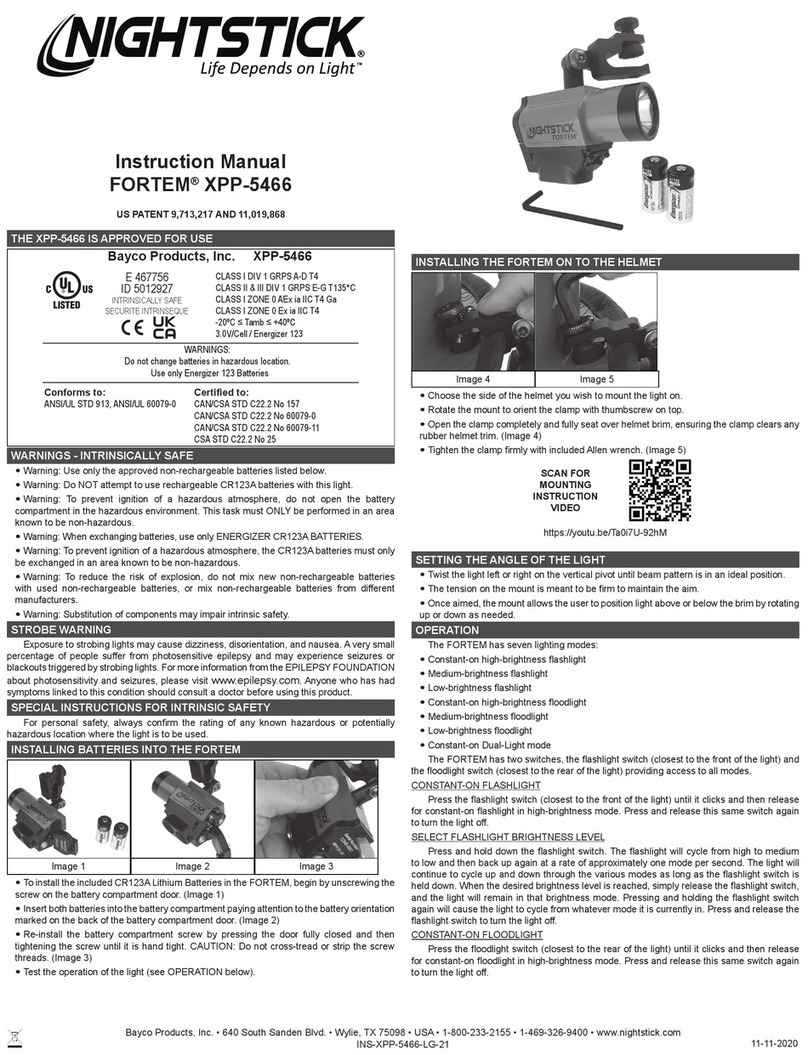
Night Stick FORTEM XPP-5466 User manual

Night Stick

Night Stick FORTEM XPP-5466 User manual

Night Stick XPR-5584 User manual

Night Stick

Night Stick XPR-5584 User manual

Night Stick XPP-5422GMXA User manual

Night Stick

Night Stick XPP-5422GMXA User manual

Night Stick TAC-460XL-K01 User manual

Night Stick

Night Stick TAC-460XL-K01 User manual

Night Stick XPP-5410G User manual

Night Stick

Night Stick XPP-5410G User manual

Night Stick XPP-5414GX-K01 User manual

Night Stick

Night Stick XPP-5414GX-K01 User manual

Night Stick MT-230 User manual

Night Stick

Night Stick MT-230 User manual

Night Stick XPP-5411GX User manual

Night Stick

Night Stick XPP-5411GX User manual

Night Stick NSR-9944XL User manual

Night Stick

Night Stick NSR-9944XL User manual

Popular Flashlight manuals by other brands

OTC CTPWM-0802 owner's manual

OTC

OTC CTPWM-0802 owner's manual

Pelican 7600 quick start guide

Pelican

Pelican 7600 quick start guide

Makita ML120 operating instructions

Makita

Makita ML120 operating instructions

ESAB PT-38 instruction manual

ESAB

ESAB PT-38 instruction manual

HOMEY's PROFJOB L2 Manual & warranty

HOMEY's

HOMEY's PROFJOB L2 Manual & warranty

STL Trigger-Beam LED Flashlight instruction manual

STL

STL Trigger-Beam LED Flashlight instruction manual

MICA IL-80 ATEX quick start guide

MICA

MICA IL-80 ATEX quick start guide

Police Force PFT6F52 instruction manual

Police Force

Police Force PFT6F52 instruction manual

Pelican 3410 Series operating instructions

Pelican

Pelican 3410 Series operating instructions

TTS Easi-Torch EL00101 user guide

TTS

TTS Easi-Torch EL00101 user guide

Silverline 456996 quick start guide

Silverline

Silverline 456996 quick start guide

ring RIT1030 instructions

ring

ring RIT1030 instructions

Hitachi UB 18DAL instruction manual

Hitachi

Hitachi UB 18DAL instruction manual

PowerTac MARK I LUMINATOR user manual

PowerTac

PowerTac MARK I LUMINATOR user manual

Nextorch GT6A-RL Operator's manual

Nextorch

Nextorch GT6A-RL Operator's manual

PNI F420 user manual

PNI

PNI F420 user manual

Cateye AMPP 100 HL-EL041RC manual

Cateye

Cateye AMPP 100 HL-EL041RC manual

PELI 9410L LED quick start guide

PELI

PELI 9410L LED quick start guide

manuals.online logo
manuals.online logoBrands
  • About & Mission
  • Contact us
  • Privacy Policy
  • Terms and Conditions

Copyright 2025 Manuals.Online. All Rights Reserved.