Night Tech Stealth Series User manual

The Next Generation
STEALTH SERIES: Monoculars
User Guide
VIDEO AND PHOTO DOWNLOAD
The device contains internal memory for the storage of videos and photos.
The internal memory can be accessed by connecting the device to your
computer using a USB cable, opening File Explorer and then selecting the
device. The files will be shown within folders on the device.
CHARGING
If the indicator light is coloured red, that means the battery is low. This will
also be shown on the screen battery indicator. Open the USB port on the
bottom of the device and plug the charging cable into the device then into
a 5V USB port. The indicator light will turn yellow/red when charging and
green when fully-charged.
This unit uses a Lithium battery – never charge unattended or overcharge
this device. Never allow it to fully discharge as this will damage or reduce
the life of the battery. Never charge in environments above 40°C or in
direct sunlight.
WARRANTY
The Night Tech Stealth Series Range of Monoculars feature a 3 year
warranty against manufacturing defects. The warranty excludes damages
caused by misuse, abuse, improper handing/care, or failure to follow the
manufacturer’s instructions.
This warranty is not transferable. If you have a problem or require
assistance with your unit, contact your purchasing Night Tech dealer.
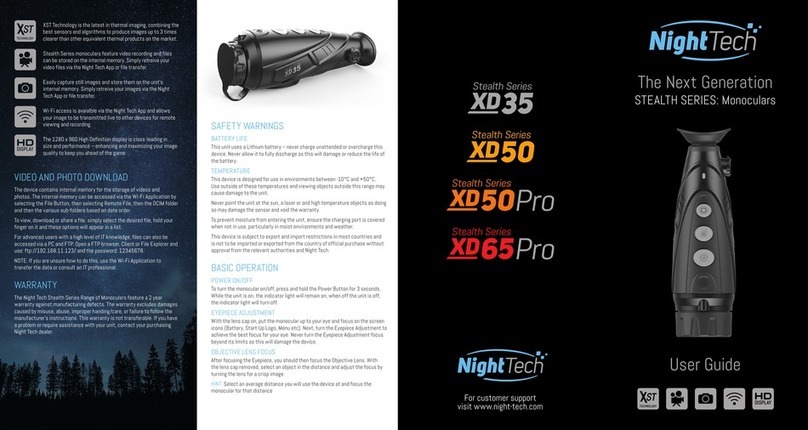
XST Technology is the latest in thermal imaging, combining the
best sensors and algorithms to produce images up to 3 times
clearer than other equivalent thermal products on the market.
Stealth Series monoculars feature video recording and files
can be stored on the internal memory. Simply retreive your
video files via the Night Tech App or file transfer.
Easily capture still images and store them on the unit’s
internal memory. Simply retreive your images via the Night
Tech App or file transfer.
Wi-Fi access is avaialble via the Night Tech App and allows
your image to be transmitted live to other devices for remote
viewing and recording.
The 1280 x 960 High Definition display is class-leading in
size and performance – enhancing and maximizing your image
quality to keep you ahead of the game.
SAFETY WARNINGS
BATTERY LIFE
This unit uses a Lithium battery – never charge unattended or overcharge this
device. Never allow it to fully discharge as this will damage or reduce the life of
the battery.
TEMPERATURE
This device is designed for use in environments between -10°C and +50°C.
Use outside of these temperatures and viewing objects outside this range may
cause damage to the unit.
Never point the unit at the sun, a laser or and high temperature objects as doing
so may damage the sensor and void the warranty.
To prevent moisture from entering the unit, ensure the charging port is covered
when not in use, particularly in moist environments and weather.
This device is subject to export and import restrictions in most countries and
is not to be imported or exported from the country of official purchase without
approval from the relevant authorities and Night Tech.
BASIC OPERATION
POWER ON/OFF
To turn the monocular on, press and hold the Power Button for 3 seconds.
While the unit is on, the indicator light will remain on, when off the unit is off,
the indicator light will turn off. To turn the monocular off, hold the Power Button
down until the screen counts down from 3 to 0. Releasing before the count is
finished will cancel the shutdown process.
EYEPIECE ADJUSTMENT
With the lens cap on, put the monocular up to your eye and focus on the screen
icons (Battery, Start-Up Logo, Menu etc). Next, turn the Eyepiece Adjustment to
achieve the best focus for your eye. Never turn the Eyepiece Adjustment focus
beyond its limits as this will damage the device.
OBJECTIVE LENS FOCUS
After focusing the Eyepiece, you should then focus the Objective Lens. With
the lens cap removed, select an object in the distance and adjust the focus by
turning the lens for a crisp image.
HINT:Select an average distance you will use the device at and focus the
monocular for that distance visit www.night-tech.com

STANDBY MODE
The device has a Standby Mode to reduce power consumption. During Standby
Mode the device will still run and allow a quick start up if required.
Press the Power Button for 1 second or less to enter or exit Standby Mode.
The indicator light will remain on while in Standby Mode.
To save power, the device will turn itself off if not used (no buttons are pressed)
for 20 minutes while in Standby Mode.
The device will automatically switch to Standby Mode if not used (no buttons are
pressed) for 15 minutes.
NOTE: Entering Standby Mode will disconnect the Wi-Fi.
IMAGE MODES
You can change image modes by pressing the Image Mode Button.
The device will scroll through available thermal colour modes.
LASER/RETICLE
Activate the Laser by pressing and holding the Image Mode, E-Zoom and Photo
buttons together for 15 seconds. Once activated you can turn the laser and
reticle on and off by pressing the Image Mode Button for 3 seconds. The Laser
is factory calibrated at 50 metres.
If you wish to switch from the Laser to the Reticle, press the Image Mode Button
for another 3 seconds. Pressing the Image Mode Button again for 3 seconds will
remove the Reticle. The Reticle can be calibrated in the Advanced Menu.
NOTE: The Reticle cannot be used for firearm-mounted applications as the unit
is not recoil rated. Never aim the laser at a human.
E-ZOOM
Use the E-Zoom Button to cycle through the Zoom Settings.
NOTE: The E-Zoom is an electronic zoom not optical. Each time you zoom you
will lose half of the resolution of the previous zoom and the image will become
more pixelated.
VIDEO AND PHOTO RECORDING
The device has built-in memory for photo and video recording. Press the Photo
Button to take a photo.
To begin video recording, press and hold the Photo Button for 3 seconds
(a blinking red light will be displayed in the top right corner). Press and hold the
Photo Button for 3 seconds to end recording. To download from the memory, see
the Video and Photo Download section of this manual.
IMPORTANT NOTE: This function will turn off if standby mode is selected.
HOT SPOT TRACKING
To enable or disable Hotspot Tracking, press the Photo and Image Mode Button
for 3 seconds. The Hotspot will be shown with a red square.
NOTE: This function will not work in Camera Mode.
RANGE FINDING MODE
To enter or exit Range Finding Mode press the E-Zoom and Image Mode Buttons
together for 3 seconds.
Centre the target between the upper and lower brackets, then adjust the size of
the brackets with the Image Mode and Photo button. Hold the buttons down to
adjust faster. human is 1.7m, pig is 0.9m, and hare is 0.2m.
MAIN MENU
To enter the Main Menu, press the E-Zoom button for 3 seconds, use the Image
Mode and Photo Button to navigate the menu and the E-Zoom Button to select
or alter a setting. Items are listed as they appear in the Menu.
ULTRA CLEAR MODE
Turn this mode on to enhance the image during rain or in conditions that are
cloudy or foggy. Use during fine conditions may degrade the image.
WI-FI
Wi-Fi can be turned on or off by selecting it in the menu. When on, a Wi-Fi icon
will appear in the top left corner of the screen. The Viewfinder video image will
be transmitted via Wi-Fi. Wi-Fi password is 12345678. See Wi-Fi Application
Instructions for more information.
IMPORTANT NOTE: This function will not work in Standby Mode.
SCREEN BRIGHTNESS
Screen Brightness can be selected and adjusted in the menu.
HINT:At night, it is recommend having your Screen Brightness on a low setting
(1-2) and during the day on a high setting (3-4).
CONTRAST
Screen contrast can be selected and adjusted in the menu.
SHARPNESS
Screen sharpness can be selected and adjusted in the menu.
VIDEO OUT
You can enable Video Out from the Main Menu of the unit, then simply connect
a cable to the Video Out port (located next to the USB charging port). Then
connect the cable to the AV device you wish to to use (not included). The device
is not designed for vehicle mounting.
HUE SELECTION
There are 2 back light colours, C – Cool White and W – Warm, use is personal
preference and they are not applicable in colour mode.
CALIBRATION
There are two calibration (NUC) methods that can be selected; B –
Background (Manual) and S – Shutter (Automatic).
To calibrate in B –Background (Manual) requires the lens cap be installed and
the E-Zoom and Photo Buttons to be pushed together for 3 seconds.
If S –Shutter (Automatic) is selected, the device will periodically (every 5-30
seconds) calibrate itself using the Internal Electronic Shutter (this can be
heard clicking). When first turned on, the unit initially calibrates often every
1-5 seconds. This will occur less as the unit warms up and becomes stable.
PICTURE IN PICTURE
To enable Picture in Picture Mode, select the PIP option from the Main Menu
and Press E-Zoom to activate.
MORE SETTINGS
To enter into the next page of the menu.
DIGITAL COMPASS
For directional orientation.
MSENSOR
Displays the horizontal and vertical tilt angles of the sight.
AUTO STANDBY
The device will automatically enter standby if there is no operation for 15
minutes, and auto power off in standby if not used for another 15 minutes.
RETICLE CALIBRATION
Adjust the laser reticle position with the Photo and Image Mode Buttons,
when finished, long press the E-Zoom Button to save and exit
BAD PIXEL CORRECTION
Adjust the cursor position with the Photo and Image Mode Buttons to the
bad pixel, short press the E-Zoom Button to switch direction, when the bad
pixel is selected, short press the Power Button to correct the bad pixel,
short press in the same position to cancel the correction. Long press the
Power Button to delete all of the added bad pixels. When done, long press the
E-Zoom Button to save and exit.
MSENSOR/COMPASS CALIBRATION
Simply rotate the device in 3 axial directions within 30 seconds to complete
the calibration.
INFORMATION
Shows the product information and software versions.
RESET TO DEFAULT
To reset the device to its default factory settings and format the internal
memory, select Reset to Default from the second page of the Main Menu
using the Image mode and Photo buttons, then pushing E-Zoom and then
confirm by selecting the Tick and E-Zoom to confirm again.
WIFI APPLICATION
The Wi-Fi application allows remote-viewing, photo and video recording,
internal memory access and downloading.
ANDROID
From Google Play, download and install the Night Tech XP App for the Stealth
Series Monoculars. Check in the app description that it is the correct app for
your device (listed on the app page on Google Play).
IOS (APPLE)
From the App Store, download and install the Cam802 App.
INSTRUCTIONS
1. Install the App, but do not open it yet
2. Turn the monocular on, go to the Main Menu and enable Wi-Fi (the Wi-Fi
symbol will be displayed in the top left corner of the screen). See Wi-Fi
instructions for more info.
3. Enable Wi-Fi by going to your Wi-Fi settings on your iPhone/iPad.
Pair your monocular. The password is: 12345678.
4. Open the App, it should auto connect. If it does not, press the button with
the Wi-Fi symbol.
VERY IMPORTANT:
• If you get a notice regarding security or internet access from this
device, click OK or dismiss it.
• When your device is scanning for the monocular, allow 2-3 minutes
for it to find the device.
• If your App fails to find your monocular, restart both your
smartphone/tablet and your monocular and repeat the connection
process.
• The Wi-Fi is only designed for use within 3-5m of the monocular.
• Depending on the speed of your device, there may be a slight delay
in displaying the video image. This is caused by the time required to
process, transmit, and reconstruct the image on your smartphone/
tablet or App.
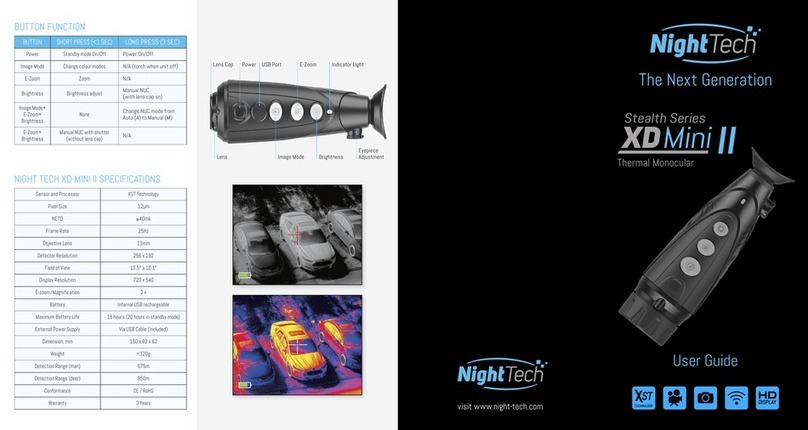
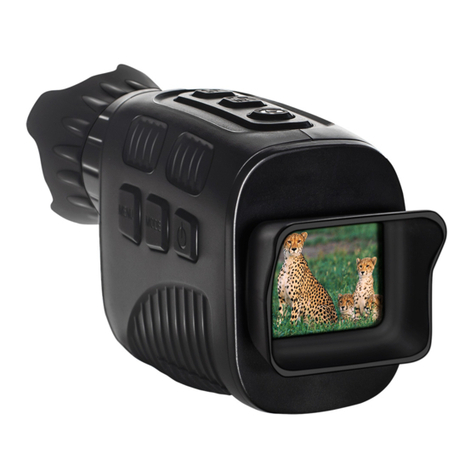
Lens Power E-Zoom Indicator
Image Mode Photo Eyepiece
Adjustment
This manual suits for next models
4
Other Night Tech Monocular manuals
