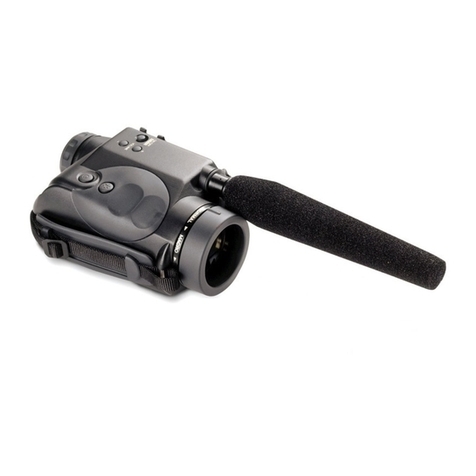
Nightfox PROWL User manual


1
English
Table of Contents
1. Package contents .................................................... 2
2. Overview of control panel ......................................... 3
3. Overview of features and controls ............................... 4
4. Charging the Prowl .................................................. 5
5. Inserting a micro SD card........................................... 5
6. Powering on the Prowl.............................................. 5
7. Display information.................................................. 6
8. Modes overview ...................................................... 7
9. Video mode ........................................................... 7
10. Important tips for using the infrared LEDs...................... 8
11. Playback mode ....................................................... 8
12. Settings mode ........................................................ 9
13. Head mount assembly............................................. 10
14. Tactical helmet mounting ........................................ 11
15. Replacing the battery............................................. 12
16. Troubleshooting .................................................... 13
17. Specifications....................................................... 15
Need help at any stage?
Read the troubleshooting guide on page 13
E-mail us at help@nightfoxstore.com
Go to www.nightfoxstore.com/prowl for our help videos

E n g l ish
2
1. Package contents
Nightfox Prowl
Wrist strap
Pre-installed 32GB memory
card
USB-C cable
Pre-installed 3200mAh
rechargeable 18650 lithium-ion
battery
Dovetail mount adapter
Head mount accessories
Lens protector

E n g l ish
3
2. Overview of control panel
①
Power /
Brightness
•Long press to turn the Prowl on or off.
•When the device is on, short press
adjusts the brightness of the LCD
screen (levels 1 to 5).
②
M
Mode
•Toggles between the three modes:
Video ›Playback ›Settings
③
Zoom
•Increases the digital zoom. On
reaching 3x magnification, press again
to disable digital zoom.
④
IR
Increase
Infrared (IR) /
Up
•Video mode: increases the IR level
•Playback mode: selects previous file
for viewing
•Settings mode: selects previous
setting
⑤
IR
Decrease IR /
Down
•Video mode: decreases the IR level
•Playback mode: selects next file for
viewing
•Settings mode: selects next setting
⑥
REC OK
Record /
select
•Video mode: starts / stops recording
•Playback mode: plays selected video
•Settings mode: confirms selection
⑦
Bracket for
head mount
accessories
•See section 13 for assembly
instructions
③④
②⑤
①⑥
⑦

E n g l ish
4
3. Overview of features and controls
⑧ Viewfinder
⑨ Eye cup
⑩ Diopter (eye
relief
adjustment)
⑪ Micro SD card
slot
⑫ Reset
⑬ USB-C port
⑭ Focus dial
⑮ Microphone for
sound recording
⑯ Battery
compartment
⑰ Tripod holder
⑱ Lens
⑲ Infrared (IR)
LEDs
⑧
⑭ ⑬ ⑫ ⑪ ⑩ ⑨
⑮
⑰
⑯
⑱
⑲

E n g l ish
5
4. Charging the Prowl
•The Prowl charges like a
phone or tablet, using a
USB-C interface.
•To charge the battery, plug
the provided USB-C cable
into a USB port. This could
be a USB port on a laptop or
computer, or phone charger.
•Open the USB cover. Plug the provided USB-C cable into the
charging port. Charging time is approximately four hours.
•It is recommended that the Prowl is charged at least once every
three months, even when the monocular is not in use. This helps
to activate the battery regularly and extend the battery life.
5. Inserting a micro SD card
•The Prowl is preinstalled with a 32GB
memory card. To remove the card,
open the USB cover. Push the memory
card in to release it. When the card is
partially ejected, it can be pulled
out.
•To reinsert the memory card, ensure the gold pins are facing up.
Push the card into the slot to lock it.
6. Powering on the Prowl
•Long press . The device powers on and enters Video mode. IR
is set to off. For night time use, press IR once to use
“Lunarsight” (IR0), then continue pressing IR to activate the IR
LEDs (IR1 – IR5).
•View the LCD screen through the viewfinder, using the diopter
to adjust the eye relief.

E n g l ish
6
7. Display information
•Video mode:
•Playback mode:
•Note: the display icons disappear by default. “Autohide Icons”
can be set to “off” via the settings menu (see section 12).
Micro SD card is
installed and ready
for videos.
If is
displayed, check
that the Micro SD
card is correctly
inserted
Indicates the LCD
screen brightness
(levels 1 – 5)
00:45:00
LCD Screen
.
5
Battery status
Displays the amount of
recording time remaining
(HH:MM:SS)
Shows that Video mode is
selected and the device is
ready to record
Displays the file
type of the
selected video
0006
LCD Screen
.
AVI
Battery status
Indicates the number of the selected
video (i.e. 6th in this example)
Indicates that Playback
mode is selected

E n g l ish
7
8. Modes overview
•The Prowl has three modes. Press M to switch from one mode to
the next. The modes are:
›Video mode, for recording videos. This is the default
mode when the device is turned on. See section 9.
›Playback mode, for watching and deleting videos stored
on the memory card. See section 11.
›Settings mode, for configuring settings. See section 12.
9. Video mode
•Video mode is the default mode when the device powers on.
•Adjust the camera focus by turning the dial at the front of the
device.
•The top right of the LCD screen shows how much space is left
for recording video onto the memory card, in HH:MM:SS.
•For daytime use, ensure IR is set to off, with no icon on the
display and the picture in colour.
•For night use, turn on the IR by pressing IR. Increase the level
of the IR LED by pressing IR up to level 5.
•Press REC/OK to start/stop recording. When recording is
stopped, the video is automatically saved onto the memory
card.
•Press to digitally zoom up to 3x magnification.
•The default setting uses 940nm IR LED for IR 1 to 3, and 850nm
IR LED for IR 4 to 5. With 940nm IR LED, the "red exposure" is
less obvious; however the brightness may be lower than 850nm.
To change this setting, press M twice to enter the settings
menu, and select "IR Settings".

E n g l ish
8
10. Important tips for using the infrared LEDs
•The Prowl has two IR LEDs: a 940nm wavelength for stealth, and
an 850nm wavelength for range.
•All IR LEDs produce a red glow, visible to the human eye. 940nm
LED produces less glow than 850nm LED, but 850nm provides a
longer viewing range than 940nm.
•The Prowl’s default factory setting uses 940nm for IR levels 1-3,
and 850nm for IR levels 4-5. Alternative options are available by
entering Settings mode (see section 12).
•Important: other night vision devices can detect the IR light
emitted by the Prowl.
•In dark environments with some ambient light, use the
“Lunarsight” setting (IR:0) to use no IR LED at all.
•Reducing usage of the IR LEDs saves battery.
11. Playback mode
•Press M until shows on the top left-hand corner of the
screen.
•The LCD screen will show the last file saved. Press IR to go to
the previous file, and press IR to go to the next file.
•Press REC/OK to enter the playback menu and use IR and IR
to navigate. Use REC/OK to select from the menu options,
which are to:
›play the selected video
›delete the selected video
›delete all videos
›exit the menu
•Selecting either ‘delete’ option will cause a thumbnail of the
image to appear with a pop-up menu, requesting confirmation
before deletion.

E n g l ish
9
12. Settings mode
•To enter Settings mode, press M until the Settings menu is
displayed.
•Use IR and IR to navigate the menu. Press REC/OK to select a
menu option.
Setting
Description
Night filter
Select “Black and White” or “Green” for night time use.
Selecting “Green” will apply a green filter to the image,
imitating the phosphor green effect found on image
intensifier night vision devices.
IR settings
Select 850nm, 940nm, a combination of both or no IR.
Autohide
icons
Turn on or off autohide icons on LCD screen.
Format SD
Delete all files currently on the micro SD card.
Power save
Set the device to power-off after a period of non-use. If
enabled, the options are 30 or 60 minutes.
Date
and
Time
The date and time are in the format YYYY / MM / DD,
HH:MM:SS.
Press REC/OK to begin amending the selected number.
Use IR and IR to adjust the values. Press REC/OK to
set the number and IR to move onto the next field.
Once the date is correct, press REC/OK again to save
and M to return to the settings menu.
Flicker
Determines the refresh rate of the LCD screen. The
device arrives with the correct setting for its
geographical area.
Date/time
tag
Choose whether a date and time stamp is included in
recorded videos.
Frame rate
Pick the frame rate of the AVI video recordings produced. A
higher frame rate may improve video quality but will
increase the video size.
Factory
reset
Restores all settings to factory defaults.
Version
Shows the current firmware version.

E n g l ish
10
13. Head mount assembly
There are 8 pieces for the
head mount
Slide piece A into the
bracket on top of the Prowl
(A)
Place piece B on piece A
Screw wing knob C into
pieces B and A
Slide piece D into the top of
piece A
Put piece B on piece D
A
B
C
C
B

E n g l ish
11
14. Tactical helmet mounting
•The Prowl is supplied with a dovetail helmet
adapter (right), compatible with helmet mount
systems like the Wilcox G24.
•To use the Dovetail adaptor, follow the
instructions in Section 13, but use the
Dovetail mount (right) instead of the
GoPro mounting point "D”
Screw wing knob C into pieces B
and D
Slot pieces F and D together
Secure using long screw E
C
F
D
E
Adjust the straps for comfort

E n g l ish
12
15. Replacing the battery
•The Prowl uses a rechargeable 18650 lithium-ion battery. Always
store the battery inside the monucular. Do not store loose.
•A 3200mAh battery is preinstalled.
•It is recommended that the Prowl is charged at least once every
three months, even when the monocular is not in use. This helps
to activate the battery and extend the battery life. If the
battery does not function any more, a new Li-ion battery will
need to be purchased.
•Only replace the battery with legitimate, branded batteries,
which adhere to these specifications:
›The battery
must have a
cap, or “button
top”;
›The battery
must be
between 67-
69mm long, and
18-19mm wide.
•To remove the battery, use a screwdriver to open the
compartment. Keep the battery stored in a box and adhere to
the following s
•afety notices:
›DO NOT IMMERSE THE BATTERY IN ANY LIQUID.
›DO NOT USE UNAUTHORIZED CHARGERS.
›DO NOT FORCE A REVERSE CHARGE OR A REVERSE CONNECTION.
›DO NOT ADAPT THE BATTERY TO UNSPECIFIED APPLICATIONS.
›KEEP THE BATTERY AWAY FROM HEAT AND FIRE.
›DO NOT MAKE A SHORT-CIRCUIT.
›AVOID UNNECESSARY IMPACT TO THE BATTERY.
›DO NOT PENETRATE WITH A NAIL OR STRIKE WITH A HAMMER.
›DO NOT USE OR PLACE THE BATTERY NEAR FIRE, A HEATER OR A
HIGH TEMPERATURE.
›DO NOT DIRECTLY SOLDER THE BATTERY.
›DO NOT DISASSEMBLE THE BATTERY.

E n g l ish
13
16. Troubleshooting
Issue
Possible cause
Action
Prowl does
not turn on
Rechargeable
battery has expired
If the Lithium-ion battery is not
holding its charge, it will need to
be replaced. See section 15.
Image quality
on LCD
screen is
poor
Diopter and/or
focus dial have not
been adjusted
Adjust the eye relief and focus
dial at every use to ensure
optimum image quality.
IR is not set to off
for daytime use
IR is not needed during daylight
hours, and should be turned off.
See section 9.
IR is not on for
night time use
In dark conditions, ensure an IR
level from 1 to 5 is selected. Use
IR to increase.
“Lunarsight” (IR0) can be used if
there is some ambient light or an
external source of IR.
If “Disable IR LEDs” has been
selected, IR will not increase
above IR0. Reset by navigating to
Settings mode → IR settings.
⚫Screen
displays, “No
SD card”
even when
an SD has
been
inserted
The inserted
memory card is not
formatted
correctly for the
Prowl or has
corrupted
Enter Settings mode and format
the memory card (see section 12).
⚫Picture is out
of focus
Manual focus wheel
has not been
adjusted
To sharpen the image, rotate the
diopter at the front of the unit.
Unit powers
on briefly or
not at all
Insufficient battery
power
Plug the unit in and leave to
charge, even if nothing shows on
the screen. After an hour has
passed, try turning on again.

E n g l ish
14
Issue
Possible cause
Action
⚫Unit has
frozen and
does not
respond
when any
buttons are
pressed
The firmware has
experienced a bug,
or the battery is
insufficiently
charged
Plug the unit in and leave to
charge (as above).
Press the reset button, located
above the USB-C port (see section
3, item ⑫)
Any other issues?
E-mail us at [email protected]
Go to www.nightfoxstore.com/prowl for our help videos

E n g l ish
15
17. Specifications
Fixed optical magnification
1x
Adjustable digital
magnification
3x
IR wavelength
940nm, 850nm
Digital sensor resolution
2MP
Infrared LED power output
2W per LED
Sensor
1920*1080p
Power supply
Rechargeable 18650 lithium-ion
battery (3200mAh included)
Battery Life
9 hours for day use
2.5 hours for night use (IR4)
Recharge via USB
Yes
Recording capability
Yes
Memory card
Micro SD: minimum 4GB to
maximum 256GB
Recording resolution
1080 FHD
Unit dimensions
117*70*67mm
4.6 x 2.7 x 2.6 in
Unit weight
255g / 9oz including battery
Viewfinder technology
TFT
Screen resolution
360 * 360 RGB port
Screen size
1.3” round TFT
Aperture
F1.0
Viewing angle
54°
Having trouble?
E-mail us at [email protected]
Go to www.nightfoxstore.com/prowl for our help videos

16
Deutsch
Inhaltsverzeichnis
1. Inhalt der Verpackung ............................................ 17
2. Übersicht über das Bedienfeld.................................. 18
3. Überblick über Funktionen und Bedienelemente ........... 19
4. Aufladen des Prowl................................................ 20
5. Einlegen einer Micro-SD-Karte .................................. 20
6. Einschalten des Prowls ........................................... 20
7. Informationen anzeigen .......................................... 21
8. Übersicht Modi ..................................................... 22
9. Videomodus ......................................................... 22
10. Wichtige Tipps zur Verwendung der Infrarot-LEDs.......... 23
11. Wiedergabemodus ................................................. 23
12. Einstellungsmodus ................................................. 24
13. Kopfhalterung ...................................................... 25
14. Taktische Helmhalterung......................................... 26
15. Auswechseln des Akkus........................................... 27
16. Fehlersuche......................................................... 28
17. Spezifikationen..................................................... 30
Benötigen Sie in einem Abschnitt Hilfe?
Lesen Sie die Anleitung zur Fehlerbehebung auf Seite 28
Schicken Sie uns eine E-Mail an help@nightfoxstore.com
Besuchen Sie www.nightfoxstore.com/prowl für unsere
Hilfevideos

Deutsch
18
2. Übersicht über das Bedienfeld
①
Leistung / Helligkeit
•Halten, zum ein-/ausschalten.
•Kurz drücken um die Helligkeit
anzupassen (Stufen 1-5).
②
M
Modus
•Schaltet zwischen den Modi:
Video > Wiedergabe >
Einstellungen
③
Zoomen
•Erhöht digitalen Zoom. Nach 3-
facher Vergrößerung wird der
Zoom wieder deaktiviert.
④
IR
Infrarot (IR) erhöhen
/Nach oben
•Videomodus: erhöht IR
•Wiedergabemodus: Ansicht der
vorherigen Datei
•Einstellungsmodus: wählt die
vorherige Einstellung aus
⑤
IR
IR verringern/
Nach unten
•Videomodus: verringert IR
•Wiedergabemodus: Ansicht der
nächsten Datei
•Einstellungsmodus: wählt die
nächste Einstellung aus
⑥
REC OK
Aufnehmen /
Auswählen
•Videomodus: Startet / Stoppt
die Aufnahme
•Wiedergabemodus: gibt das
ausgewählte Video wieder
•Einstellungsmodus: Bestätigen
⑦
Halterung für
Kopfmontagezubehör
•Siehe Abschnitt 13 für
Montageanweisungen
③ ④
② ⑤
① ⑥
⑦

Deutsch
19
3. Überblick über Funktionen und Bedienelemente
⑧ Sucher
⑨ Augenmuschel
⑩ Dioptrie
(Anpassung des
Augenabstands)
⑪ Micro SD-
Kartensteckplatz
⑫ Zurücksetzen
⑬ USB-C Anschluss
⑭ Einstellrad
⑮ Mikrofon für
Tonaufnahmen
⑯ Batteriefach
⑰ Stativhalterung
⑱ Objektiv
⑲ Infrarot (IR)
LEDs
⑧
⑭ ⑬ ⑫ ⑪ ⑩ ⑨
⑮
⑰
⑯
⑱
⑲
Table of contents
Languages:
Other Nightfox Monocular manuals

