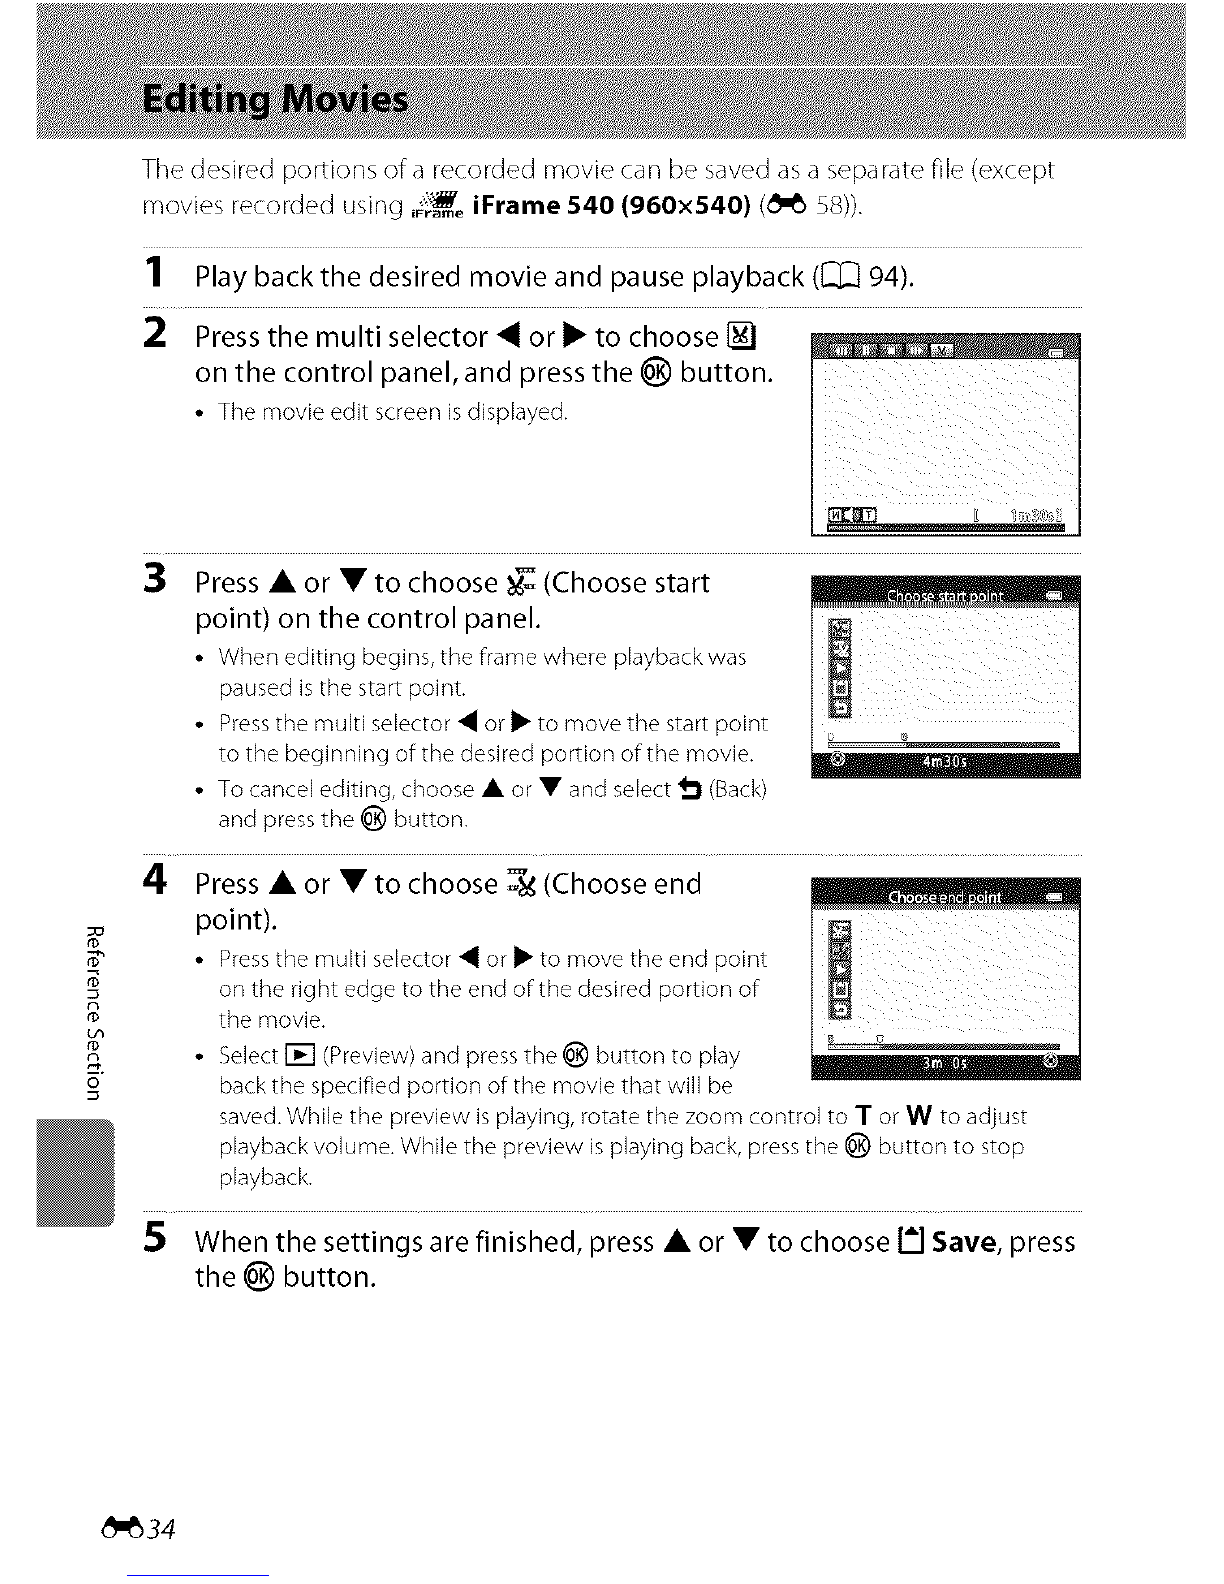
The Shooting Menu (for I_1 (Auto) Mode)
ISO Sensitivity
In the i_1 nqode -_ MENUbutton -_ i_1 tab -_ ISO
(auto) shooting screen sensitivity
The higher the sensitivity, the less light is needed to expose an picture, allowing
capturing darker subjects. Also, a higher sensitivity allows higher shutter speeds,
resulting in the picture with less camera shake and subject blur in comparison to
the same subject taken under the same brightness.
• Although high ISO sensitivity settings are suited to pictures of subjects taken
under dim lighting, those taken without flash, or those taken at telephoto
setting, high sensitivity settings are often associated with "noise" randomly
spaced, brightly colored pixels concentrated in dark portions of pictures.
Option " .. i....
Descn ptlon
Sensitivity is ISO80 when there is sufficient lighting, the
Auto (default setting) camera compensates by raising sensitivity to a maximum of
ISO 800 when lighting is dim.
Choose the range in which the camera automatically adjusts
ISO sensitivity, from ISO 80-200 (default setting) or ISO 80-
Fixed range auto 400. The camera will not increase sensitivity beyond the
maximum value in the selected range. Specify the maximum
ISO sensitivity for effective control over the amount of "grain"
that appears in pictures.
80, 100, 200, 400, 800,
1600, 3200, 6400
The current ISO sensitivit
• If Auto is selected and
displayed ([_ 8).
Sensitivity is locked at the specified value.
setting is indicated byan icon when shooting ([_ 8).
the sensitivity is raised above ISO80, the _ icon will be
• When Fixed range auto isselected, _ and the maximum value of ISO
sensitivity isdisplayed.
_1_ Notes on ISO sensitivity
• There are functions with which this setting cannot be enabled. See "Features That Cannot Be
Applied Simultaneously" (_ 63) for more information,
•Motion detection (_ 68) does not function when the ISO sensitivity is set to any setting other
than Auto.
_1_ Notes on ISO Sensitivity 3200 and 6400
• When ISO sensitivity is set to 3200 or 6400, Image mode settings are limited to _'_
2048×1536, [] 1024x768, and _ 640×480,
• When ISO sensitivity is set to 3200 or 6400, the image mode icon is dispbyed in red during
shooting.
t_
_41