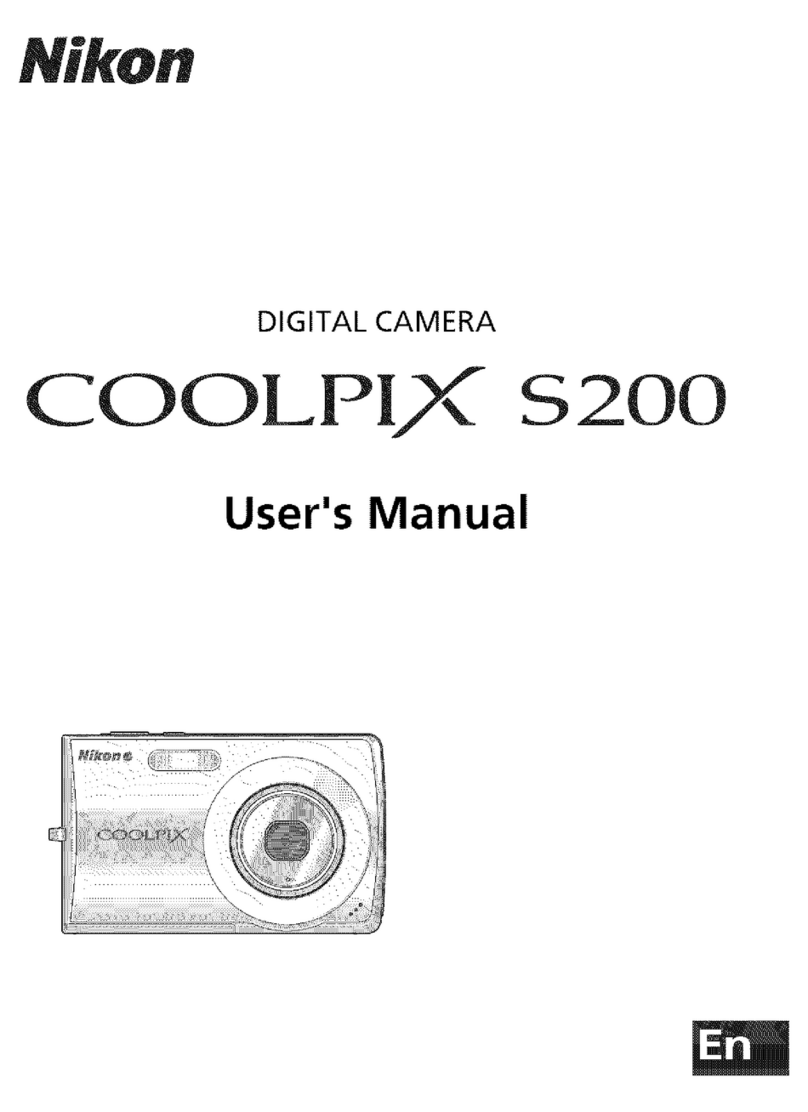
Nikon Coolpix S4100 User manual

DIGITAL CAMERA
COOLPI.X $4100
User's Manual

When shooting pictures and movies, they are automatically sorted to one of the
categories shown below. When "_ (auto sort) mode" is selected, pictures and
movies can be viewed by selecting the category to which they were sorted.
[] Smile
[] Landscape
_# Pet portrait
1_] Other scenes
• Portraits
[] Duskto dawn
,1_ Movie
In full-frame playback mode, just as with normal playback mode, picture display
can be enlarged, pictures can be displayed as thumbnails, and movies can be
played back. When the bottom tab istapped to display the setting controls,
settings can be made and editing can be performed on pictures sorted to the
specified category (_ 98).
Viewing Pictures in Auto Sort Mode
IPress the_ button in playback
mode and tap _.
Alistofcategoriesisdisplayed.
2Tap the desired category.
Formore informationon categories,see"AutoSortMode
Categories"(_ 94).
o_
g
o
A picture sorted to the selected category will be
displayed in full-frame playback mode.
The icon for the category currently selected is displayed.
Repeat steps 1 and 2 to select a different category.
93

o
s
o
n
Auto Sort Mode Categories
Category Description
[] Smile Pictures taken in smart portrait mode ([_] 74) with the smile
t_mer setting set to On.
Pictures taken ir I_1 (auto) mode (_ 26) with the face detection
function ([_] 41). Pictures taken in Portrait*, Night portrait _,
• Portraits Party/indoor, and Backlighting _ scene modes ([_) 58).
Pictures taken in smart portrait mode ([_] 74) with the smile
timer setung set to Off.
_1 Food Pictures taken in Food scene mode ([_j 58).
[] Landscape Pictures taken in Landscape* scene mode ([_) 58).
Pictures taken in Night landscape*, Sunset, Dusk/dawn, and
[] Duskto dawn Fireworks show scene modes ([_] 58).
Pictures taken in I_1 (auto) mode with the macro mode settin 9
Close-ups _] 38).
Pictures taken in Close-up* scene mode (_ 58).
_!_ Pet portrait Pictures taken in Pet portrait scene mode ([_ 58).
Movie Movies ([_) 126).
E._ Retouched copies Copies created using editin 9 functions ([_) 110).
other pictures that cannot be defined by the categories
I_] Other scenes described above.
* Pictures taken in scene auto selector scene mode ([_) 61) are also sorted to the
appropriate categories.
94
Notes on Auto Sort Mode
• Up to 999 pictures and movie files can be sorted to each category in auto sort mode. if999
pictures or movies havealready been sorted to a specific category, new pictures and movies
cannot be sorted to that category or displayed in auto sort mode. Display pictures and movies that
could not be sorted to acategory in normal playback mode ([.3_]32) or list by date mode (_ 96).
• Picturesor movies copied from the internal memory to a memory card, or vice versa (_ 167),
cannot be displayed in auto sort mode.
• Pictures or movies recorded by a camera other than the COOLPIX$41O0cannot be displayed in
auto sort mode.
Operations in Auto Sort Mode
Thefolk)wing operationsareavailableon the auto sortmode c:ategorylistscreen
shown in step 2 on page 93.
To Use
Deleteallpictures
in the Selected
_ategory
Switch to another r-'q
playback mode
Switch to ___
Shooting mode
Description
When the bottom tab istapped to display the
setting controls, and "_ is tapped, the category
selection screen is displayed. Select the desired
category and tap 1_.
Pressthe [] button to display the playback- 185
,,,m,,°,d,_,,,,,!,,!,,°,,n,,,,,m,,tn,,_,:......................................................................................................................................................................1,,,,,,,,,,,,,:...........................................
Pressthe I_1 button, • (_l_I movie-record)
button, or shutter-release button. 32 o_
o
fR-
95

o
o
n
In "11_1list by date mode", pictures taken on a same date can be played back.
• In full-frame playback mode, just as with normal playback mode, picture display
can be enlarged, pictures can be displayed as thumbnails, and movies can be
played back. When the bottom tab istapped to display the setting controls,
settings can be made and editing can be performed on pictures taken on a
specific day (_ 98).
Selecting a Date in List by Date Mode
IPress the_ button in playback
mode and tap _.
Datesfor which pictures existarelisted.
2Tap the desired date.
To changethedisplayed month, tap _3 or O.
The first picture taken on the selected date will be
displayed full-frame.
Repeat steps 1 and 2 to select a different date.
96
_1_ Notes on List by Date Mode
•Up to g,O00 of the most recently recorded pictures can be dispbyed in list by date mode.
• Pictures taken before the date and time have been set are recognized as having been taken on
January 1,2011,

Operations in List by Date Mode
Thefollowing operati(msareavailableinthe listbydatescreenshownin step2on
page 9d.
To Use
IBorl:l
month
Delete all pictures
in the selected _/
date
Switch to another
playback mode
Switch to ___
Shooting mode
Description
Tap D or D.
When the bottom tab is tapped to display the
setting controls, and "_ istapped, the date
selection screen is displayed. Select the desired
date and tap m.
Press the [] button to display the playback-
mode selection menu.
Press the I_1 button, • (_1_I movie-record)
button, or shutter-release button.
85
32 o_
o
g-
97

To adjust picture settings or edit pictures, tap the tab in full-frame playback mode
to display the setting controls.
•The controls available and monitor display vary depending upon the current
picture and camera settings.
• Tap the icon of the desired item to display the setting screen for that item.
• Tap the tab again to hide the setting controls.
o_
o
n987
2
3
4
5
6
m Rating _................................................................99
Add pictures to albums (except in
favorite pictures mode) ...................86
Remove pictures from albums (in
favorite pictures mode) ...................89
a "_ [)e]ete_" ......................................................33
M_ Slide show _. 100
o.n Protect _...................................................101
_ DPOF print order _.............................103
_ Voice memo .........................................108
F<_ Retouch ...................................................1lO
_L_ Rotate image .......................................107
al_ Paint ..........................................................112
This function can also be performed in thumbnail playback mode. If the camera isswitched
to thumbnail playback mode while pictures are played back in favorite pictures, auto sort,
or list by date mode, this function can be performed only on the pictures sorted to the
selected folder, category or date.
P8

Aratingofonetofivecanbeassignedtoeachpicture.Itisalsopossibletoplay
backonlytilepicturesthathavebeenassignedaspecificrating.
1 Taptherighttabinfull-frameplayback([_ 80)
orthumbnailplayback([_ 81)mode.
See"OperatingtheTabs"([_14)formoreinformation.
_t Drag and drop ([_ 8) the desired rating icon
onto the picture.
Rating isapplied.
Drag and drop another icon to change the rating.
Drag and drop _t!'0to cancel the rating.
A picture's rating can be confirmed by the number of '_
shown in full-frame playback mode.
Playing Back Pictures by Rating
1 Tap the right tab in full-frame playback ([_[_ 80)
or thumbnail playback ([_ 81) mode.
o
f
_t Tap a rating icon to display the pictures with
that rating.
The icon of the tapped rating turns yellow, and only the
pictures assigned with the selected rating are displayed.
Multiple ratings can be selected.
To stop displaying pictures of a selected rating, tap the icon
of the rating to deselect it.
To stop playback by rating, desdect aHratings.
_1_ Notes on the Rating
• Eachrating can be applied to a maximum of 999 pictures.
• Rating cannot be applied to movies.
• The ratings applied on the COOLPIX$41O0are not recognized by your computer. 99

Play back pictures stored in the internal memory or on a memory card one by one
in an automated "slide show"
1 Tap the bottom tab in playback mode to
display the setting controls, and tap _.
o_
o
n
100
2Tap Start.
To change the effect, tap Effects before selecting Start,
and select from Classic, Zoom, or Animated.
To change the interval between pictures, tap Frame
intvl and select the desired interval before tapping Start.
To repeat the slide show automatically, tap Loop before
tapping Start. A check mark (_) will be added to the
loop option when enabled.
To exit without playing back pictures in a slide show, tap I_l
3The slide show begins.
Tap the monitor to display the operation panel at the
bottom of the screen.
Tap the icons in the operation panel to perform the
corresponding operation. The following operations are
available.
i_Tau_!__,_,_
To Description
Rewind 0 Tap and hold I_1 to rewind slide show.
Advance Tap and hold r_l to advance slide show.
Pause •To resume playback, tap r_l displayed at the
center of the screen.
End End slide show.
_1_ Notes on Slide Show
• Only the first frame of movies included in slide shows is displayed
• Evenwhen loop isselected, the slide show will only be played for a maximum of 30 minutes

Protect selected pictures from accidental deletion. Protected pictures are
recognized by the @-_icon (_ 12) in playback mode.
Protecting One Picture
1 Select the desired picture to be protected in
full-frame playback mode and tap the bottom
tab.
2Tap 0_.
3Tap On.
The selected picture is protected.
To exit without protecting pictures, tap I_1
o_
o
_1_ Note on Protecting Pictures
Note that formatting the camera's internal memory or the memory card will permanently delete
protected files (_ 159). 101

Protecting Multiple Pictures
Multiple pictures can be protected at a time.
1 Switch to thumbnail playback mode ([_ 81),
tap the bottom tab to display the setting
controls, and tap On.
The monitor display switches to the Protect screen.
o
2 Tap the desired pictures to be protected.
When a picture is selected, a check mark isdisplayed. To
cancel the selection, tap the picture again.
Tap _ or L_31,or rotate the zoom control to T (C_)or W
(_i_) to change the number of pictures displayed.
3Tap 1_.
_ The selected pictures are protected.
To exit without protecting pictures, tap I_1
Removing Protection from Pictures
• To remove protection from a picture, display a protected picture in full-frame
playback mode, follow the procedure in "Protecting One Picture" (_ 101), and
tap Off in step 3.
• To remove protection from multiple pictures at a time, uncheck protected
pictures in step 2 of'Protecting Multiple Pictures".
102

When printing pictures stored on the memory card using any of the following
methods, the Print erder option in the playback menu is used to create digital
"print orders" for printing on DPOF-compatible devices.
• Inserting the memory card into a DPOF-compatible (_ 190) printer's card slot
• Taking the memory card to a digital photo lab
• Connecting the camera to a PictBridge-compatible (_ 190) printer (_ 140).A
print order can also be created for pictures stored in the internal memory if the
memory card is removed from the camera
Creating a Print Order for One Picture
1 Select the desired picture in full-frame
playback mode and tap the bottom tab.
3Tap the desired number of copies (up to nine)
and tap [].
To exitwithout makingthe print order setting,tap _'-_.
Ifthetotal numberof pictures in aprint order,including
picturesjust added, exceeds99,the screenshown at
rightwill be displayed.
- TapYesto removepictures previouslyadded from the
print orderand restrictthe print order to picturesjust
marked.
- TapCancel toremovethe picturesjust added fromthe
print orderand restrictthe print order to pictures
previouslymarked. 103

o
n
4 Choose whether or not to print shooting date
and photo information.
Tap Date to place q_' in the checkbox to imprint the
shooting date on the picture.
Tap Info to place q_' in the checkbox to imprint the
photo information (shutter speed and aperture value) on
the picture.
Tap [] to complete the print order.
Pictures selected for printing are recognized by the
icon displayed with playback.
104

2Tap the desired pictures to print (up to 99)
and tap D or D at the upper left in the
monitor to specify the number of copies (up
to nine) for each.
Pictures selected for printing can be recognized by the
check mark (%_) and the numeral indicating the number
of copies to be printed. If no copies have been specified
for pictures, the selection iscanceled.
Tap Q or L_I or rotate the zoom control to T or W to change the number of pictures
displayed.
Tap [] to remove print markings from all pictures and cancel the print order.
Tap [] when setting iscomplete.
3Choose whether or not to print shooting date
and photo information.
Tap Date to place _' in the checkbox to imprint the
shooting date on all pictures in the print order.
Tap Info to place _' in the checkbox to imprint the
photo information (shutter speed and aperture value) on
all pictures in the print order.
Tap [] to complete the print order.
o
f?-
105

Canceling Print Order
• To remove a print marking from a picture, display a picture selected for printing
in full-frame playback mode, follow the procedure in "C}reating a Print Order for
One Picture" (_ 103), and tap "0" in step 3.
• To remove print markings from multiple pictures at a time, remove the print
markings of the desired pictures in step 2 of"( rearing a Print Order for Multiple
Pictures" (_ 105).Tap [] to remove print markings from all pictures.
o
_1_ Notes on Printing Shooting Date and Photo Information
When the Date and Info options are enabled in the print order option, shooting date and photo
information are printed on pictures when a DPOF compatible printer ([_]_} 190) that supports
printing of shooting date and photo information is used.
• Photo information cannot be printed when the camera is connected directly to a printer, via the
supplied USB cable, for DPOF printing (_ 145),
• Note that Date and Info settings are reset each time the Print order option is displayed.
• The date printed is that recorded when the picture was taken,
Changing the Date and time and Time zone settings using the
Time zone and date option in the setup menu after a picture
has been taken has no effect on the date printed on the picture.
106
[] Print Date
When date and time of recording are imprinted on pictures using the Print date option ([.]_ 1$3) in
the setup menu, pictures are recorded with shooting date and time imprinted on the picture when
they are taken. Pictures with the date imprinted on them can be printed from printers that do not
support printing of the date on pictures.
Only the date and time imprinted on pictures using the Print date option will be printed, even if
the date print option is enabled in the Print order menu.

Specify the orientation in which recorded pictures are displayed with playback.
Still pictures can be rotated 90 degrees clockwise or 90 degrees counterclockwise.
Pictures that were recorded in portrait ("tall") orientation can be rotated up to 180
degrees in either direction.
mode (1_ 80), tap the bottom tab to display
the setting controls, and tap ______.
The retouch menu isdisplayed.
The rotate image screen is displayed. o_
o
f
3 Tap _ or _. _-
Rotate go degrees Rotate go degrees
clockwise counterclockwise
The picture rotates 90 degrees.
Tap [] to finalize display orientation and save the orientation information with the
picture.
To exit without rotating image, tap I_
107

Use the camera's built-in microphone to record voice memos for pictures.
Recording Voice Memos
1Select the desired picture from full-frame _-L,L_
playback mode ([_[_]80) and tap the bottom
tab.
2Tap_.
The screenfor recordingvoice memosisdisplayed.
o_
o
r_
3Tap r_l to record a voice memo.
Recording ends after about 20 seconds.
Do not touch the built-in microphone during recording.
To exit without recording voice memos, tap I_
Duringrecording,_ blinksinthe monitor.
Recordingendswhen [.'1istapped during recording.
When recording ends,the voice memo playbackscreenis
displayed.Followthe instructionsin step3of"Playing Voice
Memos"(Z_) 10!))to playthe voice memo.
[] More Information
108 See"image/Sound Fileand Folder Names" ([._1174) for more information,

Playing Voice Memos
Pictures for which voice memos have been recorded are indicated by _ in full-
frame playback mode.
1Select the desired picture from full-frame [i:< L,;,:v,,:u,_-L,u,__
playback mode ([Z_ 80) and tap the bottom I_ 1:_'__"'
tab.
2Tap_.
Thevoice memo playbackscreenisdisplayed.
3Tapr:lto playthevoicememo.
TapD to stop playback.
Tap_ during playbackto adjustplaybackvolume.
blinksduring playback.
To exitwithout playingvoice memos,tap I_1
Deleting Voice Memos
Tap [] in step 3of"Playing Voice Memos". Tap Yes to
delete only the voice memo.
w
L_I Notes on Voice Memos
•Whena picture with avoicememoattachedisdeleted, boththepicture anditsvoicememoare
deleted.
• If a voice memo already exists for the current picture, it must be deleted before a new voice memo
canberecorded.
•TheCOOLPIX$41O0isnotableto recordavoicememofor pictures takenwith anothermakeor
modelof digital camera, 109

c
Use the COOLPIX S4100 to edit pictures in<amera and store them as separate files
(_ 174).The editing functions described below are available.
Editing function
Paint ([_[[] 112)
(_Z]115)
D-Lig hting ([_[_J116)
Stretch (_ 117)
Perspective control
(1_ 118)
Small aicture (1_] 123)
Crop (1_ 124)
Description
Draw or aictures, or add decorations, to pictures.
Easilv create retouched copies in which contrast and saturation
have been enhanced.
._reate a copy of the current picture with enhanced brightness
_nGcontrast, brightening dark portions of the picture.
_tretch the current picture horizontally to make the subject
_DDearthinner or wider.
Adjust the perspective of pictures taken in landscape orientation.
ADD y perspective control similar to that available with shift
enses. This option is suited to pictures of buildings or
_rcnlrec_ure.
...................... AraDIva variety of effects usin9 digital filter. The available effects
Filter effects ',[_]] 119) ire Color options, Soft, Selective color, Cross screen,
Fisheye, and Miniature effect.
Glamour retouch Make facial skin tone softer and make faces look smaller with
([_[_ 121) larger eyes.
._reate a small copy of pictures suitable for use as e-mail
_tracnmenrs.
._roD_ 9ortion of the picture. Use to zoom in on a subject or
arrange a composition.
See page 107for the rotate image function for more information.
110
_1_ Notes on Picture Editing
•Pictures taken at an Image mode setting (_ 43) of _ 4224x2376 cannot be edited.
• The editing functions of COOLPIX 54100 cannot be used for pictures taken with another make or
model of digital cameras,
• if no face is detected in a picture, a copy cannot be created using the glamour retouch function
(Q] _2]).
• Edited copies created with COOLPIX $4100 may not be displayed properly on a different model of
digital camera, It may also be im possible to transfer them to a computer using a different model of
digital camera.
• Editing functions are not available when there is not enough free space in the internal memory or
on the memory card to store the edited copies.
• images created in draw scene mode ([,_ 71) can only be edited with the paint, small picture, or
crop function.

[] Restrictions on Picture Editing
When an edited copy is further modified with another editing function, check the following
restrictions,
Editing function used Editing function to add
Paint The paint, small picture, or crop function can be added,
D-Lighting
Stretch The paint, small picture, glamour retouch, or crop function can be
added.
Perspective control
Filter effects
Glamour retouch The editing functions other than glamour retouch can be added.
Small picture Another editing function cannot be added.
Another editing function cannot be added. However, the paint
Crop function can be applied to cropped copies saved at an image size of
640 x 480 pixels or larger.
• Copies created with editin( functions other than the paint function cannot be further edited with
the same function used to create them,
• When combining the small picture or crop function and another editing function, use the small
picture and crop functions after other editing functions have been applied,
• Retouch effects such as the glamour retouch function's skin softening effect can be applied to
pictures taken with the skin softening function ([,_ 77).
[] Original and Edited Pictures
• Copies created with editing functions are not deleted when the original pictures are deleted, The
original pictures are not deleted when copies created with editing functions are deleted,
• Edited copies are stored with the same recording date and time as the original,
• The rating settings (_ g9), protect settings (_ 101), and print markings ([,_ 103) of the original
image are not applied to edited copies,
111
Other manuals for Coolpix S4100
4
Other Nikon Digital Camera manuals

Nikon
Nikon CoolPix S8100 User manual

Nikon
Nikon D5000 Operating instructions

Nikon
Nikon Coolpix S9900 User manual

Nikon
Nikon 1J4 User manual

Nikon
Nikon Coolprix S570 User manual

Nikon
Nikon F6 Operating instructions

Nikon
Nikon CoolPix L24 User manual

Nikon
Nikon CoolPix S70 User manual

Nikon
Nikon Coolpix S6100 User manual

Nikon
Nikon COOLPIX 4500 User manual

Nikon
Nikon Coolpix S3600 User manual

Nikon
Nikon D300S User manual

Nikon
Nikon Coolpix e1989 User manual

Nikon
Nikon D7100 User manual

Nikon
Nikon D7200 User manual

Nikon
Nikon FE10 User manual

Nikon
Nikon CoolPix S570 User guide

Nikon
Nikon D3100 User manual

Nikon
Nikon EL2 User manual

Nikon
Nikon 26171 - Coolpix P90 Digital Camera User guide