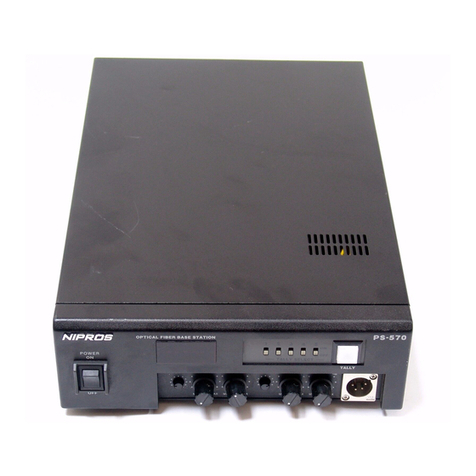
NIPROS PS-470 User manual

PS-570/1
OpticalFiberStudioSystem
Volume1,1steditionVer.1.0
光コンバージョンシステム
Operating Instructions
取扱説明書
Beforeoperatingthesystem,pleasereadthismanual
thoroughlyandremainitforfuturereference.
OpticalFiberBaseStation
ベースステーション
PS-470/1
OpticalFiberCameraAdaptor
カメラアダプター
ご使用の前に、この取扱説明書をよくお読みください。
また、お読みになった後は、大切に保管してください。

WARNING For the customers in the U.S.A.
This equipment has been tested and found
to comply with the limits for a Class A
digital device, pursuant to Part 15 of the
FCC Rules. These limits are designed to
provide reasonable protection against
harmful interference when the equipment is
operatedin a commercial environment.
This equipment generates, uses, and can
radiate radio frequency energy and, if not
installed and used in accordance with the
instruction manual, may cause harmful
interference to radio communications.
Operation of this equipment in a residential
area is likely to cause harmful interference
in which case the user will be required to
correct the interference at his own ex-
pense.
You are cautioned that any changes or
modifications not expressly approved in
this manual could void your authority to
operate this equipment.
All interface cables used to connect periph-
erals must be shielded in order to comply
with the limits for a digital device pursuant
to Subpart B of Part 15 of FCC Rules.
For the customers in Europe
This product with the CE marking complies
with both the EMC Directive and the Low
Voltage Directive issued by the Commis-
sion of the European Community.
Compliance with these directives implies
conformity of the following European stan-
dards:
・EN60065 : Product Safety
・EN61000-6-4 : Electromagnetic Interfer-
ence(Emission)
・EN61000-6-2 : Electromagnetic Suscepti-
bility(Immunity)
This product is intended for use in the
following Electromagnetic Environments:
E1 (residential), E2 (commercial and light
industrial)
E3 (urban outdoors), E4 (controlled EMC
environment,ex. TV studio)
To reduce the risk of fire or electric
shock,do not expose this apparatus to rain
or moisture.
To avoid electrical shock, do not open the
cabinet. Refer servicing to qualified per-
sonnel only.
WARNING
When installing the unit, incorporate a
readily accessible disconnect device in the
fixed wiring, or connect the power plug to
an easily accessible socket-outlet near the
unit. If a fault should occur during opera-
tion of the unit, operate the disconnect
device to switch the power supply off, or
disconnect the power plug.
Do not install the appliance in a confined
space, such as book case or built-in cabi-
net.
IMPORTANT
The nameplate is located on the bottom.
WARNING
Excessive sound pressure from earphones
and headphones can cause hearing loss.In
order to use this product safely, avoid
prolonged listening at essive sound pres-
sure levels.This equipment shall not be
exposed to excessive heat such as sun-
shine, fire or the like.
PS-470VP is class 1 laser product.
(IEC60825-1+A2:2001)
Do not directly look into the Optical fiber
connector, since laser light is emitted from
its tips.
Ensure that the dust cap is placed over the
Optical fiber connector when this equip-
ment is not in use.
02

各部名称と働き
NamesandFunctionsofParts
メインパネル
Mainpanel
コネクタパネル
Connectorpanel
リアパネル
Rearpanel
接続方法
Connection
調整及びセッティング
AdjustmentsandSettings
システム接続ガイド
SystemConnectionGuide
マルチカメラシステム接続ガイド
Multi-CameraSystemConnectionGuide
外形寸法図・仕様
OutsideViewandDimensions/Specifications
フロントパネル
Frontpanel
PS-470/1
4
6
PS-570/1
9
11
PS-470/1 32
PS-570/1 34
4
31
28
14
30
Contents
OpticalFiberStudioSystemPS-470/1PS-570/1
PS-470/1PS-570/1目次
03

PS-470/1各部名称と働き
NamesandFunctionsofParts
04
OpticalFiberCameraAdaptorPS-470/1
メインパネル
Mainpanel
HEADSET1
TALLY
POWER
ON
OFF
OFF ON
INCOM/
DC 12V IN
HEADSET2
OPTICAL FIBER
CAMERA ADAPTER
MINI MAX MINI MAX
MINI MAX MINI MAX
MIC
H.P
SIDE
TONE
INCOM
HEADSET1 HEADSET2
TALLY
HD
LS

PS-470/1各部名称と働き
05
OpticalFiberCameraAdaptorPS-470/1
メインパネル
Mainpanel
インカムを使用する場合に、ヘッドセット(DL-400)を接続します。
INCOM/DC12VINHEADSET1/2Connector(XLR4-pin)
リチウムイオンバッテリーパック(SONYタイプ)を装着します。
BatteryHolder(BatteryAdapter)
ConnectwiththeLi-ionBatteryPack.
ConnectwiththeINTERCOMHEADSET(DL-400).
OPTコネクタカバーのタリーランプをOFF/L/H切り替えるスイッチです。
TALLYSwitch
SelecttheTALLYindication,OFF/L/H,oftheTALLYLampontheOpticalconnectorcover.
POWERSwitch
TurnthepoweronandoffthepowersuppliedfromtheOpticalCable,LitiumBatteryPack,ortheDC
12VINconnector.
INCOMHEADSETコネクタ()に接続されたヘッドセット(DL-400)のMICレベルとヘッドホンレベルを調整します。
INCOMVolume
AdjusttheMIClevelandtheHEADPHONEleveloftheHEADSET(DL-400)connectedtotheINCOM
HEADSETconnector().
HD/LSは光信号の通信状況を表示します。
IndicationLED
StatusindicatorlightsuptoindicatetheStatusoftheworkfunctions,communicationoftheoptical
signals.
OPTケーブル,リチウムイオンバッテリーパック,またはDC12VINコネクタから供給された電源をON/OFF
します。
LEDIndication
HD:ON=HD-SDI,OFF=SD-SDI
LS:ON=LASERON,OFF=LASEROFF
カメラのバッテリーホルダーに接続します。
V-mountAdapter
ConnecttotheBatteryHolderoftheCamera.
TALLYindicatorlightsupwhenreceivingtheTALLYsignalfromPS-570.
タリーLEDはPS-570からのタリー信号により点灯します。
TALLY:ON=receivingtheTALLYsignal

PS-470/1各部名称と働き
06
OpticalFiberCameraAdaptorPS-470/1
コネクタパネル
Connectorpanel
GEN
LOCK
REMOTE L
HD-SDI/
SDI IN
TC
IN
TC
OUT
MADE IN JAPAN
TALLY DC OUT
IF OUT
HD-SDI
RET OUT

PS-470/1各部名称と働き
07
OpticalFiberCameraAdaptorPS-470/1
コネクタパネル
Connectorpanel
DC12Vを供給するキャノン4ピンメス出力コネクタです。
ベースステーション(PS-570)と光ケーブル(別売ALC-100M等)にて接続するコネクタです。
最大2000Mまで使用可能です。
モニターLVM-89WまたはVFインターフェースユニットVIF-100にVF6Pケーブル(VC-450)を使って接続します。
DC12VOUTconnector(XLR4-pin)
PINAssignment
SMPTEOPTCABLEconnector
IFOUT(MONITOROUT)connector(6-pin)
GENLOCK信号を出力するコネクタです。(Gタイプのみ)
HD-SDI/SDIRET映像を出力するコネクタです。
HD-SDIまたはSD-SDI信号を入力するBNCコネクタです。
HD-SDI/SDIINconnector(BNC)
HD-SDIRETOUTconnector(BNC)
GENLOCKconnector(BNC)
1
2
3
4
ConnectwiththeOpticalAdapterBaseUnitPS-570bytheOpticalfibercable(ALC-100M,).
Themaximumlengthoftheopticalfibercableis2000meters.
Outputsthepower,DC12V.
2PIN:NC
3PIN:NC
1PIN:GND
4PIN:+12V
ConnectwiththeMonitorLVM-89WorVFInterfaceUnitVIF-100bytheVF6-pincable(VC-450).
OutputstheGENLOCKreferencesignaltoacamera.(forPS-470HDG/1)
OutputstheHD-SDI/SDIreturnvideosignal.
InputtheHD-SDI/SD-SDIsignalfromacamera.
タイムコードを使用する場合にBNCケーブルを接続するコネクタです。
TCIN/TCOUTconnectors(BNC)
ConnectwithacameratosynchronizewiththevideoequipmentconnectedtoPS-570.

PS-470/1各部名称と働き
08
OpticalFiberCameraAdaptorPS-470/1
コネクタパネル
Connectorpanel
各社リモコンを使用する場合はリモートケーブルRCC-450でカメラへ接続します。
REMOTEconnector
ConnecttoacamerabythesuppliedremotecableRCC-450i/P/Swhenusingthecameraremote
controllermadebythecameramanufacturer.
RCC-450
i:forIKEGAMI
RCC-450P:forPanasonic
RCC-450S:forSONY
TALLYLamp
LightsupwhenreceivingtheTALLYsignalfromPS-570.ItcanbeturnedON/OFFbyTALLY
SwitchontheMainpanel().
PS-570からのタリー信号により点灯します。メインパネルのタリースイッチ()によりON/OFFできます。
LANCリモコンを使用する場合にミニプラグケーブルを接続するコネクタです。
REMOTEL(LANC)connector(φ2.5minijack)
ConnectwiththecameraequippedwiththeLANCterminal(φ2.5).
TALLYOUT
OutputstheTALLYsignalinputtotheTALLYINconnectorofthePS-570.
TALLYsignal:ON=5V
OFF=0V
PS-570のTALLYINコネクタに入力されたタリー信号を出力します。

PS-570/1各部名称と働き
NamesandFunctionsofParts
09
OpticalFiberBaseStationPS-570/1
フロントパネル
Frontpanel
Turnsthepoweronoroff.
光信号の通信状況を表示します。
HD:HD-SDI信号がカメラアダプタから送られているとき点灯します。
消灯の場合はSD-SDI信号が伝送されています。
LS:レーザー信号がカメラアダプタから送られているとき点灯します。
電源のON,OFFを切換えるスイッチ。
POWERSwitch
OperationStatusIndicator
Indicatesthecurrentsystemstatus.
HD:LightsupwhentheHD-SDIsignalisreceivedfromtheCameraOpticalAdaptorPS-470.
LS:LightsupwhentheLasersignalfromtheCameraOpticalAdaptorPS-470isreceived.
LEDOFF:WhentheSD-SDIsignalisreceived.
LightsupwhenthePOWERswitchison.
電源ONのとき点灯します。
POWERIndicator
4W
I/O
EXTLINE(4WI/O) INTERCOM HEADSET
INTERCOMEXTLINE4WI/OON/OFFswitch
Turnsonorofftheconnectiontotheexternal4-wireintercomline.
外部インターカム4Wラインへの接続をON/OFFします。

PS-570/1各部名称と働き
10
OpticalFiberBaseStationPS-570/1
フロントパネル
Frontpanel
インカムを使用する場合にヘッドセットを接続するコネクタです。
リアパネルの XLR5S コネクタに接続した外部 4W インカムシステムの入力、出力レベルと SIDETONE を調整します。
INCOMヘッドセットコネクタ(キャノン4P)に接続されたヘッドセット(DL-400)のMICレベルとH.Pレベル,SIDETONE
を調整します。
TALLYSELECTスイッチの選択により、リアパネルのTALLYINにタリー信号が入力されると点灯します。
TALLYIndicator
EXTLINEVolume
INCOMVolume
INCOMconnector(XLR4-pin)
LightsupaccordingtothesettingoftheTALLYSELECTswitchwhentallysignalisinputtotheTALLYIN
connectorontherearpanel.
Adjustthevolumeoftheinput/outputandthesidetoneofanexternal4-wireintercomsystem
connectedtotheAUX/INCOM4Wconnector(XLR5-pin).
Adjustthevolumeofthemicrophone,theheadphoneandthesidetoneofthesuppliedIntercomheadset
DL-400connectedtotheINCOMconnector(XLR4-pin).
ConnectthesuppliedIntercomheadsetDL-400.
Fortheheadsetonly.Donʼtconnectanexternalpowersupply.
※ヘッドセットのみ可。12V接続不可。壊れる可能性があります。
SelectsthetallychannelandtheTALLYSELECTswitchtotheONpositiontolightuptheTALLYindicator.
TALLYSELECTSwitch
タリーを点灯させるチャンネル1〜5CHのスイッチを選択してONします。

PS-570/1各部名称と働き
11
OpticalFiberBaseStationPS-570/1
リアパネル
Rearpanel
タリー信号を入力させる15Pコネクタ。
スイッチャー等からのタリー信号を次のPS-570に送るためのコネクタです。
TALLYINconnector(HDD-sub15-pin,female)
TALLYOUTconnector(HDD-sub15-pin,female)
15ピン入力端子
1
2
3
4
5
6
7
8
9
TALLY1
TALLY2
TALLY3
TALLY4
TALLY5
10
GND
11
12
13
14
15
12345
6789
10
15 14 13 12 11
Inputthetallysignalfromaswitcher.
HDD-sub15-pinconnector
Pinassignment
OutputthetallysignalsinputfromaswitchertootherPS-570.
1500
TallyCableColorassignment
Connectanopen-collectororarelaycontacttolightuptheTALLYindicatoronthefrontpanel.
Fortheconnectiontoaswitcher,pleaserefertotheinstructionmanualofaswitcher.
Usethesuppliedcable.
オープンコレクタまたは接点を接続して下さい。
スイッチャーの接続についてはスイッチャーの取扱説明書を参照ください。
付属のケーブルをご使用ください。
HD-SDI
RET IN

PS-570/1各部名称と働き
12
OpticalFiberBaseStationPS-570/1
リアパネル
Rearpanel
不平衡2WタイプのINCOMラインに接続するコネクタ。
INCOM2Wconnector(XLR3-pin,female)
1 GND
2 NC
3 INCOMH
BALANCE4WタイプのINCOMラインに接続するコネクタ。
AUX/INTERCOM4Wconnector(XLR5-pin,female)
1 GND
2 AUXINH
3
4
5
AUXINL
AUXOUTH
AUXOUTL
Connectwithanexternal2-wire(unbalanced)intercomline.
Connectwithanexternal4-wire(balanced)intercomline.
RET映像(コンポジットまたはHD-Y信号)を入力します。カメラのVFの入力に合わせて入力します。
この信号はPS-470のIFOUTコネクタ(6-pin)から出力されます。
他のPS-570と接続するBNCコネクタです。
RETINconnector(BNC)
GENLOCKconnector(BNC)
INCOMconnector(BNC)
光カメラアダプタ(PS-470)と光ケーブル(別売ALC-100M他)にて接続するコネクタです。最大2000Mまで使用可能です。
OPTCABLEconnector
InputtheRETsignal(compositeorHD-Y)fromaswitcher.InputtheappropriatesignalaccordingtotheVF
ofthecameraconnectedtotheCA.TheinputsignalisoutputfromtheIFOUTconnectorofPS-470.
このコネクタにGENLOCK信号を入力します。
InputtheGenlockreferencesignalfromanexternalsignalgenerator.
ConnectwiththeintercomlineofotherPS-570tocommunicate.
ConnectwiththeOpticalFiberCameraAdaptorPS-470byanopticalfibercable.
Themaximumlengthofanopticalfibercableis2000meters.
Donʼtlookintotheinsideoftheconnector.Thelaseremissionmightdamageyoureyes.
※コネクタ先端からはレザー光が放射されている恐れがあります。安全のため覗き込まないで下さい。
リモコンをTCモードに切換えた時タイムコードの入出力として信号を入出力します。
TCIN/OUTconnector(BNC)
Input/outputthetimecodesignal.

PS-570/1各部名称と働き
13
OpticalFiberBaseStationPS-570/1
リアパネル
Rearpanel
光カメラアダプタ(PS-470)に入力されたHD-SDIまたはSD-SDIの信号が出力されます。
HDかSDかがOperatonstatusindicatorに表示されます。
Connecttothecameramanufacturerʼsremotecontrollerbythecablesuppliedwiththeremotecontroller.
PS-570をDC駆動にて使用する場合は、PS-570から光カメラアダプタ(PS-470)には電源が供給されません。
AC100V-200V(85V〜240V50/60Hz入力コネクタ
HD-SDI/SDIOUTconnector(BNC)
DC12VINconnector(XLR4-pin)
REMOTEconnector(8-pinor10-pin)
ConnecttoanLANCremotecontrollerbythecablesuppliedwiththeremotecontroller.
REMOTEL(LANC)connector(φ2.5minijack)
ACINconnector
FAN
OutputstheHD-SDIorSD-SDIsignalfromtheOpticalFiberCameraAdaptorPS-470.
Signalformat,HDorSDisindicatedattheOperationstatusindicator().
ConnectwiththeDC12Vpowersupply.
ConnectwiththeAC85V~240V(50/60Hz)power.
各カメラメーカー製カメラリモコンをリモコン付属のケーブルで接続します。
※専用機器以外接続不可
LANCリモコンを接続します。
Donʼtclogthecoolingfun.Donʼtcovertheventilationslitsupside.
※ファンをふさがないこと。また筐体上部のスリットをふさがないこと。
ForanLANCControlleronly.
NopowerissuppliedtotheOpticalFiberCameraAdaptorPS-470whentheOpticalFiberBaseStation
PS-570runswithDC12Vpower.
POWERスイッチONのとき回ります。
TurnswhenthePOWERswitchison.
HD-SDI/SDIRETINconnector(BNC)
InputstheHD-SDIorSD-SDIsignalfromaswitcher,etc.
TheinputreturnsignalisoutputfromtheHD-SDIRETOUTconnectorofPS-470,
HD-SDIまたはSD-SDIRET信号を入力します。
入力された信号はPS-470のHD-SDIRETOUTコネクタから出力されます。

Connection
14
三脚に装着します。
Mountthecamcorderonatripod.
1
2
FixtheCameraAdaptorPS-470totheV-shoemountofthecamera.
カメラのVシューマウントにPS-470を固定します。
OpticalFiberStudioSystemPS-470/1PS-570/1
PS-470/1PS-570/1接続方法
MakesuretoturnoffthePOWERswitchofeachunitbeforeconnecting.
接続する前に必ず各機器の電源スイッチをOFFにしてください。
三脚への取り付け
Mountonthetripod

15
PS-470のHD-SDI/SD-SDIコネクタへカメラのHD-SDI/SD-SDI出力からBNCケーブルで接続します。
ConnecttheHD-SDI/SD-SDIINconnectorandtheHD-SDIoutputconnectorofthecamerawithaBNCcable
from
camera
HD-SDI/SD-SDIOUT
1
GEN
LOCK
REMOTE L
RET OUT
HD-SDI/
SDI IN
TC
IN
TC
OUT
MADE IN JAPAN
TALLY DC OUT
IF OUT
HD-SDI/
SD-SDIIN
Connection
PS-470/1PS-570/1接続方法
HD-SDIビデオ信号の接続
HD-SDIvideosignalconnection
PS-570のHD-SDI/SDIOUTコネクタからスイッチャー、VTRもしくはモニターへBNCケーブルで接続します。
HD-SDI/SDIOUTconnector
2
ConnecttheHD-SDI/SD-SDIOUTtoaswitcher,amonitororavideorecordingequipmentwithaBNC
cable.
to
monitor(HDF-700,etc.)
switcher,etc.
HD-SDI
HD-SDI
RET IN

16
Connection
PS-470/1PS-570/1接続方法
リターンHD-SDIビデオ信号の接続
RETURNHD-SDIvideosignalconnection
1
HD-SDI リターンビデオ信号の出力は、HD-SDIRETOUT コネクタからモニター等へ BNC ケーブルで接続します。
ConnecttheHD-SDIRETOUTconnectortoamonitor,etc.withaBNCcable.
GEN
LOCK
REMOTE L
RET OUT
HD-SDI/
SDI IN
TC
IN
TC
OUT
MADE IN JAPAN
TALLY DC OUT
IF OUT
HD-SDI
RETOUT
(BNC) to
monitorHDF-700
etc.
HD-SDIreturnvideosignal
HD-SDIRETINコネクタにRETHD-SDI信号をBNCケーブルで接続します。
ConnectthereturnHD-SDIvideosignalfromaswitchertotheHD-SDIRETINconnectorwithaBNCcable.
HD-SDIRETINconnector
2
from
switcher,
etc.
returnHD-SDIvideosignal
HD-SDI
HD-SDI
RET IN

17
Connection
PS-470/1PS-570/1接続方法
リターンコンポジットビデオ信号の接続
RETURNcompositevideosignalconnection
1
GEN
LOCK
REMOTE L
RET OUT
HD-SDI/
SDI IN
TC
IN
TC
OUT
MADE IN JAPAN
TALLY DC OUT
IF OUT
RETINconnector
2
from
switcher,
etc.
LVM-89Wを使用する場合は、PS-470からLVM-89Wへ6Pケーブル(VC-450)で接続します。
WhenusingthemonitorLVM-89W,connecttheIFOUT(monitorinterface)connectorofPS-470
totheMONIIFconnectorofLVM-89Wwiththe6-pincable(VC-450).
IFOUT
(6-pin) to
LVM-89W
returncompositevideosignal
TALLYsignal
DCpower
returncompositevideosignal
PS-470IFOUT6-pinコネクタにLVM89Wを接続して使用する場合は、RETINコネクタにはコンポジット信号を接続します。
WhenusingLVM-89WconnectedtotheIFconnectorofPS-470,connectthecompositevideosignal
totheRETINconnectorwithaBNCcable.
HD-SDI
HD-SDI
RET IN

18
3Fituptheviewfinderinterfaceunit(VIF-100,optional)tothecamcorderandconnecttheviewfinder,the
viewfinderinterfaceunit,PS-470andthecamcorder.
リターン画をビューファインダーに映す場合;
カムコーダーにビューファインダーインターフェイスユニット VIF-100 を取り付けて、PS-470から 6 ピンケーブルで
接続します。
VF
LENS
Camera
VF
LENS
CAMVF
CAMLENS
LENS
VF
VIF-100
RET
IN
ビューファーインターフェイスユニットVIF-100(別売)の取付け方:
ビューファーのマイクホルダーのネジをゆるめてマイクをはずし、VIF-100をマイクホルダーに吊り下げて、ケーブルで接続します。
PROTECH
VIF-100
(forSONY)
ソニーカメラ用
VIF-100P
(forPanasonic)
パナソニックカメラ用
VierfinderInterfaceUnit(VIF-100,VIF-100BC,VIF-100P,optional)fittingup:
Loosenthescrewofthemicrophoneholderandremovethemicrophone.AndhangtheViewfinder
InterfaceUnit(VIF-100)ontheholderandconnectwithCA,camcorder,andlensbycables.
PROTECH
VIF-100BC
(forSONY)
ソニーカメラ用
PDW-355,PDW-335,etc. PDW-,HDW-,etc.
IFOUT
(6-pincable)
Connection
PS-470/1PS-570/1接続方法
GEN
LOCK
REMOTE L
RETOUT
HD-SDI/
SDI IN
TC
IN
TC
OUT
MADEIN JAPAN
TALLY DC OUT
IF OUT
GEN
LOCK
REMOTE L
RET
OUT
HD-SDI/
SDI IN
TC
IN
TC
OUT
MADE IN JAPAN
REMOTE DC OUT
IF OUT
forcompositesignalonly forHD-Ysignalonly forcompositeorHD-Ysignal
accordingtothecameraused
コンポジット信号のみ HD-Y信号のみ コンポジットまたはHD-Y信号
(カメラのVFに合わせてください)
Incaseofusingtheviewfindertodisplaythereturnsignal
RETIN
RETURN
compositeorHD-Ysignal
RETURN
compositeor
HD-Ysignal
RETURN
signal
リターンコンポジットビデオ信号の接続
RETURNcompositevideosignalconnection
SelectthecompositeorHD-Ysignal
accordingtotheinputsignaltothe
cameraconnectedwiththePS-470.
HD-SDI
RET IN
HD-SDI

19
PS-470のGENLOCKコネクタからカメラのGENLOCKINコネクタへBNCケーブルで接続します。
ConnecttheGENLOCKconnectortotheGENLOCKinputconnectorofthecamerawithaBNCcable.
to
camera
GENLOCKIN
1
GEN
LOCK
REMOTE L
RET OUT
HD-SDI/
SDI IN
TC
IN
TC
OUT
MADE IN JAPAN
TALLY DC OUT
IF OUT
GENLOCK
Connection
PS-470/1PS-570/1接続方法
GENLOCK信号の接続
GENLOCKsignalconnection
GENLOCKconnector
GENLOCKreferencesignal
GENLOCKreferencesignal
from
Genlock
reference
signal
generator
GENLOCKINコネクタにGENLOCK信号(コンポジット信号)発生器をBNCケーブルで接続します。
HD-Y信号が必要な場合はHD-Y信号を入力して下さい。
ConnecttheGENLOCKconnectortoaGenlockreferencesignalgeneratorwithaBNCcable.
2
HD-SDI
RET IN
HD-SDI

20
TCINにVTR等のTCOUT信号を、TCOUTにVTR等のTCIN信号を接続します。
ConnecttheTCIN/OUTtothetimecodein/outconnectoroftheexternalrecordingequipment.
TCIN/OUTconnector
1
fromVTR,etc.
Connection
PS-470/1PS-570/1接続方法
TC信号の接続
TimeCodesignalconnection
toVTR,etc.
TCsignal
This manual suits for next models
3
Other NIPROS Camera Accessories manuals
Popular Camera Accessories manuals by other brands
Panasonic
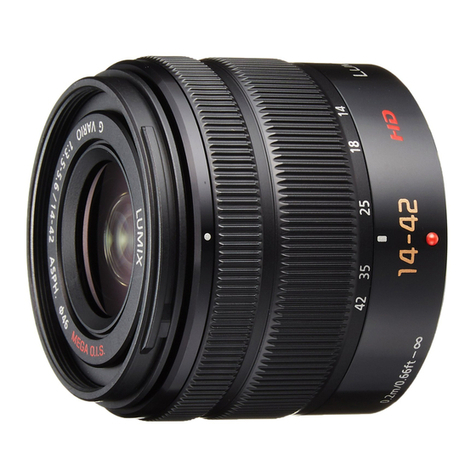
Panasonic HFS1442A operating instructions
Ikelite
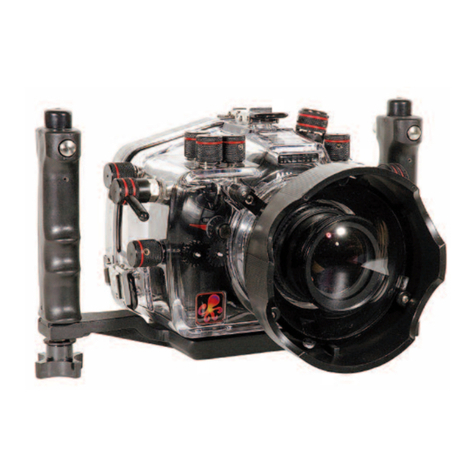
Ikelite Nikon D200 instruction manual

Hasselblad
Hasselblad HTS 1.5 User manuals
Torqeedo
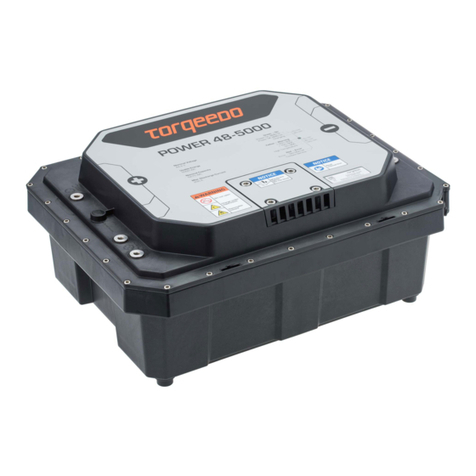
Torqeedo Power 48-5000 Translation of the original operating instructions

Vincent Associates
Vincent Associates UNIBLITZ T132 instruction manual

Hitachi
Hitachi FDS 12DV manual

Panasonic
Panasonic AW-PB506AN operating instructions

Phase Trigger
Phase Trigger Event 5.6 operating instructions
Westfalia
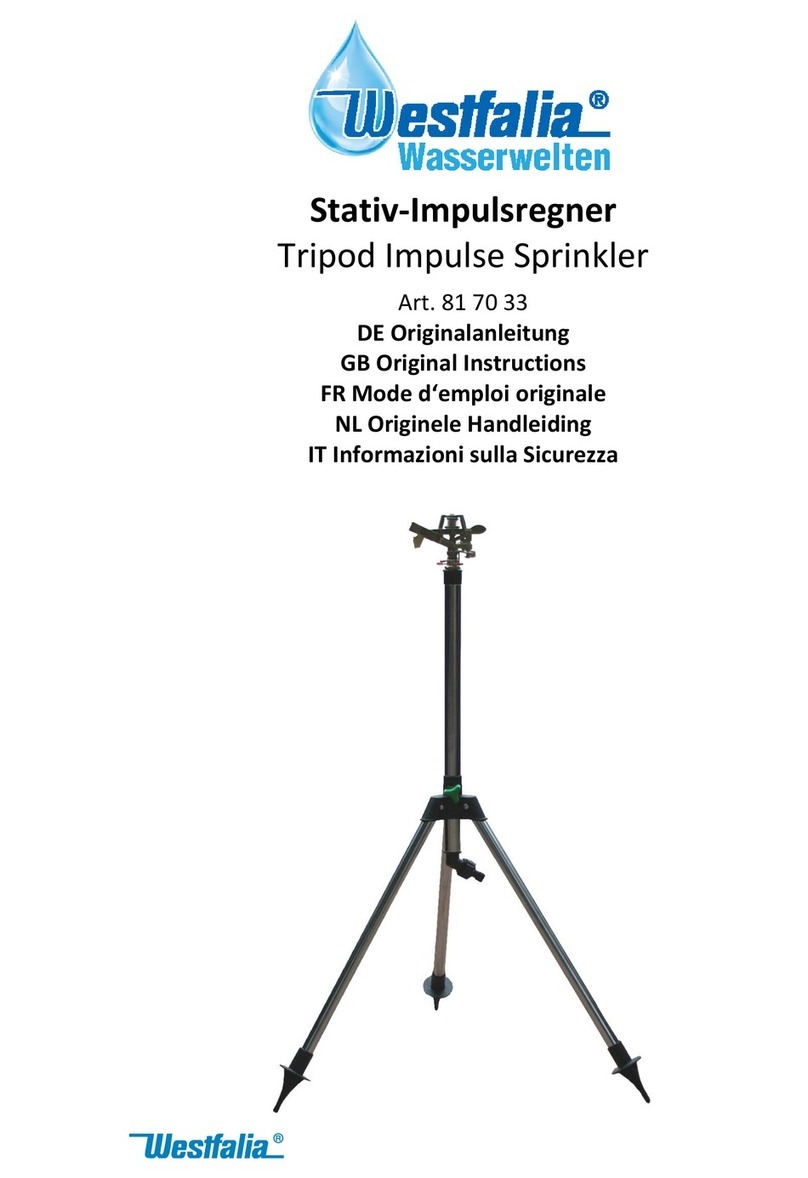
Westfalia 817033 instructions

ARTHUR HOLM
ARTHUR HOLM DynamicVision AHDVDOC01 Mounting instructions
EnerSys
EnerSys IRONCLAD Instructions for use
Starlight Xpress
Starlight Xpress SX Spectrograph PRO Handbook
