NiteFlux Red Zone Series User manual
NiteFlux Red Zone Manual 2021 Page 1 of 8
Red Zone Product Intro, 2021
•Charge before use
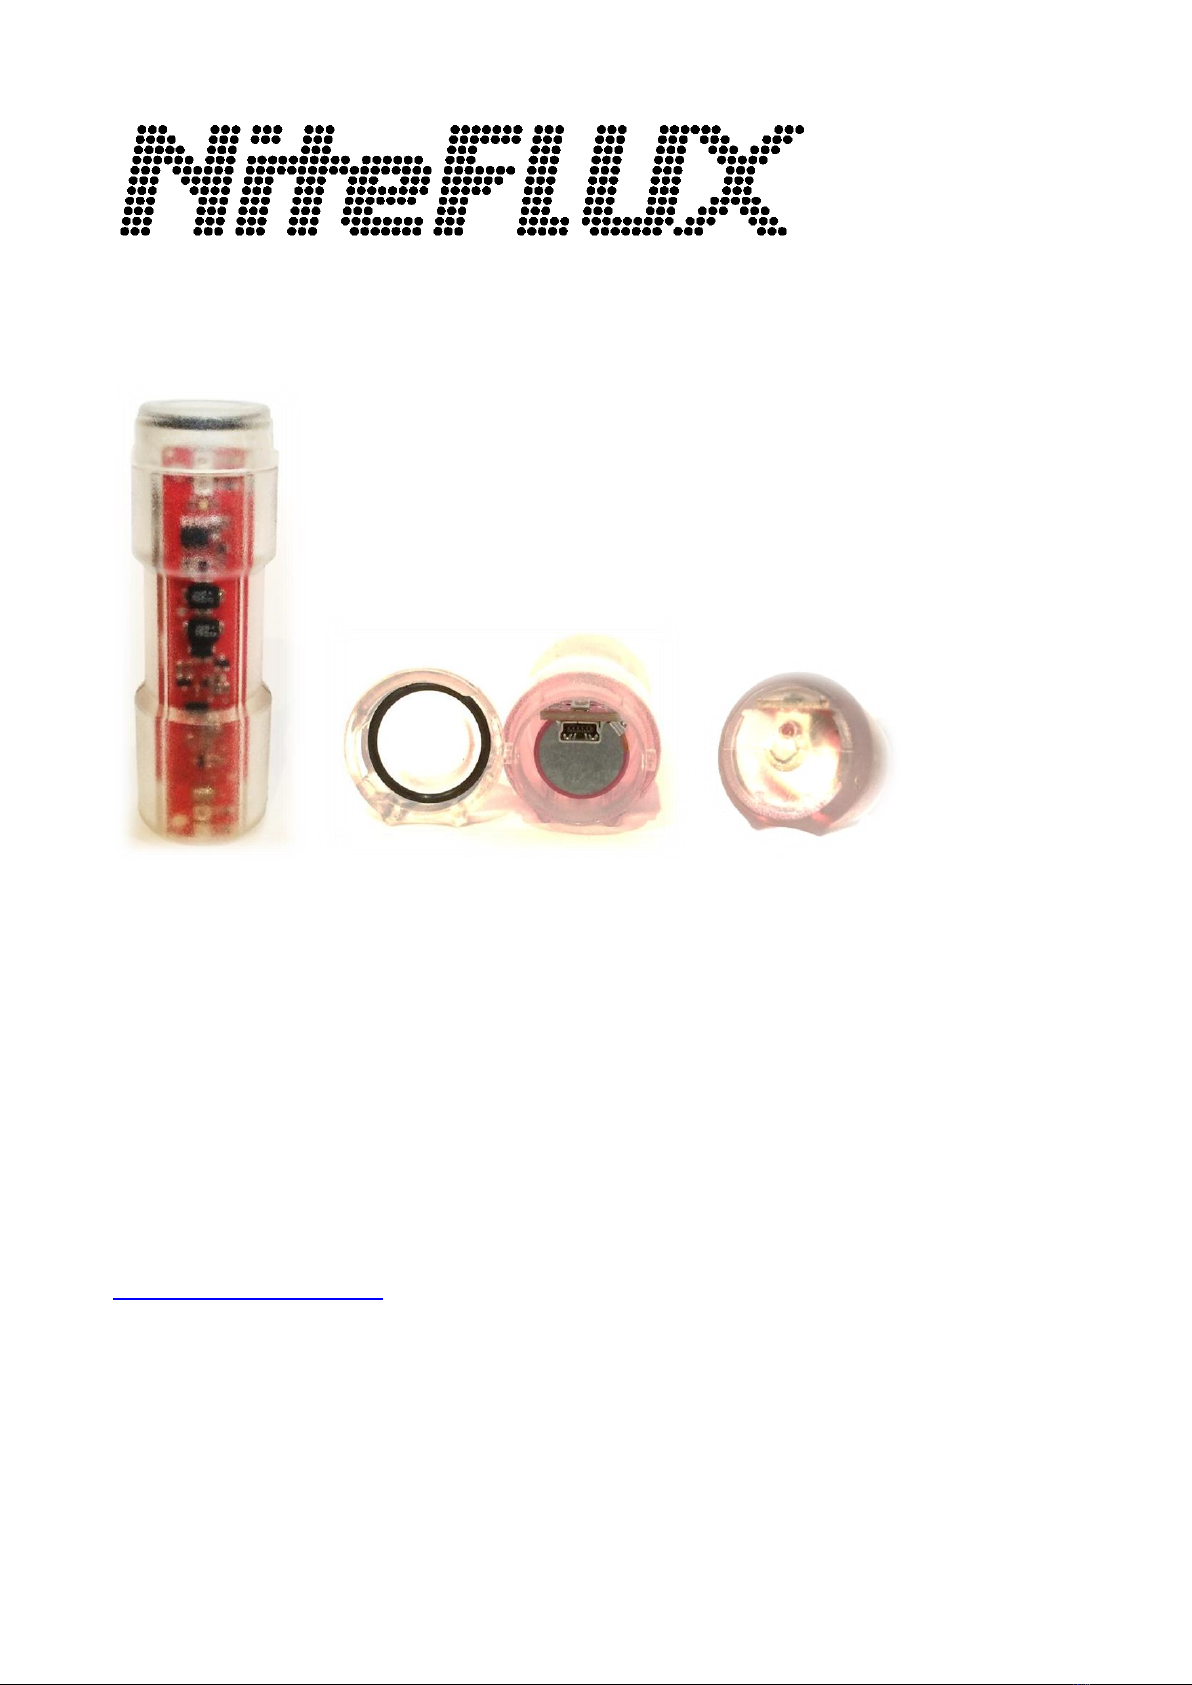
•One end of the clear plastic housing twists off to access USB socket for charging.
•Other end has red button switch inside, behind a thin-walled section of the tube.
oActivate the switch by pressing the thin-walled end with your thumb.
•Use USB cable for charging from computer or phone/ipod charger or similar.
•Press switch button to turn on or change modes. Hold one second to turn off.
•1-4 soft flashes at turn-on, and turn-off indicate runtime remaining.
•Strap and removable ties are included for universal mounting. Or, use quick release clips
available at our online store
•Mount with charger cap end upwards, switch end facing downwards.
www.niteflux.com

NiteFlux Red Zone Manual 2021 Page 2 of 8
2021 NiteFlux Red Zone series
Product Manual
Using mode button
•Look through the ends of the clear light casing. One end has a red button inside; the other has a
USB receptacle for charging.
•Press button briefly to turn on, or change modes.
•Hold one second to turn off.
Remove end for charging.
•The end cap that covers the USB charging has a bayonet style fitment; twist to release.
•The cap may get water or dirt within the mechansism, but this should not pass the o-ring seal. If
the cap becomes dirty, it can be washed while the unit is on charge.
•Remember to re-seat the o-ring if it comes out during washing.
•If o-ring ever needs replacing, it is a hard-to-find 50-duro part. Spare parts are available at the
NiteFlux website.
Charging
•Power for charging the Red Zone is passed into the USB socket. You can use a USB port on
any computer, iPod charger, 5V car adapter or similar. Anything with a USB socket and 5V,
500mA rating or higher will work. Some 5V chargers (eg Motorolla, Garmin) have the same
USB plug (USB mini) and will also do a good job.
•NiteFlux provides a short (USB mini) cable. Other suitable USB mini cables are widely
available in other lengths. You may have other cables at home or office with USB mini on one
end. There is no special cable properties required. Any USB mini cable will normally work
well.
•During charging, orange LED indicator means charge in progress. Plain green indicates charge
done. It is normal for the orange to blink on again from time to time. This indicates charge is
being topped up or maintained.
•Charge before use. The Red Zone can be recharged at any time. There is no need to wait for
batteries to finish any sort of cycle.
How to I tell what version I have?
•Through the plastic casing, you can see the LED emitters at the end of the circuit board.
oRed Zone 8 has 2 red emitters each end. Red Zone 4 has 1 red emitter each end.
NiteFlux Red Zone Manual 2021 Page 3 of 8
Range of power settings
•The Red Zone has a wide range of power levels as outlined in the table below. The unit is
shipped with settings 1, 5, and 8 active. All the rest are blanked out. You can edit this power
menu at any time and choose your own favorites. Most people will settle for a small number of
active settings, the actual levels that are chosen allows for personal preference. It is
recommended that at least one softer setting be retained for use at night, and one bright flashing
be retained for use during the daytime.
•Skipping a power setting is very easy. Just click the mode button until you get to the setting that
you want to remove. Then hold the button down and the light will turn off. Keep holding the
button down. After 5 seconds continuous hold, the light will come back on and the unwanted
power setting will be gone. The light will come back in the power that is next on the active list.
•NB: while it is very easy to skip a single power setting, skipping several and keeping track of
the power settings that remain is more difficult. It is recommended that you sit in a quiet
location so that you can concentrate. Write out a list with all 8 power settings on. Cross off the
power settings as you deactivate them.
•If you use the 5-second hold to skip the last remaining power setting, the whole list will return
and you can start over again.
•Visit the NiteFlux website for a video that shows how to edit the power menu. Find it on the
Red Zone product page in the instruction manual tab.
All 2021 models use constant power regulation
Power
(rz8)
Light
output
Runtime
Power
(rz4)
Light
output
Runtime
8
Solid 2W
125 lm
4 hrs
Solid 1W
64 lm
8 hrs
7
Solid 1W
64 lm
8 hrs
Solid 0.5W
32 lm
16 hrs
6
Solid 0.5W
32 lm
16 hrs
Solid 0.25W
16 lm
32 hrs
5
Flash 8W
500 lm
4 hrs
Flash 4W
250 lm
8 hrs
4
Flash 6W
375 lm
6 hrs
Flash 3W
185 lm
12 hrs
3
Flash 4W
250 lm
8 hrs
Flash 2W
125 lm
16 hrs
2
Flash 2W
125 lm
16 hrs
Flash 1W
64 lm
32 hrs
1
Flash 0.25W
16 lm
100+hrs
Flash 0.25W
16 lm
100+hrs
Recharge
6hrs
Recharge
6hrs
Settings lock:
If you have kids around that fiddle with your stuff, or perhaps if you are the manager of a fleet of
cycles and want to set up and keep the settings from being changed, you can use the settings lock
function. When the lock is set, neither the power settings, nor the flashing settings can be changed.
•Start with light turned off, charger unplugged.
•Hold the button down before connecting the charger. Keep hold until the charger is connected.
Release the button once the charger is connected.
oA distinctive fast, repetitive flashing pattern in the orange-green charge light indicates
the lock is set. The flashing will expire after 30 seconds, but the lock is stored in
memory.
•To remove the lock, start with light turned off, unplugged, then repeat as above.
oObserve normal charge light function to verify the lock is removed.

NiteFlux Red Zone Manual 2021 Page 4 of 8
Flashing patterns
•The Red Zone ships with a strident quadruple flashing pattern by default. This is certainly eye
catching but some users will have other preferences. The user can choose from 8 different
flashing patterns, including a range of tame single flash options so there is sure to be one that
suits people that are sensitive to bright flashing lights. NB: not all flash patterns yield the same
runtimes.
•To enter the flash selection menu, first switch the light to flashing mode.
•Turn the light off. Turn on and off again quickly. Just holding your finger on the button for 1
second is the easiest way to do this. Repeat 5 times.
•Now turn on and use normal button clicks to scroll through the 8 different options. When the
light is turned off again, the changes are stored in memory.
•You can repeat the process at any time.
•Visit the NiteFlux website for a video that shows how to edit the flashing pattern menu. Find it
on the Red Zone product page in the instruction manual tab.
•Note the video on our site was produced in 2011 but is still valid. When using the 2019 version
(with runtime indicator after turn-off), be sure to wait for the flashes to stop before turning on
again.
Low Battery Indicator
•When the battery voltage gets lower, the flash pattern will change from the default quadruple
flash (or whatever option the user has selected) to a brief single flash. The power will also
revert to a low setting. The battery should be recharged as soon as convenient. If the light is in
a solid mode, then it will begin to blink and will blink more frequently as the battery voltage
gets lower.
•If the battery voltage gets very low, the light will shut off.
•NB: it is recommended to avoid relying on low battery indicators for cue to recharge. There can
be considerable variation in the length of warning that this basic system gives, depending on the
age of the battery, and the ambient temperature conditions. It is recommended to recharge
regularly and avoid running out of charge while out riding.
Runtime indicator
•1 - 4 soft flashes immediately after turn-on, and after turn-off indicate remaining runtime as a
fraction of full charge
o4 flashes: between full and ¾ full.
o3 flashes: between ¾ and ½ full
o2 flashes: between ½ and ¼ full.
o1 flash: between ¼ full and empty. Recommend recharge when convenient.
•If the battery ever gets to the low battery indicator, the nominal runtime is re-recorded. Thus
the runtime indicator adapts to changed runtime over the life of the product.
•Runtime indicator does not work until first complete charge. Charge before first use.
•Indicator level resets to 4 flashes on full charge, once green charge light is showing for one
second at a time or more.
•Partial/incomplete charge locks indicator to just one flash. Complete recharge to unlock.
NiteFlux Red Zone Manual 2021 Page 5 of 8
Attachments
The Red Zone produces a strong light, across a very wide angle. This simplifies mounting issues as
there is no need to be concerned with precise alignment. Generally, any position that leaves the
light facing approximately rearwards will be effective.
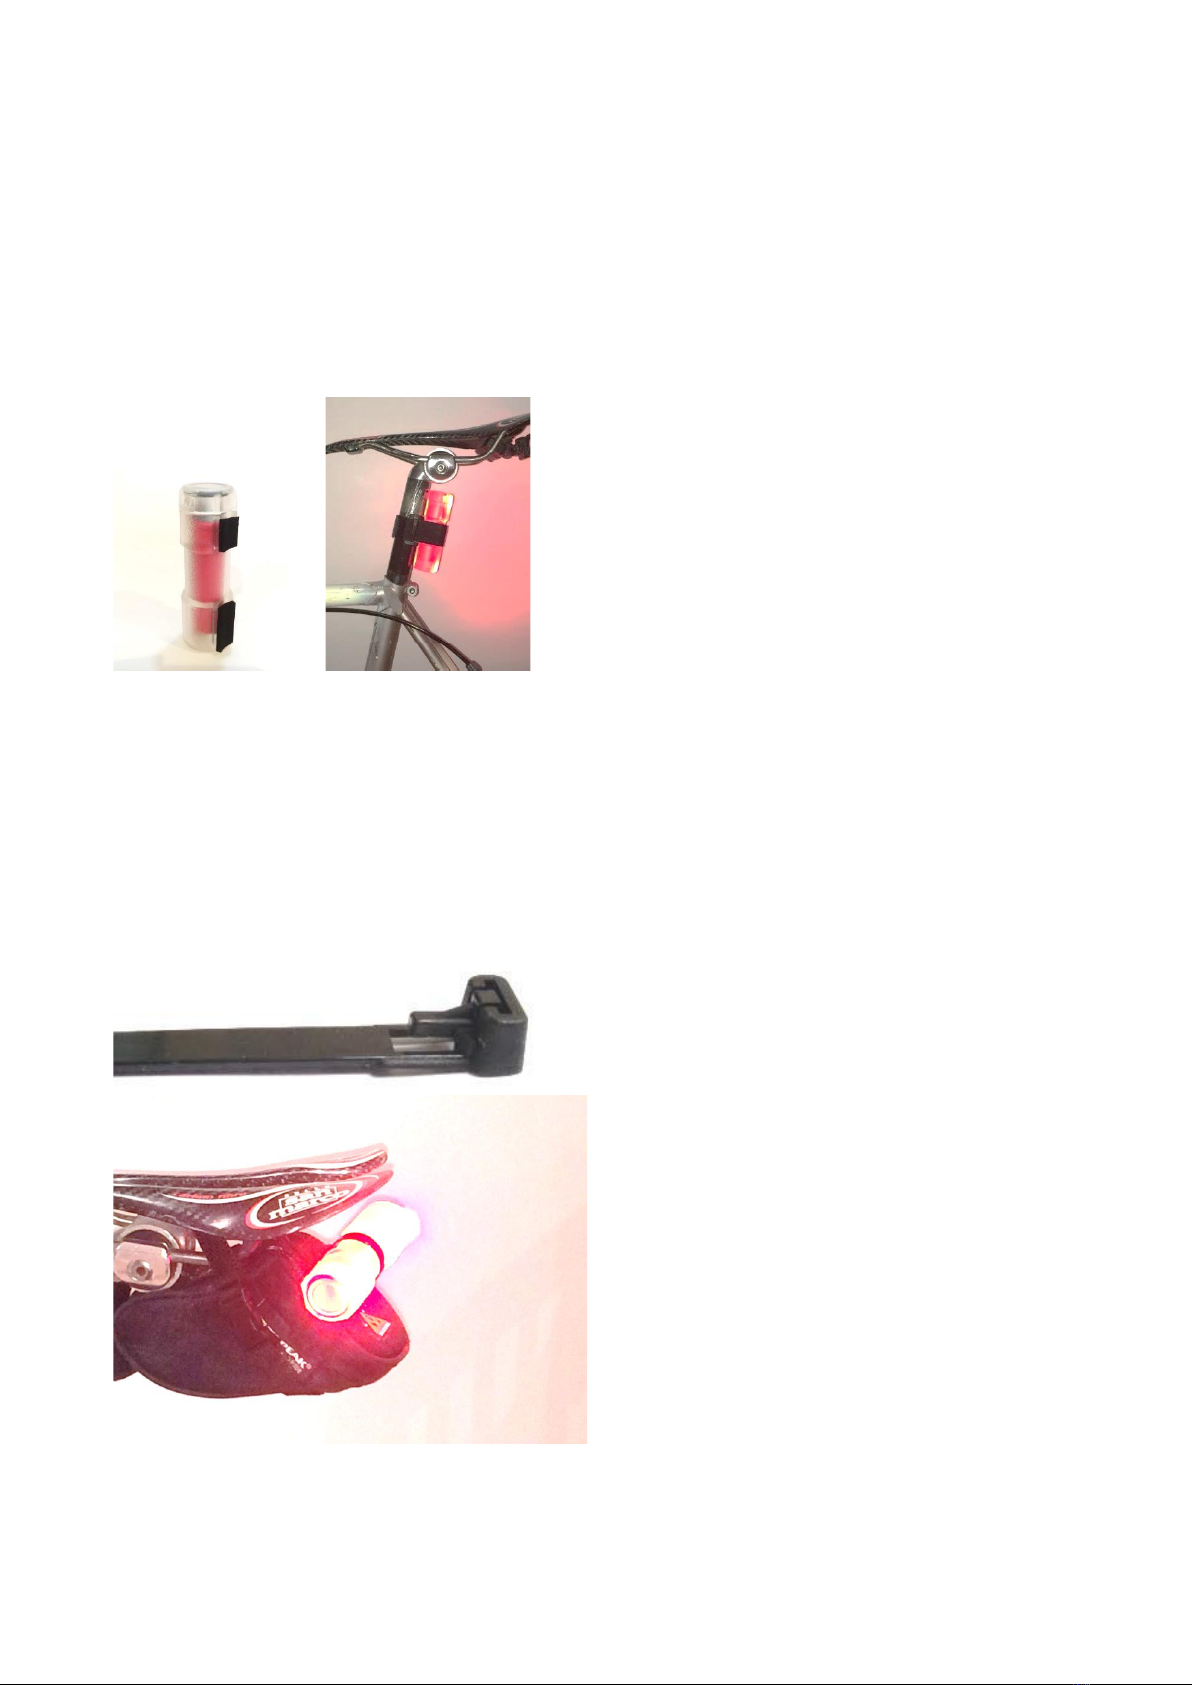
Seat Post:
Attach two Velcro dots to seat post and hook pads to light casing. A simple Velcro strap secures to
the seat post. Use scissors to remove excess strap length so it won’t snag on your pants.
Mount with charger cap upwards and switch downwards.
Saddle Bag and backpack loops:
Saddle bag is a popular location, especially on bikes where the seat post is very short.
When mounted on a back pack, you can carry with you. Saves time removing when you park the
bike in public spaces.
Use a releasable cable tie; through the loop on your bag and around the red zone tube. This system
is simple and very secure. NiteFlux supplies a couple of these releasable ties with the kit but they
are also available at our website or electronics stores.
NiteFlux Red Zone Manual 2021 Page 6 of 8
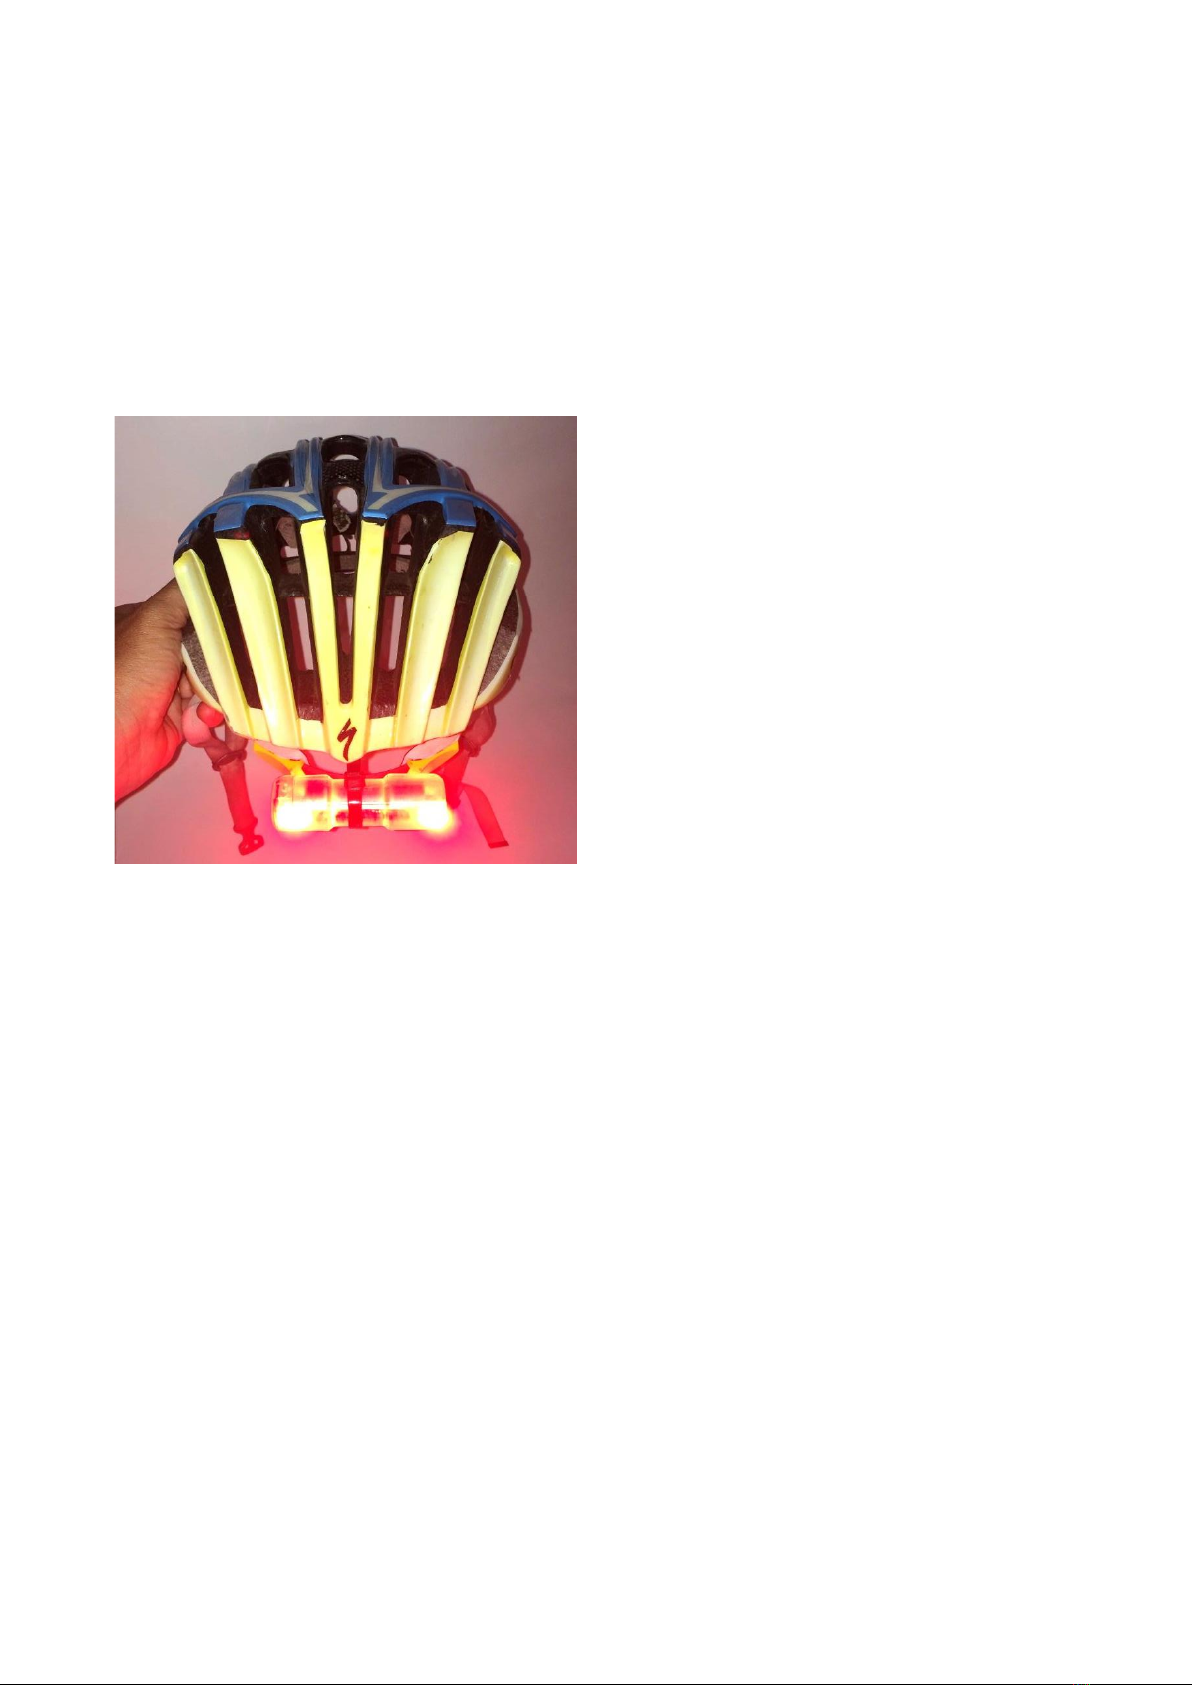
Helmet
Helmet mounting is a popular way to get the light up high and visible above some surrounding
vehicles in traffic. It is also a popular choice for people that ride many different bikes but wear just
one helmet. It is also a very aero-dynamic position.
Use a releasable cable tie and secure to the occipital strap. Very comfortable and won’t interfere
with the balance of the helmet when wearing, or during crash.
There is no need to remove the light for charging, just remove the end cap and charge in-situ.
Other locations
Because the end cap quickly and easily removes for charging, it is possible to make more
permanent attachment to bags, or other bike parts with non-releasable cable ties or other methods.
So long as the end cap is removable, and your charge cable is long enough, you may recharge the
light in place.
NiteFlux Red Zone Manual 2021 Page 7 of 8
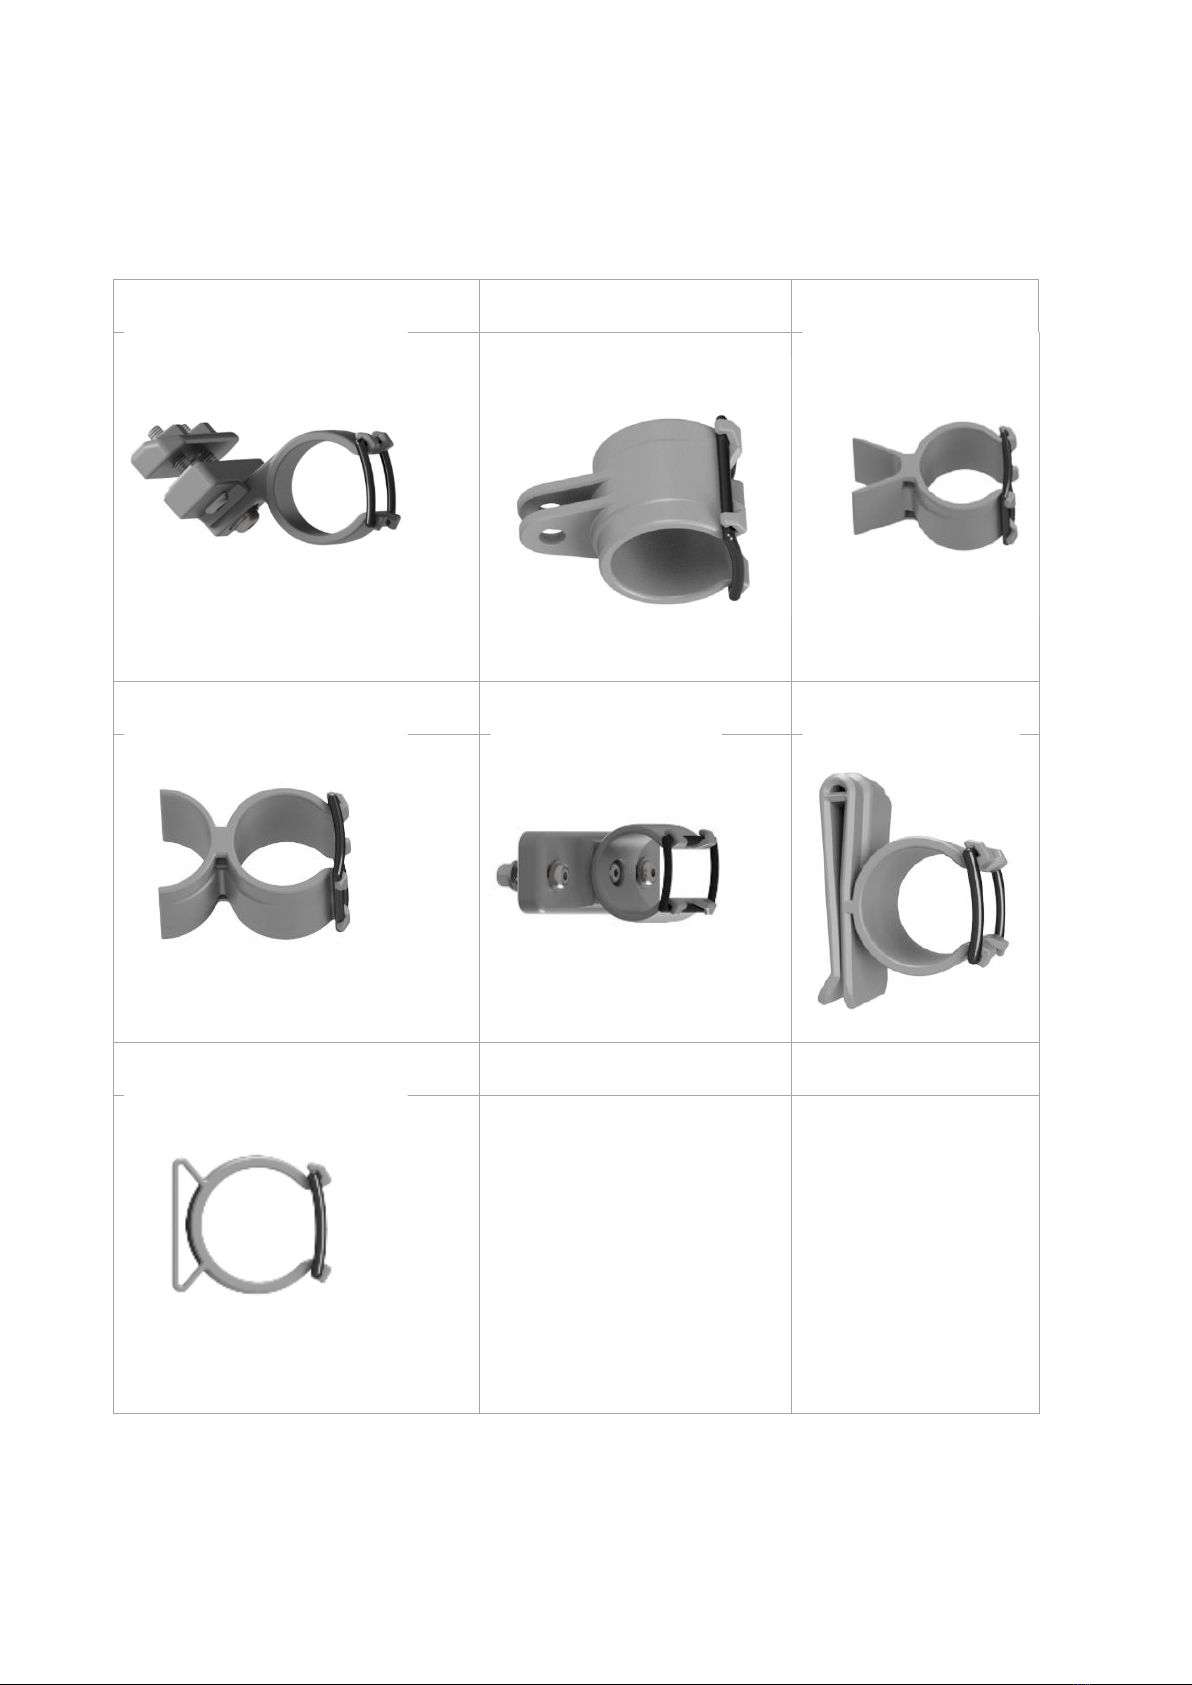
Quick release clips
NiteFlux has sold thousands of red zone lights without quick release clips over the years.
In 2021, NiteFlux produces and sells a comprehensive range of quick release clips on our website.
Details on the site include interactive 3D models to view exactly how parts relate.
Saddle rail clip
GoPro clip
Aero tube clip
Round tube clip
Panel mount clip
Belt clip
Strap clip

NiteFlux Red Zone Manual 2021 Page 8 of 8
Warranty
•NiteFlux will, at their discretion, repair or replace the product, or any necessary component
part if it is found to be defective in materials or workmanship within one year of purchase.
•Extended warranty options are available, up to three years total. Visit the NiteFlux website
to add extended warranty within 30 days of purchase.
•Any claim for warranty must be made via the NiteFlux website. Visit the service page and
follow the necessary instructions. Add the warranty item to your cart ($0) and check out.
You will receive an email with your order number, which will act as your return authority
number (RA#). This RA# must be written on the outside of the package when returned.
Other manuals for Red Zone Series
1
Table of contents
Popular Lighting Equipment manuals by other brands


Lena Lighting
Lena Lighting UV-C STERILON SQUARE HEPA 144W PP Installation instruction

Federal Signal Corporation
Federal Signal Corporation VISTA 581016-OHP Series Installation and maintenance instructions

FLUVO
FLUVO rio Air bubbler Original Operator's Manual

LED World
LED World FA120M30-5M-12V-W manual

Uplus Lighting
Uplus Lighting 200 BLINDER user manual

Sygonix
Sygonix 2336850 operating instructions


