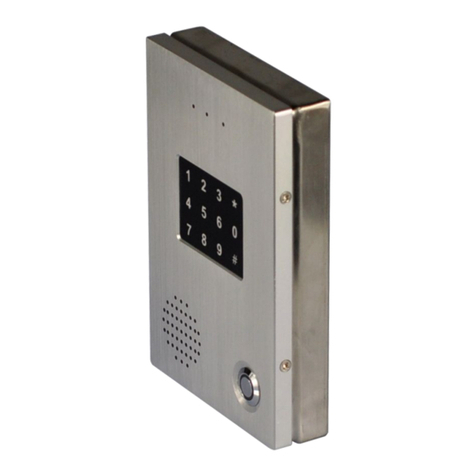
NiteRay Electronic Q502 Service manual

Q502 SIP Door Phone
Administrator Guide
NiteRay Electronic Co. Limited

Quick Specification
Hardware Description:
Features:
Stainless steel case.
Metal wire drawing process face plate.
Waterproof Speaker and bell key.
Relay to connect to door lock , NO/NC
relay mode.
Relay time adjustable.
Use SIP protocol, Easy to deploy.
Directly call to preset telephone.
Volume control.
Hight quality conversation voice.
Full Duplex intercom.
Auto Answer , Auto hand down.
Powerful Web management.
Auto Provision via FTP,TFTP.
Front
Back
1 Indicator Flash while powering up, Lights up during conversation
2 Broadcast
Use stick to press and hold for 5 seconds,Door phone will
broadcast the IP address.
3 Mic Microphone
4 Speaker Water proof Speaker
5 Bell button Bell button/DSS key
6 - -
7 Mounting hole Mounting hole for hardware installation
8
Network
interface
RJ 45 Network interface
9 Wire in hole Knock off this sheet to let Door lock cable in

Accessories:
Adapter
AC input 100-240V,50/60 Hz
DC output 12V 1.5A
Plug 5.5*2.5MM,length 10.5mm
Inside positive
Cable length 1900mm
CAT5 Ethernet cable
Compatible with IEEE 802.3af 48V PoE
standard
Security screw and driver
Data Sheet:
Ethernet Port 10/100mbps
Protocol SIP
Power PoE IEEE 802.3af, 48V
Adapter:12V1A
Network Static IP, DHCP, PPPoE, VPN(L2TP/OpenVPN), NAT,STUN,
VLAN
Audio Codec G.711A/U, G.722, G.723.1, G.726-32, G.729AB
Operation Conditions 0~40 ℃
Relative humidity 20%-85%, non-condensing
Dimensions (mm) 27 *100*160
Weight(Main Body) 471g
Packing weight 1KG
Relay NO and NC
Mounting hole pitch Horizontal: 60mm; Perpendicular: 115mm

Log in
The door phone has a web manage interface, all configurations will be set on it.
(Remark:The default network mode of the door phone is DHCP, if you are using Stitac IP
or PPPoE in your system, you could connect it to a DHCP server/router to set the network
firstly and set the network and other configurations, then plug it into your current
system.)
1. Get the door phones IP
There 2 ways to get the IP address of the door phone:
A.Log in your Router/DHCP server and see in DHCP client list, you would find the door
phone in the list. The mac ID label on the main board would help to find it easier.
B. Press the ‘
’ key and hold for over 5 seconds, the door phone will broadcast the IP
address automatically.
2. Log in
On the web browser, fill in the IP
address and press enter, the page will
turn to the door phone’s manage
interface.
Log in with user name :admin ;
Password:admin .
Quick set up with wizard
You could set up the door phone with the wizard, it will help you to set the door phone
up step by step.

Network settings
In Network tab, WAN tab, you could set up the network settings of the door phone,
select the suitable one according to you network condition. Click ‘Apply’ after change
the values.
1. DHCP:
Default mode of the door phone network is DHCP, the door phone will get IP
address from your router automatically.
2. Static IP:
Set up the Static IP Address, please fill the form as your network administrator
requires.

3. PPPoE:
Set up the PPPoE register informations, please note that, the User and password
are the account and password your ISP provide to you.
4. Proxy:
In some network conditions, you might need to set up the Proxy or using a VPN.
For Proxy please refer to “VoIP settings”, you could set up the proxy details in the VoIP
basic setting form.
5. VPN (virtual private network ):
In ‘SECURITY’->VPN tab, Enable VPN, and select the right VPN protocol you are
currently using, fill in the your VPN server address, user , password and then click
‘Apply’.

VoIP settings
1.Basic settings:
a) Fill in the Registration information in the left part of the form, select ‘Enable
Registration’ and then click’Apply’
b) If you need to use a proxy server, please fill the proxy information in the right
part of the form.
2.Codec settings
Normally you do not need to set the codecs, the phone will use a suitable one. But
for some reasons, like network bandwidth limit, or SIP server requirement, you
could set this up accordingly.
Select a codec,use to add to enable list, use to remove.
Use and to adjust the codec list.Click ‘Apply’.

3. STUN
You could set up STUN if your server request.
Phone settings:
1. Audio settings
a) Set the codec sequence
b) Set the door phone ring type
c) Set the mic input and speaker output volume
d) Set the Codec hardware gain if the sound is low

2. Feature settings
The door phone is set to Auto answer, when you have incoming call to this door
phone, it will answer the call automatically, if you do prefer to answer the call by
hand, please deselect ‘Enable Auto Answer’
Door phone settings
1.Function Key setting tab is to set up the Bell button function.
A. If you need to use the keypad to entry a phone number and call out, please set
the DSS key 1 to ‘Key Event’, Sub type select ‘OK”, then click ‘Apply’.
B. If you need the bell button use as a bell key, when people press on it,the door
phone will directly call to a phone/ring group/intercom group, please set the DSS Key 1
to Hot key mode, then fill Number 1 with the phone number, then click ‘Apply’.

2. Door phone settings
Open Duration: This allows to set the relay switch time from 3-10 seconds.
Talk Duration: When the conversation time reaches this value, the door phone hand down the call, this
will help to avoid people forgetting to hand down the phone and keeping the line busy.
Remote
password:
Able to set up a 1-6 digits password, when the door phone call to other phones, people
can entry this password to open the door on the other phone.
Local password: 1-6 digits, Use this password to open the door on the door phone’s touch keypad.
Door Unlock
Indication: This Set different sound type when the local password entry is right.
Keypad Mode: Select to choose different mode: password only; Dial and password.
Enable/Disable
Access Table:
When switch to Disable, Calls from other phones to the door phone to open door, ( the
cards will still be usable)
Enable/Disable
Card reader:
When switch to Disable, The RFID card will stop working, not able to use ID card to open
door.
Access table:
Access table allows to add access authorization and manage them in one form, Phones in
this table will be able to call to the door phone and open the door.
Number: Telephone number
Access code: People should entry this code to open the door, when they use their
phones make the call to the door phone.
Name/Department
/Position: Please fill accordingly, or just leave blank
ID: RFID card number,NOT available on this model
Access
management: Select a Access number to modify or delete.

Hardware installation
We recommend you to test the functions and debug before install the hardware into the
final position.
Steps to install the hardware:
1. Release the screw and open the door phone case.
2. Arrange the mounting base board suitable for the dimension of the door phone,
Details as below:
3. If you need to connect to the door lock ,or using the DC adapter not PoE,please knock
off the small sheet near the bottom.
4. Let the Relay wire and DC adapter cable through the hole near the bottom. The CAT
5 cable through the network interface hole.
5. Install the back sheet on the mounting base with 4 screws.
6. Connect the Power wire / lock relay, and plug the CAT5 network cable onto the RJ45
port. Diagram as below:
7. Install the main body to the base, use the security screw driver to drive the screw in
as below:
Table of contents
Other NiteRay Electronic Intercom System manuals
Popular Intercom System manuals by other brands

urmet domus
urmet domus GROTHE vidoora quick guide

Sigtronics
Sigtronics SPA-600N Installation and operating instructions

Comelit
Comelit 3602 Technical manual

Auta
Auta KVD-1 S1 VISUALTECH 5W instructions
Fermax
Fermax VDS VIDEO CITYLINE iLOFT KIT User& installer's manual
CyberData
CyberData 11214 Operation guide
