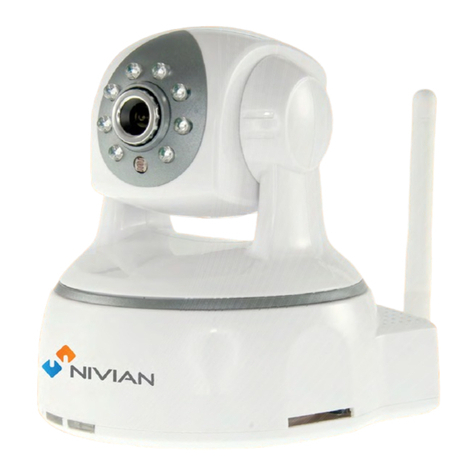
Nivian ONV515 User manual

Wi-Fi SECURITY CAMERA
Camera IP Nivian ONV515
2015-05 (v1.0)
ES Manual de Instalación
FR Manuel d’installation
IT Manuale di installazione
EN Installation Manual
PT Manual de Instalação

2
English
Caméra IP Nivian ONV515
Installation Guide
Motorized Swivel Base and Head
Speaker
Wi-Fi Antenna
Alarm Output
Alarm Input
Audio Input
(WPS)Reset Button
DC5V Power
Audio Output
RJ45 10-100 LAN Port
IR LEDs
Lens
Light Sensor
SD Card Slot
Power LED
Built-in Microphone
Network LED

3
English
Nivian ONV515 IP Camera - Installation Guide
ABOUT THIS MANUAL
Congratulations, you have acquired a magnicent IP camera, versatile and adapted to the
needs of the most demanding home user. This manual will help in the installation process and
basic conguration of the device.
If you need more information, please see the other documentation that accompanies the
product in paper or digital format (CD), or visit the website of the brand www.nivian.info where
you will nd:
This equipment is an electronic device. For your safety and for the preservation of the
product itself, before you start using it, take all possible precautions.
All the installations and operations described must be done according to national codes and
standards for electrical safety. TRADEMARK is not liable in case of re or electrical discharges
caused by improper handling or installation.
! It is possible that some of the images and screen captures or functionalities described
herein may not exactly match the nal product. This may be due to updates to the rmware
or software tool associated with the product, made with the aim of improving the functionality
and user satisfaction.
• Detailed documentation about the use of the product.
• General information about the product.
• Available accessories.
• Guarantee and support information.
• Keep the device away from places with high temperatures, hot surfaces and direct
sunlight.
• Keep the device away from water. If it gets wet, unplug it immediately from the
electrical outlet.
• Avoid using the device in humid environments above 85% relative humidity.
• The temperature range for proper operation of the device is between -10 and 50 ° C.
• Install the device on a at horizontal surface or at the wall. Avoid supports exposed to
vibration or unstable surfaces.
• Do not cover the device or place items on it.
• Handle the device with care. Avoid impacts or drops.
• Unplug the device before handling.
• Use the original power adapter supplied with the product.
Installation Environment
Transport and handling
PRECAUTIONS

4
English
PRODUCT DESCRIPTION
Minimum Requirements
Useful Information
5V DC 1,5A using included adapterPower supply
•Internet broadband connection at site for the camera
• Connection via Ethernet/LAN to the router (for the initial installation).
Connectivity
•Operating system iOS (version 4.3 or higher) or Android (version 4.2 or
higher).
• Data Connection to the network.
Mobile App
Requirements
Username: admin
Password: 123456
Factory Default values
See the label on the bottom of the camera. The device type corresponds to
the rst letter of the text "X Series". Example: "M Series" is type "M".
Camera type
See www.nivian.info
Support service
contact
www.nivian.infoBrand website
Nivian ONV515 IP Camera - Installation Guide

5
English
CAMERA INSTALLATION
To install the camera, follow the explained steps in this section in the given order:
1. Connect the camera.
2. Install the smartphone/tablet app.
3. Add and congure the camera in the app.
4. Congure the WiFi connection in the camera.
5. Install the PC tool
1. Connect the camera to the router through the Ethernet port.
2. Connect the camera to a power supply.
Download and installation options:
A. Find and download the iSmartViewPro app from Google Play Store.
B. Find the app on the CD that accompanies the product (note that there could exist a
newer updated version of the app).
C. Check the available software on the product website www.nivian.info.
Download and install the iSmartViewPro app for Android on your Smartphone or tablet. This
app allows you to install, congure and operate the IP camera. It is available for Android and
iOS devices (iPhone and iPad).
For more information on using the app for Smartphone, see the specic user manual of
the tool.
1. Connect the camera
2. Install the smartphone/tablet app
Android installation
Nivian ONV515 IP Camera - Installation Guide

6
English
Download and installation options:
A. Find and download the iSmartViewPro app from App Store. (Revisar)
B. Find the app on the CD that accompanies the product (note that there could exist a
newer updated version of the app).
C. Check the available software on the product website www.nivian.info.
Step 1) Enter the installed app on your smartphone/tablet.
Step 2) Add the camera by the DID code.
Select add camera (Add camera)
There are three ways to add the device: manually, scanning the QR code or by
searching on the LAN.
a) LAN search: select the “Search” option and choose one of the cameras shown on the
screen.
b) Scan the QR code: select the “Scan ID” option and scan the QR code that is found on the
label at the camera base.
iOS installation
Android conguration
3. Add and congure the camera
Before you add and congure your camera, at the base of the device, nd the label with
information about your ID, administrator username and password, as shown in the example
next to this text.
Nivian ONV515 IP Camera - Installation Guide

7
English
Step 1) Enter the installed app on your smartphone/tablet.
Paso 2) Add the camera by the DID code.
Select add camera (Add camera)
There are three ways to add the device: manually, scanning the QR code or by searching on
the LAN.
iOS conguration
a) LAN search b) Scan the QR code
Step 3) If necessary, add username and password. The factory settings for both are
indicated on the label on the base of the camera (admin/123456).
Step 4) Press done (Done).
Nivian ONV515 IP Camera - Installation Guide

8
English
a) LAN search: select the “Search” option and choose one of the cameras shown on the
screen.
b) Scan the QR code: select the “Scan ID” option and scan the QR code that is found on the
label at the camera base.
a) LAN search b) Scan the QR code
Step 3) If necessary, add username and password. The factory settings for both are
indicated on the label on the base of the camera (admin/123456).
Step 4) Press done (Done).
: Settings available for both iOS and Android.
Step 1) Enter the basic settings screen of the camera by clicking on the icon to the right of it.
Step 2) Enter the advanced settings screen by pressing the ”Advanced Settings” button.
Step 3) Press “WiFi Settings”
Step 4) Press WiFi Search to nd the available WiFi networks around the IP camera. Select
one from the list that appears, enter the network password and press “Done”.
4. Congure the WiFi connection (optional)
Nivian ONV515 IP Camera - Installation Guide

9
English
iSmartViewPro for PC (Windows) permits you to view and manage your IP cameras in your
own local network or a remote network.
For further information about the use of this software, see the specic user manual of
the tool.
Step 1) Download and install the iSmartViewPro app for PC:
A. Find the app on the CD that accompanies the product (note that there could exist
a newer updated version of the app).
B. Check the available software on the product website www.nivian.info.
Step 2) Once installed, the direct Access to iSmartViewPro appears.
Execute the app, which will look like this:
Install the PC tool (optional)
Paso 1 Paso 2 Paso 3 Paso 4
F
E
AB
D
C
Nivian ONV515 IP Camera - Installation Guide

10
English
A. Camera list area
B. Video display and conguration area
C. Local conguration menu area
D. Registration of operations with the camera
E. Search bar
F. Interface options (including language)
A. Search on the Network (Search to Add)
1. In the new window, select the type of device ("Device Type") and click Search (Search). (If you
do not know the type of device, see the label on the bottom of your camera or select
“All series”).
2. In the list of cameras found on the network, identify the one that interests you, ll in the
username and password elds and click Save (Save).
3. Then the camera will appear in the "camera list area”.
B. Manual conguration (Add device manually)
With this option, you must know the parameters of your camera (the device type is
indicated as "Series" on the label on the base of your camera).
1. On the form, manually ll in the elds marked (*) and click save (Save).
2. Then the camera will appear in the "camera list area".
Step 3) Add a camera clicking on the corresponding button.
Button to add camera
There are two options:
Nivian ONV515 IP Camera - Installation Guide

11
English
Guarantee and Support
NIVIAN guarantees that this product is free from material and manufacturing defects on the
date of purchase for a period according to current regulations. In the unlikely case that the
product requires use of the guarantee, contact your dealer, point of sale or an Authorized
Nivian Service Center. Visit the Nivian website (www.nivian.info) to obtain further information
about the Guarantee and the Support Service.
Declaration of Conformity
LONG XIANG EXPORTACION IMPORTACION SL
Av. del Sol, 22
28850 Torrejón de Ardoz (Madrid)
CIF: B80645518
Declares that:
the product: Nivian ONV515 IP Camera (Made in China)
meets essential requirements and other relevant demands of Directive 1999/5 / EC about
Radio and Telecommunications Equipment Terminals (R&TTE), of the Directive 2004/108 /
EC about Electromagnetic Compatibility (EMC), and Directi ve 2011/65/EU about Restriction
of Hazardous Substances in Electrical and Electrical Equipment (RoHS) complying with the
relevant harmonized standards:
Safety: EN 60950-1:2006 + A11:2009 + A1:2010 + A12:2011
EMC/Radio: EN 301 489-1:2011 V1.9.2, EN 301 489-17 V2.2.1, EN 301 328 V1.8.1
You can request a copy of the declaration of conformity at the indicated address.
Waste disposal
This symbol associated with the product indicated that it cannot be treated as
ordinary household waste
. It must be recycled, be delivered at the appropriate collection point for electrical
and electronic equipment where it is handled properly, and hereby avoid potentially
negative consequences for the environment and human health. Correct recycling
also facilitates the preservation of natural resources.
The electronic elements should not be mixed with other waste from the product, as boxes and
other non-electronic materials. These should be treated separately.
For more information on how to recycle the product, please contact your city council or
corresponding local government, or contact the store where you purchased the product.
Trademarks
NIVIAN and its logotype are trademarks registered by LONG XIANG EXPORTACION
IMPORTACION SL or its subsidiaries in Spain or other countries. All rights about this publication
are reserved. It may not be reproduced in whole or in part, without the express consent of
LONG XIANG EXPORTACION IMPORTACION SL.
iPhone, iPad, iOS y OS X are trademarks registered by Apple Inc. Android is a trademark
registered by Google Inc. All other trademarks mentioned in this document have been
registered by their respective owners.
Versions
NIVIAN reserves the right to make changes to this manual without obligation to notify any
person or organization. The information included in this document may be outdated due to
changes in later versions. For the latest version, visit the website WWW.NIVIAN.INFO.
Version: GI-NIV-ONV515-EN (v1.0)
Copyright © 2015 LONG XIANG EXPORTACION IMPORTACION SL.
Nivian ONV515 IP Camera - Installation Guide

12
Française
Caméra IP Nivian ONV515
Guide d’installtion
Base et tête Motorisé
Haut-parleur
Antenne Wi-Fi
Sortie Alarme
Entrée Alarme
Entrée Audio
Bouton de Reset (WPS)
Entrée DC5V
Salida de Audio
Port Lan RJ45 10-100
Leds IR
Objectif
Capteur d’illumination
Rainure pour carte SD
LED d'allumage
Microphone intégré
Led de transfert de données

13
Française
A PROPOS DE LA NOTICE
Félicitations, vous avez acquis une magnicque caméra IP, versatile et adaptée aux nécessités
de l'utilisateur domestique le plus exigeant. Ce manuel vous aidera en processus d'installation
et conguration basique de l'appareil.
Si vous avez besoin de plus d'information consultez le reste de documentation qui accompagne
le produit en format papier ou digital (en CD), ou visitez le site de la marque www.nivian.info où
vous trouverez:
Ce dispositif est un appareil électronique. Pour votre sécurité et pour la préservation du
propre produit, avant de commencer à l'utiliser, prenez toutes les précautions possibles.
Toutes les installations et opérations décrites doivent être faites conformément aux codes et
les réglementations nationales de sécurité électrique. MARQUE ne devient pas responsable en
cas des feux ou des décharges électriques par une mauvaise manipulation ou installation de
produit.
! Il est possible que certaines des images et des captures d'écran ou des fonctionnalités
décrites ici puissent ne pas correspondre exactement au produit nal. Cela peut être dû à des
des actualisations dans le rmware ou l'outil de logiciel associé au produit, réalisé avec l'objectif
d'améliorer la fonctionnalité et la satisfaction de l'utilisateur.
• Information genérale du produit.
• Accessoires disponibles.
• Information sur garantie et support.
• Conserver le produit loin des endroits avec des températures élevées, des surfaces
chaudes et des rayons directs du soleil.
• Gardez l'appareil loin de l'eau. S’il est mouillé, débranchez-le de la prise électrique
immédiatement
• Évitez d'utiliser l'appareil dans des climats humides au-dessus de 85 % d'humidité
relative.
• Le rang de températures pour le fonctionnement adéquat de l'appareil est entre -10ºC
et 50ºC.
• Installez l'appareil sur une surface horizontale xe ou dans le mur. Évitez des supports
exposés aux vibrations ou des surfaces instables.
• Ne pas couvrir l'appareil ou placer des objets dessus.
• Manipulez l'appareil attentivement. Évitez des coups ou des chutes.
• Déconnectez l'appareil du réseau électrique avant sa manipulation
• Utilisez l'adaptateur d'alimentation d'origine fourni avec le produit.
Environnment d’installation
Transport et manipulation
PRÉCAUTIONS
Caméra IP Nivian ONV515 – Guide d’installtion

14
Française
DESCRIPTION DU PRODUIT
Exigences minimales
Information Utile
5V DC 1,5A (au moyen d'un adaptateur inclus
Alimentation électrique
• La Connexion à Internet de large bande dans l'emplacement pour la caméra
• Connexion au moyen d’Ethernet/LAN au router (pour l'installation initiale).
Connectivité
• Système d'exploitation iOS (version 4.3 ou supérieur) ou Android (version 4.2
ou supérieur).
•Connexion de données au réseau.
Conditions requises App
mobile
Utilisateur: admin
Mot de passe: 123456
Valeurs par défaut de
fabrication
Consultez l'étiquette de la partie inférieure de la caméra. Le type de dispositif
entretient une correspondance à la première lettre du texte “X Series”.
Exemple: “M Series” type “M”.
Type de caméra
Consultar www.nivian.info
Contact du service de
support
www.nivian.info
Site Web de la marque
Caméra IP Nivian ONV515 – Guide d’installtion

15
Française
INSTALLATION DE LA CAMÉRA
Pour installer la caméra, suivez-les pas décrits dans cette partie dans l'ordre indiqué:
1. Connectez la caméra.
2. Installer l'application pour smartphone/tablet.
3. Ajouter et congurer la caméra dans l'application.
4. Congurer la connexion WiFi dans la caméra.
5. Installer l'outil de PC
1. Connectez la caméra au routeur via le port Ethernet
2. Conecte la cámara a una fuente de alimentación.
Options pour téléchargement et installation:
A. Cherchez et téléchargez l'application iSmartViewPro depuis Google Play Store.
B. Trouvez l'application sur le CD qui accompagne le produit (note qui serait en fait une
version plus actuelle de l'application
C. Consultez le logiciel disponible dans le site Web du produit www.nivian.info.
Déchargez et installez l'application iSmartViewPro pour Android dans son Smartphone
ou tablet. Cette application permet d'installer, congurer et utiliser la caméra IP. Elle est
disponible pour des dispositifs Android et iOS (iPhone et iPad).
Pour plus d'information sur l'usage de l'application pour Smartphone, consultez le
manuel d'utilisateur spécique de l'outil.
1. Connectez la caméra
2. Installez l'application pour smartphone/tablet
Installation dans Android
Caméra IP Nivian ONV515 – Guide d’installtion

16
Française
Options pour téléchargement et installation:
A. Cherchez et téléchargez l'application iSmartViewPro depuis App Store.
B. Trouvez l'application sur le CD qui accompagne le produit (note qui serait en fait une
version plus actuelle de l'application
C. Consultez le logiciel disponible dans le site Web du produit www.nivian.info.
Étape 1) Accéder à l'application installée sur votre smartphone/tablet.
Étape 2) Ajoutez la caméra au moyen de son code DID.
Sélectionnez ajouter caméra (Add camera)
Existent trois manières d'ajouter le dispositif : manuellement, en scannant le code
QR ou en le cherchant dans le réseau LAN.
a) Chercher dans LAN: sélectionnez l’option “Search” et choisissez l'une des caméras qui se
montrent dans l’écran.
b) Scannez le code QR: sélectionnez l’option “Scan ID” et capturez le code QR qui se trouve
dans l'étiquette de la partie inférieure de la caméra.
Installation dans iOS
Conguration dans Android
3. Ajoutez et congurez la caméra
Avant d'ajouter et avant de congurer la caméra, trouvez dans la base de l'appareil
l'étiquette avec information sur son ID, nom d'utilisateur et le mot de passe administrateur,
comme le montre l'exemple à côté de ce texte.
Caméra IP Nivian ONV515 – Guide d’installtion

17
Française
Étape 1) Accéder à l'application installée sur votre smartphone/tablet.
Étape 2) Ajoutez la caméra au moyen de son code DID.
Sélectionnez ajouter caméra (Add camera)
Existent trois manières d'ajouter le dispositif : manuellement, en scannant le code QR ou en
le cherchant dans le réseau LAN.
Conguration dans iOS
a) Chercher dans LAN b) Scannez le code QR
Étape 3) Si nécessaire, ajoutez utilisateur et mot de passe. Les valeurs originales de
fabrique pour les deux sont indiquées dans l'étiquette de la partie inférieure de la caméra
(admin/123456).
Étape 4) Appuyez Terminer (Done).
Caméra IP Nivian ONV515 – Guide d’installtion

18
Française
a) Chercher dans LAN: sélectionnez l’option “Search” et choisissez l'une des caméras qui se
montrent dans l’écran.
b) Scannez le code QR: sélectionnez l’option “Scan ID” et capturez le code QR qui se trouve dans
l'étiquette de la partie inférieure de la caméra.
a) Cherchez dans LAN b) Scannez le code QR
Étape 3) Si nécessaire, ajoutez utilisateur et mot de passe. Les valeurs originales de
fabrique pour les deux sont indiquées dans l'étiquette de la partie inférieure de la
caméra (admin/123456).
Étape 4) Appuyez Terminer (Done).
Conguration disponible tant pour iOS comme Android.
Étape 1) Accédez à l'écran de conguration basique de la chambre en cliquant sur l'icône à droite
de la même.
Étape 2) Accédez à l'écran de conguration avancée en appuyant le bouton “Advance Settings”.
Étape 3) Appuyez sur “WiFi Settings”
Étape 4) Appuyez sur WiFi Search pour localiser les réseaux WiFi disponibles autour de la caméra
IP. Sélectionnez un dans la liste qui apparaît, saisissez la clé de réseau et appuyez sur «Done».
4. Congurez la connexion WiFi (optionnel)
Caméra IP Nivian ONV515 – Guide d’installtion

19
Française
iSmartViewPro pour PC (Windows) permet de visualiser et de manipuler Les caméra IP dans
votre réseau local ou dans un réseau à distance.
Pour plus d'information sur l'usage de ce logiciel, consultez le manuel d'utilisateur
spécique de l'outil.
Étape 1) Descargue e instale la aplicación iSmartViewPro para PC:
A. Trouvez l'application sur le CD qui accompagne le produit (note qui serait en fait
une version plus actuelle de l'application).
B. Consultez le logiciel disponible dans le site Web du produit www.nivian.info.
Étape 2) Une fois installé, il apparaît le raccourci pour iSmartViewPro.
Exécutez l'application, qui aura l'aspect suivant :
5. Installez l'outil de PC (optionnel)
Paso 1 Paso 2 Paso 3 Paso 4
F
E
AB
D
C
Caméra IP Nivian ONV515 – Guide d’installtion

20
Française
A. Zone liste de caméras
B. Zone de visualisation de vidéo et de conguration
C. Zone de menu de conguration locale
D. Registre d'opérations avec la caméra
E. Barre de recherche
F. Options d'interface (en incluant un langage)
A. Cherchez dans le Réseau (Search to Add)
1. Dans la nouvelle fenêtre sélectionnez le type de dispositif (sélectionnez “Device Type”),
et cliquez dans Chercher (Search). (Si vous ne connaissez pas le type de dispositif consultez
l'étiquette sur le bas de votre caméra ou sélectionnez “All series”).
2. Dans la liste des caméras situées sur le réseau, identier celle qui vous intéresse, remplissez
les champs nom d'utilisateur et mot de passe et cliquez sur Enregistrer (Save).
3. Ensuite, la caméra apparaît dans la "zone de liste de la caméra".
B. Congurer manuellement (Add device manually)
Avec cette option, vous devez connaître les paramètres de votre appareil photo (le type
d'appareil est indiqué comme "Série" sur la base de votre appareil photo).
1. Sur le formulaire, remplir manuellement les caméras marqués (*) et cliquez sur
Enregistrer (Save).
2. Ensuite, la caméra apparaît dans la "zone de liste de la caméra"
Étape 3) Ajoutez une caméra en cliquant dans le bouton correspondant.
Bouton pour ajouter des caméras
Existe 2 options:
Caméra IP Nivian ONV515 – Guide d’installtion
Other manuals for ONV515
1
Table of contents
Languages:
Other Nivian IP Camera manuals
