Nixplay W15A User manual

1
W15A User Manual
Version 3.0 27.03.14

1
2
3-5
6-14
6-10
11-12
13
15-18
15
16-18
18
19
19
19- 20
1.
2.
3.
4.
5.
6.
7.
8.
1.1
1.2
1.3
3.1
3.2
4.1
3.3
3.4
4.2
4.3
4.4
3.1.i
3.1.ii
3.1.iii
3.1.iv
3.1.v
3.1.vi
3.1.vii
3.1.viii
3.2.i
3.2.ii
3.2.iii
3.2.iv
4.4.i
4.4.ii
4.4.iii
4.4.iv
4.4.v
MEET YOUR NIXPLAY CLOUD FRAME
GETTING STARTED
NIXPLAY CLOUD ACCOUNT
NIXPLAY CLOUD ACCOUNT
WARRANTY
SUPPORT
COMPLIANCE INFORMATION
IMPORTANT SAFETY INFORMATION
Front of Cloud Frame
Back of Cloud Frame
Remote
Photos, Albums & Slideshows
Emailing a Photo to Your Frame
Playing your Slideshows
Pairing Another Frame
Frame Setting
Browsing your Slideshows
USB/SD Card
Settings
Creating an Album
Adding photos to an Album
Managing your photos & Albums
Facebook, Picasa & Instagram
Create a Slideshow
Adding photos to a Slideshow
Managing your Slideshows
Sending a Slideshow to your Cloud Frame
@mynixplay.com Address
Managing your Email Photo Settings
Email Albums
Most Recent Feature
Network Settings
Frame Settings
Time Zone Settings
Software Update
Frame Information
Contents

2
1MEET YOUR NIXPLAY CLOUD FRAME
FRONT OF CLOUD FRAME
BACK OF CLOUD FRAME
REMOTE
Motion Sensor - to adjust motion sensor settings select the Motion Sensor
button on the remote (labeled L below)
IR Sensor for Remote - Receives signals from the remote
To Power On - press & hold ON/OFF button for about 3 seconds
Motion Sensor - Senses movement and turns the Cloud Frame ON and OFF
A
B
1.1
1.2
1.3
SD/SDHC Card Slot - Connect and view external photos and videos from the
memory card
Headphone/Speaker port - Connect your headphones or speakers
USB Port - Connect your USB ash drive and view photos and videos
Power Adapter DC-in (5V) - Plug in power cable for power
ON/OFF Button - Press and hold to power on the Cloud Frame
Menu Button - This will allow you to go back a step
4-way Menu Control and Play button - Helps you navigate and select
Stand screw hole
C
D
E
F
G
H
I
J
Delete - Delete selected photo
Rotate & Save - Rotates a selected photo 90 degrees at a time
Share - Coming soon
WiFi Setting - Coming soon
Slide Show - Starts the slideshow (whenever you are in the Frames settings)
UP/DOWN/LEFT/RIGHT - Navigate through the Cloud Frame’s menus
OK / Play - (Conrms changes made on Cloud Frame)
Back - Go Back a step in any of the Cloud Frame’s menus
Vol- / Vol+ - Adjust the volume when you watch a video
Menu - Goes directly to the main menu
ON / OFF - Turns your Frame on or puts it on standby
Motion Sensor - Allows you to turn the motion sensor on or o
C
D
E
F
G
A
B
H
I
J
K
L
A B C D
E
F
G
H
I
J
K
L
AB
G H IJ
C
D
E
F

3
Welcome to the nixplay family and congratulations on receiving your nixplay Cloud Frame!
First let’s walk you through how to set up your Cloud Frame.
ASSEMBLE CLOUD FRAME: screw in the stand to the back of the Cloud Frame
and remove the plastic tab from your Remote.
PLACE YOUR CLOUD FRAME NEXT TO A COMPUTER
1.
2.
PLUG IN THE POWER ADAPTOR TO YOUR CLOUD FRAME: then plug your Cloud
Frame power cable into a power source.
3.
GETTING STARTED
2

4
PRESS AND HOLD THE POWER BUTTON: This is located on the back of your
Cloud Frame or you can use the ON/OFF button on your Remote.
CONNECT TO YOUR WIFI: Use the UP/DOWN arrows on the Remote or the
4-Way Key on the back of the Frame. Press OK to select your WiFi. Then enter
your WiFi password and select the Connect button.
WAIT FOR UPDATE: This process may take up to 10 minutes.
4.
5.
6.

xxxx xxxx xxxx xxxx
ACTIVATE FRAME
16 DIGIT SERIAL NUMBER: Once your Cloud Frame is connected to WiFi and
updated with the latest software, it will display a 16 Digit Serial Number that
you will need to enter on the www.nixplay.com website in order to pair your
Cloud Frame with its own Cloud Account.
ON YOUR COMPUTER: Please visit www.nixplay.com. Click the Activate Frame
button on the website and follow the on-screen instructions to pair your Cloud
Frame.
7.
8.
If the Cloud Frame fails to connect or displays error messages during the pairing
process, please follow on-screen instructions and/or restart your Cloud Frame.
Once you have successfully paired your Cloud Frame with your nixplay Account you can
now begin uploading your photos!
5

6
To start uploading photos, creating albums and publishing slideshows to your Cloud
Frame, please log in to your nixplay Account at www.nixplay.com.
1. Under the Albums tab, select Add New Album.
2. Name New Album and select OK. Please note you can rename your Album at
any time.
3. You’ll now get a message telling you Album Created. You can either click
Open Album & Add Photos to start adding photos or if you want to do this
later, click No Thanks, I’ll Do It Later.
1. Select the Albums tab, and then the nixplay Albums tab.
2. Select the Album you want to add photos to and select Add New Photo.
Alternatively, you can transfer your photos by simply dragging the les from
your computer into the page when inside an Album.
nixplay CLOUD ACCOUNT
3
PHOTOS, ALBUMS & SLIDESHOWS
CREATING AN ALBUM
ADDING PICTURES TO AN ALBUM
3.1
3.1.i
3.1.ii
First, create an album to store your photos in.

7
SORT BY: Allows you to sort your photos by Name or Date.
ACTIONS: Allows you to Select all, Move or Delete your photos.
MANAGING YOUR PHOTOS & ALBUMS
3.1.iii

8
Simply select the relevant social media tab and log in to your social
network, so you can access all of your social media photos.
FACEBOOK
You can select photos from your own Facebook Albums or your Friends.
INSTAGRAM
You can select your own Instagram photos, or nd photos uploaded by
other Instagram Users or search Tags.
FACEBOOK, PICASA & INSTAGRAM
3.1.iv
PICASA
You can select photos from your own Picasa Albums.

9
Once you’ve loaded photos into your Albums and logged into your social
networks, you can start creating Slideshows to share with your Cloud
Frame.
1. Under the Slideshows tab, select Add New Slideshow.
2. Name This Slideshow and select OK. Please note you can rename your
slideshow at any time.
1. Select the relevant Albums tab: nixplay Albums, Email Albums,
Facebook, Picasa or Instagram.
2. Select the photos you want to move to your Cloud Frame. Simply tick
the empty box on the top left corner of the picture or use Actions:
Select All if you want to add all your photos.
1. Once you have selected all the photos you want to add, simply drag
them into the desired slideshow in the Slideshows panel located on the
right.
2. Click Save to continue (If the slideshow is not yet assigned to any
Frame, you will be prompted to either Save the slideshow or to Save &
Send to Frame immediately).
CREATE A SLIDESHOW
ADDING PHOTOS TO A SLIDESHOW
3.1.v
3.1.vi

10
1. Select Slideshows tab.
2. Click on the Slideshow you want to manage. You can use the Action
button to shue or remove photos. Or you can simply drag and drop
them into a new order.
3. Select Save to save the changes that you make.
1. Under the Slideshows tab, simply select the relevant Slideshow and
drag it onto the relevant Frame in the My Frames section.
2. Click Publish and this slideshow will be sent directly to the frame.
MANAGING YOUR SLIDESHOWS
SENDING A SLIDESHOW TO YOUR CLOUD FRAME
3.1.vii
3.1.viii

11
The @mynixplay email address you use to send messages to your Frame
is the same address that you use to login. Please note that this address
can only be used for receiving photos to your Cloud Frame, it can’t be
used as a regular email address.
In your Settings Tab, there is a dedicated @mynixplay tab which allows
you to set up your Email Photo Settings.
Enjoying photos on your nixplay Cloud Frame is really easy, with our @mynixplay
Email Feature.
EMAILING A PHOTO TO YOUR FRAME
@MYNIXPLAY.COM ADDRESS
MANAGING YOUR EMAIL PHOTO SETTINGS
EMAIL ALBUM FILTER: For your privacy and security your @mynixplay
Filter is enabled by default, this gives you the control to choose who is
allowed to email you photos.
APPROVED CONTACTS: With your lter enabled you can set up and
manage all of your email contacts under the Approved Contacts section.
To add a new contact simple click Add new Contact and type in their
name and email address.
You can also choose to have these photos added to a specic Slideshow,
which means they’ll be directly sent to the frame that this Slideshow has
been assigned to.
You can edit or delete the Approved Contacts settings, when ever you
want.
3.2
3.2.i
3.2.ii

12
DISABLING THE EMAIL FILTER: Please note that if you choose to disable
the @mynixplay lter, then any settings in the Approved Contacts list will
not apply and anyone will be able to email photos to your @mynixplay
address.
With the Email lter disabled, you can choose for ALL of your emailed
photos to be automatically sent to a specic slideshow.
All of your Email Albums can be located under the Albums tab. To help
your photos stay organised each contact is assigned their own album.
1. Under the Frame tab, select the Frame you want to access.
2. Scroll down to the General Settings section to access the Most Recent
Feature options.
The “Most recent” feature allows for any photos that have been sent to
your slideshow to jump to the front of that slideshow when the Cloud
Frame is awakened.
You can choose for photos that have been added in the last day, 3 days
or the last week to display rst. Please remember to save your selection.
EMAIL ALBUMS
MOST RECENT FEATURE
3.2.iii
3.2.iv
13
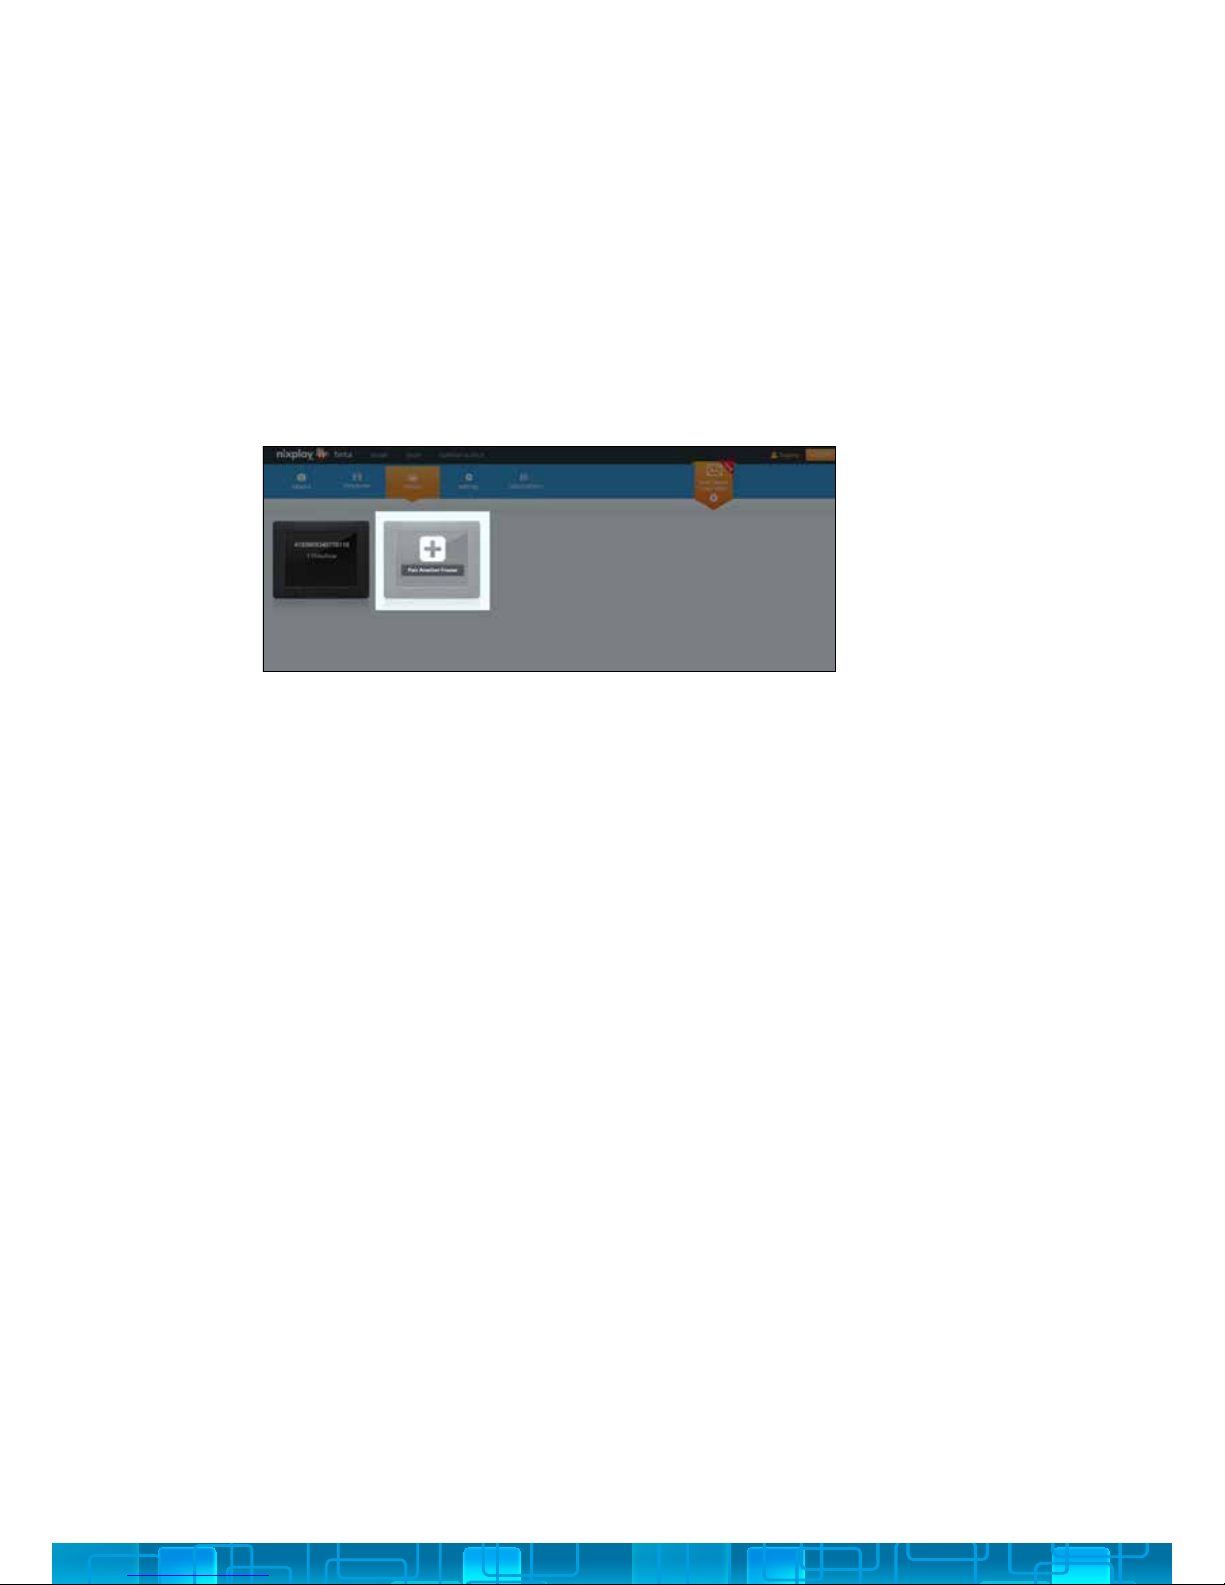
You can pair up to 5 Frames with the free Standard Account that comes with
your Cloud Account, simply follow the instructions below:
PAIRING ANOTHER FRAME
3.3
1. Under the Frames tab, select Pair Another Frame.
2. Enter the 16 Digit Serial Number that appears on the Cloud Frame, click Next.
3. Now enter the verication word that appears on your Cloud Frame, click Next.
4. Wait for the Cloud Frame and Cloud Account to pair, then click OK to complete
the pairing process.

14
SLIDESHOWS SENT TO FRAME
First you’ll see the Slideshows that are set to this Cloud Frame.
GENERAL SETTINGS
Here you can choose
SLIDESHOW SETTINGS
Here you can choose
FRAME SETTINGS
3.4
• Your Frame’s name and location
• MOTION SENSOR: to control the motion sensor, you can choose for it
to go to sleep either after an amount of time when no motion has been
detected, or at a specic time.
• MOST RECENT PHOTOS: You can choose for photos that have been
added in the last day, 3 days or the last week to display rst on your
Frame.
Please note that these changes will only take place if your Cloud Frame is
connected to a WiFi network.
• PHOTO TRANSITION TYPE : to decide how you want the photos to
transition from one to another.
• TIME BETWEEN TRANSITIONS
• PHOTO FIT: lets you choose how your photos display on the Cloud
Frame, select Fill Screen to ensure your photos are displayed without
borders.
• START UP ORDER: lets you choose what you want your Cloud Frame to
display when its rst powered on.
• SHOW ALERT: lets you choose whether you want to be notied of
alerts on your Cloud Frame.

15
PLAYING YOUR SLIDESHOWS
BROWSING YOUR SLIDESHOWS
USB/SD CARD
4.1
4.2
4.3
nixplay CLOUD FRAME
4
1. To play your slideshows, select Play Slideshows
from the Main Menu.
2. This will display all the photos from your
slideshows.
1. To browse your slideshows, select Browse
Slideshows from the Main Menu.
2. Under Browse Slideshows you will be shown a
list of all the slideshows you have created and
published with your nixplay Account.
3. Simply choose the slideshow you want to view
from the list of slideshows and
select OK.
1. To browse your memory card or USB drive, select
USB & SD Card Menu from the Main Menu.
2. Select the storage medium you connected to
your Cloud Frame. (SD Card/USB Media)
3. Once you have selected the storage medium,
choose the folder your photos are located in.
4. If there are too many photos or videos, you can
narrow the search by choosing Show Video or
Show Pictures.
If the Cloud Frame does not recognize your USB/SD card, please check whether
it is correctly plugged in. The Cloud Frame supports the following formats: File
(FAT/FAT32); Photos (JPG/JPEG); Videos (HD 720p H.264 AAC).

16
SETTINGS4.4
1. Use the UP/DOWN arrows on the Remote or the
4-Way Key on the back of the Cloud Frame.
2. Press OK to select your WiFi.
3. Enter your WiFi password (if required) and then
select the Connect button
You can change various settings on your nixplay Cloud Frame so that it suits your
needs better. To change your Cloud Frame settings, select Settings from the
Main Menu. When you enter the Settings menu, you will see a list of settings for
you to choose from:
NETWORK SETTINGS: TO CONNECT TO ANOTHER WIFI NETWORK
4.4.i

17
FRAME SETTINGS
4.4.ii
ITEM
Transition type
Photo t
Start up mode
Display duration
Show alert on
slideshow
Sleep after no
motion detected
Sleep at
DESCRIPTION
Select a dierent transition for your photos.
Set up how your photos are displayed on your Cloud Frame.
Select what you will see when your Cloud Frame starts up.
Select how long each photo will be displayed for.
Choose whether to display alerts while playing slideshows.
For energy saving & convenience, select the duration of time
before the Cloud Frame goes to sleep.
Set a specic time for your Cloud Frame to go to sleep.
OPTION
Jump Cut
Cross Fade
Fit To Screen
Fill Screen
Main Menu
Startup Slideshow
USB
SD Card
10 secs
30 secs
1 min
5 mins
10 mins
30 mins
On
O
Disabled
5 mins
10 mins
30 mins
1 hr
Disabled
0.00
2.00
...
22.00

18
Set the time that is displayed on your Cloud Frame by selecting Set Time
Zone. Once you have chosen the correct time zone, press OK and your
Cloud Frame will be updated to reect the changes.
To get the latest features and for us to continually improve upon your
nixplay Cloud Frame, we require you do a software update. Your Cloud
Frame will check for any software updates when it starts up after being
powered o or unplugged.
Frame Information gives you all the technical information you need
to know about your Cloud Frame. Below is all the information that is
displayed:
It is critical that you do not switch o or unplug your Cloud Frame during
the update process.
TIME ZONE SETTINGS
SOFTWARE UPDATE
FRAME INFORMATION
4.4.iii
4.4.iv
4.4.v
• Model:
• Firmware:
• Serial Number:
• Frame ID:
• Link Address:
• Network Address:
Your Cloud Frame comes with a Full One-Year Manufacturer’s Warranty. The
warranty begins from the date of the rst customer purchase.
In the event your Cloud Frame requires servicing, please contact us via our
website at www.nixplay.com.
Please provide a copy of your original order information as proof of purchase.
WARRANTY
5

19
Please refer to our FAQs on our website at www.nixplay.com
If you have any questions or feedback in regards to our product and service,
reach us by going to our support page on our website. The nixplay Support
Team is committed to delivering exceptional service and will answer your
questions and queries promptly to solve your problems.
Waste Electrical and Electronic Equipment Directive (Applicable to Europe):
This symbol on the product or on its packaging indicates that this product shall
not be treated as household waste. There are separate collection systems for
recycling in your country. For more information about recycling of this product,
please contact the local authority or the retailer where you purchased the
product.
Always follow the basic safety precautions when using your Cloud Frame. This
will reduce the risk of re, electric shock, product damage and personal injury.
SUPPORT
COMPLIANCE INFORMATION
IMPORTANT SAFETY INFORMATION
6
7
8
• Do not block ventilation openings. Slots and openings on the Cloud Frame
are provided for ventilation. The openings should never be blocked by placing
your Cloud Frame on a cushion, sofa or other similar surface.
• Keep the Cloud Frame away from direct sunlight and heat sources such as
radiators or stoves.
• Never place heavy or sharp objects on the LCD panel or Cloud Frame.
• Do not place the Cloud Frame on an unstable cart, stand, tripod, bracket or
table.
• Only use the AC adapter included with the Cloud Frame. Using any other
adapter will void your warranty.
• Protect the power cord from being walked on or pinched particularly at plugs,
receptacles and the point where the cord attaches to the Cloud Frame.
Table of contents
Other Nixplay Digital Photo Frame manuals

Nixplay
Nixplay Nixplay N User manual

Nixplay
Nixplay W13D Reference guide

Nixplay
Nixplay W18 User manual

Nixplay
Nixplay Lola Reference guide

Nixplay
Nixplay W15D Reference guide

Nixplay
Nixplay W08F Reference guide

Nixplay
Nixplay W15C Reference guide

Nixplay
Nixplay Iris User manual

Nixplay
Nixplay W10E Reference guide

Nixplay
Nixplay W10G Reference guide


