NIXXO NXG9230 User manual

1
NXG9230 User Guide

2
FCC Information
FCC part 15.19
This device complies with Part 15 of the FCC Rules. Operation is subject to the following two
conditions: (1) this device may not cause harmful interference, and (2) this device must
accept any interference received, including interference that may cause undesired operation.
FCC ID: RB2NXG9230
FCC part 15.21
Modifications not expressly approved by this company could void the user's authority to
operate the equipment.
FCC part 15.105
NOTE: This equipment has been tested and found to comply with the limits for a Class B
digital device, pursuant to Part 15 of the FCC Rules. These limits are designed to provide
reasonable protection against harmful interference in a residential installation. This equipment
generates, uses and can radiate radio frequency energy and, if not installed and used in
accordance with the instructions, may cause harmful interference to radio communications.
However, there is no guarantee that interference will not occur in a particular installation. If
this equipment does cause harmful interference to radio or television reception, which can be
determined by turning the equipment off and on, the user is encouraged to try to correct the
interference by one or more of the following measures:
. Reorient or relocate the receiving antenna.
. Increase the separation between the equipment and receiver.
. Connect the equipment into an outlet on a circuit different from that to which the receiver is
connected.
. Consult the dealer or an experienced radio/TV technician for help.
RF exposure FCC
Tests for SAR are conducted using standard operating positions specified by the FCC with
the phone transmitting at its highest certified power level in all tested frequency bands.
Although the SAR is determined at the highest certified power level, the actual SAR level of
the phone while operation can be well below the maximum value. This is because the phone
is designed to operate at multiple power levels so as to use only the power required to reach
the network. In general, the closer you are to a wireless base station antenna, the lower the

3
power output.
Before a phone model is available for sale to the public, it must be tested and certified to the
FCC that it does not exceed the limit established by the government-adopted requirement for
safe exposure. The tests are performed in positions and locations (e.g., at the ear and worn
on the body) as required by the FCC for each model. (Body-worn measurements may differ
among phone models, depending upon available accessories and FCC requirements). While
there may be differences between the SAR levels of various phones and at various positions,
they all meet the government requirement for safe exposure.
For body worn operation, to maintain compliance with FCC RF exposure guidelines, use only
accessories that contain no metallic components and provide a separation distance of 15mm
(0.6 inches) to the body. Use of other accessories may violate FCC RF exposure guidelines
and should be avoided.
Health and Safety Information FCC
Exposure to Radio Frequency (RF) Signals
Your wireless phone is a radio transmitter and receiver. It is designed and manufactured not
to exceed the emission limits for exposure to radio frequency (RF) energy set by the Federal
Communications Commission of the U.S. Government. These limits are part of
comprehensive guidelines and establish permitted levels of RF energy for the general
population. The guidelines are based on the safety standards previously set by both U.S. and
international standards bodies:
This EUT has been shown to be capable of compliance for localized specific absorption rate
(SAR) for uncontrolled environment/general population exposure limits specified in ANSI/IEEE
Std. C95.1-1992 and had been tested in accordance with the measurement procedures
specified in FCC/OET Bulletin 65 Supplement C (2001) and IEEE Std. 1528-200X (Draft 6.5,
January 2002).
Ministry of Health (Canada), Safety Code 6. The standards include a substantial safety margin
designed to assure the safety of all persons, regardless of age and health. The exposure
standard for wireless mobile phones employs a unit of measurement known as the Specific
Absorption Rate, or SAR. The SAR limit set by the FCC is 1.6W/kg *.
* In the U.S. and Canada, the SAR limit for mobile phones used by the public is 1.6 watts/kg
(W/kg) averaged over one gram of tissue. The standard incorporates a substantial margin of
safety to give additional protection for the public and to account for any variations in.

4
Contents
1. Before You Begin ......................................................................................................... 5
2. About Your Phone ........................................................................................................ 6
3. Basic Operations .......................................................................................................... 8
4. Predictive Text Input................................................................................................... 13
5. Phone Book................................................................................................................ 15
6. The Menu ................................................................................................................... 22
7. Messages ................................................................................................................... 30
8. Call records ................................................................................................................ 39
9. Communication Settings............................................................................................. 41
10. Agenda....................................................................................................................... 43
11. Fun ............................................................................................................................. 46
12. Games........................................................................................................................ 51
13. WAP Services ............................................................................................................ 52
14. Phone Setting............................................................................................................. 55
15. Tools .......................................................................................................................... 62
16. Security ...................................................................................................................... 65
17. Net Services ............................................................................................................... 68
18. Trouble Shooting ........................................................................................................ 72

5
1. Before You Begin
Charge the battery:
Plugging the charger into the phone while it is off will charge the phone and
display the “charging” screen: “Charging” is displayed blinking, the battery
animation fills the battery, and the charging time is shown on the bottom row.

6
2. About Your Phone
* Key Features:
- 4k color LCD
- 16 poly ring tone
- Various profiles: Normal, Meeting, In car, Pocket, Silent
- Agenda
- Media Center
- Memo
- Calculator
- Currency converter
- World clock
- WAP
- Games
* Keypad:
The 0- 9, ∗and #keys are used to dial as well as entering security codes, phone
numbers, and, with their alphabetical extension, names and short messages.
They are also used to select an item in menus (∗stands for menu item 10, 0 for menu
item 11 and #for menu item 12)
A long press on the 0key is used to input the international dialing symbol: +.
A long press on the 1key calls the voice mailbox.
A long press on the 2- 9keys launches One-touch speed dialing call.
A long press on the *key activates/deactivates the vibrate mode.
A long press on the @key is used to go to WAP services.
A short press on the @key is used to go to phonebook.
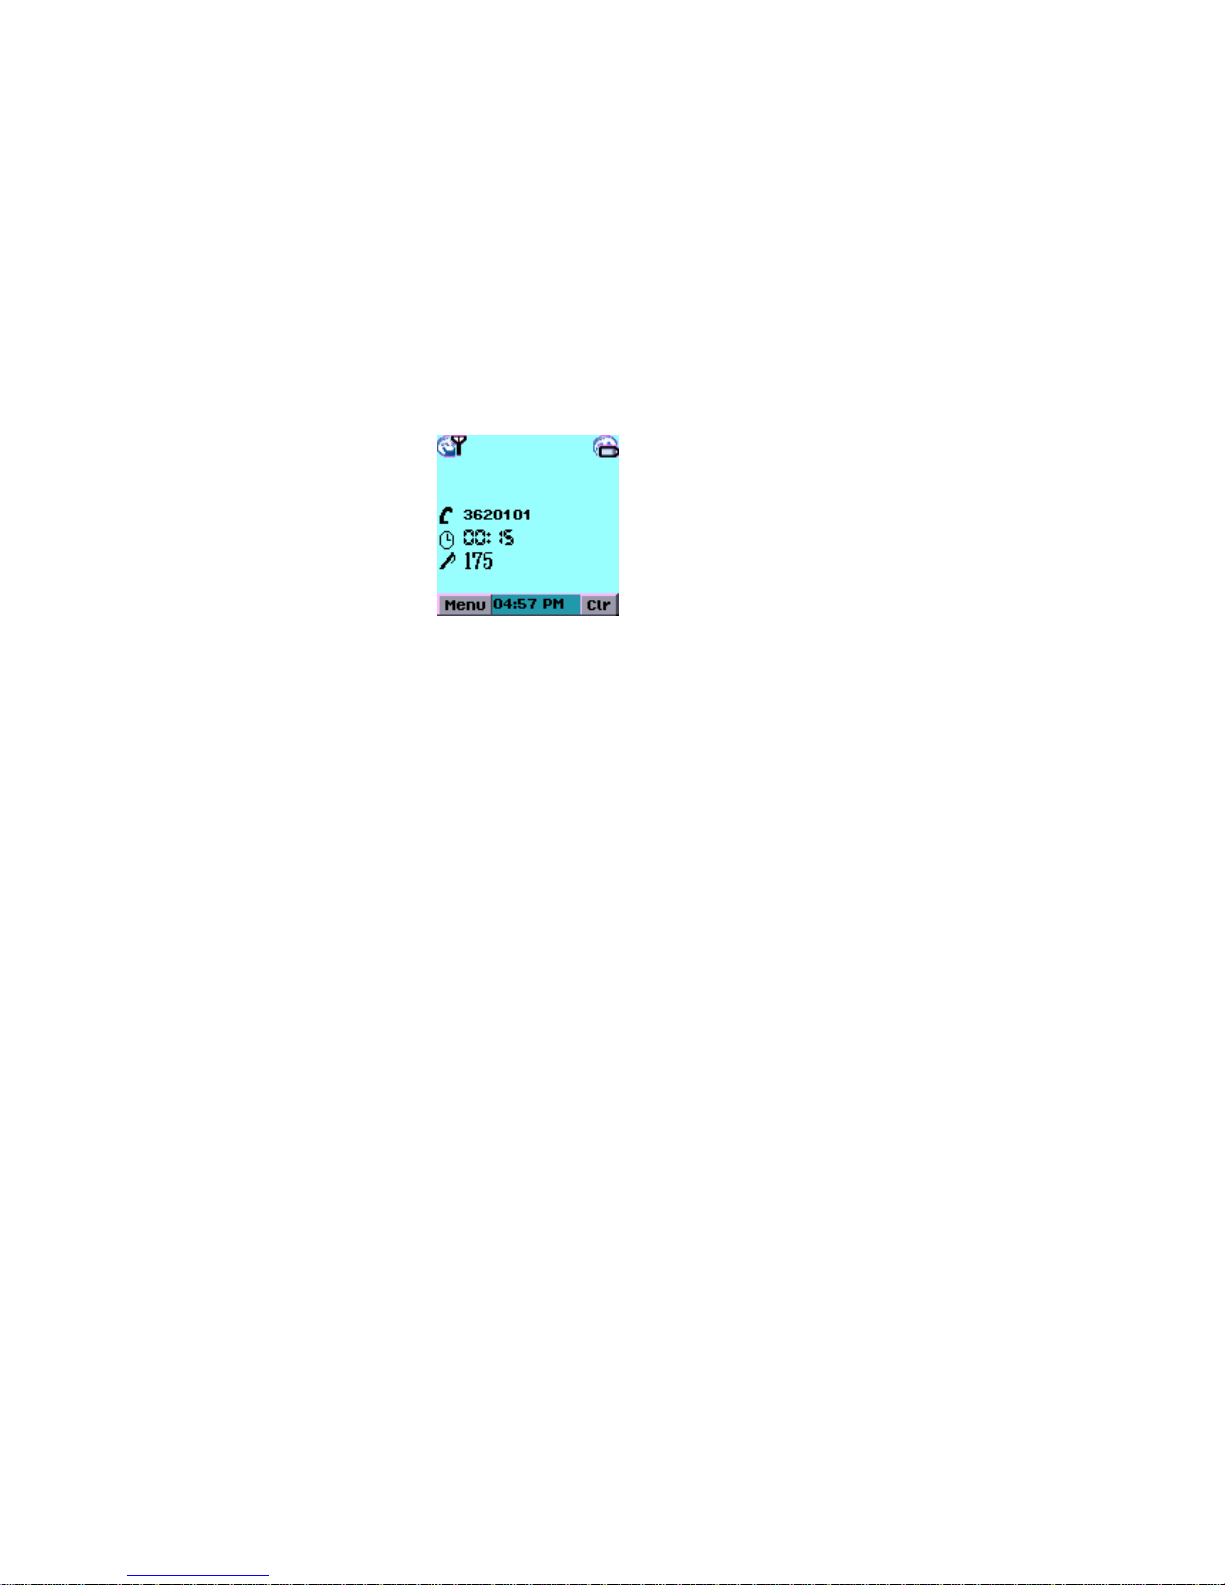
* Viewing the Display Screen:
1. Main LCD:
There are 11 icons, visible only in Idle and during communications:
7
•Antenna
•Signal strength
•Roaming
•Alarm
•Voice message
•Short message
•Silent mode activated indication or vibrator activated with priority on silent
mode indicator
•Battery level
•Call forwarding and call barring
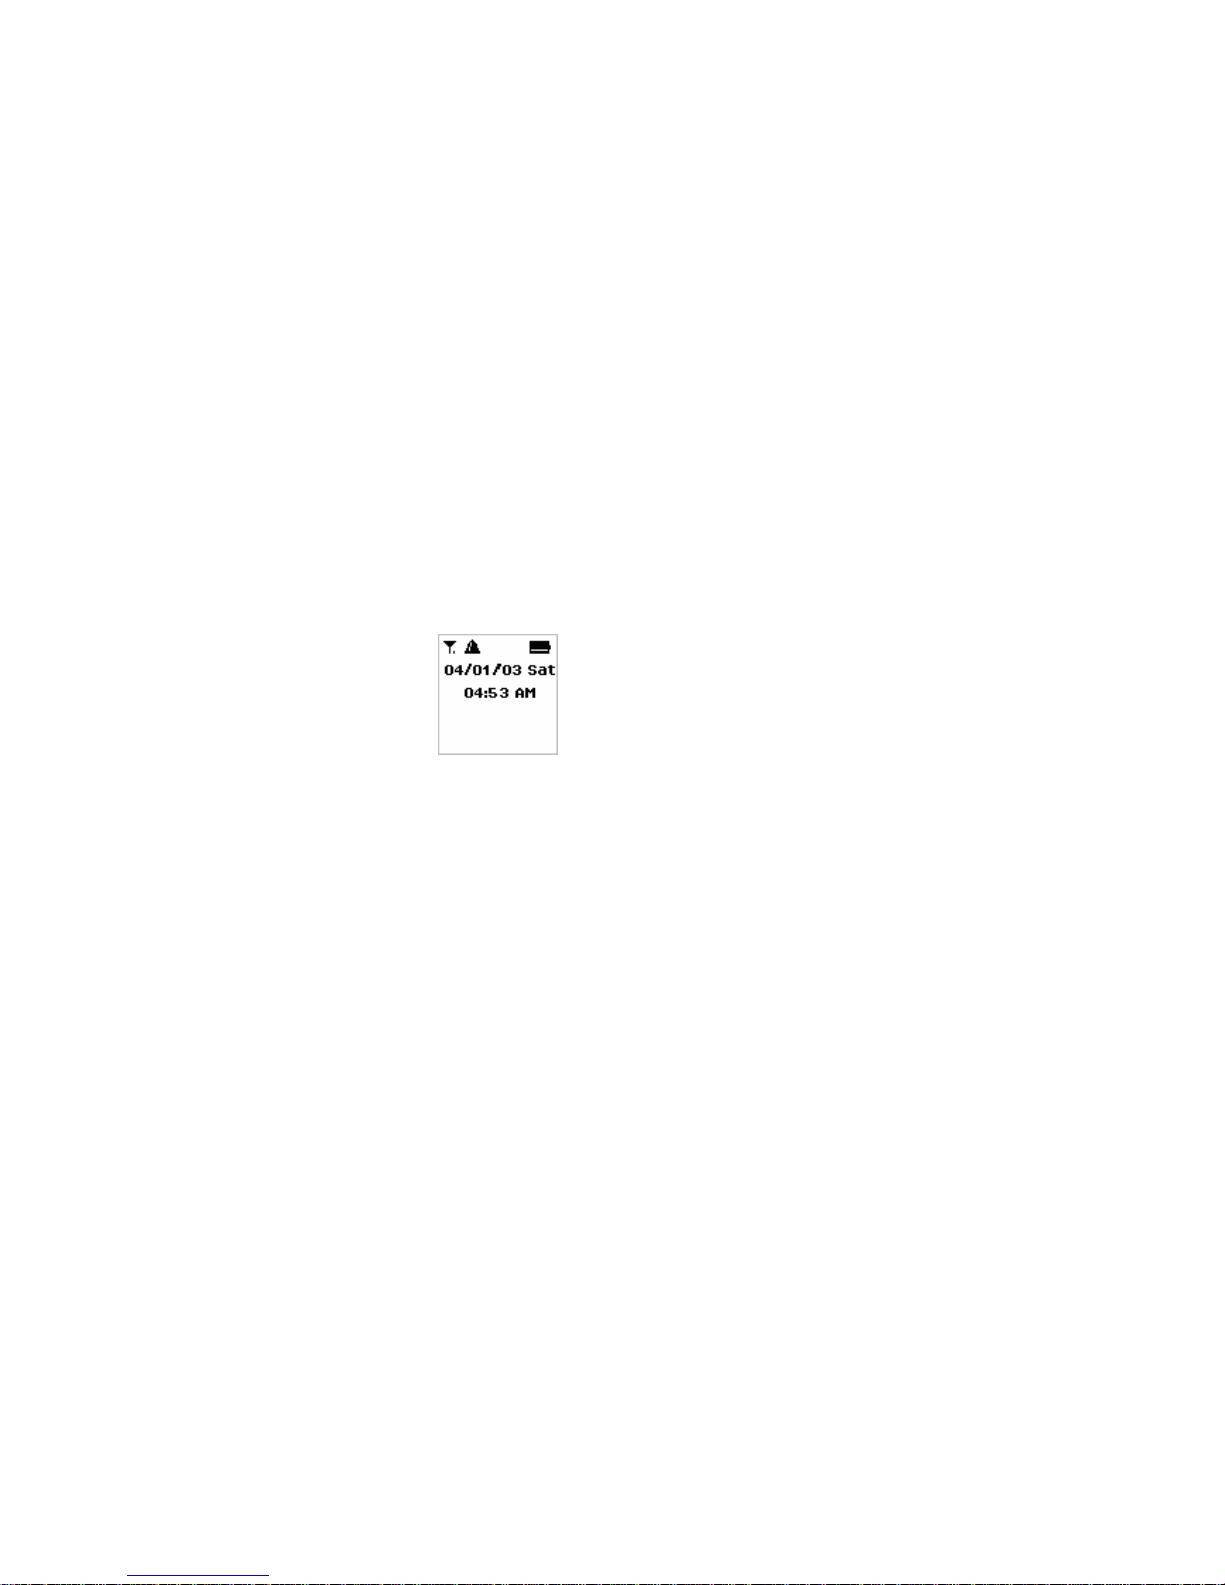
2. External LCD:
External LCD is used to indicate time, date and icons (Antenna,
battery, short message, alert mode, voice message, etc…) or an analog clock
depending of the configuration.

8
3. Basic Operations
* Turn on/off the phone: Press and hold ON/OFF for a few seconds.
- Unlock the phone:
After power on, the phone may need to be unlocked before calls can be
made or received. Enter the correct code and press the Ok softkey or the #
key. Once unlocked, the phone will display the network it is registered onto, the
signal strength bars and be in the standby condition.
* Make a call
- Use the keypad
1. Enter the area code and phone number.
2. Press SEND.
- Ear-piece volume control during a call:
To increase/decrease the volume of a call, press the UP/DOWN side key.
* End a call: Press End or close the flip.
* Answer a call:
If you turn on the “folder” function in answer mode, just open a flip to answer a call.
Otherwise, after opening a flip, press Send key or one of the side keys for a few seconds.
* Reject a call
- To reject, press End key.
* Redial the last dialed numbers:
The NXG9230 stores the 20 last called numbers in its memory.
1. Press Send key to display the last called number.
2. Select the number you want to redial using UP/DOWN side keys.
3. Press the Send key
9
* One-touch speed dialing : You can associate 8 phonebook entries to One-touch
speed dialing keys (See chapter “Phonebook”). Those numbers can be recalled and
dialed by a single long press on the key 2 to 9.
* Sending DTMF tones:
DTMF tones are a way to communicate passwords and callback numbers, and are
used to access answering machines, voicemail boxes, etc…
The DTMF tones are sent immediately when you press the numbers while in
communication.
This functionality can be deactivated using the menu function (see chapter “ Com
Settings ”).
After communication has ended, the numbers dialed during communication are
displayed, allowing you call or store them in the phonebook.
* Call menu: During a communication, the Menu softkey allow you to manage two or
more calls, to have a look in its phonebook, go in main menu, mute the microphone.
The menu items depend on the current state of the phone.
When one communication is active and no communication is on hold, the call
menu allows:
* Phonebook
* Mute/Un-mute
* Hold
* Hang-up (active call)
* Main menu
When one communication is on hold and no communication is active, the call
menu allows:
* Phonebook
* Mute/Un-mute
* Retrieve
* Hang-up (hold call)

10
* Main menu
When one communication is active and one is on hold, the call menu allows:
* Phonebook
* Mute/Un-mute
* Swap
* Hang-up
-Activecall
- Hold call
- All calls
* Main menu
* Multiparty
* ECT (Explicit call transfer)
1. Call menu phonebook:
During conversation, you can have browse the phonebook and make a
second call. If a second call is initiated, the first one is automatically put on
hold.
2. Call menu mute:
During conversation, the microphone can be muted (turned off) to allow you
privacy. The ear-piece remains actives.
An icon is displayed to indicate the microphone state.
Choose Un-mute in the menu: the microphone is turned back on, and the icon
disappears.

11
3. Call menu hold, retrieve, swap:
The active call may be put on hold by pressing the Send key or selecting Hold
from the menu. (Note: subscription to the supplementary Call Hold service is
required)
Pressing the Send key again or selecting Retrieve from the menu reactivates
the call.
If you have subscribed to have two calls (one hold and one active), it is
possible to switch between the two calls – placing the active call on hold while
reactivating the call on hold – by pressing the Send key again or selecting
Swap from the menu.
4. Call menu hang up:
To hang up the active call, press 1then Send or choose menu Hang up.
To hang up the hold call, press 0then Send or choose menu Hang up.
To hang up all call, press the End or choose menu Hang upl.
* Short Message Quick Access: Upon short message arrival, the phone beeps, the
message icon is displayed. Press “ Message ” softkey in the bottom-right corner of the
screen.
Pressing the Envelope softkey directly accesses the first unread message - proceed with
SMS handling as described in section “Short Message” .
The message icons remain displayed as long as an unread message exists.
* Unanswered calls
- If there were any unanswered incoming calls, the “Missed” softkey is displayed
in the bottom-right corner of the screen, and shows the number missed.

12
- The phone can store details of the last 20 unanswered calls.
* Quick call to voicemail box: The NXG9230 allows you to divert incoming calls to your
voicemail box and receive a notification that a voice message has been received.
This optional notification, depending on the network, displays the voicemail icon and
softkey as shown below.
Pressing the voicemail softkey calls the mailbox. A screen prompts the mailbox number
if is not already defined.
13
4. Predictive Text Input:
The ZiCorp standard predictive input engine is used for Spanish and English text input.
It is available in SMS’s, phonebook name and address entries.
The following illustrations are of text input for an SMS.
Each LONG-PRESS of ‘#’ cycles to the next mode as follows:
«ABC» «abc» «Zi8» «123»
OK - validates / inserts a character (candidate window shown)
- validates text and goes to next field / menu
BACK - returns to the previous screen / menu
CLR - erases strokes / characters
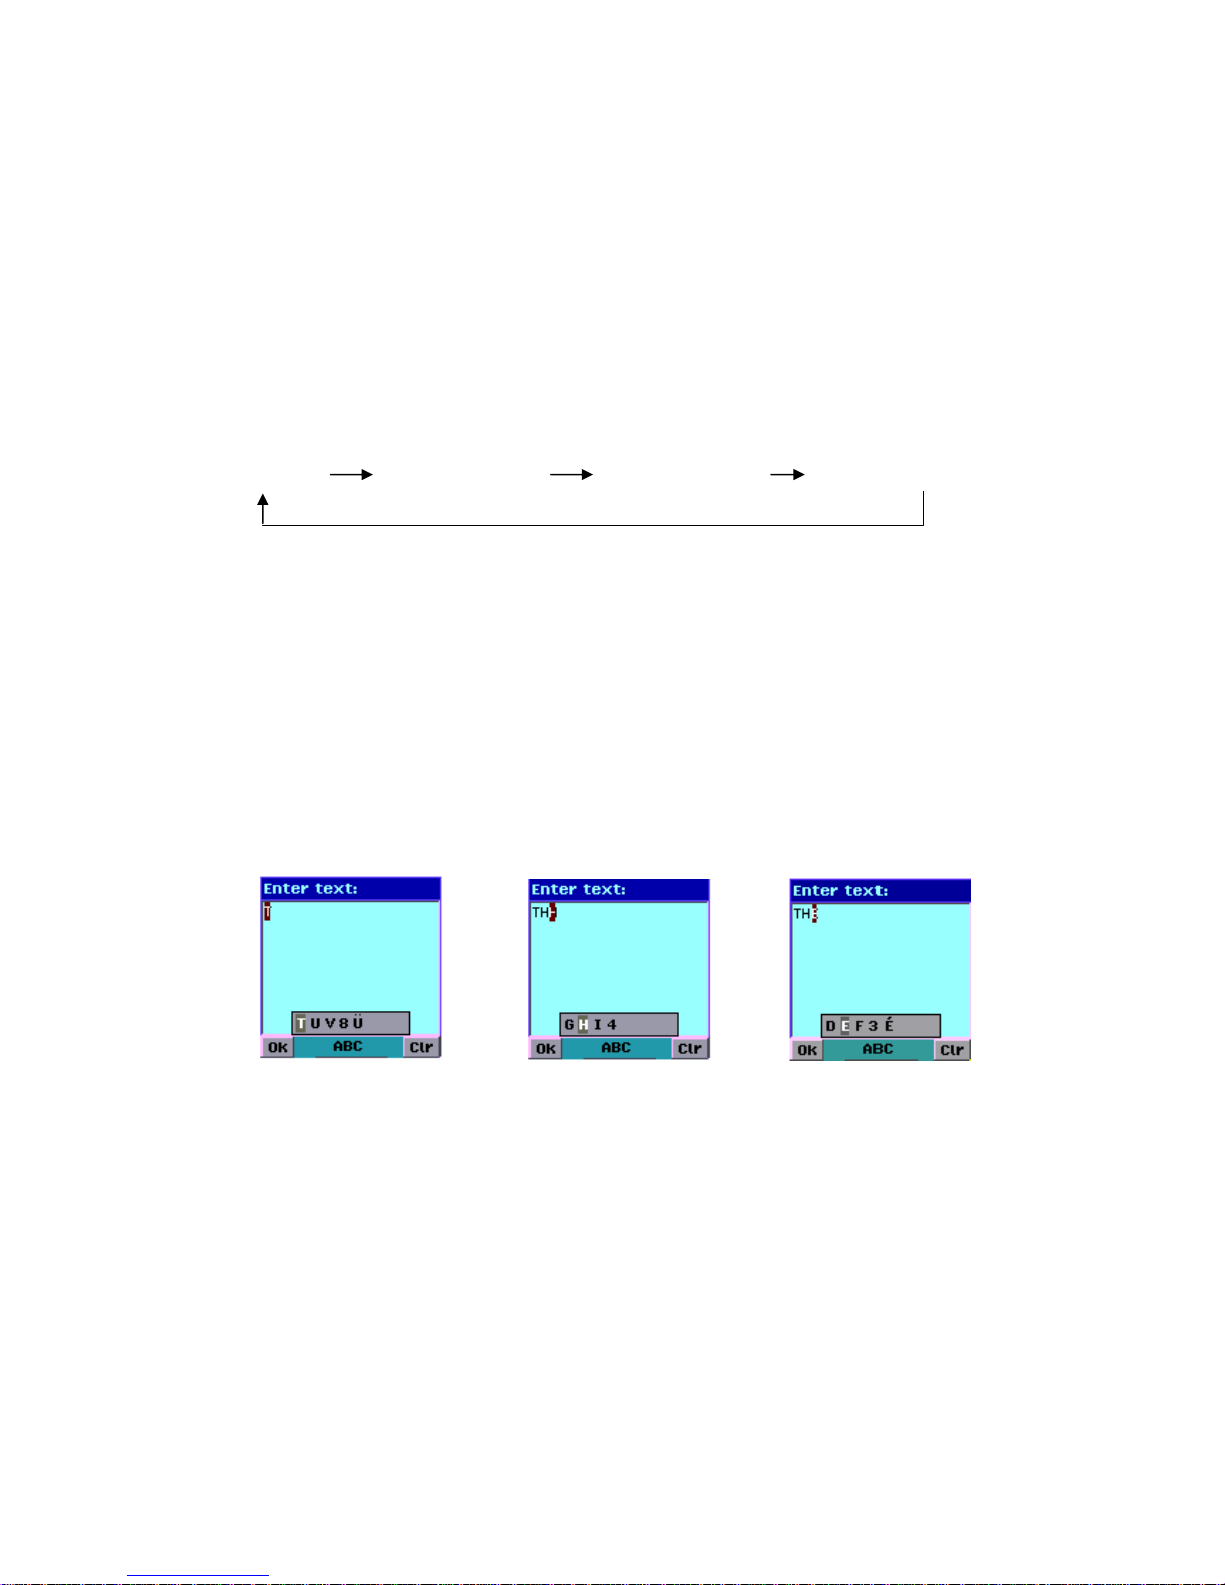
1. ABC mode:
A window displays the current and subsequent characters. Press the same key
to move the cursor within the text body.
1) One key-press on ‘8’ 2) Two presses on ‘4’ 3) Two
presses on ‘3’
2. abc mode:
This mode is the same as « ABC », except in lower-case.
3. Zi8 mode :
As you type a word, using one key-press per character, the Zi8 window
proposes a completed word. Continue completing the word by entering
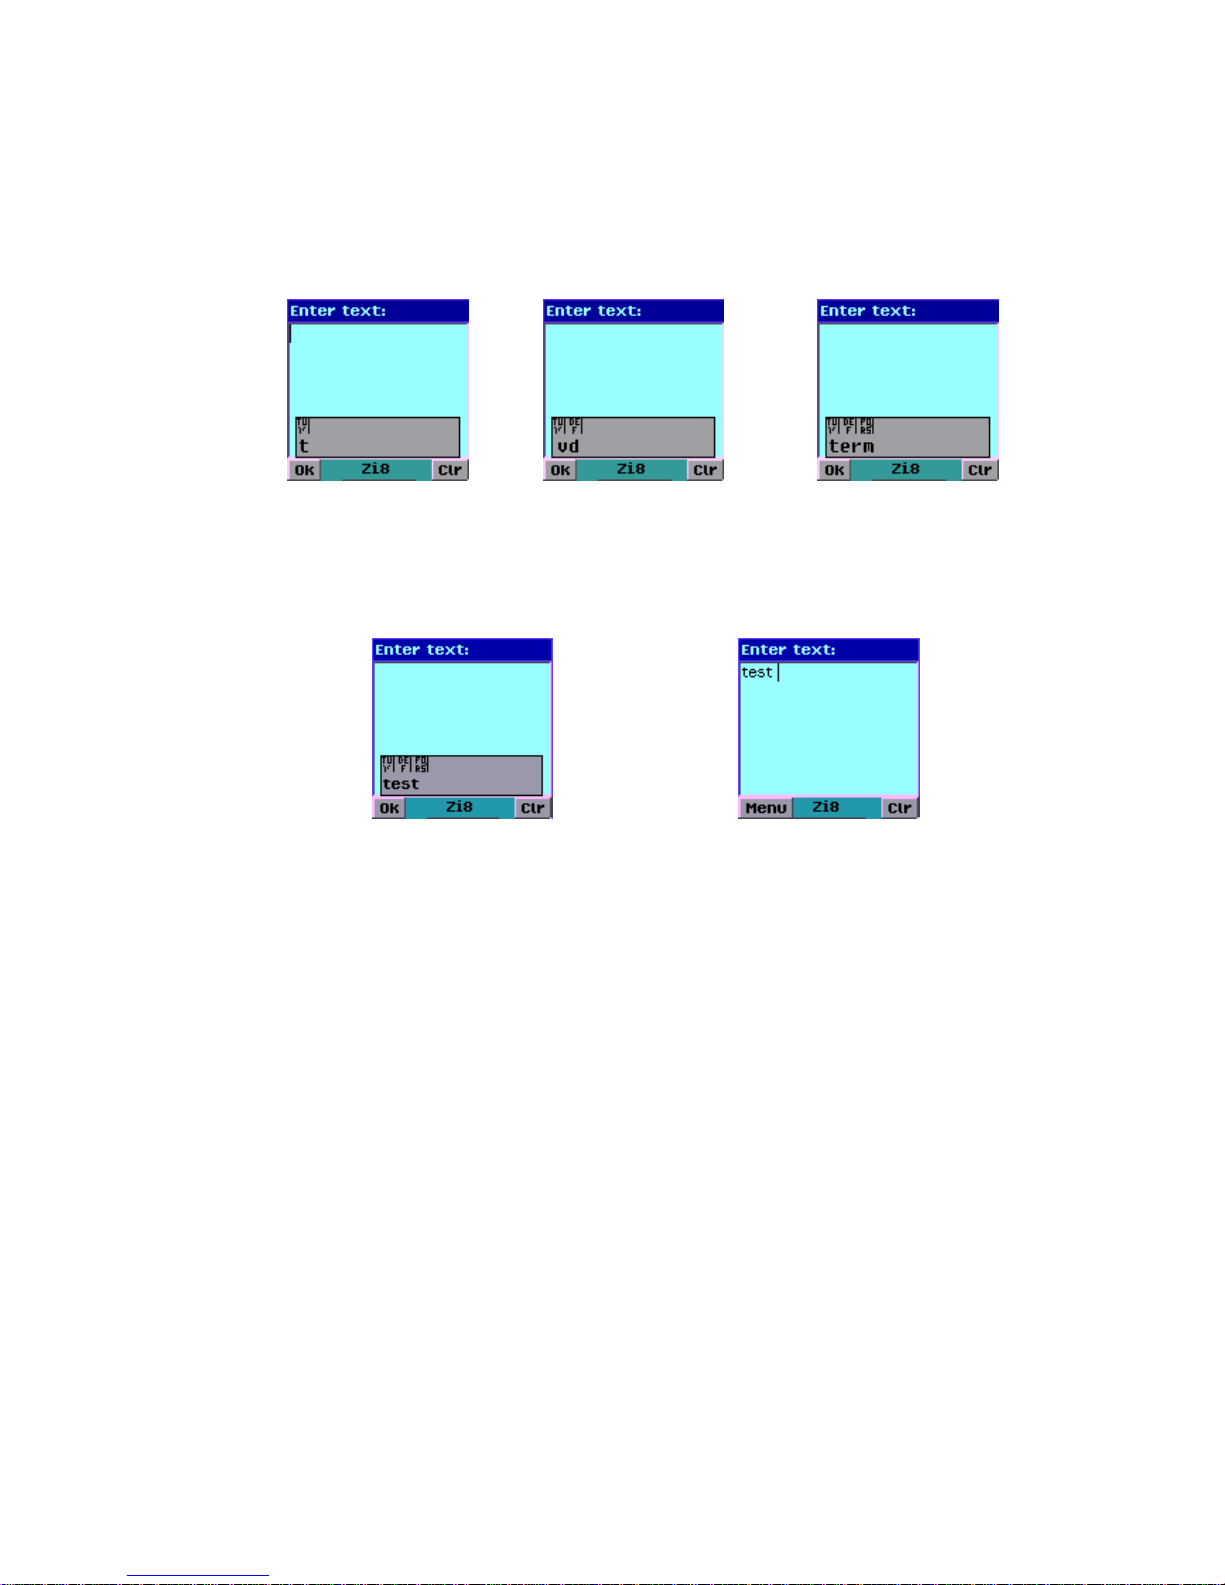
14
more characters, or use the UP / DOWN / LEFT / RIGHT navigation pad to see
more possible matches. The OK softkey validates the word shown in the
window.
1) First key-press on ‘8’ 2) Second key-press on ‘3’ 3) Third key-press on ‘7’— the
word ‘very’ is proposed
4) Navigate to next word ‘test’ 5) Validate ‘test’ with OK

15
5. Phone book:
The NXG9230 supports SIM card and “in-phone memory”, each with capacities up to
255 entries. (Note: the capacity of entries supported varies depending on the SIM card)
You can access to the phonebook by pressing the phonebook softkey in the standby
mode.
Then you can store, edit, and make a call using the stored number.
* Display records and call a stored number
The first line displays the phone number and its type. If the record has several numbers
available, the number displayed is the first non-empty of the following fields (in order):
Home, Mobile, Office, Fax, Data.
The second line displays the first non-empty of the following fields (in order): Address, E-
mail, another phone number & its type.
On the third line:
- On the left side, an icon indicates One-touch speed dialing number
- In the right side, the number of the melody that plays when receiving a call from
this person
On the title bar right side, an icon indicates if the record exists in phone memory or in
the SIM; followed by a number showing its location.
You can display the other records using the Up/Down keys.
Pressing Send makes a call to the record displayed. If several numbers are available, a
pop-up menu proposes phone numbers from which to choose—either Send or the Ok
softkey dials.
The Menu softkey brings up the phonebook functions menu.
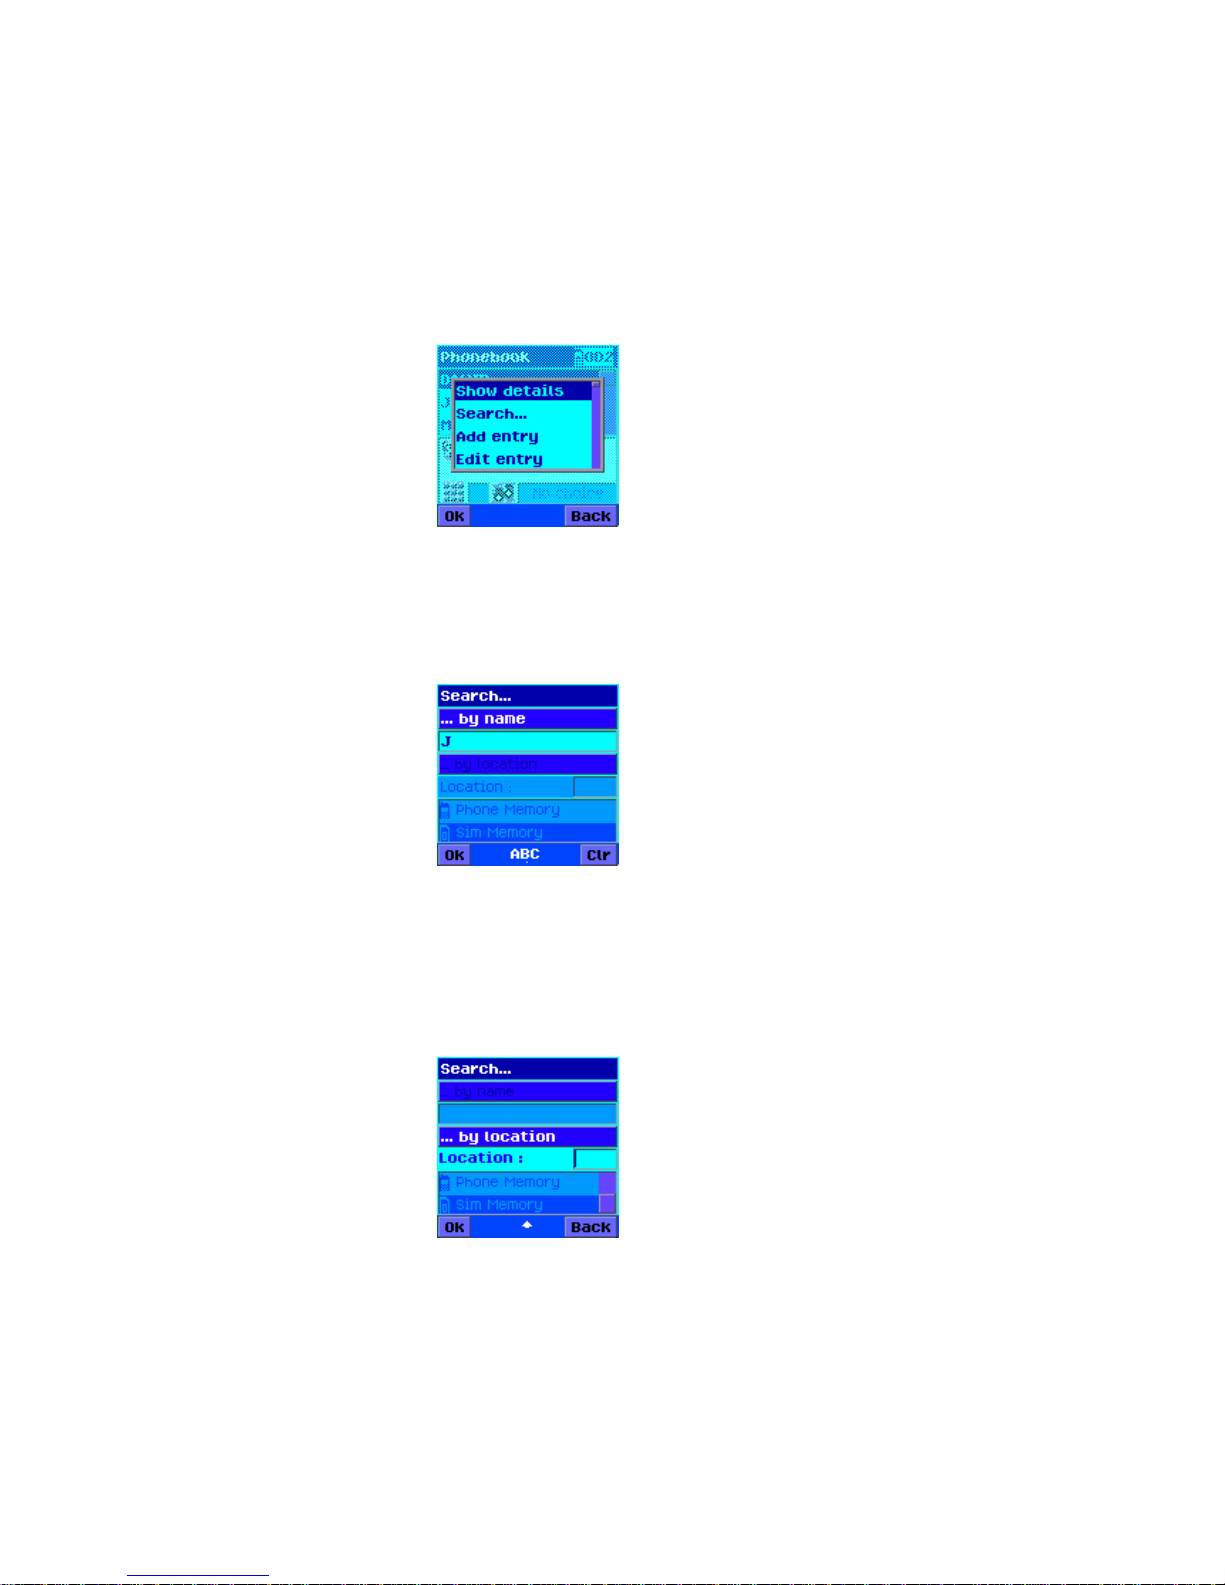
16
The Back softkey returns to the idle screen.
The current record’s detailed information may be viewed by selecting “Show details”
from the menu.
* Search
- Search by name:
1. Enter the name which you are looking for.
2. Press Ok softkey.
- Search by location:
1. Enter the location associated to the entry you are looking for.
2. Select the phonebook which you want to find: SIM or “in-memory”.
3. Press Ok softkey.

17
* Add entry:
1. Enter the name
1. Enter the name associated to the number.
2. Press Down key to go to the home phone number entry.
-To cancel the procedure, press Back softkey.
2. Enter phone numbers:
1. Enter phone numbers
2. Press OK or Down key to go to the next field.
-To modify the previous entered name or number and keep the
number entered, press Up key.
-To cancel the procedure, press Back softkey.
-To quickly finish and go to the second screen input, press SEND key.
-You can save 5 numbers for an entry: Home, Mobile, Office, Fax,
Data
3. Enter the One-touch speed dialing number
1. If you want this phone information to be part of the One-touch speed
dialing number, enter the number (2-9).
2. Press OK or Down to go to the melody input field.
- To modify the previous entered fields and keep the quick dial entered,
press Up key.
- To cancel the procedure, press Back softkey.
4. Enter the melody/sound

18
If you want a special melody associated to this number, press right key, and
select one in the available Media Center melodies list using Up and Down keys.
By default, phone will use the currently default melody/sound selected when
the call arrives.
The selected melody is played to help you making your choice.
- To modify the previous entered fields and keep the melody/sound
selected, press Up key.
-To cancel the procedure, press Back softkey.
-To quickly finish and save the information, press SEND key.
5. Enter the picture/animation:
If you want a special picture/animation associated to this number, press right
key, and select one in the available Media Center picture/animation list using
Up and Down keys. By default, phone will use the currently default
picture/animation selected when the call arrives.
6. Enter email address:
1. Enter the email address (Note: To enter “@”, press “1” and find)
2. Press Ok or Down key to go to address.
- Whatever you selected language, email address is always written in
an English editor.

19
- To modify the previous entered fields and keep the email address
entered, make a press to the Up key.
-To cancel the procedure, press Back softkey.
-To quickly finish and save the information, press SEND key.
Whatever the current selected language, the email address is always
written in an English editor.
7. Enter address:
1. Enter the address.
2. Press Ok or Down key to go in the confirmation screen and save the
new record.
- To modify the previous entered fields and keep the address entered,
press Up key.
-To cancel the procedure, press Back softkey.
8. Save the new record:
- Press Save softkey to confirm and save the new record.
- To return to the list of entries without saving the new record, press
Back softkey. (Warning: All the inputs are lost!)
- To modify the previous entered before saving, press Up key.
* Edit entry:
- Use Left/Right keys to move the cursor within the input field and Clr key to

20
delete the character/digit before the cursor and press Ok to validate the
changes.
- Use Up key to go to the previous field and Down or Ok key to the next field.
- You can go directly to the confirmation screen by pressing Send key.
- To confirm all the modifications and return to the list of entries, press Save
softkey
- To cancel the procedure, press Back softkey.
* Delete entry: It proposes to definitely remove the current record. A confirmation
screen will ask you if you really want to delete the record.
The Ok softkey goes on with the deletion and the Back softkey cancels the action.
* Select memory
- You can select default phonebook storage between SIM and “in-memory”
phonebook.
- The bottom of the screen displays the number of used entries and the total
number of entries for each phonebook.
- Use Up/Down keys to select the default phonebook storage and press Ok
softkey to validate the choice.
- Back softkey can be used to cancel the whole procedure.
Table of contents


