Nobles Quick Clean 12 1072857 Troubleshooting guide

®
9011268
Rev. 05 (08-2019)
1200 PSI HARD SURFACE CLEANER
www.nobles.com
OPERATOR AND PARTS MANUAL
Quick Clean 12
EN
ES
FR
SPANISH
FRENCH
SPANISH
FRENCH
Model Part No.:
1072857-- 120V
To view, print or download
the latest manual, visit:
www.nobles.com/manuals
™
MANUEL DE L’OPÉRATEUR ET DES PIÈCES DÉTACHÉES
1200 PSI HARD SURFACE CLEANER
LIMPIADOR PARA SUPERFICIES DURAS DE 1200 PSI
APPAREIL DE NETTOYAGE DES SURFACES DURES DE 1200 PSI
MANUAL PARA EL OPERADOR Y MANUAL DE REPUESTOS

2
INTRODUCTION
This manual is furnished with each new model. It provides
necessary operation and maintenance instructions and
replacement parts information.
Read all instructions before
using this machine.
This machine will provide excellent service. However, the
best results will be obtained at minimum costs if:
The machine is operated with reasonable care.
The machine is maintained regularly - per the
maintenance instructions provided.
7KHPDFKLQHLVPDLQWDLQHGZLWKPDQXIDFWXUHUVXSSOLHG
or equivalent parts.
To view, print or download manuals online visit
www.nobles.com
The Nobles Hard Surface Cleaner is intended for commercial
XVHIRUH[DPSOHLQKRWHOVVFKRROVKRVSLWDOVVKRSVRI¿FHV
and rental businesses. It is designed to clean tile, stone,
DQGRWKHUKDUGVXUIDFHVH[FOXGLQJKDUGZRRGÀRRUVLQDQ
indoor environment. It’s also designed to clean carpet
with the use of optional accessory tools. This machine is
not constructed for any other use. Use only commercially
DYDLODEOHÀRRUFOHDQHUVDQGUHFRPPHQGHGDFFHVVRU\WRROV
intended for machine application. Do not use this machine
other than described in this manual.
MACHINE DATA
IMPORTANT 7R HQVXUH IXOO ZDUUDQW\ SURWHFWLRQ ¿OO
out the attached MACHINE INSTALLATION/WARRANTY
REPORT REPLY CARD and return to Tennant within 30
days of purchase.
3OHDVH¿OORXWDWWLPHRILQVWDOODWLRQIRUIXWXUHUHIHUHQFH
Model No. - _________________________________
Serial No. - _________________________________
Installation Date - ____________________________
PROTECT THE ENVIRONMENT
Please dispose of packaging materials
and used machine components in an
environmentally safe way according to
your local waste disposal regulations.
Always remember to recycle.
INTENDED USE
GENERAL INFORMATION
Carefully check machine for signs of damage. Report
damage at once to carrier. Check machine contents to
ensure all parts and accessories are included. Contact
distributor or Tennant for missing items.
MACHINE SERIAL NO. TAG LOCATION
TABLE OF CONTENTS
IMPORTANT SAFETY INSTRUCTIONS 3
SAFETY LABEL 4
GROUNDING INSTRUCTIONS 4
MACHINE COMPONENTS 5
MACHINE SETUP 6-7
MACHINE OPERATION 8
DRAINING TANKS 9
MACHINE MAINTENANCE 9
SERVICING MACHINE 10
STORING MACHINE 10
LOADING MACHINE 10
MACHINE SPECIFICATIONS 11
TROUBLESHOOTING 12
PARTS LIST 35-48
ELECTRICAL DIAGRAM 49
ACCESSORY TOOLS APPLICATION GUIDE 50
Tennant Company
PO Box 1452
Minneapolis, MN 55440
Phone: (800) 553-8033 or (763) 513-2850
www.nobles.com
Nobles is a registered United States trademark of Tennant Company.
Quick Clean is a United States trademark of Tennant Company.
6SHFL¿FDWLRQVDQGSDUWVDUHVXEMHFWWRFKDQJHZLWKRXWQRWLFH
Original Instructions. Copyright ©2013-2019 Tennant Company
All rights reserved. Printed in U.S.A.
Nobles Quick Clean 12 (08/2019)
English
EN
UNPACKING MACHINE

3
EN
IMPORTANT SAFETY INSTRUCTIONS
When using an electrical appliance, basic precautions should always be followed, including the following:
READ ALL INSTRUCTIONS BEFORE USING THIS MACHINE
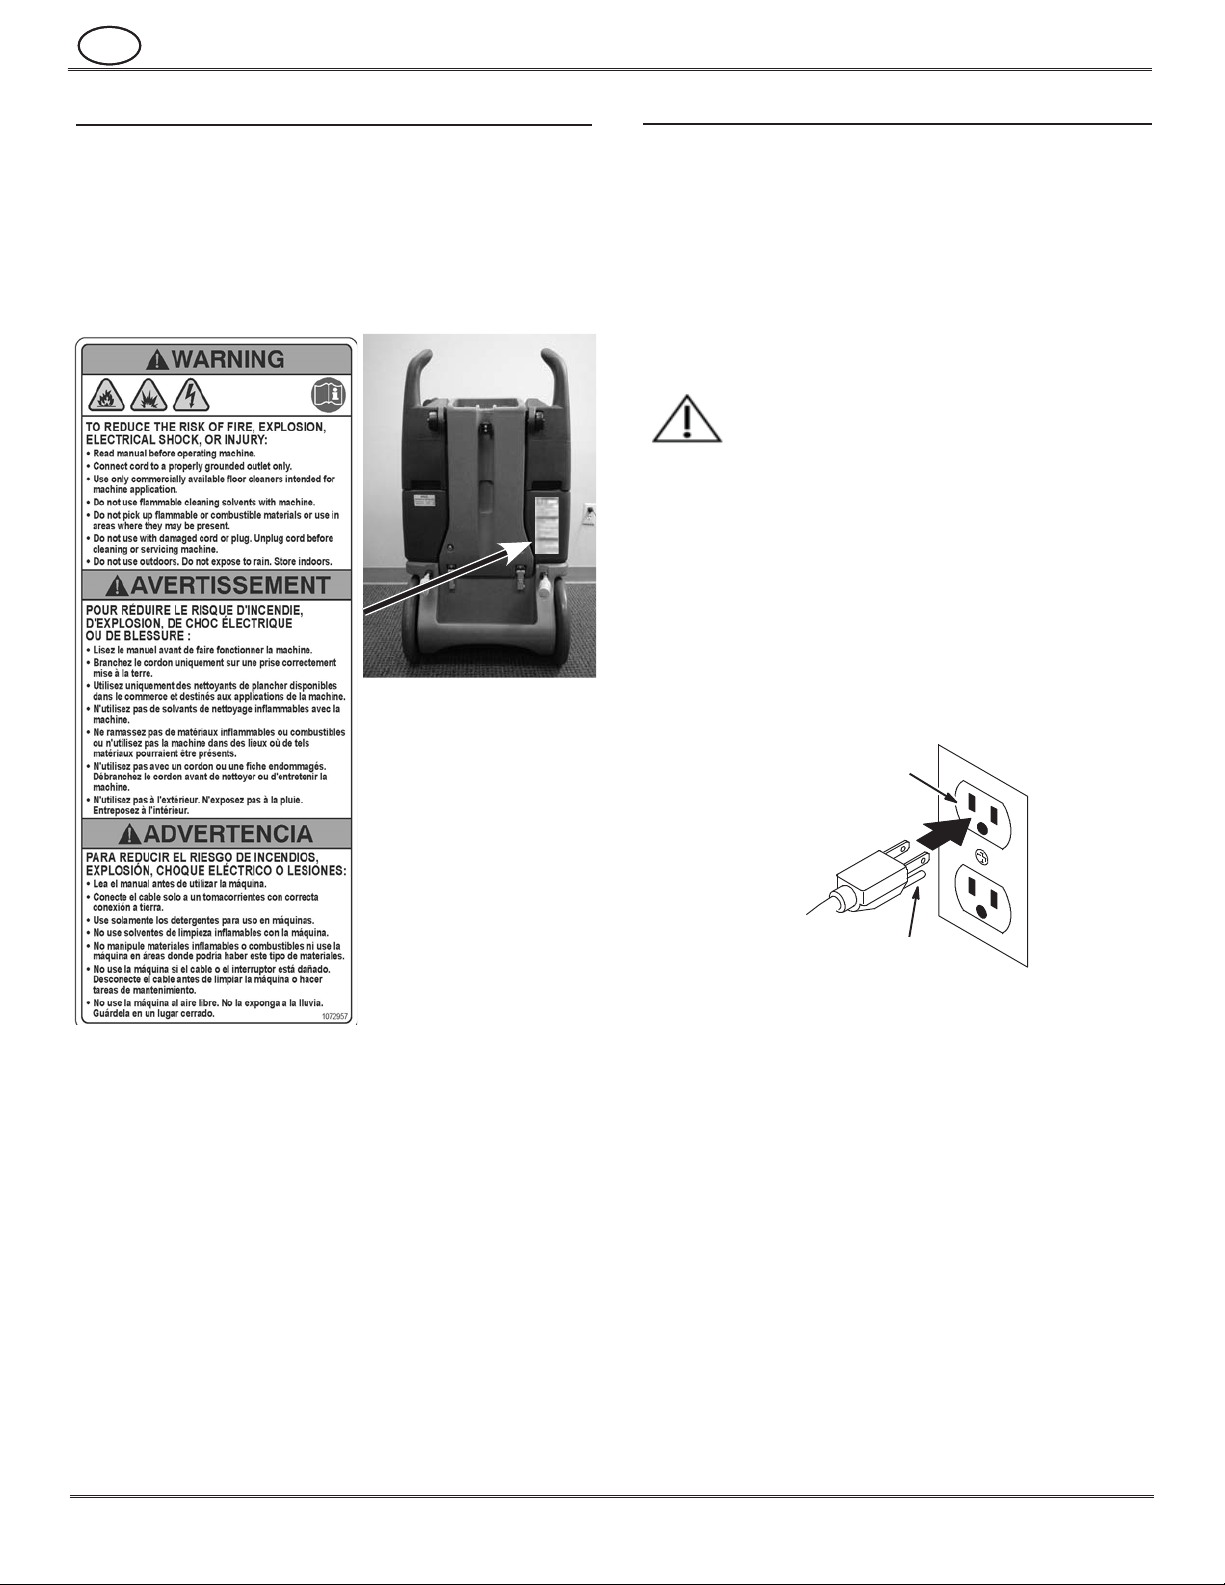
WARNING - 7RUHGXFHWKHULVNRI¿UHH[SORVLRQHOHFWULFVKRFNRULQMXU\
1. Do not leave appliance when plugged in. Unplug cord from outlet when not in use or servicing machine.
2. Do not use outdoors. This machine is for indoor use only.
3. Do not allow to be used as a toy. Close attention is necessary when used near children.
4. Use only as described in this manual. Use only manufacturer’s recommended accessory tools.
5. Operators shall be adequately instructed on the use of this machine.
6. This machine is not intended for use by persons, including children, with reduced physical, sensory or mental capabilities, or lack
of experience and knowledge.
7. )ROORZVLWHVDIHW\JXLGHOLQHVFRQFHUQLQJZHWÀRRUV
8. Wear non-slip shoes when operating machine.
9. Do not use with damaged cord or plug. If appliance is not working as it should, has been dropped, damaged, left outdoors, or
dropped in water, return it to a service center for repair.
10. Do not pull or carry by cord, use cord as a handle, close a door on cord, or pull cord around sharp edges or corners. Do not run
appliance over cord. Keep cord away from heated surfaces.
11. Do not pull cord to unplug. To unplug, grasp the plug, not the cord.
12. Do not handle plug or appliance with wet hands.
13. 'RQRWSXWDQ\REMHFWLQWRRSHQLQJV'RQRWXVHZLWKDQ\RSHQLQJEORFNHGNHHSIUHHRIGXVWOLQWKDLUDQGDQ\WKLQJWKDWPD\
UHGXFHDLUÀRZ
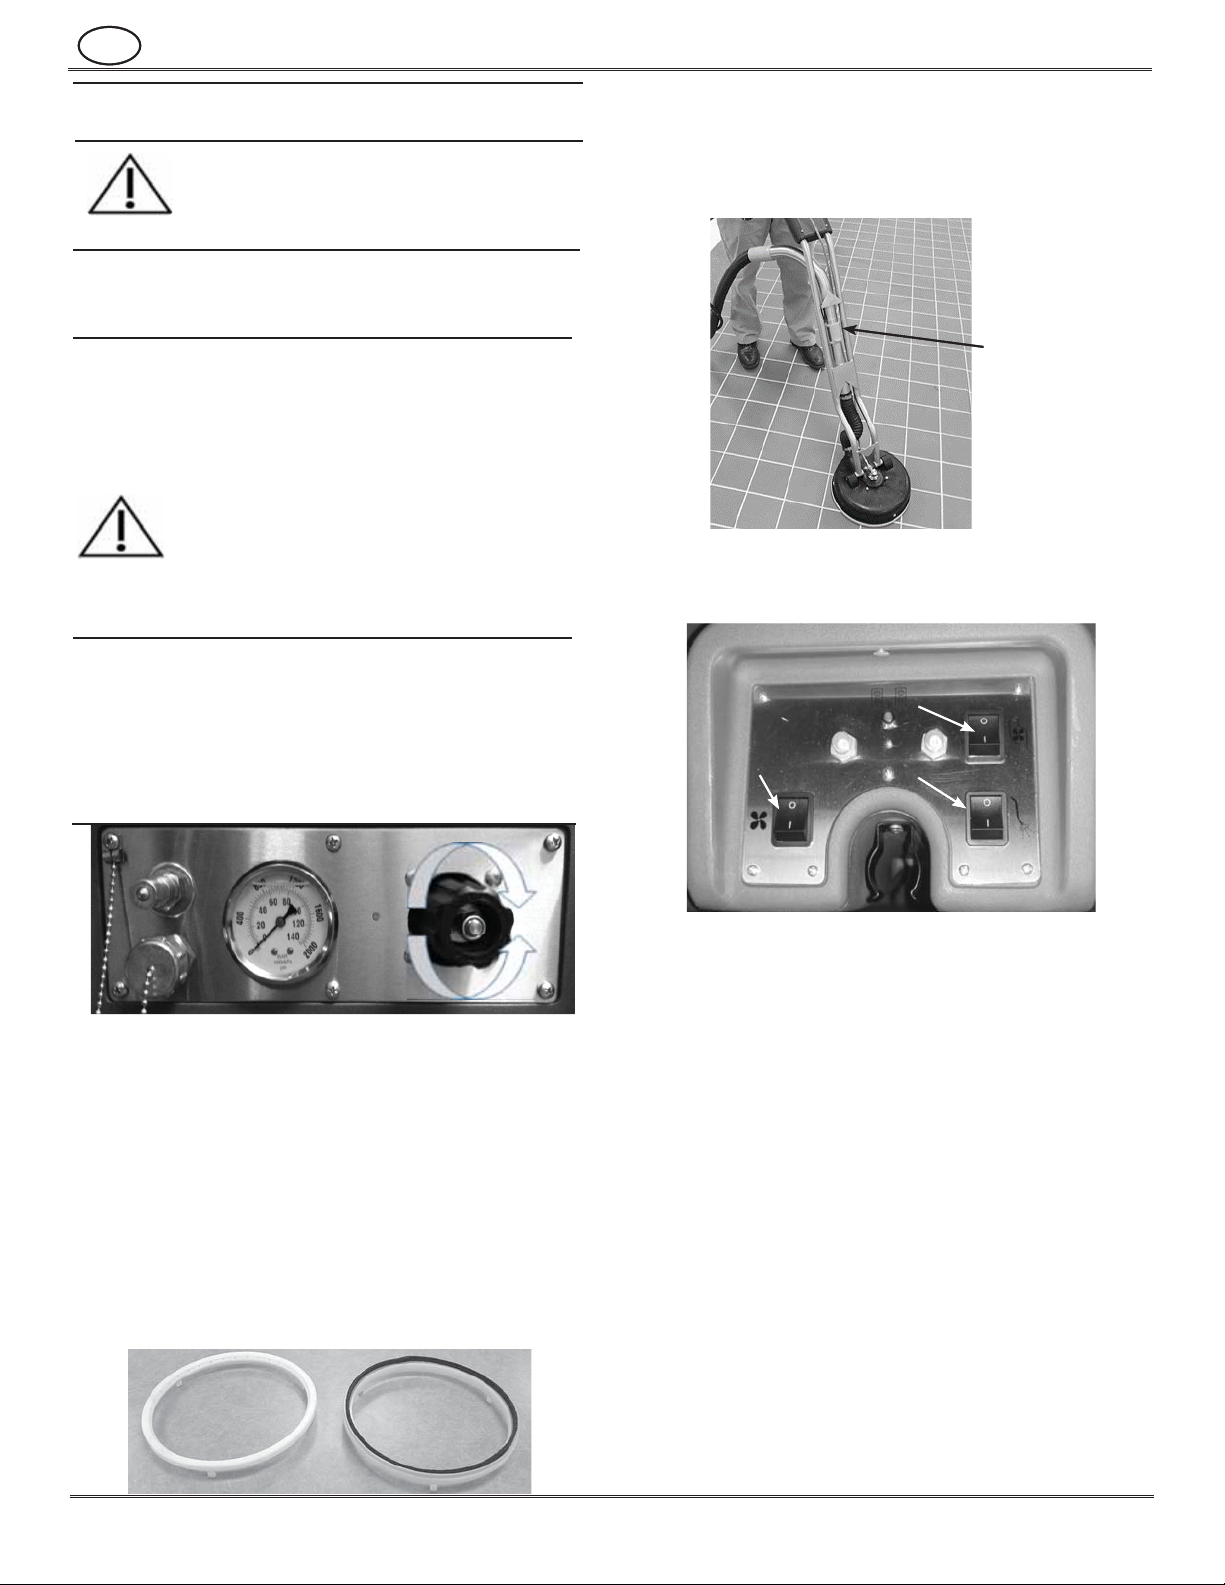
14. 'RQRWXVHZLWKRXWEDOOÀRDWVFUHHQLQSODFH
15. .HHSKDLUORRVHFORWKLQJ¿QJHUVDQGDOOSDUWVRIERG\DZD\IURPRSHQLQJVDQGPRYLQJSDUWV
16. Turn off all controls before unplugging.
17. 'RQRWXVHÀDPPDEOHFOHDQLQJVROYHQWVZLWKPDFKLQH
18. 'RQRWDGGZDWHURYHUÛ)Û&WRVROXWLRQWDQN
19. 'RQRWXVHWRSLFNXSÀDPPDEOHRUFRPEXVWLEOHOLTXLGVVXFKDVJDVROLQHRUXVHLQDUHDVZKHUHWKH\PD\EHSUHVHQW
20. Do not pick up any type of hazardous dust or toxic materials.
21. Do not pick up anything that is burning or smoking, such as cigarettes, matches, or hot ashes.
22. Do not point spray at yourself or in the direction of others
23. Do not use this machine for dry vacuuming before wet cleaning.
24. Do not operate machine in standing water.
25. Immediately unplug power cord from outlet if machine leaks solution/foam or if machine tips over while operating.
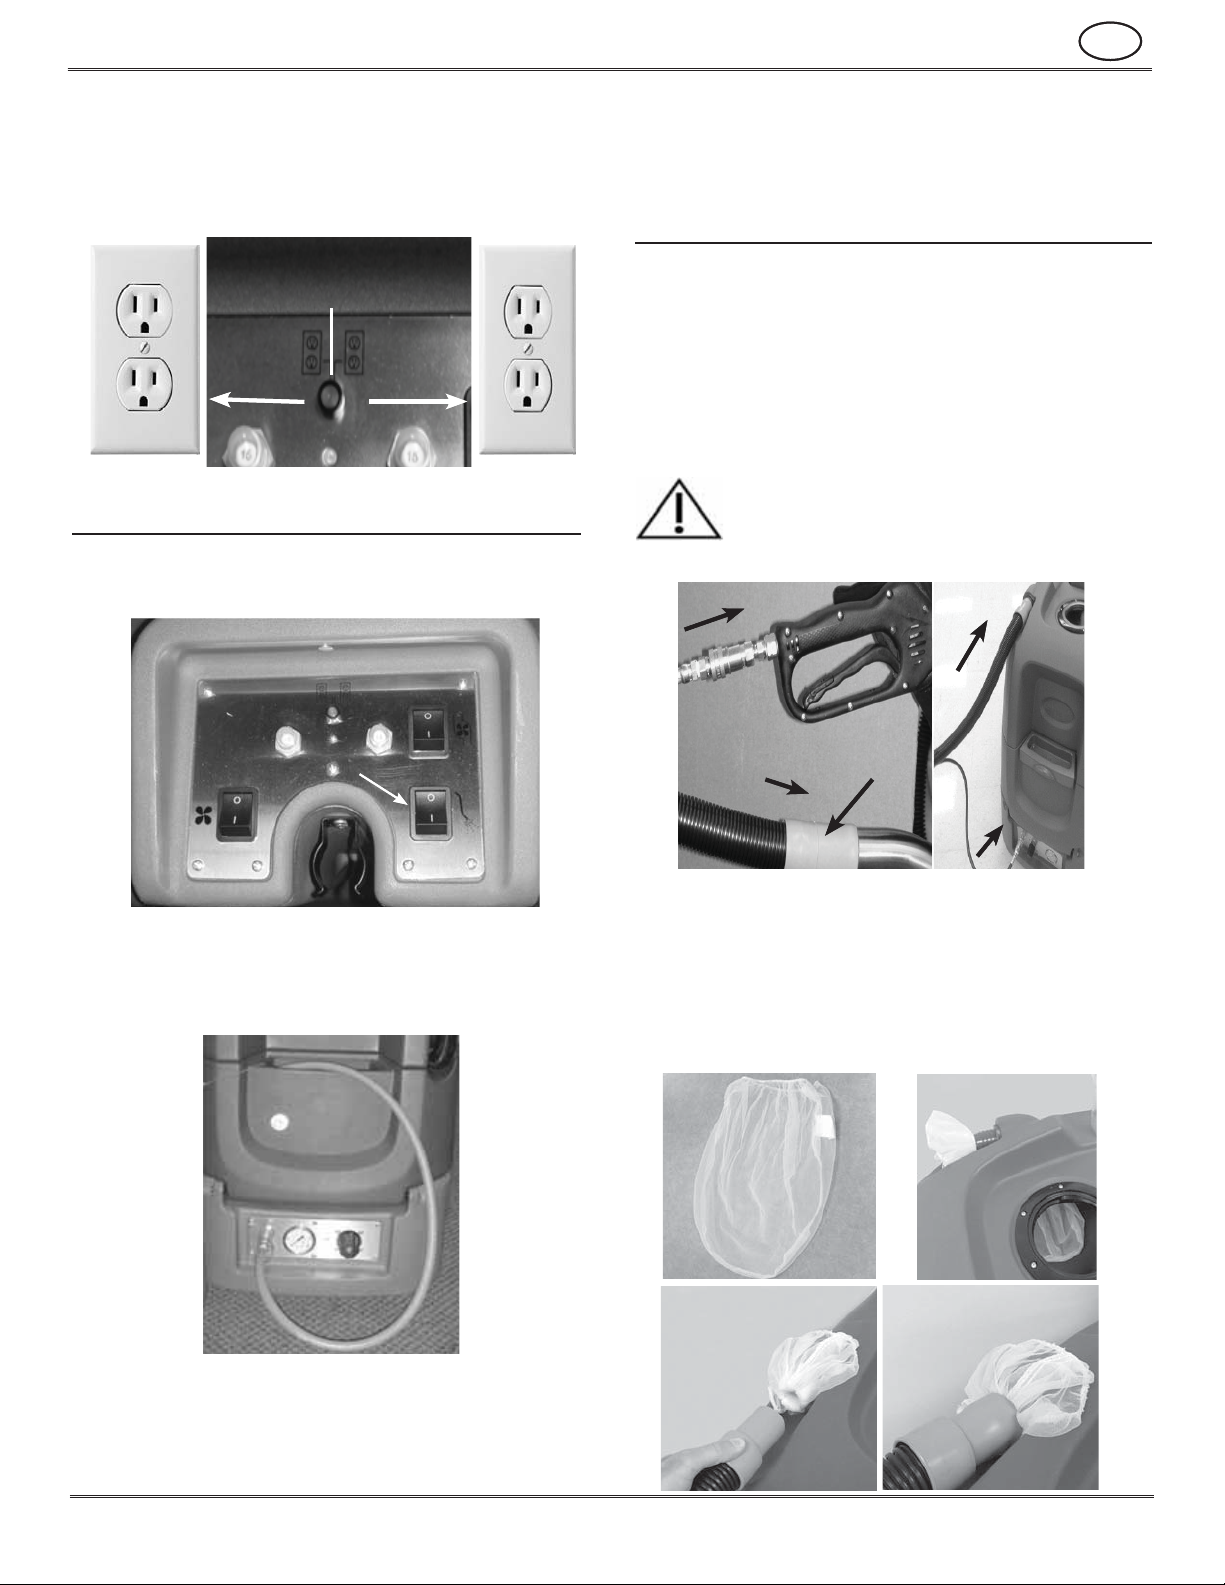
26. Release water pressure at accessory tool spray nozzle before disconnecting solution hose.
27. Always stop machine on a level surface.
28. Use extra care when cleaning on stairs. Do not wheel machine up or down stairs.
29. Connect to a properly grounded outlet only.
30. Extension cord must be 12/3 gauge and no longer than 40 feet. Replace cord if ground plug becomes damaged.
31. Do not use additional extension cords with machine.
32. Do not use machine if not in proper operating condition.
33. Do not modify machine from its original design.
34. Get assistance when lifting machine.
35. $OOUHSDLUVPXVWEHSHUIRUPHGE\DTXDOL¿HGVHUYLFHSHUVRQ8VHRQO\PDQXIDFWXUHUVXSSOLHGRUHTXLYDOHQWUHSODFHPHQWSDUWV
36. Do not expose machine to rain or moisture. Store indoors only. Do not expose machine to freezing temperatures.
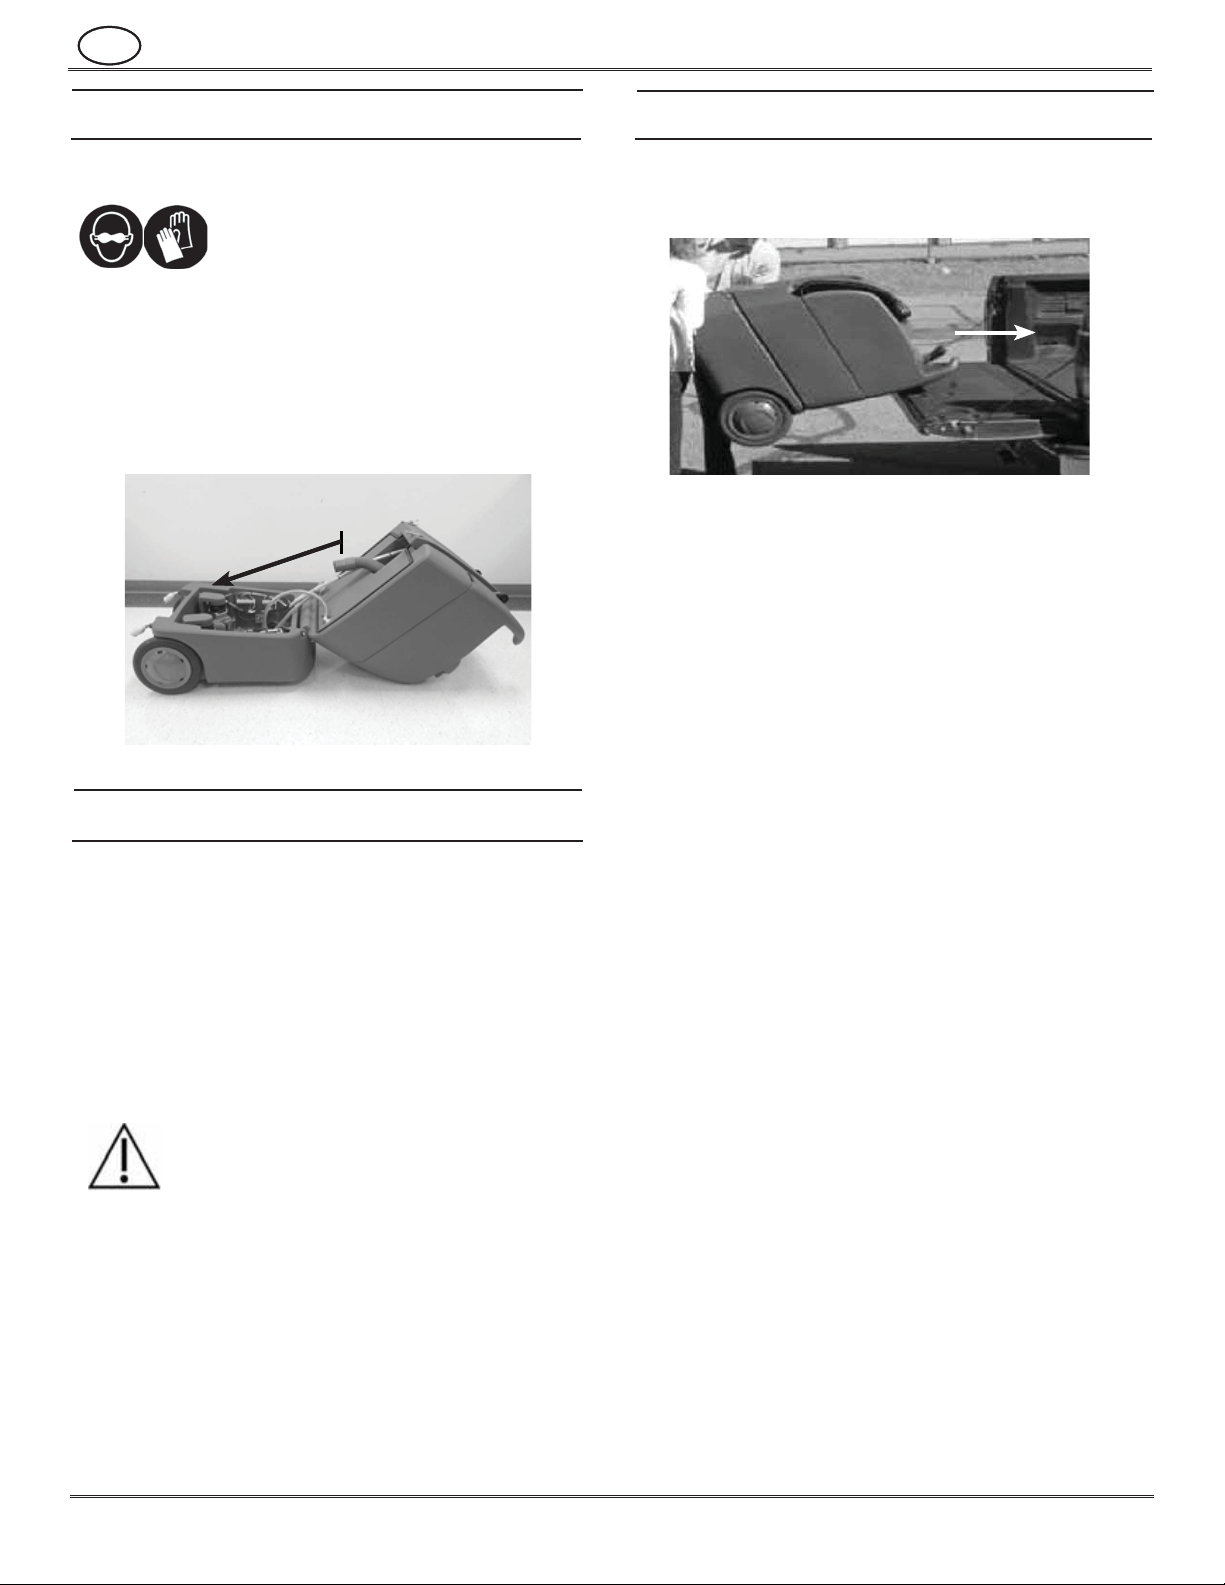
37. Wear appropriate personal protection equipment as needed.
SAVE THESE INSTRUCTIONS
Nobles Quick Clean 12 (01/2014)
English

4
GROUNDING INSTRUCTIONS
This machine must be grounded. If it should malfunction
or breakdown, grounding provides a path of least resistance
for electrical current to reduce the risk of electrical shock.
This machine is equipped with a cord having an equipment-
grounding conductor and grounding plug. The plug must
be inserted into an appropriate outlet that is properly
installed and grounded in accordance with all local codes
and ordinances.
WARNING - Improper connections of the
equipment-grounding conductor can result in a risk of
HOHFWULFVKRFN&KHFNZLWKDTXDOL¿HGHOHFWULFLDQRUVHUYLFH
person if you are in doubt as to whether the outlet is
properly grounded. Do not modify the plug provided with
WKHPDFKLQH,ILWZLOOQRW¿WWKHRXWOHWKDYHDSURSHU
RXWOHWLQVWDOOHGE\DTXDOL¿HGHOHFWULFLDQ
This machine is for use on a nominal 120 volt circuit and
has a grounding attachment plug that looks like the plug
illustrated below. Make sure that the machine is connected
WRDQRXWOHWKDYLQJWKHVDPHFRQ¿JXUDWLRQDVWKHSOXJ
SAFETY LABEL
The safety label appears on the machine in the location
indicated. Replace label if it becomes damaged or illegible.
WARNING LABEL - Location on back.
Grounded
3 Hole Outlet
Grounding Pin
Nobles Quick Clean 12 (01/2014)
English
EN

5
EN
Nobles Quick Clean 12 (01/2014)
English
0$&+,1(&20321(176
MACHINE AND ACCESSORIES REAR VIEW
FRONT VIEW CONTROL PANEL COMPONENENTS
Loading
Wheels
Wand Holder
>ŝŌŝŶŐ
Handles
Internal Access
Latches
Recovery Tank
Drain Hose
Vacuum Hose
ŽŶŶĞĐƟŽŶ
^ŽůƵƟŽŶ
Tank Fill
>ŽĐĂƟŽŶ
Pressure
Gauge
Swivel
Caster
^ŽůƵƟŽŶ
Hose
ŽŶŶĞĐƟŽŶ
Auto Dump
,ŽƐĞŽŶŶĞĐƟŽŶ
Pressure
Adjustment
Knob
Dual Circuit
Indicator
Internal Access
Lock Plates
Hard Surface
Tool
Recovery
Tank Cover
Ϯ—ϰϬŌWŽǁĞƌ
Cords
^ŽůƵƟŽŶ,ŽƐĞĂŶĚ
Vacuum Hose
Priming Hose
Auto Fill Hose
Lo
Lo
Loa
Loa
Loa
Loa
oa
oa
oa
oa
Loa
Loa
Loa
Loa
Loa
oa
Loa
Loa
Loa
Loa
oa
Lo
oa
oa
Loa
L
oa
oa
Lo
oa
Lo
Lo
a
o
a
o
o
din
i
din
din
din
din
din
din
din
din
d
din
din
di
din
din
din
din
din
din
din
din
din
din
din
din
d
din
di
n
n
g
g
g
g
g
g
g
g
g
g
g
g
g
g
g
g
g
g
g
g
g
g
g
g
Wh
Wh
Wh
Wh
Wh
Wh
Wh
h
h
he
he
e
h
h
Wh
h
Wh
els
els
els
Wan
Wan
Wan
n
n
n
n
n
n
n
n
n
Wa
n
n
n
d H
d H
d H
d H
d H
d
H
H
H
H
H
d
H
d
o
o
o
o
old
old
ld
o
o
er
er
>ŝŌ
>ŝŌ
>ŝ
>
>
>
>ŝŌ
Ō
Ō
Ō
Ō
Ō
>
ŝŶŐ
ŝŶ
ŝŶ
ŝŶ
ŝŶ
Ŷ
Ŷ
Ő
Ŷ
Han
Ha
Ha
a
a
a
a
n
n
a
n
dle
dl
dldl
dl
d
d
s
s
s
Int
nt
ern
ern
ern
rn
al
al
l
al
al
A
Ac
Acc
Acc
ess
s
s
Lat
La
La
Lat
Lat
cheche
che
s
s
s
Loading
Wheels
Hard Surface
Tool Strap
>ŝŌŝŶŐ
Handles
Internal Access
Lock Plates
Control
Panel
Vacuum
Switch Pump
Switch
Vacuum
Circuit
Breaker
Pump and
Auto Dump
Circuit
Breaker
Auto Dump
Switch
Auto Fill
,ŽƐĞŽŶŶĞĐƟŽŶ

6Nobles Quick Clean 12 (01/2014)
English
EN
MACHINE SETUP
1. Before each use, inspect the machine, hoses, and hard surface
tool for cleanliness and completeness. Ensure the spray tips
RQWKHKDUGVXUIDFHWRRODUHWLJKW(QVXUHWKDWWKHEDOOÀRDW
VFUHHQDQGUHFRYHU\WDQN¿OWHULVFOHDQDQGRSHUDWLRQDO
2. Close and tighten the recovery tank cover and screw the cap
onto the drain hose.
3. Fill the solution tank with 15 gallons/57 liters of clean water
(maximum temperature 120°F/49°C) using a garden hose or
bucket. If choosing to use the AUTO-FILL and AUTO DUMP
feature skip to steps 4-7.
NOTE: For optimum cleaning performance, it is recommended
WRSUHVSUD\ÀRRUZLWKDQDSSURYHG+DUG6XUIDFH3UH6SUD\
detergent using a pump-up sprayer instead of adding detergent
in machine. If you choose to use cleaning detergent in machine
follow proper mixing and handling instructions on detergent
ERWWOH,W¶VDGYLVHGWRÀXVKVROXWLRQV\VWHPZLWKFOHDQZDWHU
after each use to prevent detergent buildup. The use of
powdered detergents with machine is discouraged.
4. Auto Fill - Connect the hose adaptor supplied with the
machine to the Auto Fill Hose Connection at front of
machine. Then connect a water supply garden hose to the
hose adapter.
5. Turn on the water supply hose. The Auto-Fill valve located
LQVLGHWKHVROXWLRQWDQNZLOODXWRPDWLFDOO\VKXWRIIWKHÀRZ
when tank reaches capacity. When the water level drops,
DV\RXFOHDQWKHDXWR¿OOYDOYHZLOORSHQDQGEHJLQ¿OOLQJ
the tank again.
6. Auto Dump - Attach a garden hose to the Auto Dump Hose
Connection and route the garden hose to dump site.
NOTE: When using the Auto-Dump feature use a 3/4” garden
hose. The maximum garden hose length is 75 ft/23 m with a
gradual vertical rise no more than 15 ft/4.5 m from machine to
dump site.
7. Turn the Auto Dump switch on when ready to begin
cleaning. The Auto-Dump pump will automatically turn
on when the recovery tank reaches full capacity and begin
discharging the recovered water.
Auto Dump
Switch
Auto-Fill Hose
Connection
Hose Adaptor
Auto Dump Hose
Connection

7
EN
Nobles Quick Clean 12 (01/2014)
English
5. 3XOOWKHKRVHRXWMXVWDERYHWKHZDWHUYHULI\LQJWKHUHLV
good water pressure.
6. Shut off the pump switch.
7. Remove the primer hose from the solution tank and
disconnect the other end of the primer hose from the front
of the machine.
CONNECT HARD SURFACE TOOL TO MACHINE
1. Turn all switches off.
2. Place the hose cuff adaptor onto the stainless steel pipe
located below the handle of the Hard Surface Tool.
3. Connect the solution hose and the vacuum hose to the
machine and to the Hard Surface Tool. Only use accessory
tools supplied with machine or offered by Tennant. The use
RILPSURSHUDFFHVVRU\WRROVPD\FDXVHLQMXU\
:$51,1*'RQRWDWWHPSWWRFRQQHFWVROXWLRQ
hose to machine with pump switch turned on.
OPTIONAL FILTER BAG: For areas with excessive soil or grease
EXLOGXSLW¶VUHFRPPHQGHGWRXVHWKHRSWLRQDO¿OWHUEDJ7KH¿OWHU
bag will capture the larger debris and prevent the auto-dump
¿OWHUIURPFORJJLQJ7KHRSWLRQDO¿OWHUEDJLVLQVWDOOHGDWWKH
vacuum hose connection as shown. After each use or as needed,
UHPRYHWKH¿OWHUEDJDQGFOHDQ
8. CONNECT POWER CORDS: Turn off all the switches. Plug
the two power cords into properly grounded outlets. Do not
connect both power cords into the same circuit. The Dual
Circuit Indicator will illuminate bright green when power
cords are plugged into different circuits. Machine is ready
for operation.
PRIME MACHINE
1. Turn pump switch off.
2. Attach the primer hose to the front of the machine and
place the end of the hose without the connections into the
solution tank holding the hose under water.
3. Turn the pump switch on. The water will come out with air
LQWKHZDWHUÀRZ
4. Run the pump until there are no air bubbles coming
out of the hose. May take 1-2 minutes.
Hose Cuff
Adaptor
Dual Circuit
Indicator
Circuit 1 Circuit 2
Pump Switch

8Nobles Quick Clean 12 (01/2014)
English
EN
MACHINE OPERATION
PRE-SWEEP
Sweep the area to be cleaned prior to operating the
machine.
PRE-SPRAY
:LWKWKHXVHRIDSXPSXSVSUD\HUSUHVSUD\WKHÀRRUZLWK
an approved Hard Surface Pre-Spray detergent. Only use
FRPPHUFLDOO\DYDLODEOHÀRRUFOHDQHUVLQWHQGHGIRUPDFKLQH
application. Follow proper mixing and handling instructions on
detergent bottle.
:$51,1*'RQRWXVHÀDPPDEOHFOHDQLQJ
VROYHQWVZLWKPDFKLQH'RQRWSLFNXSÀDPPDEOHRU
combustible material or work in areas were they may be
present.
SET PRESSURE
While the trigger is activated on the hard surface tool and the
SXPSVZLWFKLVWXUQHGRQWXUQWKHSUHVVXUHDGMXVWPHQWNQRERQ
the front of the machine between 400-1200 PSI.
&$87,21:KHQXVLQJDKDQGWRRORUFDUSHWZDQGDGMXVW
SUHVVXUHDFFRUGLQJWRDFFHVVRU\WRROVSHFL¿FDWLRQV
CLEANING WITH HARD SURFACE TOOL
1. )ROORZVLWHVDIHW\JXLGHOLQHVFRQFHUQLQJZHWÀRRUV
2. Verify the vacuum hose and solution hose are securely
connected to the machine and hard surface tool.
3. Choose either the Glide Ring or the Brush Ring for the Hard
Surface Tool. Using the 3 tabs snap the desired ring onto
the Dome Housing of the Hard Surface Tool.
Glide Ring – man made tiles such as porcelain and ceramic.
Brush Ring – natural stone and non-man made surfaces with a
texture.
Read all instructions before using
this machine.
4. Ensure the vacuum break cover is closed when using the
Hard Surface Tool. If the Hard Surface Tool happens to
VWLFNWRWKHÀRRUGXHWRWKHYDFXXPVXFWLRQVOLGHWKH
vacuum break cover up. Once the Hard Surface Tool is loose
IURPWKHÀRRUFORVHWKHYDFXXPEUHDNFRYHU
5. Turn on the pump and vacuum switches. Turn on the Auto-
Dump switch if using this feature.
6. For optimum cleaning results pull trigger while moving the
Hard Surface Tool in a front to back motion.
7. *RRYHUDUHDMXVWFOHDQHGZLWKYDFXXPRQO\VWURNHEHIRUH
moving to the next area.
NOTE: Use defoamer any time foaming occurs in the recovery
tank to prevent damage to the motor or other components.
8. Monitor the water level in the solution tank. If the solution
tank runs dry, the pump must be reprimed.
9. When the solution tank is low, turn off all the switches,
HPSW\WKHUHFRYHU\WDQNDQGWKHQ¿OOWKHVROXWLRQWDQN
127(:KHQWKHUHFRYHU\WDQNLVIXOOWKHEDOOÀRDWVFUHHQZLOO
VKXWRIIWKHVXFWLRQWRSUHYHQWWKHPDFKLQHIURPRYHUÀRZLQJ
$OZD\VXVHGHIRDPHUWRSUHYHQWRYHUÀRZ7KHEDOOÀRDWVFUHHQ
may not work if there is too much foam in the tank. Always use
GHIRDPHUWRSUHYHQWRYHUÀRZ
10. :KHQ¿QLVKHGZLWKWKHMREVKXWRIIDOOVZLWFKHV%HIRUH
disconnecting solution hose relieve the water pressure from
the Hard Surface Tool by holding the trigger on the Hard
Surface Tool.
Vacuum
Break Cover
Glide Ring Brush Ring
Pump Switch
Auto Dump
Switch
Vacuum
Switch

9
EN
Nobles Quick Clean 12 (01/2014)
English
DRAINING TANKS
DRAINING SOLUTION TANK
:KHQ¿QLVKHGZLWKWKHMREVXFWLRQRXWDQ\XQXVHGVROXWLRQIURP
the solution tank. Place the end of the vacuum hose that was
attached to the wand into the solution tank and turn the vacuum
switch on.
DRAINING RECOVERY TANK
1. Turn off all switches.
2. Drain the recovery tank by holding the end of the drain hose
with the cap above the machine. Remove the cap on the
drain hose. Lower the drain hose over a drain or a bucket
to drain the recovery tank.
NOTE: When using the Auto Dump feature, the recovery tank
must be rinsed and then drained with the drain hose after each
use.
3. Remove the Ball Float Screen, unscrew the Solution Tank Inlet
Filter and Recovery Tank Filter. Remove the debris from the
VFUHHQDQG¿OWHUV%HVXUHWRUHSODFHWKH%DOO)ORDW6FUHHQ
Solution Tank Inlet Filter and Recovery Tank Filter securely.
4. Wipe down the machine with a damp cloth. Do not hose off
or power spray machine.
5. Inspect solution hose and vacuum hose for cracks or damage
Do not use hose if damaged.
6. Store machine with tank covers off to promote air circulation.
7. Inspect the electrical cord ends on the machine and the
power cords used with the machine for damage. Replace
power cords if damaged and contact service center or a
TXDOL¿HGVHUYLFHSHUVRQLIHOHFWULFDOFRUGHQGVRQPDFKLQH
are damaged.
8. Coil power cords neatly after each use and store on
machine.
AFTER 80 HOURS OF USE
Flush solution lines and pump with a descaling solution (such as
white vinegar) to remove mineral accumulation which may have
formed from the use of hard water. Remove spray tips from hard
surface tool and soak in a descaling solution. Re-attach tool and
hose to machine. Pour solution into solution tank and run solution
through system by turning on pump and activating tool. Do not
recycle solution as it will carry small mineral deposits. After running
VROXWLRQWKURXJKV\VWHPÀXVKZLWKFOHDQZDWHUDQGUHLQVWDOOVSUD\
tips.
Recovery
Tank Filter
MACHINE MAINTENANCE
To keep machine in good working condition, simply follow
machine maintenance procedures.
)256$)(7<:KHQVHUYLFLQJPDFKLQH
unplug cords from wall outlets. Wear
appropriate personal protection
equipment as needed.
AFTER EACH USE
1. ,IFKHPLFDOVDUHXVHGLQVROXWLRQWDQNÀXVKV\VWHPZLWKFOHDQ
water by running the machine using clean water at the end
RIHDFKMRE
2. Drain and rinse out recovery tank.
Ball Float
Screen
Solution
Tank Filter

10 Nobles Quick Clean 12 (01/2014)
English
EN
SERVICING MACHINE
$OOUHSDLUVPXVWEHSHUIRUPHGE\DTXDOL¿HGVHUYLFHWHFKQLFLDQ
)256$)(7<:KHQVHUYLFLQJPDFKLQH
unplug cords from wall outlets. Wear
appropriate personal protection
equipment as needed.
The machine is designed to hinge open for ease of servicing.
To access the internal components, remove the two lock plates
at back of machine and carefully hinge open machine. Empty
tanks before opening machine. Reconnect the vacuum hose
when closing machine. Replace lock plates.
STORING MACHINE
1. Remove all water from solution tank by using the hose from
the machine to vacuum water into the recovery tank.
2. Drain and rinse out recovery tank.
3. Attach solution hose to machine and hard surface tool.
Turn on pump and hold lever on wand to run pump dry.
Turn off pump.
4. Disconnect power cords from machine. Neatly coil the
power cords and store on machine.
5. Store extractor with tank covers off to promote air circula-
tion.
6. Store machine in dry area.
:$51,1*'RQRWH[SRVHWRUDLQ6WRUH
indoors only.
$77(17,21,IVWRULQJPDFKLQHLQIUHH]LQJWHPSHUD-
tures be sure that machine solution system and pump
are completely drained and dry.
Vacuum
Hose
LOADING MACHINE
Load machine with assistance by utilizing the 2 top loading
wheels as shown. Secure machine with tie down straps. Empty
solution tank and recovery tank before loading machine.

11
EN
MODEL NOBLES QUICK CLEAN 12
Length 32.5 in/ 826 mm
Width 25.25 in/ 641 mm
Height 41.5 in/ 1054 mm
Weight 155 lbs/ 70 kg
Solution Tank Capacity 15 Gallon/ 56.78 L
Recovery Tank Capacity 13.5 Gallon/ 51.1 L
Voltage 120 AC/ 60HZ
Total Power Consumption 25A Nominal
Vacuum Motor 120V, .685HP/ .511Kw, 3-stage, 13.2A
Water Lift - Air Flow 137 in/ 3480 mm, 107cfm
Solution Pump 120V, 14.5A, 2.2 gpm/ 8.33L/min, 400-1200 PSI/ 27.6-83 bar
Dump Pump 120V, 0.5A, 2.8gpm/ 10.6L/min, Open Flow
Cord Length 2 - 12/3, 40ft/ 12 m
Sound Pressure Level* 75 dBA
25.25 inches
641 mm
32.5 inches
826 mm
41.5 inches/ 1054 mm
*Sound levels (ISO 11203) as recommended by the American Association of Cleaning Equipment Manufacturers *(AACEM) and OSHA.
6SHFLILFDWLRQVDUHVXEMHFWWRFKDQJHZLWKRXWQRWLFH
Nobles Quick Clean 12 (01/2014)
English
MACHINE DIMENSIONS
MACHINE SPECIFICATIONS

12
PROBLEM POSSIBLE CAUSE SOLUTION
Low pump
pressure
3OXJJHGRUGLUW\VROXWLRQWDQNLQOHW¿OWHU &OHDQVROXWLRQWDQNLQOHW¿OWHU
3XPSQRWVXI¿FLHQWO\SULPHG Prime pump
Faulty Pump &RQWDFWDTXDOL¿HGVHUYLFHWHFKQLFLDQ
No spray Solution tank is empty Fill solution tank
Solution hose is not properly connected Secure solution hose connection
Spray tip is plugged Clean or replace spray tip
Pump motor is not running Verify machine is plugged in and turned on
3OXJJHGGLUW\SXPSVROXWLRQWDQNLQOHW¿OWHU 8QSOXJVROXWLRQWDQNLQOHW¿OWHU
Damaged solution hose Replace solution hose
Pump not
running
No power to pump -- no power to cord Test the switch, test the pump motor, verify
power cords are plugged in properly
Circuit Breaker tripped Reset circuit breaker on control panel
Faulty Pump &RQWDFWDTXDOL¿HGVHUYLFHWHFKQLFLDQ
Low suction Recovery tank cover is loose or drain hose cap is loose Close recovery tank cover and secure drain
hose cap
Damaged vacuum gasket &RQWDFWDTXDOL¿HGVHUYLFHWHFKQLFLDQ
'LUW\EDOOÀRDWVFUHHQ &OHDQEDOOÀRDWVFUHHQ
Vacuum Break Cover is open on Hard Surface Tool Close Vacuum Break Cover
Vacuum hose connection loose or damaged vacuum hose Check vacuum hose or replace vacuum hose
No suction Recovery tank is full Empty recovery tank
Circuit Breaker tripped Reset circuit breaker on control panel
Faulty vacuum motor &RQWDFWDTXDOL¿HGVHUYLFHWHFKQLFLDQ
No power No power to machine Check building circuit breakers, make sure
power cords are on 2 different outlet circuits
Auto Dump not
running
Strainer is dirty Clean Strainer
Nobles Quick Clean 12 (01/2014)
English
EN
UNPLUG POWER CORDS BEFORE
SERVICING MACHINE.
TROUBLESHOOTING

INTRODUCCIÓN
Este manual se entrega con cada modelo nuevo. Brinda las
instrucciones de operación y mantenimiento necesarias e información
sobre repuestos.
Lea todas las instrucciones
DQWHVGHXWLOL]DUODPiTXLQD.
INFORMACIÓN GENERAL
Esta máquina le brindará un servicio excelente. Sin embargo, se obtienen
ORVPHMRUHVUHVXOWDGRVDOPHQRUFRVWRVL
ODPiTXLQDVHRSHUDFRQHOFXLGDGRUD]RQDEOH
se realizan tareas de mantenimiento periódico en la máquina, según
ODVLQVWUXFFLRQHVGHPDQWHQLPLHQWRSURYLVWDV
VHUHDOL]DQWDUHDVGHPDQWHQLPLHQWRHQODPiTXLQDFRQSLH]DVSURYLVWDV
por el fabricante o equivalentes.
Para ver, imprimir o descargar manuales en línea, visite www.nobles.com
USO PREVISTO
(OOLPSLDGRUSDUDVXSHU¿FLHVGXUDV1REOHVHVWiGLVHxDGRSDUDXVRFRPHUFLDO
SRUHMHPSORHQKRWHOHVHVFXHODVKRVSLWDOHVFRPHUFLRVR¿FLQDV\HPSUHVDV
GH DOTXLOHU (VWi GLVHxDGR SDUD OD OLPSLH]D GH EDOGRVDV SLHGUD\RWUDV
VXSHU¿FLHVGXUDVH[FHSWRSLVRVGHPDGHUDGXUDHQXQDPELHQWHLQWHUQR
7DPELpQHVWi GLVHxDGR SDUD OD OLPSLH]D GHDOIRPEUDVFRQ HO XVRGH ORV
DFFHVRULRVRSFLRQDOHV (VWD PiTXLQDQR KD VLGRFUHDGD FRQ RWURV¿QHV
Utilice solamente los limpiadores de piso disponibles en el mercado y los
accesorios recomendados para uso en máquinas. Utilice la máquina solo
del modo que se indica en este manual.
DATOS DE LA MÁQUINA
IMPORTANTE$¿QGHDVHJXUDUVHODSURWHFFLyQFRQJDUDQWtDFRPSOHWD
complete la FICHA DE RESPUESTA AL INFORME DE GARANTÍA O
,167$/$&,Ï1'(/$0È48,1$DGMXQWD\HQYtHODD7HQQDQWGHQWURGH
un plazo de 30 días a partir de la fecha de compra.
Complételos al momento de la instalación para que sirvan
de referencia en el futuro.
N.º de modelo: _________________________________
N.º de serie: _________________________________
Fecha de instalación: ____________________________
Tennant Company
P.O. Box 1452
Minneapolis, MN 55440
Teléfono: (800) 553-8033 o (763) 513-2850
www.nobles.com
Nobles es una marca registrada en los Estados Unidos de Tennant Company.
Quick Clean es una marca registrada en los Estados Unidos de Tennant
Company.
/DVHVSHFL¿FDFLRQHV\ODVSLH]DVHVWiQVXMHWDVDPRGL¿FDFLRQHVVLQSUHYLR
aviso.
Instrucciones originales. Copyright ©2013-2019 Tennant Company
Todos los derechos reservados. Impreso en EE. UU.
DESEMPAQUE DE LA MÁQUINA
9HUL¿TXH FXLGDGRVDPHQWH TXH OD PiTXLQD QR HVWp GDxDGD ,QIRUPH GH
LQPHGLDWRDOGLVWULEXLGRUVLODPiTXLQDSUHVHQWDDOJ~QGDxR9HUL¿TXHHO
contenido de la máquina para asegurarse de que incluya todas las partes y
los accesorios. En caso de que haya faltantes, comuníquese con el distribuidor
o con Tennant.
ÍNDICE
INSTRUCCIONES IMPORTANTES DE SEGURIDAD 14
ETIQUETA DE SEGURIDAD 15
INSTRUCCIONES PARA LA CONEXIÓN A TIERRA 15
COMPONENTES DE LA MÁQUINA 16
INSTALACIÓN DE LA MÁQUINA 17-18
OPERACIÓN DE LA MÁQUINA 19
TANQUES DE DRENAJE 20
MANTENIMIENTO DE LA MÁQUINA 20
ASISTENCIA TÉCNICA DE LA MÁQUINA 21
ALMACENAMIENTO DE LA MÁQUINA 21
CARGA DE LA MÁQUINA 21
ESPECIFICACIONES DE LA MÁQUINA 22
RESOLUCIÓN DE PROBLEMAS 23
LISTA DE PIEZAS
DIAGRAMA ELÉCTRICO
35-48
49
PROTEJA EL MEDIO AMBIENTE
'HVHFKHORVPDWHULDOHVGHHPEDODMH\ORV
componentes usados de la máquina de
manera segura para el medio ambiente,
según las normas de desecho de residuos
locales. Siempre acuérdese de reciclar.
UBICACIÓN DE LA ETIQUETA DEL
N.º DE SERIE DE LA MÁQUINA
13
ES
Nobles Quick Clean 12 (08/2019)
Español

INSTRUCCIONES IMPORTANTES DE SEGURIDAD
Cuando utilice un artefacto eléctrico, siempre siga las precauciones básicas, que incluyen lo siguiente:
LEA TODAS LAS INSTRUCCIONES ANTES DE UTILIZAR LA MÁQUINA
ADVERTENCIA3DUDUHGXFLUHOULHVJRGHLQFHQGLRVH[SORVLyQFKRTXHHOpFWULFRR
OHVLRQHV
1. 1RGHMHHODUWHIDFWRHQFKXIDGRVLQRORXWLOL]D'HVFRQHFWHHOFDEOHGHOWRPDFRUULHQWHFXDQGRQRXWLOLFHODPiTXLQDRFXDQGRVHUHDOLFHQWDUHDVGH
mantenimiento.
2. 1RXVHODPiTXLQDDODLUHOLEUH(VWDPiTXLQDHVWiGLVHxDGD~QLFDPHQWHSDUDVXXVRHQLQWHULRUHV
3. 1RSHUPLWDTXHODPiTXLQDVHXVHFRPRXQMXJXHWH3UHVWHPXFKDDWHQFLyQFXDQGRODXWLOLFHFHUFDGHQLxRV
4. Utilice la máquina solo como se describe en este manual. Utilice únicamente los accesorios recomendados por el fabricante.
5. Los operadores deben recibir instrucciones adecuadas sobre el uso de la máquina.
6. (VWDPiTXLQDQRHVWiGLVHxDGDSDUDHOXVRSRUSDUWHGHSHUVRQDV\QLxRVFRQGLVFDSDFLGDGHVItVLFDVVHQVRULDOHVRPHQWDOHVRELHQIDOWDGH
experiencia y conocimientos.
7. Siga las instrucciones de seguridad del sitio sobre pisos húmedos.
8. Use calzado antideslizante cuando utilice la máquina.
9. 1RXVHODPiTXLQDVLHOFDEOHRHOFRQHFWRUHVWiGDxDGR6LHODUWHIDFWRQRIXQFLRQDFRPRGHEHUtDVHFD\yHVWiGDxDGRTXHGyDODLUHOLEUHRVH
sumergió en agua, envíelo a un centro de asistencia técnica para su reparación.
10. 1RHPSXMHQLWLUHGHOFDEOHQRXVHHOFDEOHFRPRDJDUUDGHUDQRFLHUUHQLQJXQDSXHUWDVREUHHOFDEOHQLSDVHHOFDEOHSRUERUGHVRHVTXLQDV
¿ORVDV1RSDVHODPiTXLQDHQIXQFLRQDPLHQWRVREUHHOFDEOH0DQWHQJDHOFDEOHOHMRVGHVXSHU¿FLHVFDOLHQWHV
11. No tire del cable para desconectarlo. Para desconectarlo, tome el conector, no el cable.
12. No manipule el conector o el artefacto con las manos húmedas.
13. 1RREVWUX\DODVDSHUWXUDVFRQREMHWRV1RXWLOLFHODPiTXLQDVLODVDSHUWXUDVHVWiQEORTXHDGDV&RQWUROHTXHQRWHQJDSROYRSHOXVDVSHORVR
FXDOTXLHURWUDSDUWtFXODTXHSXHGDUHGXFLUHOÀXMRGHDLUH
14. 1RXWLOLFHODPiTXLQDVLODSDQWDOODGHOÀRWDGRUGHERODQRHVWiHQVXOXJDU
15. Evite el contacto de las aperturas y las partes móviles con el pelo, la ropa holgada, los dedos y otras partes del cuerpo.
16. Apague todos los controles antes de desconectar la máquina.
17. 1RXVHVROYHQWHVGHOLPSLH]DLQÀDPDEOHVFRQODPiTXLQD
18. 1RDJUHJXHDJXDTXHVXSHUHORVÛ)RÛ&DOWDQTXHGHVROXFLyQ
19. 1RPDQLSXOHPDWHULDOHVLQÀDPDEOHVRFRPEXVWLEOHVFRPRODJDVROLQDQLXVHODPiTXLQDHQiUHDVGRQGHSRGUtDKDEHUHVWHWLSRGHPDWHULDOHV
20. 1RPDQLSXOHQLQJ~QWLSRGHSROYRGDxLQRRPDWHULDOHVWy[LFRV
21. No levante elementos calientes o con humo, tales como cigarrillos, fósforos o cenizas.
22. No coloque el rociador en dirección a su propio cuerpo ni a otras personas.
23. 1RXWLOLFHODPiTXLQDSDUDODDVSLUDFLyQHQVHFRDQWHVGHODOLPSLH]DHQPRMDGR
24. No ponga la máquina en funcionamiento en agua estancada.
25. Desconecte inmediatamente el cable de alimentación del tomacorriente si la máquina presenta derrame de solución o de espuma, o si la máquina
se vuelca mientras está en funcionamiento.
26. Alivie la presión de agua en la boquilla rociadora accesoria antes de desconectar la manguera de solución.
27. 6LHPSUHFRORTXHODPiTXLQDVREUHXQDVXSHU¿FLHSODQD
28. 7HQJDPXFKRFXLGDGRFXDQGRUHDOLFHODOLPSLH]DHQHVFDOHUDV1RVXEDREDMHHVFDOHUDVFRQODVUXHGDVGHODPiTXLQDHQIXQFLRQDPLHQWR
29. Conecte el cable únicamente a un tomacorriente con la conexión a tierra correcta.
30. (OFDEOHGHH[WHQVLyQGHEHVHUFDOLEUH\VXORQJLWXGQRGHEHVXSHUDUORVSLHV5HHPSODFHHOFDEOHVLHOFRQHFWRUDWLHUUDHVWiGDxDGR
31. No utilice cables de extensión adicionales con la máquina.
32. No utilice la máquina si no se encuentra en las condiciones apropiadas para su uso.
33. 1RPRGL¿TXHHOGLVHxRRULJLQDOGHODPiTXLQD
34. Pida ayuda para levantar la máquina.
35. 8QDSHUVRQDGHPDQWHQLPLHQWRFDOL¿FDGDGHEHUHDOL]DUWRGDVODVUHSDUDFLRQHV8VH~QLFDPHQWHODVSLH]DVGHUHSXHVWRSURYLVWDVSRUHOIDEULFDQWHR
equivalentes.
36. 1RH[SRQJDODPiTXLQDDODOOXYLDRDODKXPHGDG*XiUGHODHQXQOXJDUFHUUDGR1RODH[SRQJDDWHPSHUDWXUDVPX\EDMDV
37. Utilice equipos de protección personal según sea necesario.
CONSERVE ESTAS INSTRUCCIONES
14 Nobles Quick Clean 12 (01/2014)
Español
ES

INSTRUCCIONES PARA LA CONEXIÓN
A TIERRA
La máquina debe estar conectada a tierra. Si presenta
alguna falla o avería, la conexión a tierra brinda un trazado
de menor resistencia para la corriente eléctrica, y de esta
forma se reduce el riesgo de choque eléctrico. La máquina
está equipada con un cable que tiene un conductor de
puesta a tierra de equipos y un enchufe de conexión a
tierra. El enchufe debe colocarse en un tomacorriente
adecuado que esté instalado correctamente con conexión a
tierra y en cumplimiento de todos los códigos y ordenanzas
locales.
$'9(57(1&,$Si no se conecta correctamente
el conductor de puesta a tierra de equipos, se puede
presentar el riesgo de choque eléctrico. Consulte a un
HOHFWULFLVWDRSHUVRQDGHPDQWHQLPLHQWRFDOL¿FDGRVVLWLHQH
dudas sobre la conexión a tierra correcta del tomacorriente.
1RPRGL¿TXHHOHQFKXIHTXHYLHQHFRQODPiTXLQD6LHVWH
no entra en el tomacorriente, solicite que un electricista
FDOL¿FDGRLQVWDOHXQWRPDFRUULHQWHDGHFXDGR
(VWDPiTXLQDHVWiGLVHxDGDSDUDVXXVRHQXQFLUFXLWR GH
120 voltios nominales y cuenta con un enchufe de conexión
a tierra similar al de la siguiente ilustración. Asegúrese
de conectar la máquina a un tomacorriente con la misma
FRQ¿JXUDFLyQGHOHQFKXIH
ETIQUETA DE SEGURIDAD
La etiqueta de seguridad aparece en la máquina en el lugar
LQGLFDGR'HEHUHHPSOD]DUODHWLTXHWDVLVHKDGDxDGRRVL
se ha vuelto ilegible.
ETIQUETA DE SEGURIDAD: ubicación en la parte trasera.
Grounded
3 Hole Outlet
Grounding Pin
Tomacorriente
GHRUL¿FLRVFRQ
conexión a tierra
Perno de conexión
a tierra
15
ES
Nobles Quick Clean 12 (01/2014)
Español

&20321(17(6'(/$0È48,1$
Wand Holder
Internal Access
Lock Plates
Wa
Wa
Wa
W
nd
nd
nd
nd
nd
nd
n
n
n
n
nd
nd
n
n
d
n
n
n
H
H
H
H
H
H
H
H
H
H
H
H
H
o
o
o
o
o
ol
ol
o
o
l
de
de
de
r
r
MÁQUINA Y ACCESORIOS
Cubierta del
tanque de
recuperación
Herramienta para
superficies duras
Manguera de vaciado del
tanque de recuperación
Conexión de la manguera
de aspiración
Conexión de
la manguera de
llenado automático Ubicación
de llenado
del tanque
de solución
Conexión de
la manguera
de solución
Manómetro Roldana
giratoria
Perilla de
ajuste de
presión
Conexión de
la manguera
de descarga
automática
Indicador de
circuito doble
Interruptor de seguridad
de la bomba y de la
descarga automática
Manguera
de llenado
automático
Cable de
alimentación
de entre
2 y 40 pies
Manguera
de cebado
Manguera de solución y
manguera de aspiración
VISTA DELANTERA
VISTA TRASERA
COMPONENTES DEL PANEL DE CONTROL
Interruptor
de seguridad
de la
aspiradora
Interruptor
de la
aspiradora Interruptor
de la
bomba
Interruptor
de descarga
automática
Panel de
control
Placas de seguridad
de acceso interno
Agarraderas
de alzado
Ruedas de
carga
Correa de
herramienta para
superficies duras
16 Nobles Quick Clean 12 (01/2014)
Español
ES

INSTALACIÓN DE LA MÁQUINA
1. Antes de cada uso, revise la máquina, las mangueras y la
KHUUDPLHQWDSDUDVXSHU¿FLHVGXUDVSDUDGHWHFWDUTXHHVWpQ
limpios y que no haya faltantes. Asegúrese de que las cabezas
URFLDGRUDVGHODKHUUDPLHQWDSDUDVXSHU¿FLHVGXUDVHVWpQ
DMXVWDGDV$VHJ~UHVHGHTXHODSDQWDOODGHOÀRWDGRUGHEROD
\HO¿OWURGHOWDQTXHGHUHFXSHUDFLyQHVWpQOLPSLRV\HQ
funcionamiento.
2. &LHUUH\DMXVWHODFXELHUWDGHOWDQTXHGHUHFXSHUDFLyQ\
DMXVWHODWDSDDODPDQJXHUDGHGUHQDMH
3. Llene el tanque de solución con 15 galones o 57 litros de
DJXDOLPSLDFRQXQPDQJXHUDGHMDUGtQRFXERFRQXQD
WHPSHUDWXUDPi[LPDGH)&6LSUH¿HUHXWLOL]DU
las funciones de LLENADO AUTOMÁTICO Y DESCARGA
AUTOMÁTICA, omita los pasos 4 a 7.
NOTA: Para obtener un máximo rendimiento de limpieza, se
recomienda rociar previamente el piso con un detergente
DSUREDGRSDUDHOURFLDGRSUHYLRGHVXSHU¿FLHVGXUDVSRUPHGLR
de un rociador de bombeo en lugar de agregar detergente a la
PiTXLQD6LSUH¿HUHXWLOL]DUGHWHUJHQWHGHOLPSLH]DHQODPiTXLQD
siga las instrucciones de mezclado y manipulación adecuados
TXH¿JXUDQHQHOHQYDVHGHOGHWHUJHQWH6HDFRQVHMDHQMXDJDUHO
VLVWHPDGHVROXFLyQFRQDJXDOLPSLDGHVSXpVGHFDGDXVRD¿Q
GHHYLWDUODDFXPXODFLyQGHGHWHUJHQWH1RVHDFRQVHMDHOXVRGH
detergentes en polvo con la máquina.
4. Llenado automático: conecte el adaptador de la manguera
provisto con la máquina en la conexión de la manguera
de llenado automático ubicada en la parte delantera de
ODPiTXLQD/XHJRFRQHFWHODPDQJXHUDGHMDUGtQFRQ
suministro de agua al adaptador de la manguera.
5. Active el suministro de agua de la manguera. La válvula de
llenado automático ubicada dentro del tanque de solución
GHVDFWLYDUiDXWRPiWLFDPHQWHHOÀXMRFXDQGRHOWDQTXHOOHQH
su capacidad. Cuando disminuye el nivel de agua, durante
la limpieza, la válvula de llenado automático se abrirá y
comenzará a llenar el tanque nuevamente.
6. 'HVFDUJDDXWRPiWLFDDFRSOHXQDPDQJXHUDGHMDUGtQDOD
conexión de la manguera de descarga automática y coloque
ODPDQJXHUDGHMDUGtQHQGLUHFFLyQDOVLWLRGHGHVFDUJD
NOTA: Cuando utilice la función de descarga automática, utilice
XQDPDQJXHUDGHMDUGtQGHRSXOJDGDV/DORQJLWXGPi[LPD
GHODPDQJXHUDGHMDUGtQHVGHSLHVRP\ODHOHYDFLyQ
vertical gradual no debe superar los 15 pies o 4,5 m desde la
máquina hasta el sitio de descarga.
7. Encienda el interruptor de descarga automática cuando
esté listo para comenzar la limpieza. La bomba de descarga
automática se encenderá automáticamente cuando el tanque
de recuperación alcance su capacidad máxima y comenzará
la descarga del agua recuperada.
Conexión de la
manguera de lle-
nado automático
Adaptador de la manguera
Interruptor
de descarga
automática
Conexión de la
manguera de
descarga automática
17
ES
Nobles Quick Clean 12 (01/2014)
Español

8. CONEXIÓN DE LOS CABLES DE ALIMENTACIÓN: apague
todos los interruptores. Conecte los dos cables de
alimentación en los tomacorrientes con una conexión a tierra
correcta. No conecte los dos cables en el mismo circuito.
El indicador de circuito doble encenderá una luz verde
cuando los cables de alimentación estén conectados a
distintos circuitos. La máquina está lista para funcionar.
CEBADO DE LA MÁQUINA
1. Desactive el interruptor de la bomba.
2. Acople la manguera cebadora a la parte delantera de la
máquina y coloque el extremo de la manguera sin las
FRQH[LRQHVHQHOWDQTXHGHVROXFLyQVLQGHMDUGHVRVWHQHUOD
manguera con suministro de agua.
3. $FWLYHHOLQWHUUXSWRUGHODERPED(OÀXMRGHDJXDVDOGUiFRQ
aire.
4. Ponga la bomba en funcionamiento hasta que no salgan
PiVEXUEXMDVGHDLUHGHODPDQJXHUD3XHGHGHPRUDUR
2 minutos.
5. 3DUDYHUL¿FDUTXHWHQJDEXHQDSUHVLyQGHDJXDWLUHGHOD
PDQJXHUDMXVWRSRUHQFLPDGHODJXD
6. Desactive el interruptor de la bomba.
7. Quite la manguera cebadora del tanque de solución y
desconecte el otro extremo de la manguera cebadora de la
parte delantera de la máquina.
CONEXIÓN DE LA HERRAMIENTA PARA
SUPERFICIES DURAS A LA MÁQUINA
1. Desactive todos los interruptores.
2. Coloque el adaptador del brazalete de la manguera en el tubo
GHDFHURLQR[LGDEOHTXHVHHQFXHQWUDGHEDMRGHOPDQJRGHOD
KHUUDPLHQWDSDUDVXSHU¿FLHVGXUDV
3. Conecte la manguera de solución y la manguera de aspiración
DODPiTXLQD\DODKHUUDPLHQWDSDUDVXSHU¿FLHVGXUDV8VH
solamente los accesorios provistos con la máquina u ofrecidos
por Tennant. El uso de accesorios inadecuados puede causar
lesiones.
$'9(57(1&,$1RLQWHQWHFRQHFWDUODPDQJXHUD
GHVROXFLyQDODPiTXLQDFRQHOLQWHUUXSWRUGHODERPED
activado.
BOLSA DE FILTRO OPCIONAL: para áreas con demasiada suciedad
RDFXPXODFLyQGHJUDVDVHUHFRPLHQGDXWLOL]DUODEROVDGH¿OWUR
RSFLRQDO/DEROVDGH¿OWURFDSWXUDORVUHVLGXRVGHPD\RUWDPDxR
\HYLWDODREVWUXFFLyQGHO¿OWURGHGHVFDUJDDXWRPiWLFD/DEROVD
GH¿OWURRSFLRQDOHVWiLQVWDODGDHQODFRQH[LyQGHODPDQJXHUDGH
DVSLUDFLyQFRPRPXHVWUDOD¿JXUD'HVSXpVGHFDGDXVRRFXDQGR
ORQHFHVLWHTXLWHODEROVDGHO¿OWUR\OtPSLHOD
Dual Circuit
Indicator
Circuito 1 Circuito 2
Interruptor de la bomba
Indicador de
circuito doble
Adaptador del brazalete
de la manguera
18 Nobles Quick Clean 12 (01/2014)
Español
ES

OPERACIÓN DE LA MÁQUINA
BARRIDO PREVIO
Barra el área que desea limpiar antes de poner la máquina en
funcionamiento.
ROCIADO PREVIO
Con el uso de un rociador de bombeo, rocíe previamente el piso
con un detergente aprobado para el rociado previo de superficies
duras. Utilice solamente limpiadores de pisos disponibles en el
mercado para uso en máquinas. Siga las instrucciones de mezclado
y manipulación adecuados que figuran en el envase de detergente.
$'9(57(1&,$ No utilice solventes de
OLPSLH]DLQÀDPDEOHVFRQODPiTXLQD1RPDQLSXOH
PDWHULDOHVLQÀDPDEOHVRFRPEXVWLEOHVQLXVHODPiTXLQD
HQiUHDVGRQGHSRGUtDKDEHUHVWHWLSRGHPDWHULDOHV
REGULACIÓN DE LA PRESIÓN
&RQHOJDWLOORHQODKHUUDPLHQWDSDUDVXSHU¿FLHVGXUDV\HO
LQWHUUXSWRUGHODERPEDDFWLYDGRVJLUHODSHULOODGHDMXVWHGH
presión que se encuentra en la parte delantera de la máquina a
400-1200 PSI.
35(&$8&,Ï1 Cuando utilice una herramienta manual o una
YDULOODGHOLPSLH]DGHDOIRPEUDVDMXVWHODSUHVLyQVHJ~QODV
HVSHFL¿FDFLRQHVGHODFFHVRULR
LIMPIEZA CON LA HERRAMIENTA PARA
SUPERFICIES DURAS
1. Siga las instrucciones de seguridad del sitio sobre pisos
húmedos.
2. 9HUL¿TXHTXHODPDQJXHUDGHDVSLUDFLyQ\ODPDQJXHUDGH
solución estén conectadas con seguridad a la máquina y a la
KHUUDPLHQWDSDUDVXSHU¿FLHVGXUDV
3. (OLMDHODURGHGHVOL]DPLHQWRRHODURGHOFHSLOORSDUDOD
KHUUDPLHQWDSDUDVXSHU¿FLHVGXUDV&RQHOXVRGHODV
tres lengüetas, coloque el aro que desee en la cubierta en
IRUPDGHF~SXODGHODKHUUDPLHQWDSDUDVXSHU¿FLHVGXUDV
Aro de deslizamiento: recomendado para baldosas sintéticas,
como porcelana y cerámica. Aro del cepillo: recomendado para
SLHGUDQDWXUDO\VXSHU¿FLHVQRVLQWpWLFDVFRQWH[WXUD
4. Asegúrese de que la cubierta del freno de aspiración esté
FHUUDGDFXDQGRXWLOLFHODKHUUDPLHQWDSDUDVXSHU¿FLHVGXUDV
6LODKHUUDPLHQWDSDUDVXSHU¿FLHVGXUDVVHDGKLHUHDOSLVR
debido a la succión durante la aspiración, abra la cubierta
del freno de aspiración. Una vez que aparte la herramienta
SDUDVXSHU¿FLHVGXUDVGHOSLVRFLHUUHODFXELHUWDGHOIUHQRGH
aspiración.
5. Active los interruptores de la bomba y la aspiradora. Active el
interruptor de descarga automática si utiliza esta función.
6. Para obtener resultados óptimos de limpieza, tire del gatillo
GXUDQWHHOPRYLPLHQWRGHODKHUUDPLHQWDSDUDVXSHU¿FLHV
duras de adelante hacia atrás.
7. Recorra el área que limpió recién con pasadas de aspiradora
únicamente antes de desplazarse a la próxima área.
NOTA: Utilice un elemento antiespuma cuando se genere espuma
HQHOWDQTXHGHUHFXSHUDFLyQSDUDHYLWDUGDxRVHQHOPRWRURHQ
otros componentes.
8. Controle el nivel del agua en el tanque de solución. Si el
tanque de solución se seca, la bomba se debe volver a cebar.
9. &XDQGRHOWDQTXHGHVROXFLyQHVWpEDMRGHVDFWLYHWRGRVORV
interruptores, vacíe el tanque de recuperación y luego llene el
tanque de solución.
NOTA: Cuando el tanque de recuperación esté lleno, la
SDQWDOODGHOÀRWDGRUGHERODDSDJDUiODVXFFLyQSDUDHYLWDUHO
desbordamiento de la máquina. Utilice siempre un elemento
antiespuma para evitar el desbordamiento. Es posible que la
SDQWDOODGHOÀRWDGRUGHERODQRIXQFLRQHVLKD\GHPDVLDGD
espuma en el tanque. Utilice siempre un elemento antiespuma
para evitar el desbordamiento.
Lea todas las instrucciones antes
GHXWLOL]DUODPiTXLQD.
Cubierta del
freno de as-
piración
Interruptor de la bomba
Interruptor de
descarga automática
Interrup-
tor de la
aspiradora
Aro de
deslizamiento Aro del
cepillo
19
ES
Nobles Quick Clean 12 (01/2014)
Español

10. &XDQGRWHUPLQHHOWUDEDMRGHVDFWLYHWRGRVORVLQWHUUXSWRUHV
Antes de desconectar la manguera de solución, sostenga el
JDWLOORGHODKHUUDPLHQWDSDUDVXSHU¿FLHVGXUDVD¿QGHDOLYLDU
la presión del agua de la herramienta.
TANQUES DE DRENAJE
TANQUE DE SOLUCIÓN DE DRENAJE
&XDQGRWHUPLQHVXWUDEDMRH[WUDLJDGHOWDQTXHWRGDODVROXFLyQ
que no se utilizó mediante la succión. Coloque el extremo de
la manguera de aspiración que estaba acoplada al mango en el
tanque de solución y active el interruptor de la aspiradora.
TANQUE DE RECUPERACIÓN DE DRENAJE
1. Desactive todos los interruptores.
2. Para vaciar el tanque de recuperación, sostenga el extremo
GHODPDQJXHUDGHGUHQDMHFRQODWDSDFRORFDGDVREUHOD
PiTXLQD4XLWHODWDSDGHODPDQJXHUDGHGUHQDMH&RORTXH
ODPDQJXHUDGHGUHQDMHKDFLDXQGUHQDMHRFXERSDUDTXHVH
vacíe el tanque de recuperación.
NOTA: Cuando utilice la función de descarga automática, el
WDQTXHGHUHFXSHUDFLyQVHGHEHHQMXDJDU\OXHJRYDFLDUFRQOD
PDQJXHUDGHGUHQDMHGHVSXpVGHFDGDXVR
MANTENIMIENTO DE LA MÁQUINA
Para mantener la máquina en buenas condiciones de
funcionamiento, simplemente siga los procedimientos de
mantenimiento de la máquina.
3$5$0$<256(*85,'$'&XDQGR
realice tareas de mantenimiento de
ODPiTXLQDGHVFRQHFWHORVFDEOHV
de los tomacorrientes de la pared.
8WLOLFHHTXLSRVGHSURWHFFLyQSHUVRQDO
según sea necesario.
DESPUÉS DE CADA USO
1. Si se utilizan productos químicos en el tanque de solución,
HQMXDJXHHOVLVWHPDFRQDJXDOLPSLDPHGLDQWHHO
IXQFLRQDPLHQWRGHODPiTXLQDFRQDJXDOLPSLDDO¿QDOGH
FDGDWUDEDMR
2. 9DFtH\HQMXDJXHHOWDQTXHGHUHFXSHUDFLyQ
3. 4XLWH OD SDQWDOOD GHO ÀRWDGRU GH EROD GHVHQURVTXH HO ¿OWUR
GH HQWUDGD GHO WDQTXH GH VROXFLyQ \ HO ¿OWUR GHO WDQTXH GH
UHFXSHUDFLyQ4XLWHORVUHVLGXRVGHODSDQWDOOD\GHORV¿OWURV
Asegúrese de volver a colocar con seguridad la pantalla del
ÀRWDGRUGHERODHO¿OWURGHHQWUDGDGHOWDQTXHGHVROXFLyQ\HO
¿OWURGHOWDQTXHGHUHFXSHUDFLyQ
4. /LPSLHODPiTXLQDFRQXQSDxRK~PHGR1RXVHURFLDGRUHVR
mangueras para una limpieza rápida de la máquina.
5. Revise la manguera de solución y la manguera de aspiración
SDUDGHWHFWDUTXHQRHVWpQDJULHWDGDVRGDxDGDV1RXWLOLFHOD
PDQJXHUDVLHVWiGDxDGD
6. Guarde la máquina sin las cubiertas del tanque para permitir
la circulación de aire.
7. Revise los extremos del cable eléctrico de la máquina y
los cables de alimentación utilizados con la máquina para
YHUL¿FDUTXHQRHVWpQGDxDGRV5HHPSODFHORVFDEOHVGH
DOLPHQWDFLyQVLHVWiQGDxDGRVRFRPXQtTXHVHFRQHOFHQWUR
de asistencia técnica o con una persona de mantenimiento
FDOL¿FDGDVLORVH[WUHPRVGHOFDEOHHOpFWULFRGHODPiTXLQD
HVWiQGDxDGRV
8. Enrolle los cables de alimentación cuidadosamente después
de cada uso y guárdelos con la máquina.
DESPUÉS DE 80 HORAS DE USO
(QMXDJXH ODV OtQHDV GH VROXFLyQ \ OD ERPED FRQ XQD VROXFLyQ
desincrustante (como el vinagre blanco) para eliminar la acumulación
de minerales que se puede formar por el uso de agua dura. Quite
ODV FDEH]DV URFLDGRUDV GH OD KHUUDPLHQWD SDUD VXSHU¿FLHV GXUDV
\VXPpUMDODVHQXQDVROXFLyQGHVLQFUXVWDQWH9XHOYDDFRORFDUOD
herramienta y la manguera en la máquina. Vierta la solución en
HOWDQTXHGHVROXFLyQ3DUDGHMDUTXHODVROXFLyQFLUFXOHDWUDYpV
del sistema, encienda la bomba y active la herramienta. No recicle
ODVROXFLyQ\DTXHSXHGHFRQWHQHUSHTXHxRVGHSyVLWRVPLQHUDOHV
'HVSXpVGHTXHODVROXFLyQFLUFXOHDWUDYpVGHOVLVWHPDHQMXiJXHOR
con agua limpia y vuelva a instalar las cabezas rociadoras.
Filtro del
tanque de
UHFXSHUDFLyQ
Pantalla
GHOÀRWDGRU
de bola
Filtro del
tanque de
VROXFLyQ
20 Nobles Quick Clean 12 (01/2014)
Español
ES
This manual suits for next models
1
Table of contents
Languages:
Other Nobles Ultrasonic Jewelry Cleaner manuals
Popular Ultrasonic Jewelry Cleaner manuals by other brands

Ultrawave
Ultrawave Hygea 6427 Daily Operation Guide

Kaivac
Kaivac KV-1700 Series Operator and parts manual

General Wire Spring
General Wire Spring Model 88 operating instructions

Mosmatic
Mosmatic FL-AER 200 Assembly instructions

LifeBasis
LifeBasis Ultrasonic Oral Cleaner User instruction

Carlisle
Carlisle DEVILBISS Pro CLEAN 2 manual