Nobu 10DEN1 User manual

English/Ελληνικά/ Română
Για τη σωστή χρήση της μονάδας, παρακαλούμε διαβάστε προσεκτικά το εγχειρίδιο
και φυλάξτε το για αναφορά στο μέλλον.
For correct use of this unit, please read this manual carefully and keep it for future reference.
Dehumidier
Αφυγραντήρας
Εγχειρίδιο Χρήσης
User’s Manual
10DEN1
ΜΟΝΤΕΛΑ/MODELS:
SOCIABLE REMARK
DISPOSAL:Do not dispose this product as unsorted municipal waste. Separate
collection of such waste is necessary for special treatment.
It is prohibited to dispose of this appliance in domestic household waste.
For disposal, there are several possibilities:
A) The municipality has established collection systems, where electronic waste can
be disposed of at least free of charge to the user.
B) When buying a new product, the retailer will take back the old product at least
free of charge.
C) The manufacture will take back the old appliance for disposal at least free of
charge to the user.
D) As old products contain valuable resources, they can be sold to scrap metal
dealers.
Wild disposal of waste in forests and landscapes endangers your health when
hazardous substances leak into the ground-water and find their way into the food
chain.
When using this dehumidifier in the European countries, the following information
must be followed:
1
CONTENTS
SAFETY PRECAUTIONS
Warning .......................................................................................................................2
Caution ........................................................................................................................2
Electrical information ...................................................................................................3
CONTROL PADS ON THE DEHUMIDIFIER
Indicator lights..............................................................................................................4
Control pads.................................................................................................................4
Other features..............................................................................................................5
IDENTIFICATION OF PARTS
Identification of parts ...................................................................................................5
Positioning the unit ......................................................................................................6
OPERATING THE UNIT
When using the unit ....................................................................................................6
Removing the collected water .....................................................................................7
CARE AND MAINTENANCE
Care and cleaning of the dehumidifier ........................................................................8
TROUBLESHOOTING TIPS
Troubleshooting tips ....................................................................................................9
Inside you will find many helpful hints on how to use and maintain your dehumidifier
properly. Just a little preventive care on your part can save you a great deal of time
and money over the life of your dehumidifier. You will find many answers to common
problems in the chart of Troubleshooting Tips.If you reviewour chart of Troubleshooting
Tips first, you may not need to call for service at all.
Read This Manual
CAUTION
• This appliance can be used by children aged from 8 years and above and persons
with reduced physical, sensory or mental capabilities or lack of experience and
knowledge if they have been given supervision or instruction concerning use of the
appliance in a safe way and understand the hazards involved. Children shall not play
the appliance. Cleaning and user maintenance shall not be made by children without
supervision. ( be applicable for the European Countries )
• This appliance is not intended for use by persons (including children) with reduced
physical ,sensory or mental capabilities or lack of experience and knowledge, unless
they have been given supervision or instruction concerning use of the appliance by a
person responsible for their safety. (be applicable for other countries except the
European Countries )
• Children should be supervised to ensure that they do not play with the appliance.
• If the supply cord is damaged, it must be replaced by the manufacturer, its service
agent or similarly qualified persons in order to avoid a hazard.
• The appliance shall be installed in accordance with national wiring regulations.
• The appliance with electric heater shall have at least 1 meter space to the combustible
materials.
• Contactthe authorised service technician for repair or maintenance of this unit.
!
2
SAFETY PRECAUTIONS
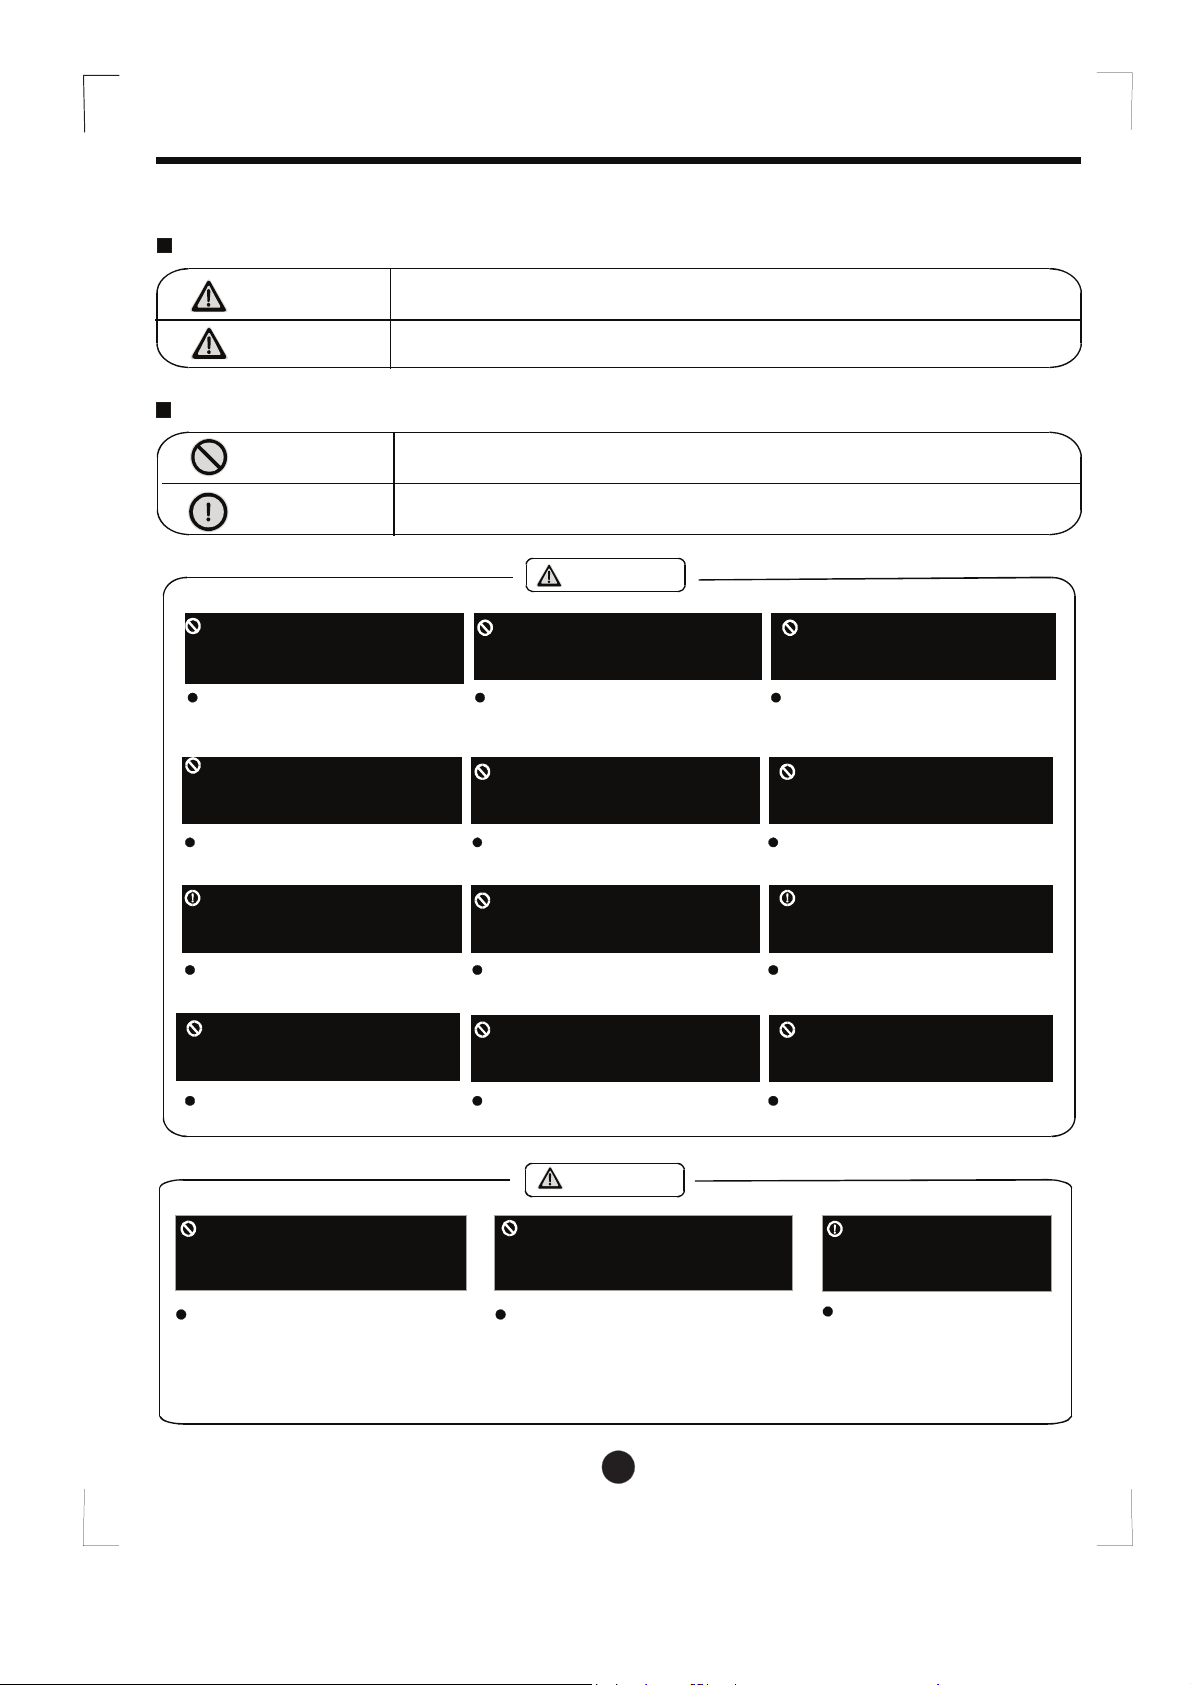
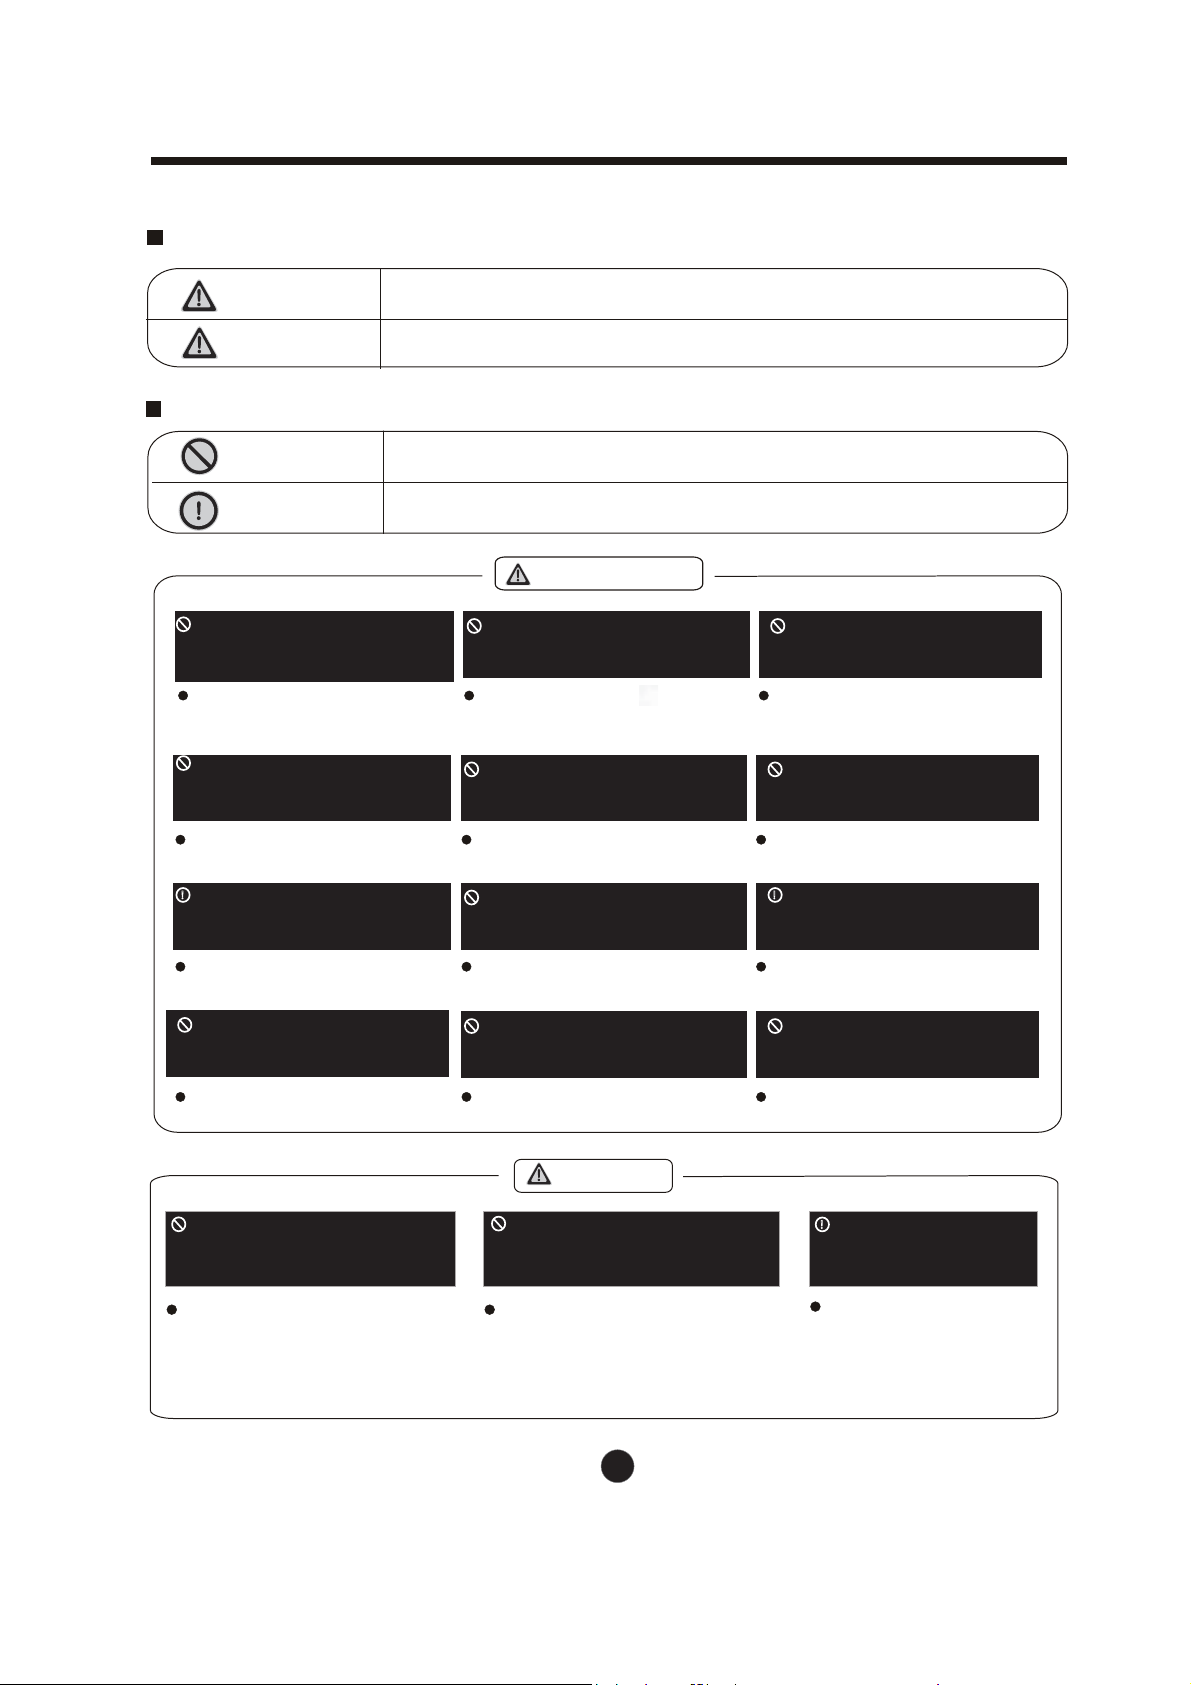
Do not exceed the rating
of the power outlet or
connection device.
Do not operate or stop the
unit by switching on or off
the power.
Do not damage or use an
unspecified power cord.
Do not modify the power cord
length or share the outlet
with other appliances.
Disconnect the power if
strange sounds, smell, or
smoke comes fromit.
Donotusethemachinenear
flammablegasorcombustibles,such
asgasoline,benzene,thinner,etc.
Otherwise, it may cause electric
shock or fire due to excess heat
generation.
It may cause electric shock or
fire due to heat generation.
It may cause fire and electric
shock.
It may cause electric shock or fire
due to heat generation.
It may cause electric shock.
It may cause failure of the
machine or electric shock.
It contains contaminants and
could make you sick.
It may cause electric shock or fire.
Plastic parts may melt and cause
a fire.
It may cause electrical shock or
injury.
It may cause an explosion or fire.
Do not insert or pull out
the plug with wet hands.
You should never try to take
apart or repair the unit by
yourself.
Do not drink or use the
water drained fromthe unit.
Before cleaning, turn off
the power and unplug the
unit.
Do not place the unit near
a heat source.
CAUTION
Lack of ventilation can cause
overheating and fire.
Water may enter the unit and
degrade the insulation. It may
cause an electric shock or fire.
If the unit falls over, it may
cause water to spill and
damage belongings, or
cause electrical shock or
fire.
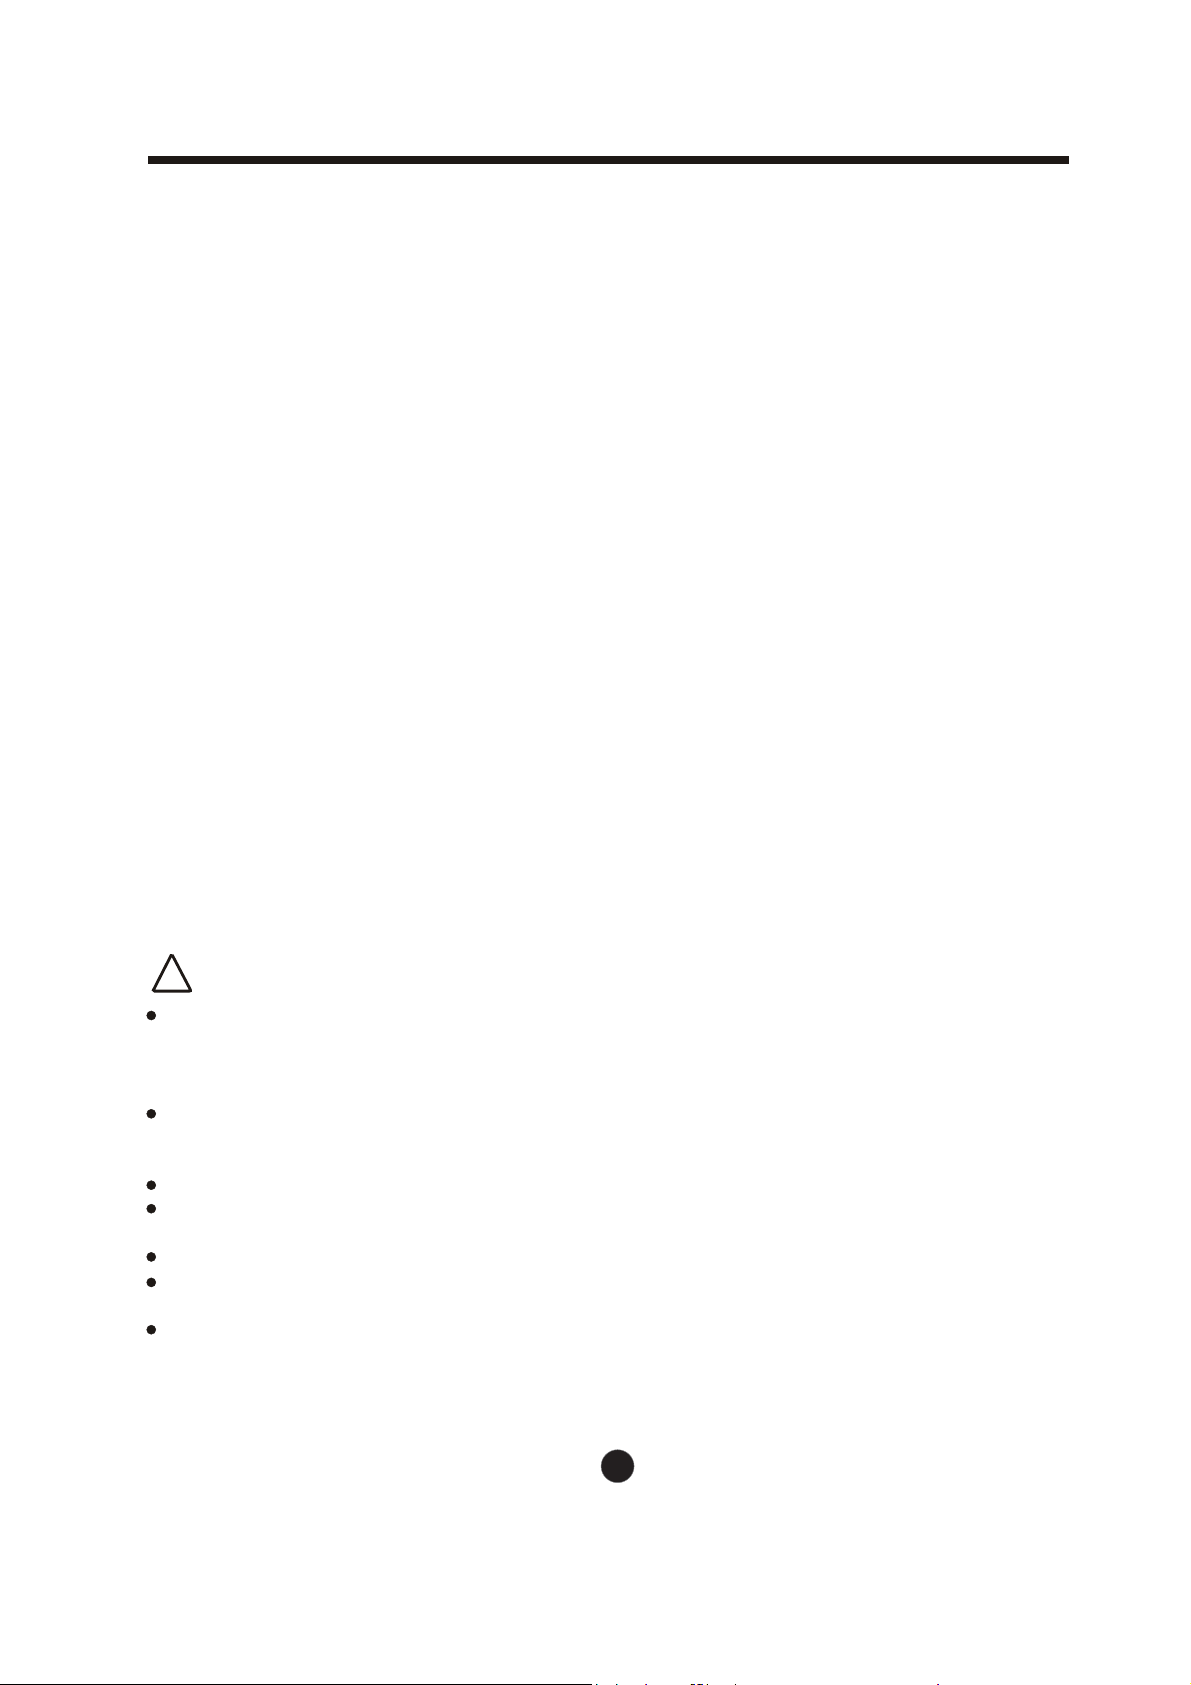
To prevent injury to the user or other people and property damage, the following instructions must be
followed. Incorrect operation due to ignoring of instructions may cause harmor damage.
The seriousness is classified by the following indications.
Meanings of symbols used in this manual are as shown below.
This symbol indicates the possibility of death or serious injury.
This symbol indicates the possibility of injury or damage to property.
Always do this.
Never do this.
WARNING
CAUTION
WARNING
The water from the full bucket
may cause electric shock.
Do not take the water bucket
out during operation.
Do not use the unit in small
spaces. Do not put in places where
water may splash onto the
unit.
Place the unit on a
level, sturdy section
of the floor.
3
SAFETY PRECAUTIONS
A lack of air flow can lead
to overheating and fire.
It may cause electric shock
or failure of appliance.
Operation without filters
may cause failure. It may cause failure of the appliance
or an accident. Water may spill inside the
unit, causing insulation
failure and electrical
shock or fire.
There is danger of fire or
electric shock. You may be injured if you
fall or if the unit falls over.
Infants, children, elderly people,
and people not senstive to
humidity.
This will cause the unit to
deteriorate due to
chemicals and solvents
dissolved in the air.
CAUTION
The manufactures nameplate is located on the rear panel of the unit and contains electrical and other
technical data specific to this unit.
Be sure the unit is properly grounded. To minimize shock and fire hazards, proper grounding is important.
The power cord is equipped with a three-prong grounding plug for protection against shock
hazards.
Your unit must be used in a properly grounded wall receptacle. If the wall receptacle you intend to use is
not adequately grounded or protected by a time delay fuse or circuit breaker, have a qualified electrician
install the proper receptacle.
Ensure the receptacle is accessible after the unit installation.
Do not use extension cords or an adapter plugs with this unit.However, if it is necessary to use an
extension cord, use an approved Dehumidifier extension cord only (available at most local hardware
stores).
To avoid the possibility of personal injury, always disconnect the power supply to the unit, before installing
and/or servicing.
Electrical Information
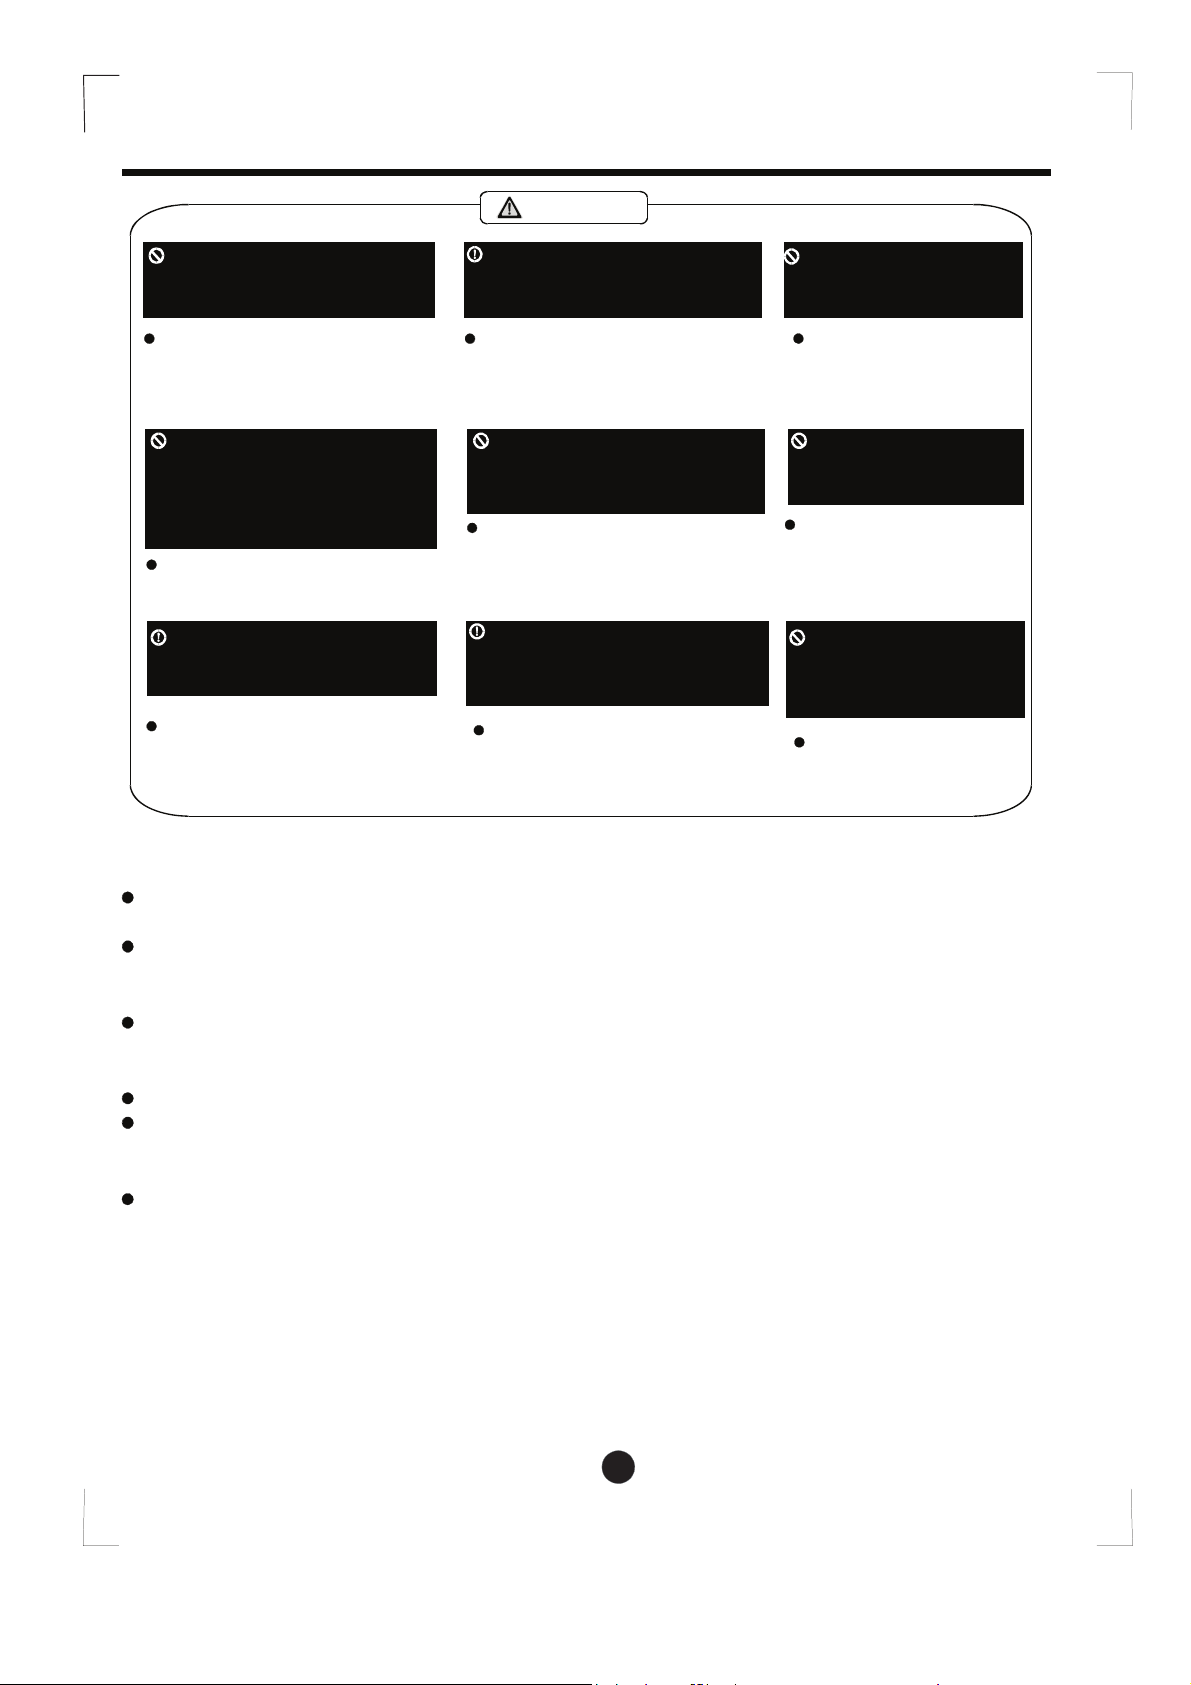
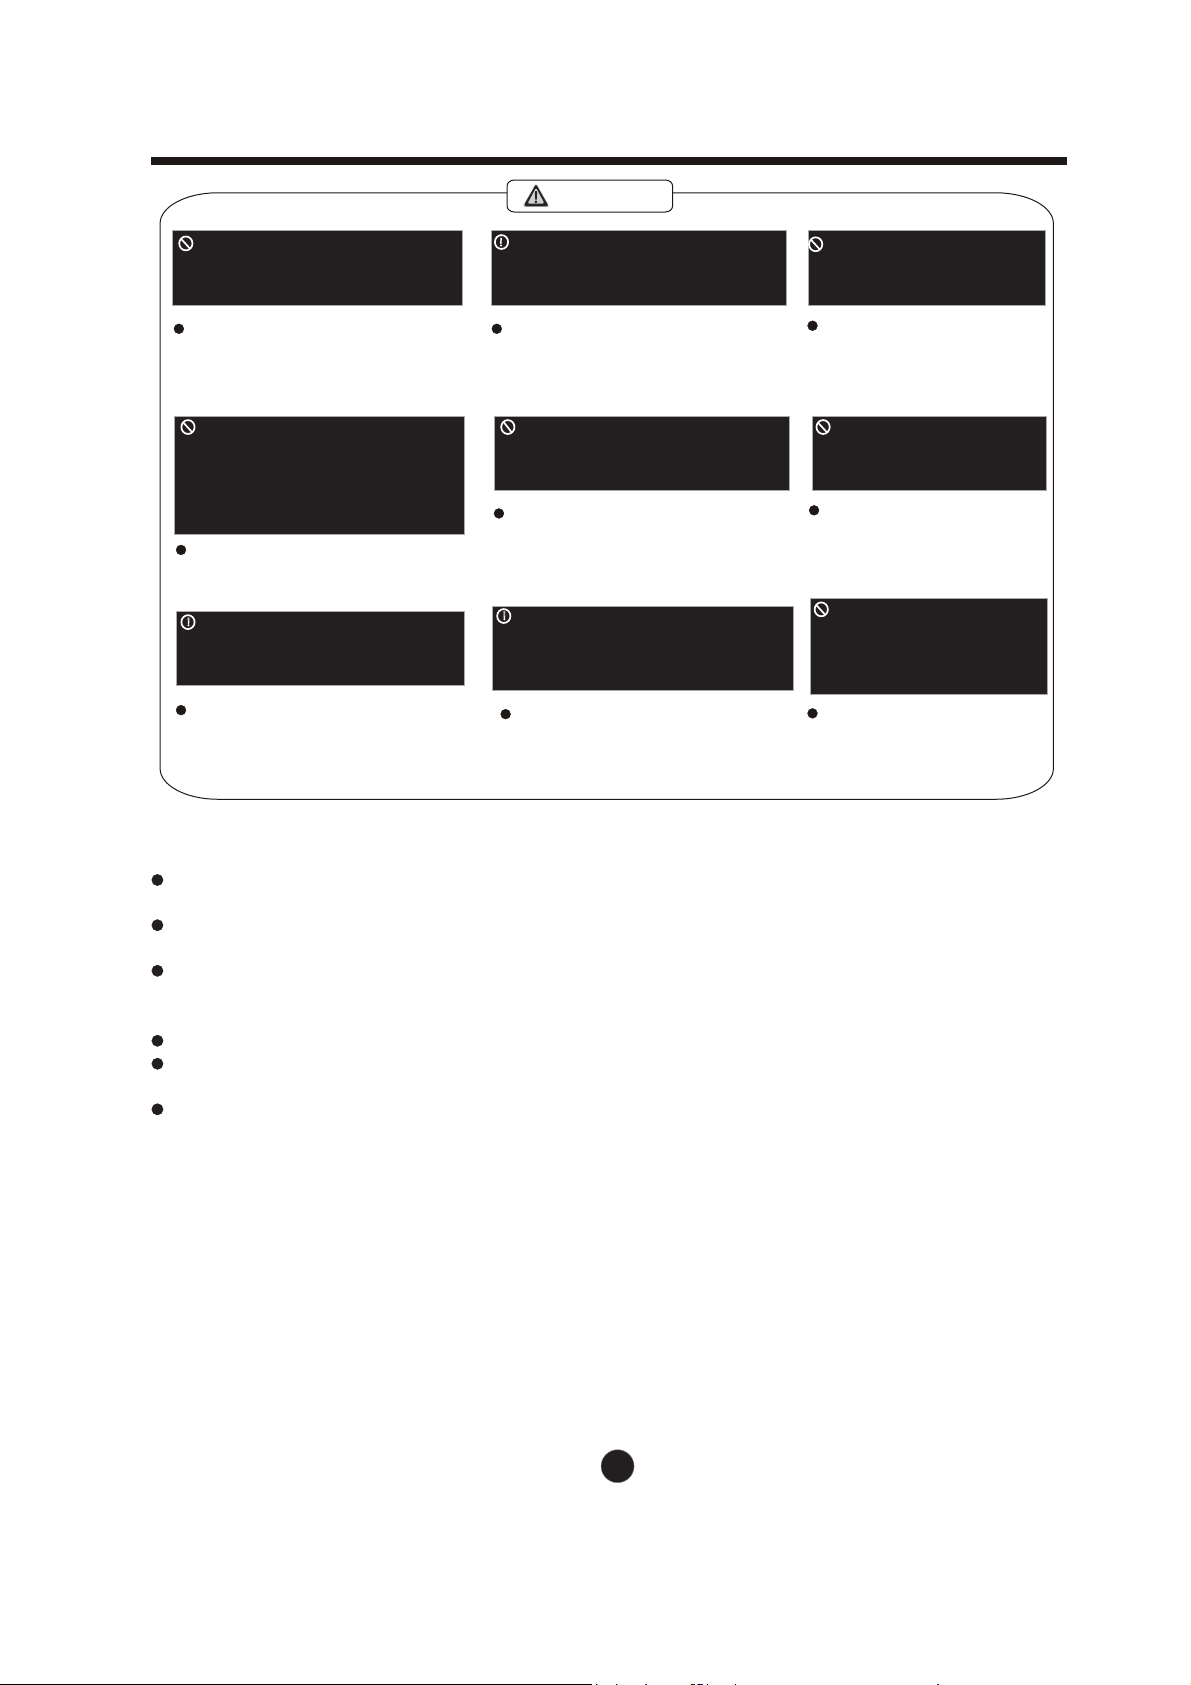
Do not cover the intake or
exhaust openings with
cloths or towels.
Never insert your finger or
other foreign objects into grills
or openings. Take special care
to warn children of these
dangers.
Always insert the filters
securely. Clean filter
once every two weeks.
If water enters the unit, turn
the unit off and disconnect the
power, contact a qualified
service technician.
Do not place flower
vases or other water
containers on top of
the unit.
Care should be taken when
using the unit in a roomwith
the following persons:
Do not place heavy objects on
the power cord and take care
so that the cord is not
compressed.
Do not climb up on
or sit on the unit.
Do not use in areas
where chemicals are
handled.
CONTROL PADS ON THE DEHUMIDIFIER
4
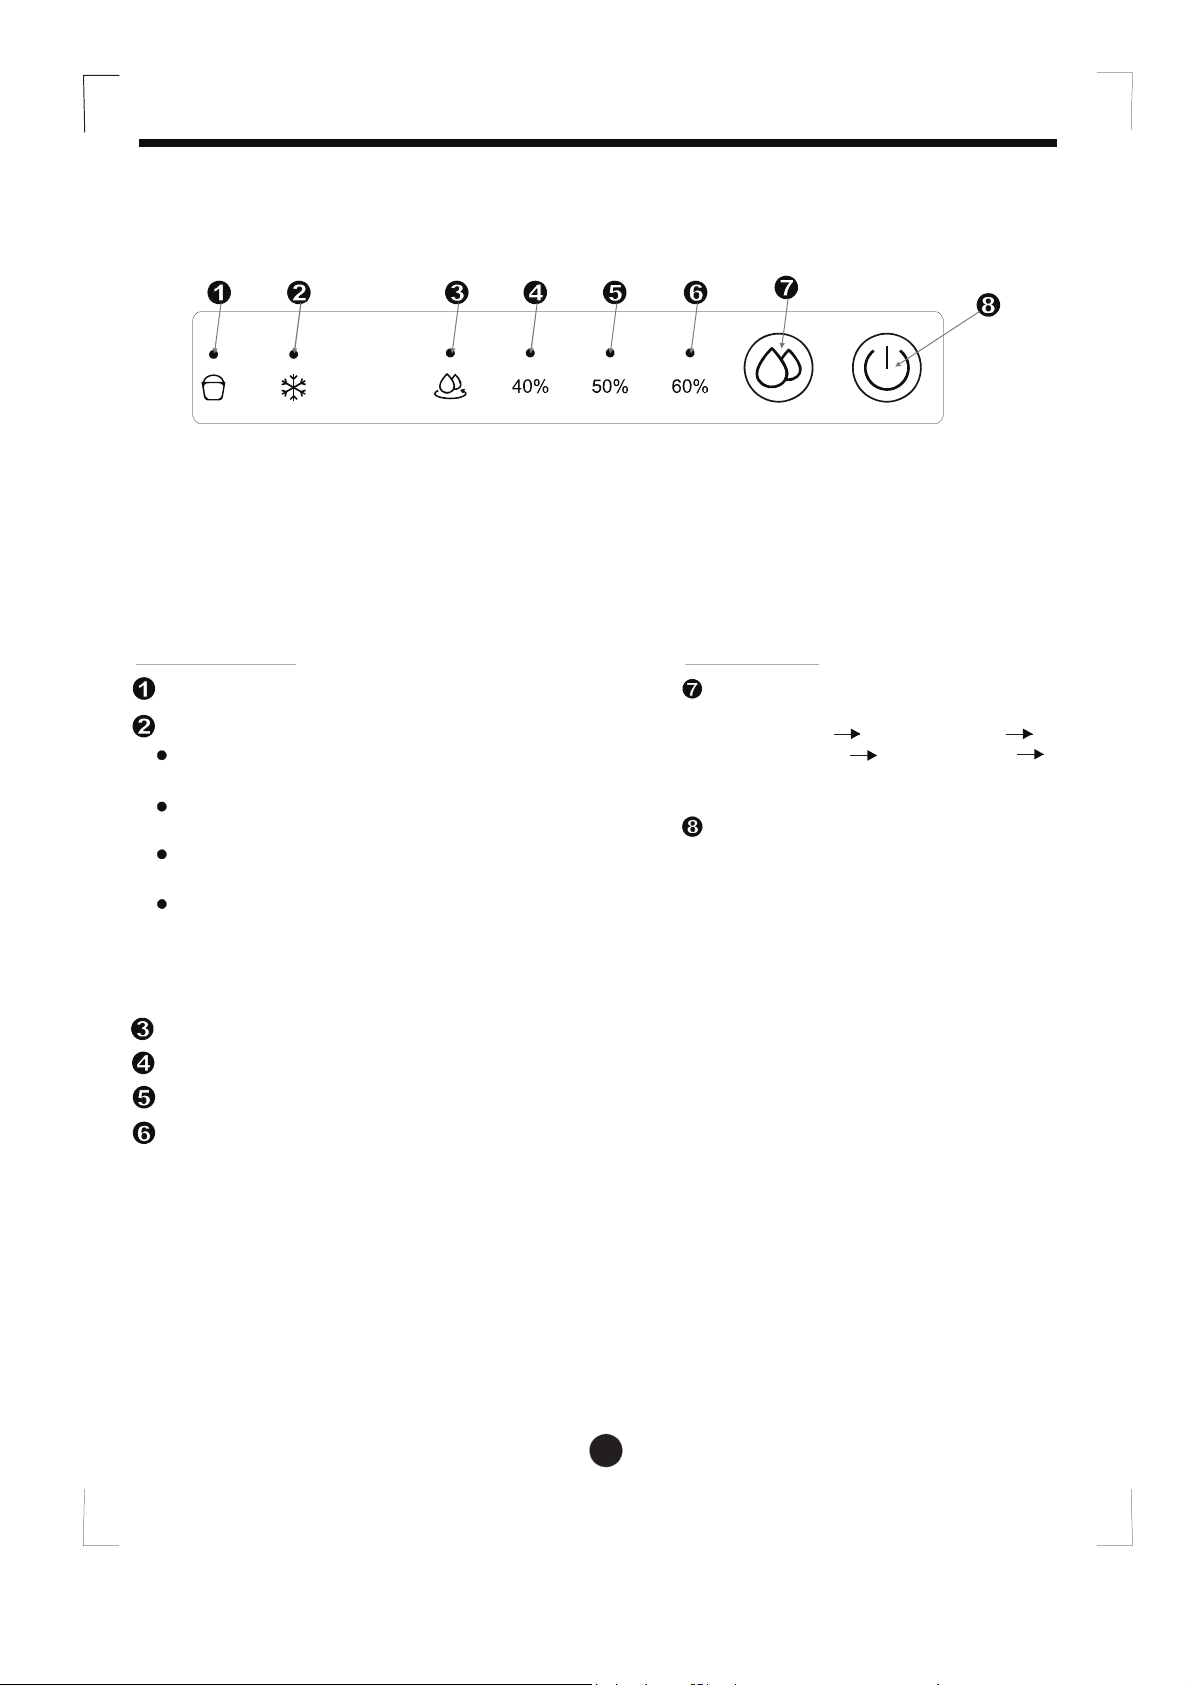
I ndic a t or li gh ts Mode Pad
Press to select the operation mode: continuously
dehumidification 40% humidity level
50% humidity level 60% humidity level
continuously dehumidification
C ontr o l pa ds
The control panel of the dehumidifier you purchased may be look like one of the following:
C on t r o l p a n e l ( 1)
Auto defrost indicator light
Continuous operation on indicator light
Press to turn the dehumidifier on and off.
POWER Pad
Bucket full indicator light
40% humidity level setted mode operation on indicator light
50% humidity level setted mode operation on indicator light
60% humidity level setted mode operation on indicator light
When auto defrost is operation on,the indicator
light illumunates.
The indicator light fashes at 0.5Hz under
refrigerant leakage detetcton.
The indicator light fashes at 5Hz under
room temperature sensor error.
The indicator light fashes at 5Hz under
evaporator temperature sensor error.
NOTE: If the auto defrost indicator light flashes,
unplug the unit and plug it back in. If error
repeats, call for service.,

5
IDENTIFICATIONOF PARTS
Identification of parts
Other features
Bucket Full Light
Glows when the bucket is ready to be
emptied, or when the bucket is removed
or not replaced in the proper position.
Auto Shut Off
The water level control switch shuts off the
dehumidifier when the bucket is full, or when
the bucket is removed or not replaced in the
proper position. When the set humidity level
is reached, the unit will be shut off automatically.
Power Cord
Air Outlet grille
Drain hose outlet (see page 7)
Air filter (behind the air intake grille)
Power Plug
Power cord band (Used only when storing the unit.)
Control panel
Air intake grille
Water bucket
Handle
Wait 3 minutes before resuming operation
After the unit has stopped, it will not restart operation
for three minutes. This is to protect the unit.
Operation will automatically start after 3 minutes.
NOTE: All the pictures in the manual are
for explanation purposes only.Your unit
may be slightly different. The actual shape
of the unit you purchased may be slightly
different, but the operations and functions
are the same.
When frost builds up on the evaporator coils, the
compressor will cycle off and the fan will continue
to run until the frost disappears.
Auto Defrost
Auto-Restart
If the unit turns off unexpectedly due to a power outage, it will
restart with the previously set functions automatically when the
power resumes.
Front
Rear
Fig.1
Fig.2
6
OPERATING THE UNIT
When using the unit
• When first using the dehumidifier, operate the unit continuously for 24 hours.
• This unit is designed to operate with a working environment between 5 ºC(41 ºF) and 35 ºC(95 ºF).
• If the unit has been switched off and needs to be switched on again quickly, allow approximately
three minutes for the correct operation to resume.
• Do not connect the dehumidifier to a multiple socket outlet, which is also being used for other electrical appliances.
• Select a suitable location, making sure you have easy access to an electrical outlet.
• Plug the unit into a 115V~ 60Hz/220~240V 50Hz (Refer to the nameplate located on the side/rear of the unit ) electrical
socket-outlet with earth connection.
• Make sure the water bucket is correctly fitted otherwise the unit will not operate properly.
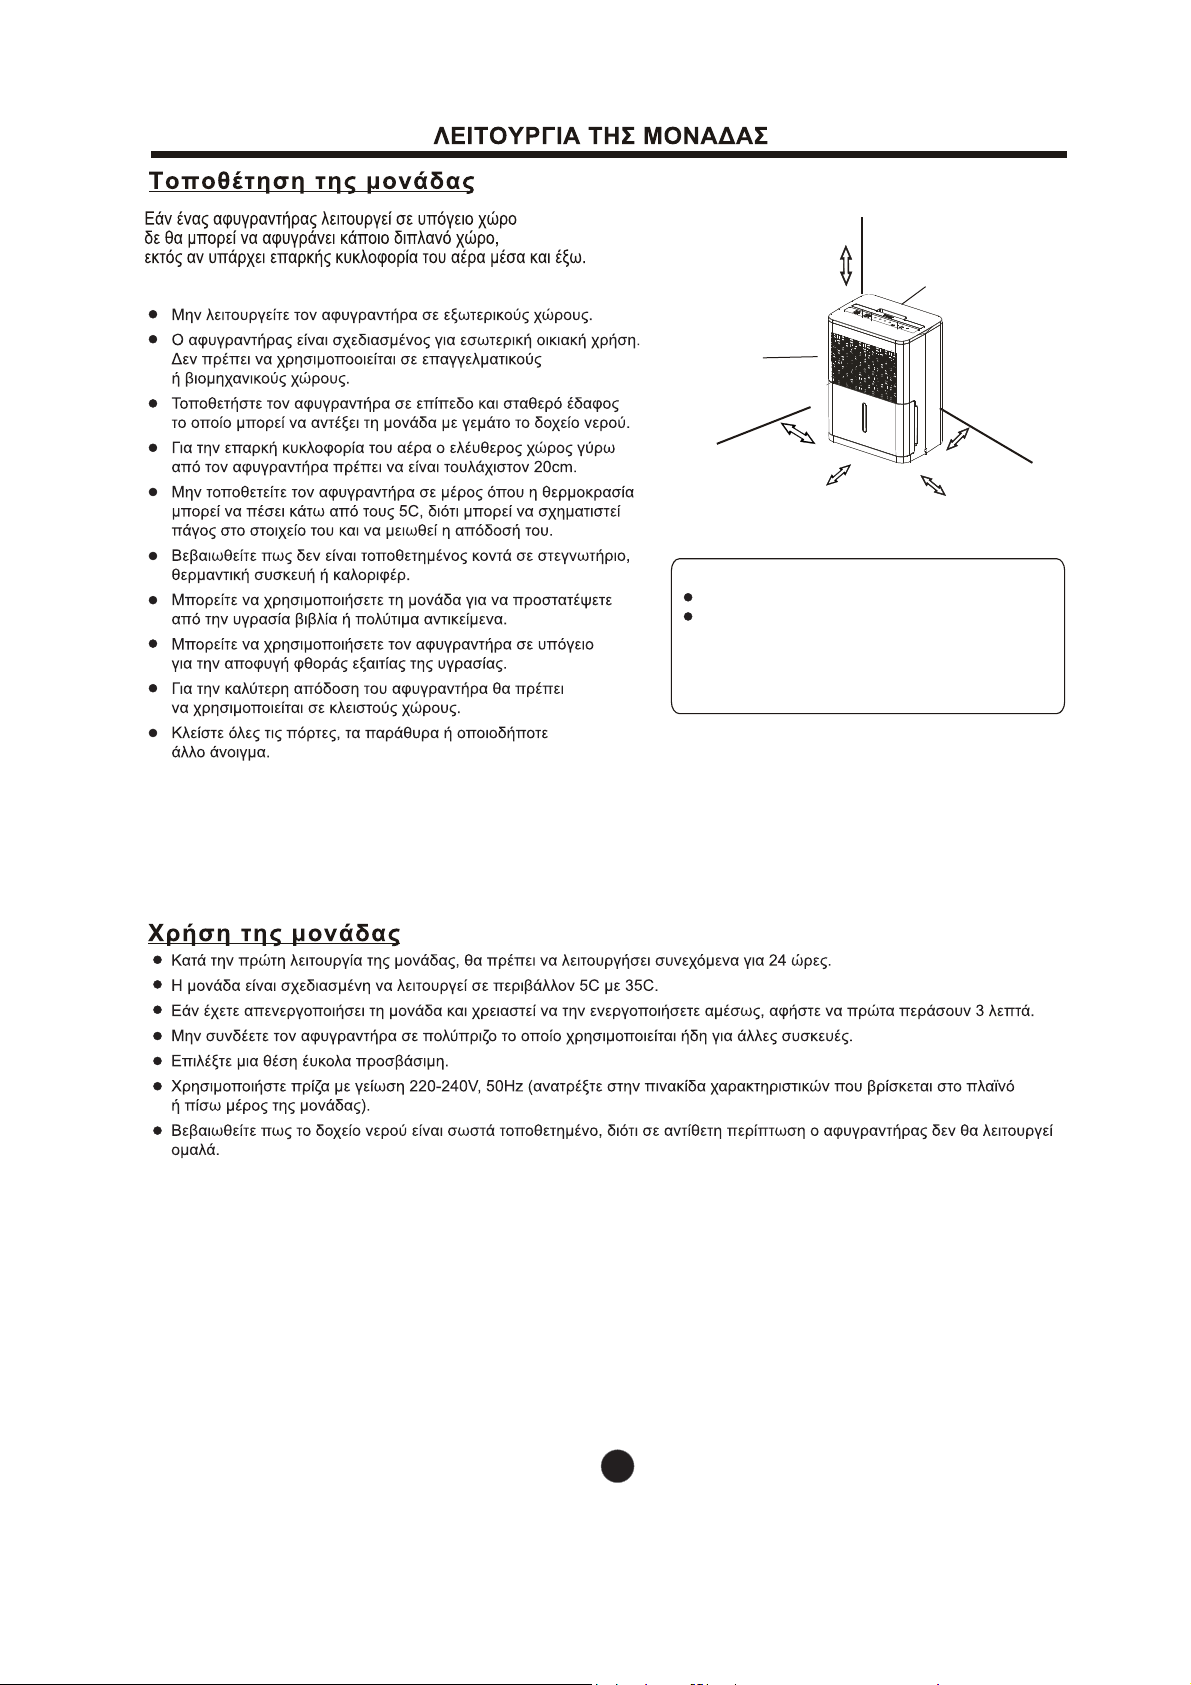
Adehumidifier operating in a basement will have little or no
effect in drying an adjacent enclosed storage area, such as a
closet, unless there is adequate circulation of air in and out of
the area.
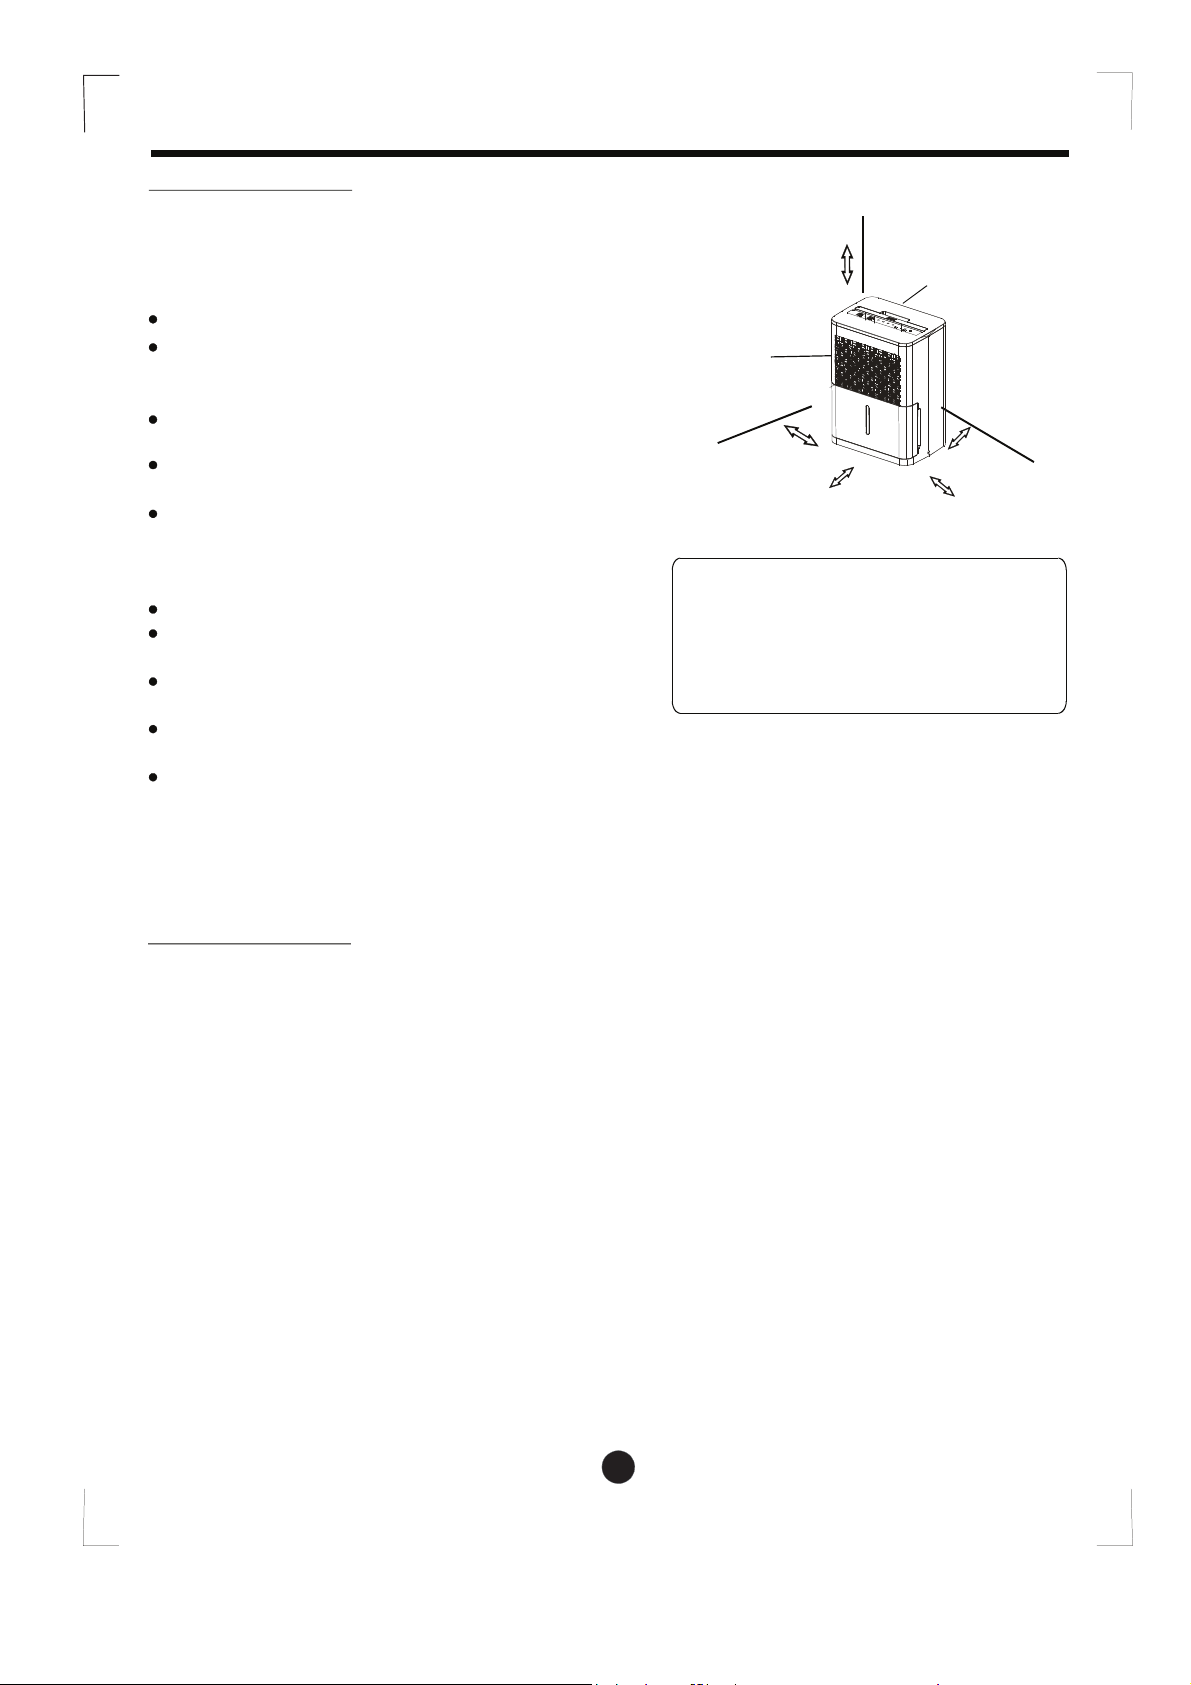
Air outlet grille
Air intake
grille
20cm or more
20cm or more 20cm or more
20cm or more
40cm or
more
Positioning the unit
Do not use outdoors.
This dehumidifer is intended for indoor residential
applications only. This dehumidifier should not be used
for commercial or industrial applications.
Place the dehumidifier on a smooth, level floor strong
enough to support the unit with a full bucket of water.
Allow at least 20cm of air space on all sides of the unit
for good air circulation.
Place the unit in an area where the temperature will not
fall below 5 ºC(41 ºF). The coils can become covered with
frost at temperatures below 5 ºC(41 ºF), which may reduce
performance.
Place the unit away fromthe clothes dryer, heater or radiator.
Use the unit anywhere books or valuables are stored to
prevent moisture damage.
Use the dehumidifier in a basement to help prevent
moisture damage.
The dehumidifier must be operated in an enclosed
area to be most effective.
Close all doors, windows and other outside openings
to the room.
Fig.4
Casters(Install at four points on the bottom
of unit)
• Casters can only move laterally.
• Do not force casters to move over carpet,
nor move the unit with water in the bucket.
(The unit may tip over and spill water.)
NOTE:Casters is optional,some models without.

7
Removing the collected water
There are two ways to remove collected water.
1. Use the bucket
• When the bucket is full, the unit will automatically
stop running, and the Full indicator light will flash.
• Slowly pull out the bucket. Grip the left and right
handles securely, and carefully pull out straight so the
water does not spill. Do not put the bucket on the floor
because the bottomof the bucket is uneven.
Doing so will cause the bucket to fall and the water to spill.
• Throw away the water from the water outlet (See Fig.7)
and replace the bucket. The bucket must be in place
and securely seated for the dehumidifier to operate.
• The machine will re-start when the bucket is restored
in its correct position.
NOTES:
When you remove the bucket, do not touch any parts
inside of the unit. Doing so may damage the product.
Be sure to push the bucket gently all the way into the
unit. Banging the bucket against anything or failing to
push it in securely may cause the unit not to operate.
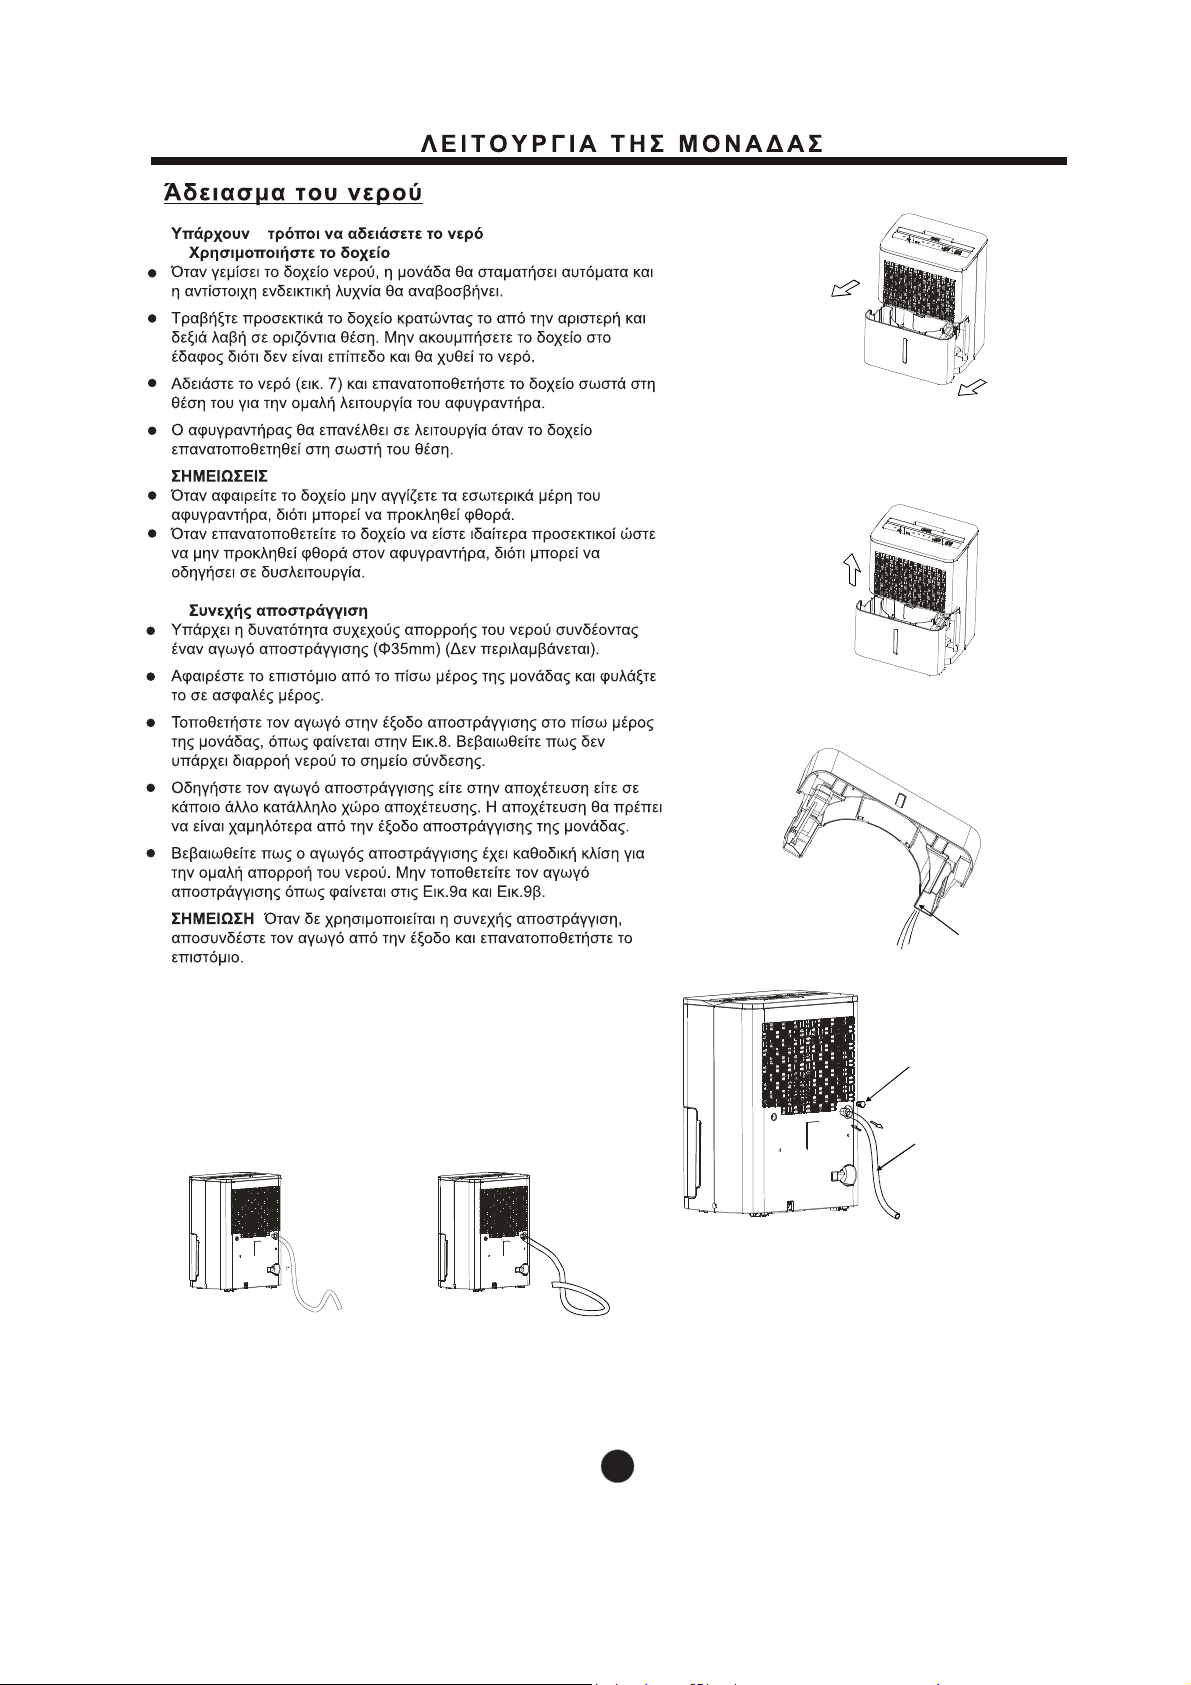
2. Continuous draining
Water can be automatically emptied into a floor
drain by attaching the unit with a water hose
( Φ16.5*13.5mm) (not included).
Remove the rubber plug fromthe back of the unit and store
it in a safe location.
Insert the water hose into the unit from the drain outlet in the
back of the unit as shown in Fig.8. Attach the water hose to
the drain hose outlet of the unit. Make sure the connection
of the water hose and the drain hose outlet of the unit is tight
and does not let the water leak.
Then lead the water hose to the floor drain or a suitable
drainage facility.The drainage facilify should be lower than the
drain outlet of the unit.
Be sure to run the water hose sloping downward allowing the
water to flow out smoothly. Do not install the water hose as
shown in Fig.9a and Fig.9b.
NOTE: When the continuous drain feature is not
being used, remove the drain hose fromthe outlet
and attach the rubber plug back into the drain outlet.
Fig.5
Fig.6
Fig.7
1. Pull out the bucket a little.
2. Hold both sides of the bucket
with even strength, and pull it
out fromthe unit.
3. Pour the water out.
OPERATING THE UNIT
Do not block water flow by a rise. Do not block water flow by a retortion.
Fig.8
Remove the
rubber plug
Insert the water
hose fromthe
drain outlet
Water outlet
Fig.9a Fig.9b
8
• After turning off the unit, wait one day before emptying
the bucket.
• Clean the main unit, bucket and air filter.
• Wrap the cord and bundle it with the band(see Fig.16).
• Cover the unit with a plastic bag.
• Store the unit upright in a dry, well-ventilated place.
NOTE: You should loosen the screw on the cover of the
bucket before cleaning it and then reinstall it.
4. When not using the unit for long time periods
CARE AND MAINTENANCE
Turn the dehumidifier off and remove the plug
fromthe wall outlet before cleaning.
1. Clean the Grille and Case
Use water and a mild detergent. Do not use bleach
or abrasives.
Do not splash water directly onto the main unit. Doing
so may cause an electrical shock, cause the insulation
to deteriorate, or cause the unit to rust.
The air intake and outlet grilles get soiled easily, so use
a vacuumattachment or brush to clean.
2. Clean the bucket
Every few weeks, clean the bucket to prevent
growth of mold, mildew and bacteria. Partially
fill the bucket with clean water and add a little
mild detergent. Swish it around in the bucket,
empty and rinse.
NOTE: Do not use a dishwasher to clean the
bucket. After cleaning, the bucket must be in place
and securely seated for the dehumidifier to operate.
Fig. 10 Fig. 11
Fig. 13
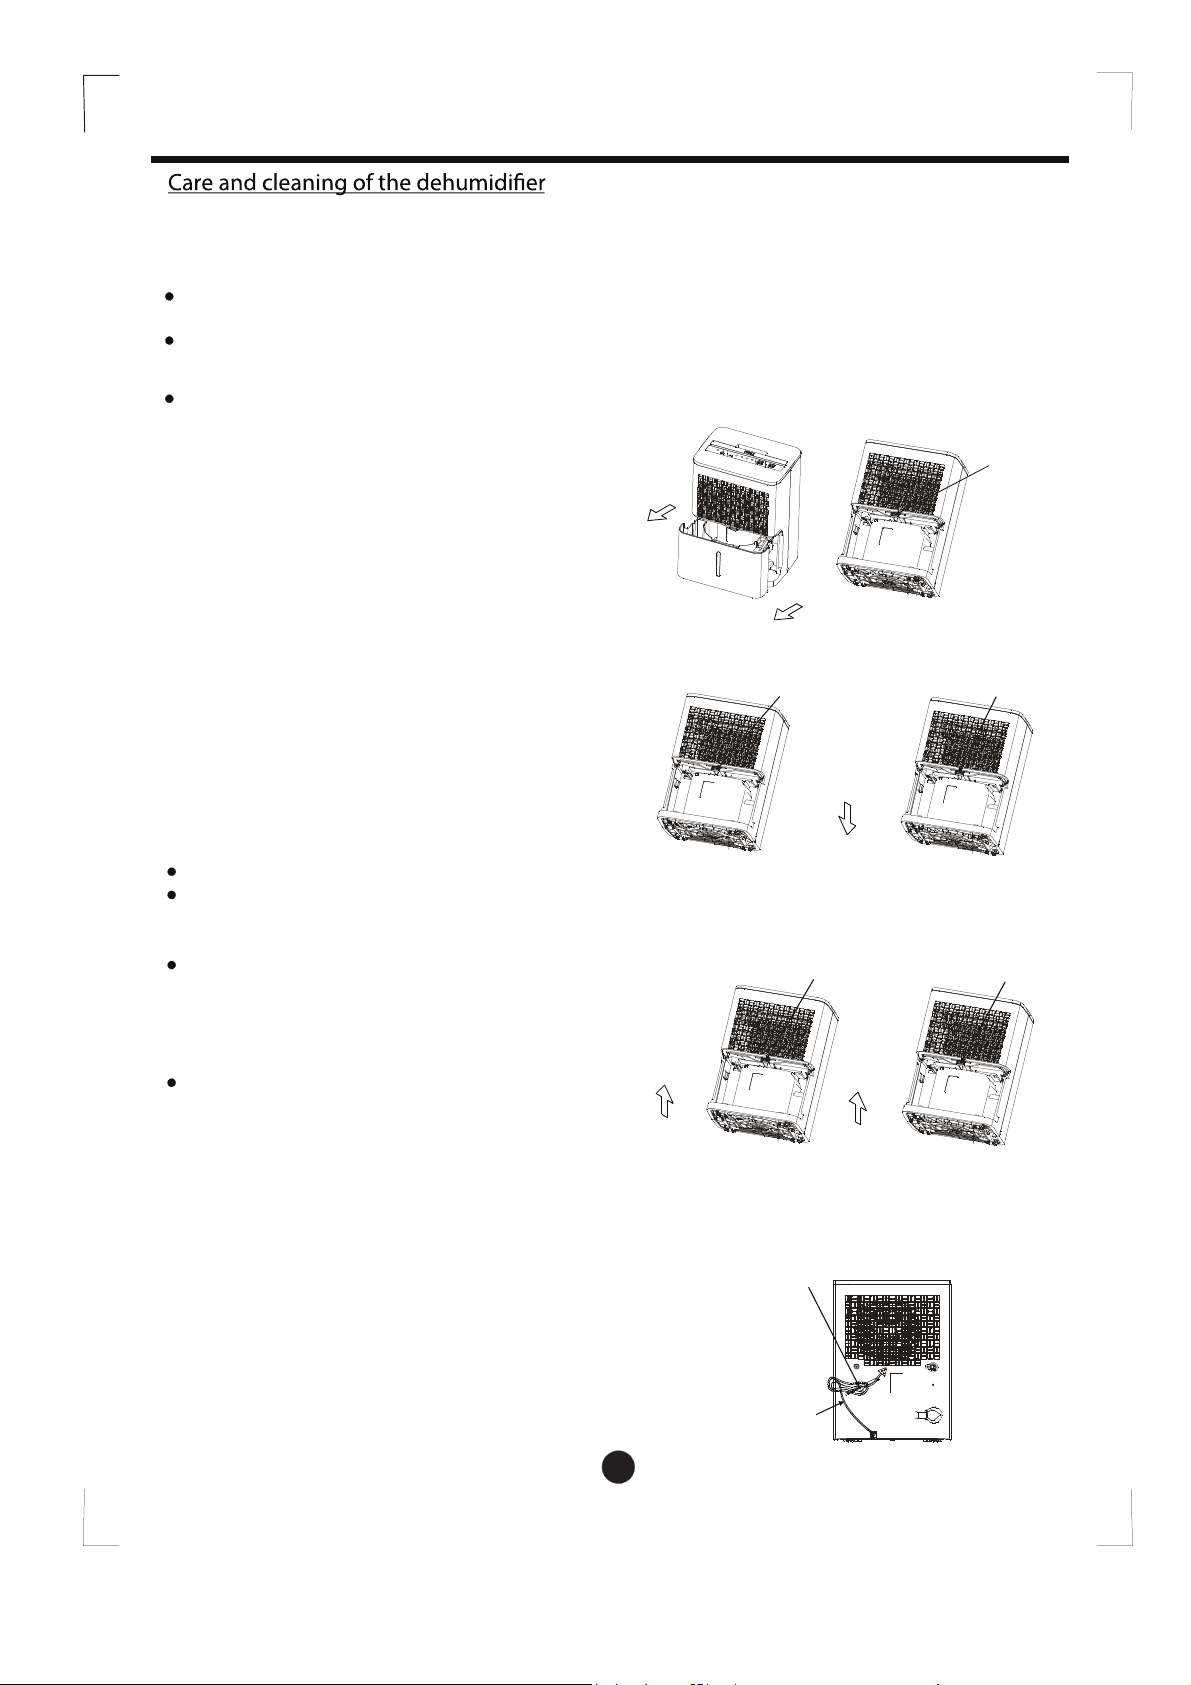
3.Clean the air filter
The air filter behind the front grille should be
checked and cleaned at least every 30 days
or more often if necessary.
Pull the water bucket out as shown in Fig.10.
Grip the tab on the filter and press them in slightly
to take them out fromthe filter holder, then pull out
the filter downward.(see Fig.11~13).
Clean the filter with warm, soapy water. Rinse and
let the filter dry before replacing it. Do not clean the
filter in a dishwasher.
Insert the filter into the unit,then press the tab in on
the filter slightly and push the filter upward.(See
Fig.14 and Fig.15).
DO NOT operate the dehumidifier without a filter
because dirt and lint will clog it and reduce performance.
NOTE: DO NOT RINSE OR PUT THE FILTER
IN AN AUTOMATIC DISHWASHER.
To remove:
To attach:
CAUTION:
Grip the tab
on the filter
and press
them in.
Pull out the filter
downward.
Fig. 12
Tab
Fig. 14
Press the tab
in and push
the filter upward.
Fig. 15
Insert the filter.
Fig. 16
Band
Power cord
9
TROUBLESHOOTING TIPS
Before calling for service, review the chart below.
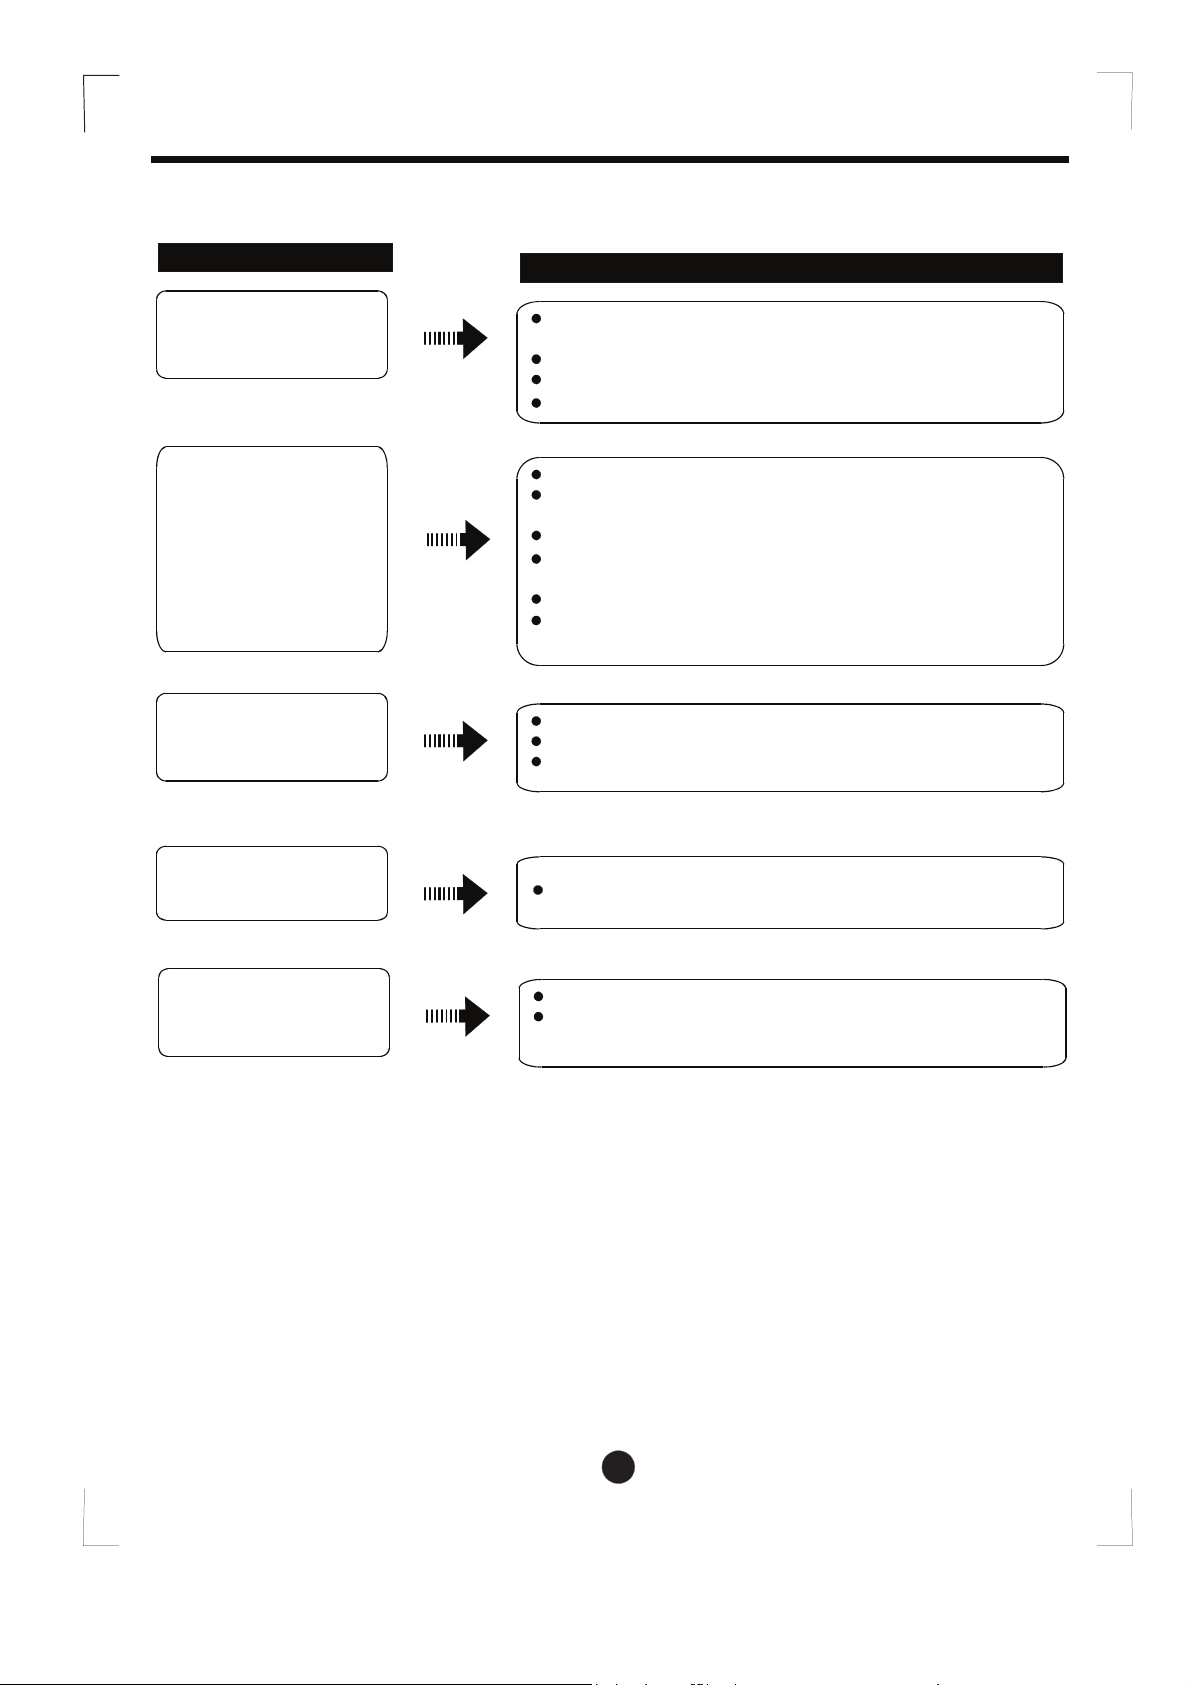
Problem What to check
Unit does not start Make sure the dehumidifier s plug is pushed completely into the
outlet.
Check the house fuse/circuit breaker box.
Dehumidifier has reached its preset level or bucket is full.
Bucket is not in the proper position.
Dehumidifier does not
dry the air as it should Did not allow enough time to remove the moisture.
Make sure there are no curtains, blinds or furniture blocking the
front or back of the dehumidifier.
The humidity selector may not be set low enough.
Check that all doors, windows and other openings are securely
closed.
Roomtemperature is too low, below 5 ºC(41 ºF).
There is a kerosene heater or something giving off water vapor
in the room.
The unit makes a loud
noise when operating The air filter is clogged.
The unit is tilted instead of upright as it should be.
The floor surface is not level.
Frost appears on the
coils This is normal. The unit has Auto defrost feature.
Water on floor • Hose to connector or hose connection may be loose.
• Intended to use the bucket to collect the water, but the back
drain plug is removed.
тфьшщфёярѐрђцѐцёфшё
ΑΠΟΡΡΙΨΗ: Μην απορρίπτετε το συγκεκριμένο προϊόν στα αστικά λύμματα, χρειάζεται
ειδική περισυλλογή και επεξεργασία.
Απαγορεύεται η απόρριψή του συγκεκριμένου προϊόντος μαζί με τα αστικά λύμματα.
Για την απόρριψή υπάρχουν αρκετές επιλογές:
A) Έχουν συσταθεί ειδικά συστήματα περισυλλογής ηλεκτρονικών αποβλήτων
όπου μπορούν να απορριφθούν χωρίς επιβάρυνση.
B) Κατά την προμήθεια ενός νέου προϊόντος μπορείτε να επιστρέψετε στον προμηθευτή σας
το παλιό χωρίς επιβάρυνση.
C) Ο κατασκευαστής μπορεί να παραλάβει την παλιά συσκευή προς απόρριψη
χωρίς επιβάρυνση
D) Μπορούν να πωληθούν σε επαγγελματίες που εκμεταλλεύονται τα μεταλλικά
εξαρτήματα των παλιών προϊόντων.
Η απόρριψή σε δάση και πεδιάδες μπορεί να βλάψει την υγεία σας λόγω του ότι η επιβλαβείς
ουσίες μεταφέρονται μέσω του υδροφόρου ορίζοντα στην τροφική αλυσίδα.
Για την χρήση του αφυγραντήρα σε χώρες της Ευρωπαϊκής Ένωσης θα πρέπει
να ακολουθούνται οι παρακάτω οδηγίες:
1
яфѐшфѕюыфьр
ΠΡΟΣΟΧΗ
!
ȅǻǾīǿǼȈ ǹȈĭǹȁǼǿǹȈ
ȆȡȠİȚįȠʌȠȓȘıȘ
ȆȡȠıȠȤȒ
ǾȜİțIJȡȚțȐȤĮȡĮțIJȘȡȚıIJȚțȐ
ȆȁǾȀȉȇǹ ȉȅȊ ǹĭȊīȇǹȃȉǾȇǹ
ǼȞįİȚțIJȚțȑȢȜȣȤȞȓİȢ
ȆȜȒțIJȡĮ
DZȜȜİȢȜİȚIJȠȣȡȖȓİȢ
ȆǼȇǿīȇǹĭǾ ȉȍȃ ǼȆǿȂǼȇȅȊȈ ǼȄǹȇȉǾȂǹȉȍȃ
ȆİȡȚȖȡĮijȒIJȦȞİʌȚȝȑȡȠȣȢİȟĮȡIJȘȝȐIJȦȞ
ȉȠʌȠșȑIJȘıȘIJȘȢȝȠȞȐįĮȢ
ȁǼǿȉȅȊȇīǿǹ ȉǾȈ ȂȅȃǹǻǹȈ
ȋȡȒıȘIJȘȢȝȠȞȐįĮȢ
ǹijĮȓȡİıȘIJȠȣȞİȡȠȪ
ĭȇȅȃȉǿǻǹ Ȁǹǿ ȈȊȃȉǾȇǾȈǾ
ĭȡȠȞIJȓįĮțĮȚțĮșĮȡȚıȝȩȢIJȠȣĮijȣȖȡĮȞIJȒȡĮ
ǹȃȉǿȂǼȉȍȆǿȈǾ ȆȇȅǺȁǾȂǹȉȍȃ
ǹȞIJȚȝİIJȫʌȚıȘʌȡȠȕȜȘȝȐIJȦȞ
ǻȚĮȕȐıIJİ IJȠ ʌĮȡȩȞ İȖȤİȚȡȓįȚȠ
ȈIJȠʌĮȡȩȞİȖȤİȚȡȓįȚȠșĮȕȡİȓIJİȤȡȒıȚȝİȢıȣȝȕȠȣȜȑȢȖȚĮIJȘıȦıIJȒȤȡȒıȘțĮȚıȣȞIJȒȡȘıȘIJȠȣ
ĮijȣȖȡĮȞIJȒȡĮȆȡȠȜȘʌIJȚțȒijȡȠȞIJȓįĮĮʌȩȝȑȡȠȣȢıĮȢȝʌȠȡİȓȞĮıĮȢİȟȠȚțȠȞȠȝȒıİȚȤȡȩȞȠțĮȚȤȡȒȝĮIJĮ
țĮȚȞĮİʌȚȝȘțȪȞİȚIJȘȗȦȒIJȠȣĮijȣȖȡĮȞIJȒȡĮıĮȢĬĮȕȡİȓIJİʌȠȜȜȑȢĮʌĮȞIJȒıİȚȢıİıȣȞȒșȘʌȡȠȕȜȒȝĮIJĮ
țĮȚȝʌȠȡİȓȞĮȝȘȤȡİȚĮıIJİȓȞĮİʌȚțȠȚȞȦȞȒıİIJİȝİIJİȤȞȚțȩʌȡȠıȦʌȚțȩ
ǾıȣıțİȣȒȝʌȠȡİȓȞĮȤȡȘıȚȝȠʌȠȚȘșİȓĮʌȩʌĮȚįȚȐȐȞȦIJȦȞİIJȫȞțĮȚȐIJȠȝĮȝİİȚįȚțȑȢĮȞȐȖțİȢȒ
ȑȜȜİȚȥȘȖȞȫıȘȢȝȩȞȠİijȩıȠȞİʌȚȕȜȑʌȠȞIJĮȚĮʌȩȐIJȠȝĮȣʌİȪșȣȞĮȖȚĮIJȘȞĮıijȐȜİȚȐIJȠȣȢȉĮʌĮȚįȚȐ
įİȞİʌȚIJȡȑʌİIJĮȚȞĮʌĮȓȗȠȣȞȝİIJȘıȣıțİȣȒȅțĮșĮȡȚıȝȩȢįİȞʌȡȑʌİȚȞĮȖȓȞİIJĮȚĮʌȩʌĮȚįȚȐȤȦȡȓȢ
İʌȓȕȜİȥȘǼijĮȡȝȠȖȒıIJȚȢǼȣȡȦʌĮȧțȑȢȤȫȡİȢ
ǾıȣıțİȣȒįİȞʌȡȑʌİȚȞĮȤȡȘıȚȝȠʌȠȚİȓIJĮȚĮʌȩʌĮȚįȚȐțĮȚȐIJȠȝĮȝİİȚįȚțȑȢĮȞȐȖțİȢȒȑȜȜİȚȥȘȖȞȫıȘȢ
ȒİȝʌİȚȡȓĮȢİțIJȩȢĮȞİʌȚȕȜȑʌȠȞIJĮȚĮʌȩȐIJȠȝĮȣʌİȪșȣȞĮȖȚĮIJȘȞĮıijȐȜİȚȐIJȠȣȢǼijĮȡȝȠȖȒıİȤȫȡİȢ
İțIJȩȢǼȣȡȦʌĮȧțȒȢDzȞȦıȘȢ
ȉĮʌĮȚįȚȐșĮʌȡȑʌİȚȞĮİʌȚȕȜȑʌȠȞIJĮȚȫıIJİȞĮȝȘȞʌĮȓȗȠȣȞȝİIJȘȝȠȞȐįĮ
ǼȐȞijșĮȡİȓIJȠțĮȜȫįȚȠIJȡȠijȠįȠıȓĮȢȘĮȞIJȚțĮIJȐıIJĮıȘșĮʌȡȑʌİȚȞĮȖȓȞİȚĮʌȩİȟİȚįȚțİȣȝȑȞȠ
ʌȡȠıȦʌȚțȩȖȚĮIJȘȞĮʌȠijȣȖȒIJȡĮȣȝĮIJȚıȝȠȪ
ǾıȣıțİȣȒșĮʌȡȑʌİȚȞĮİȖțĮIJĮıIJĮșİȓıȪȝijȦȞĮȝİIJȠȣȢİșȞȚțȠȪȢțĮȞȠȞȚıȝȠȪȢ
ȈȣıțİȣȒȝİȘȜİțIJȡȚțȒĮȞIJȓıIJĮıȘșĮʌȡȑʌİȚȞĮIJȠʌȠșİIJȘșİȓIJȠȣȜȐȤȚıIJȠȞıİPĮʌȩıIJĮıȘĮʌȩ
İȪijȜİțIJĮȣȜȚțȐ
īȚĮIJȘıȣȞIJȒȡȘıȘȒİʌȚıțİȣȒIJȘȢıȣıțİȣȒȢİʌȚțȠȚȞȦȞȒıIJİȝİİȟİȚįȚțİȣȝȑȞȠʌȡȠıȦʌȚțȩ
2
юуцтшфёрёєръфшрё
Συνδέστε σωστά
το καλώδιο τροφοδοσίας.
Μην τροποποιείτε το μήκος του
καλωδίου τροφοδοσίας και μη
χρησιμοποιείτε την ίδια πρίζα και για
άλλες συσκευές.
Αν ακουστούν περίεργοι θόρυβοι ή αν
εξέρχεται κάποια περίεργη οσμή ή καπνός,
απενεργοποιήστε αμέσως τη μονάδα και
αποσυνδέστε την από την παροχή ρεύματος.
Σε αντίθετη περίπτωση μπορεί να
προκληθεί ηλεκτροπληξία ή πυρκαγιά.
Μπορεί να προκληθεί
ηλεκτροπληξία ή πυρκαγιά.
Μπορεί να προκληθεί
ηλεκτροπληξία ή πυρκαγιά.
Μπορεί να προκληθεί
ηλεκτροπληξία ή πυρκαγιά.
Μπορεί να προκληθεί
ηλεκτροπληξία.
Μπορεί να προκληθεί βλάβη
ή ηλεκτροπληξία.
Περιέχει συστατικά που μπορεί
να βλάψουν την υγεία σας.
Μπορεί να προκληθεί
ηλεκτροπληξία ή πυρκαγιά.
Μπορεί να λιώσουν τα πλαστικά
μέρη και να προκληθεί πυρκαγιά.
Μπορεί να προκληθεί
ηλεκτροπληξία ή τραυματισμός.
Μπορεί να προκληθεί
έκρηξη ή πυρκαγιά.
Μην ενεργοποιείτε ή απενεργοποιείτε
τη λειτουργία της μονάδας μέσω
του ασφαλειοδιακόπτη.
Μη τοποθετείτε ή βγάζετε την πρίζα με
βρεγμένα χέρια και μην τη λειτουργείτε
σε χώρο με υψηλή υγρασία.
Μην επιχειρήσετε
να επισκευάσετε
τη μονάδα μόνοι σας.
Μην πίνετε ή χρησιμοποιείτε
το νερό που συλλέγεται
στη μονάδα.
Μην φθείρετε το καλώδιο
ή χρησιμοποείτε
μη προδιαγεγραμμένο
καλώδιο.
Μην τοποθετείτε τη μονάδα
κοντά σε πηγή θερμότητας.
Πριν τον καθαρισμό απενεργοποιήστε
τη μονάδα και αποσυνδέστε την
από την παροχή ρεύματος.
Η μονάδα δεν πρέπει να βρίσκεται κοντά
σε εύφλεκτα ή εκρηκτικά αέρια,
όπως βενζίνη, διαλυτικά κ.α.
! !
ΠΡΟΣΟΧΗ
Μην χρησιμοποιείτε
τη μονάδα σε μικρούς
χώρους.
Έλλειψη αερισμού μπορεί
να προκαλέσει υπερθέρμανση
και πυρκαγιά.
Μην τοποθετείτε τη μονάδα
σε μέρος όπου μπορεί
να πέσει πάνω της νερό.
Μπορεί να εισέλθει νερό
και να φθαρεί η μόνωση.
Μπορεί να προκληθεί
ηλεκτροπληξία ή πυρκαγιά.
Τοποθετήστε
τη μονάδα σε επίπεδο
και σταθερό έδαφος.
.
Εάν η μονάδα πέσει
μπορεί να βραχούν τα γύρω
από αυτήν αντικείμενα ή να
προκληθεί ηλεκτροπληξία
ή πυρκαγιά.
!
Για την αποφυγή τραυματισμού και φθοράς της μονάδας θα πρέπει να ακολουθηθούν οι παρακάτω οδηγίες.
Η κατηγοριοποίηση γίνεται σύμφωνα με τις παρακάτω ενδείξεις
Αυτό το σύμβολο υποδεικνύει πιθανότητα θανάτου ή σοβαρού τραυματισμού
Η επεξήγηση των συμβόλων που εμφανίζονται στο παρόν εγχειρίδιο φαίνεται παρακάτω
Βεβαιωθείτε πως ακολουθείτε αυτές τις οδηγίες
Απαγορεύεται
ΠΡΟΣΟΧΗ
Αυτό το σύμβολο υποδεικνύει την πιθανότητα τραυματισμού ή φθορά της μονάδας
ΠΡΟΣΟΧΗ
ΠΡΟΕΙΔΟΠΟΙΗΣΗ
Θα ενεργοποιηθεί η προστασία υπερχείλισης
και μπορεί να προκληθεί ηλεκτροπληξία
Μην αφαιρείτε το δοχείο
νερού κατά τη λειτουργία
της μονάδας.
3
юуцтшфёрёєръфшрё
Μην καλύπτετε τις εισόδους
και εξόδους του αέρα.
Έλλειψη ροής αέρα μπορεί
να προκαλέσει υπερθέρμανση
και πυρκαγιά.
Μην εισάγετε τα δάχτυλά σας ή
άλλα αντικείμενα στα ανοίγματα
ή στις περσίδες. Προσέξτε και
προειδοποιήστε τα παιδιά για
αυτούς τους κινδύνους.
Μην χρησιμοποιείτε
τη μονάδα σε χώρους
όπου υπάρχουν χημικά.
Θα προκληθεί φθορά στη μονάδα
εξαιτίας των χημικών και
των διαλυμάτων που υπάρχουν
στην ατμόσφαιρα.
Θα πρέπει να δίνεται ιδιαίτερη προσοχή
όταν η μονάδα χρησιμοποιείται σε χώρο
που υπάρχουν τα παρακάτω άτομα:
Βρέφη, παιδιά, ηλικιωμένοι και
άτομα με ευαισθησία στην υγρασία.
Μπορεί να προκληθεί
τραυματισμός από πτώση σας
ή από πτώση της μονάδας.
Εάν εισέλθει νερό στη μονάδα,
μπορεί να προκληθεί βλαβη
της μόνωσης, πυρκαγιά
ή ηλεκτροπληξία.
!
!
Υπάρχει κίνδυνος βλάβης
της μονάδας ή ατυχήματος.
Υπάρχει κίνδυνος πυρκαγιάς
ή ηλεκτροπληξίας.
Βεβαιωθείτε πως το καλώδιο
τροφοδοσίας δεν συμπιέζεται.
Λειτουργία χωρίς φίλτρα μπορεί
να προκαλέσει δυσλειτουργία
της μονάδας.
Να εισάγετε προσεκτικά
τα φίλτρα και να τα καθαρίζετε
κάθε 15 μέρες.
ΠΡΟΣΟΧΗ
Μην ανεβαίνετε και
μην κάθεστε πάνω
στη μονάδα.
Εάν εισέλθει νερό στη μονάδα
απενεργοποιήστε την, αποσυνδέστε
την παροχή ρεύματος και επικοινωνήστε
με εξειδικευμένο τεχνικό.
!
Μην τοποθετείτε βάζα
ή άλλα αντικείμενα
με νερό επάνω
στη μονάδα.
ǾȜİțIJȡȚțȐ ȤĮȡĮțIJȘȡȚıIJȚțȐ
Μπορεί να προκληθεί ηλεκτροπληξία
ή δυσλειτουργία της μονάδας.
Η πινακίδα που βρίσκεται στο πίσω μέρος της μονάδας περιέχει ηλεκτρικά και άλλα τεχνικά χαρακτηριστικά
της μονάδας.
Βεβαιωθείτε πως η μονάδα είναι σωστά γειωμένη, για την αποφυγή ηλεκτροπληξιών και πυρκαγιών.
Το καλώδιο τροφοδοσίας είναι εφοδιασμένο με γείωση για προστασία έναντι ηλεκτροπληξίας.
Η συσκευή θα πρέπει να συνδεθεί σε γειωμένη πρίζα. Εάν η πρίζα που πρόκειται να χρησιμοποιήσετε δεν είναι
κατάλληλα γειωμένη ή προστατευμένη από ασφάλεια ή διακόπτη απευθυνθείτε σε εξειδικευμένο ηλεκτρολόγο
για να εγκαταστήσει την κατάλληλη πρίζα.
Βεβαιωθείτε πως η πρίζα θα είναι προσβάσιμη μετά την εγκατάσταση.
Μην χρησιμοποιείτε μπαλαντέζα ή πολύπριζα. Αν όμως χρειαστεί να χρησιμοποιήσετε μπαλαντέζα,
χρησιμοποιήστε μόνο ειδικό καλώδιο για αφυγραντήρα (διαθέσιμα σε αρκετά καταστήματα)
Πριν τη συντήρηση ή επισκευή να αποσυνδέεται πάντα το καλώδιο τροφοδοσίας προς αποφυγή
τραυματισμού.
4
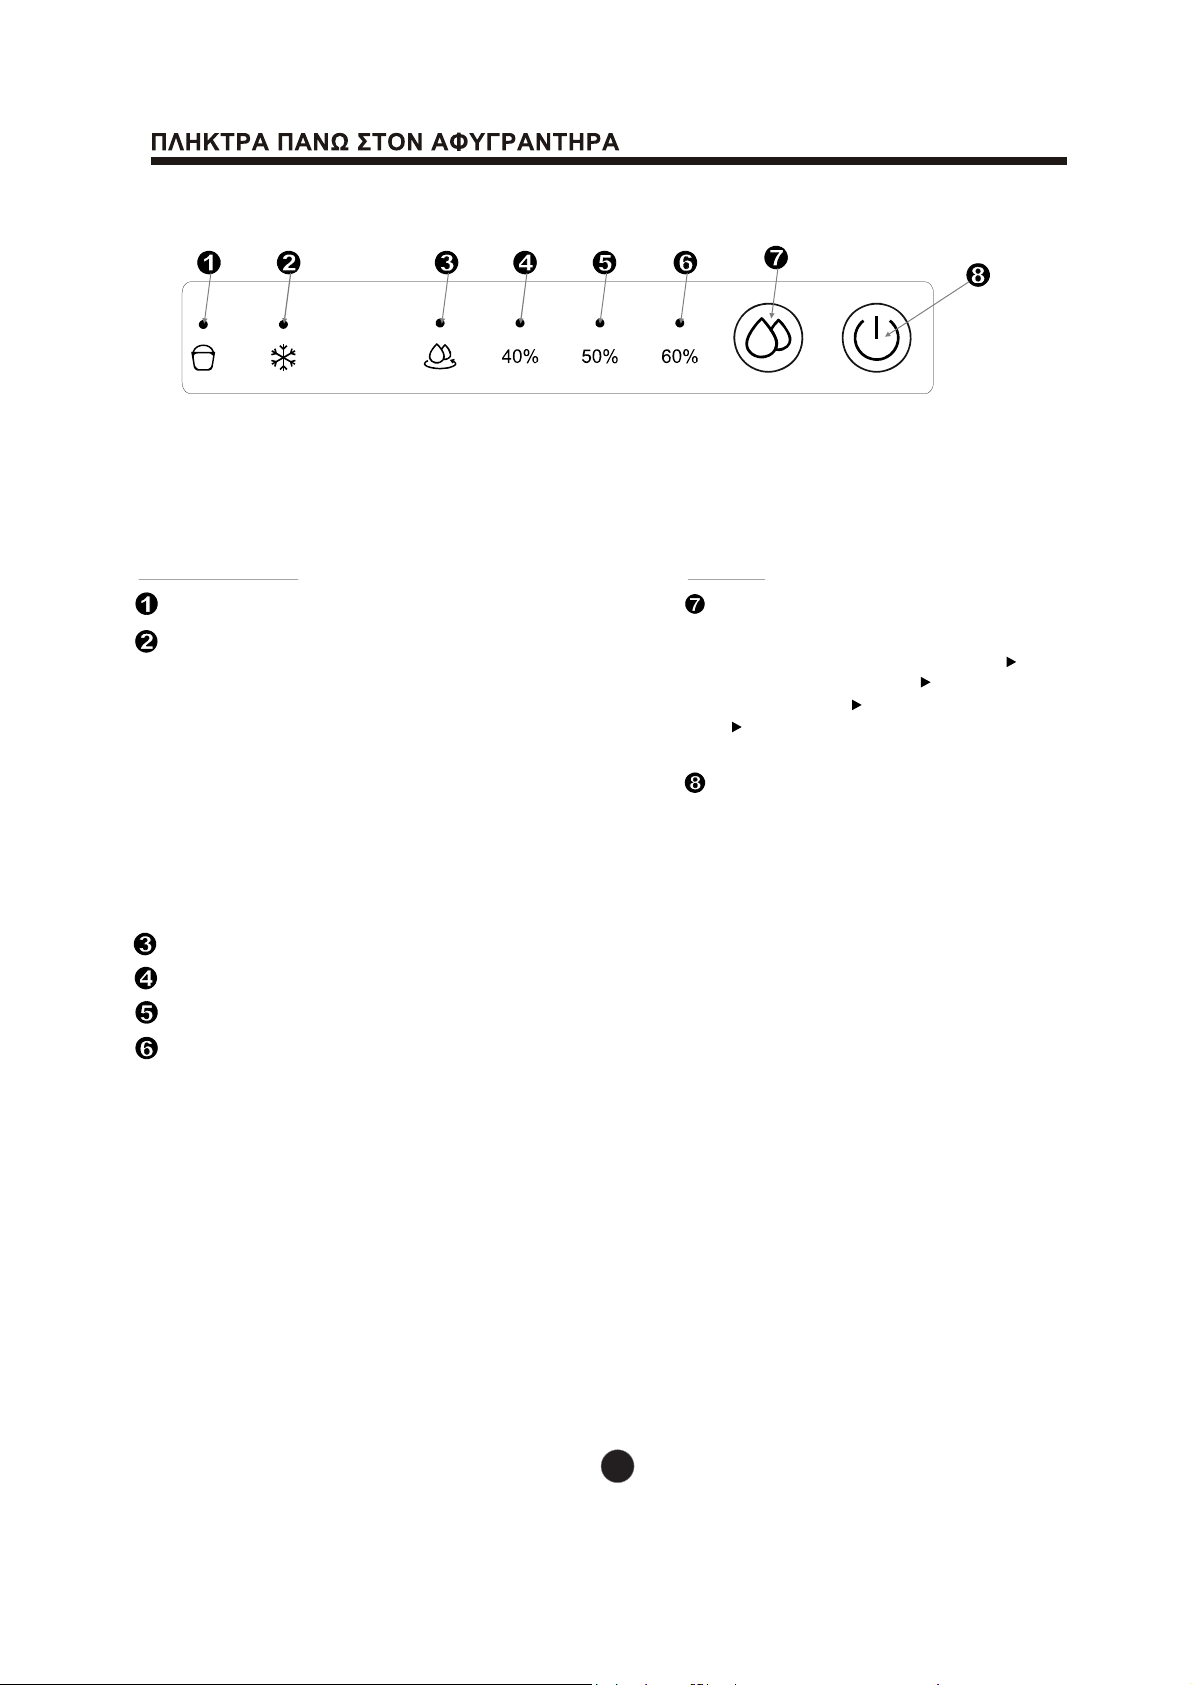
Το πάνελ χειρισμού του αφυγραντήρα που έχετε προμηθευτείθα μοιάζει με κάποιοαπό τα παρακάτω:
Ένδειξη γεμάτου δοχείου.
Ένδειξη αυτόματης αποπάγωσης.
Ένδειξη συνεχούς λειτουργίας.
Ένδειξη λειτουργίας με ρυθμισμένο επίπεδο υγρασίας 40%
Ένδειξη λειτουργίας με ρυθμισμένο επίπεδο υγρασίας 50%
Ένδειξη λειτουργίας με ρυθμισμένο επίπεδο υγρασίας 60%
•Όταν η αυτόματη αποπάγωση είναι σε λειτουργία
ανάβει η ένδειξη
• Η ένδειξη ανάβει με συχνότητα 0.5Hz εάν υπάρχει
διαρροή ψυκτικού.
• Η ένδειξη ανάβει με συχνότητα 0.5Hz εάν υπάρχει
σφάλμα στον αισθητήρα εσωτερικής θερμοκρασίας.
• Η ένδειξη ανάβει με συχνότητα 0.5Hz εάν υπάρχει
σφάλμα στον αισθητήρα θερμοκρασίας του στοιχείου.
ΣΗΜΕΙΩΣΗ: Εάν αναβοσβήνει η ένδειξη αυτόματης
αποπάγωσης, αποσυνδέστε τη συσκευή από το ρεύμα
και επανασυνδέστε την. Εάν το σφάλμα παραμένει, καλέστε
το τμήμα επισκευών.
Φωτινές Ενδείξεις Πλήκτρα
Πλήκρο επιλογής προγράμματος
λειτουργίας.
Πιέστε για να επιλέξετε το προγραμμα
λειτουργίας : συνεχή αφύγρανση --
επίπεδο υγρασίας 40% -- επίπεδο
υγρασίας 50% -- επίπεδο υγρασίας 60%
-- συνεχή αφύγρανση.
Πλήκρο ενεργοποίησης
Πιέστε για να ενεργοποιήσετε ή να
απενεργοποιήσετε τη μονάδα.

5
Πάνελ χειρισμού
Πλέγμα εισόδου αέρα
Δοχείο νερού
Φίλτρο αέρα (πίσω από το πλέγμα εισόδου αέρα)
Λαβή
Πλέγμα εξόδου αέρα
Σημείο πρόσδεσης καλωδίου τροφοδοσίας
(Χρησιμοποιείται μόνο όταν θέλετε να αποθηκεύσετε τη μονάδα)
Έξοδος αγωγού αποστράγγισης (ανατρέξτε στην σελ.7)
Καλώδιο τροφοδοσίας
Φις
9
10
7
5
6
8
3
1
2
4
ι
3
.
Εικ.1
Εικ.2
Μπροστά
Πίσω
6
Πλέγμα εξόδου αέρα
Πλέγμα
εισόδου αέρα
Τουλάχιστον
20cm
Τουλάχιστον 20cm Τουλάχιστον 20cm
Τουλάχιστον
20cm
Τουλάχιστον
40cm
Εικ.4
Ροδάκια (Τοποθετήστε τα στην βάση της μονάδας)
Τα ροδάκια μπορούν να κινηθούν μόνο πλευρικά.
Μην κινείτε τα ροδάκια σε χαλί ή όταν το δοχείο
νερού είναι γεμάτο. (Μπορεί να αναποδογυρίσει
η μονάδα και να χυθεί το νερό)
ΣΗΜΕΙΩΣΗ: Τα ροδάκια είναι διαθέσιμα
σε ορισμένα μοντέλα.
7
Εικ.5
Εικ.6
Εικ.7
1. Τραβήξτε ελαφρώς το δοχείο
2. Κρατήστε το δοχείο και
από τις 2 λαβές και αφαιρέστε
το από τη μονάδα.
3. Αδειάστε το νερό
Εικ.9αΕικ.9β
Μην εμποδίζετε τη ροή του νερού
ανυψώνοντας τον αγωγό. Μην παρεμποδίζετε τη ροή
του νερού τσακίζοντας τον αγωγό.
Εικ.8
Αφαιρέστε
το επιστόμιο
Εισάγετε τον αγωγό
στη έξοδο
αποστράγγισης
Έξοδος νερού
2
1.
:
2.
:

8
Εικ.10 Εικ.11
Εικ.12 Εικ.13
Πιάστε τη λαβή
του φίλτρου
και πιέστε
το φίλτρο
προς τα μέσα
Βγάλτε το φίλτρο
τραβώντας προς τα κάτω
Tab
Πιέστε τη λαβή προς
τα μέσα και σπρώξτε
το φίλτρο προς τα επάνω
Εισάγετε το φίλτρο
Ταινία
Καλώδιο
τροφοδοσίας
1. .
2.
:
3.
:
υ
:
:
4.
:μ
Εικ.14 Εικ.15
Εικ.16
Table of contents
Languages:
Other Nobu Dehumidifier manuals


