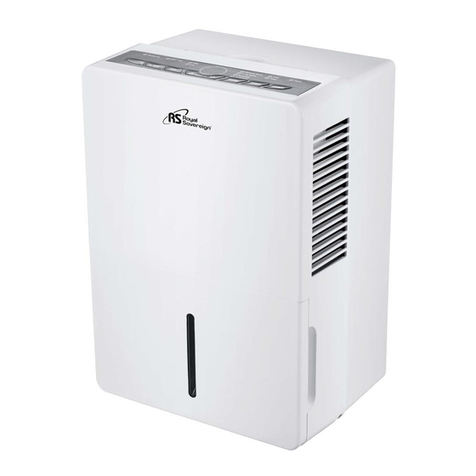
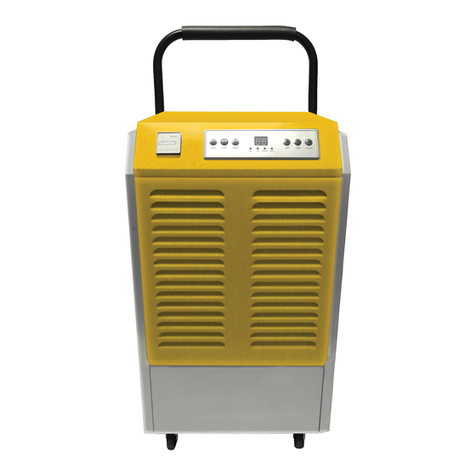
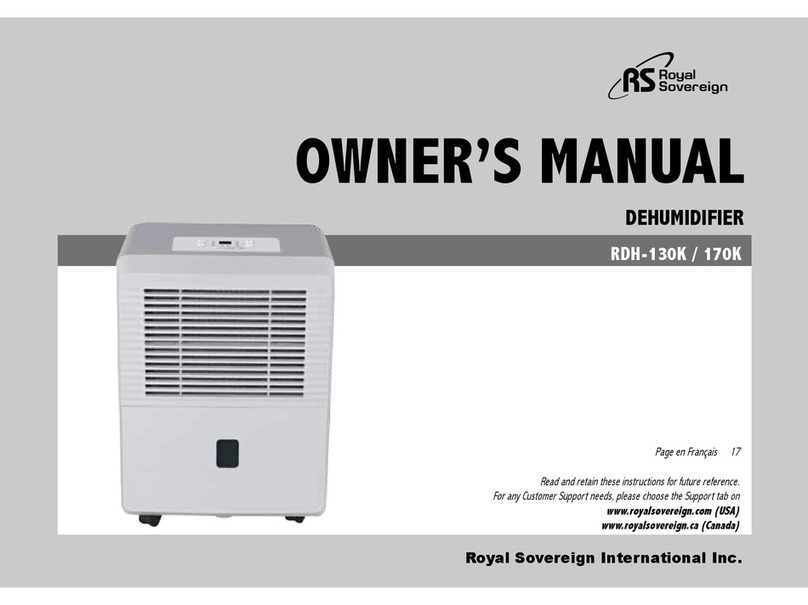
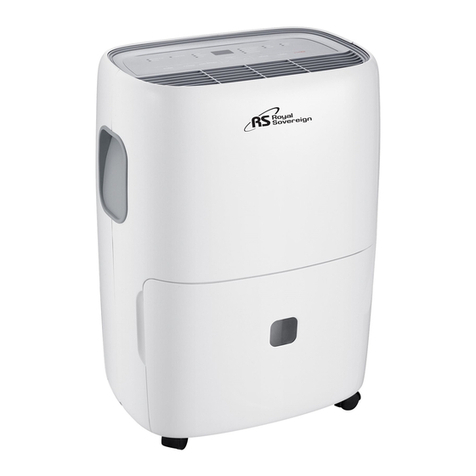
Royal Sovereign RDH-470P User manual

Model: RDH-470P
DEHUMIDIFIER
WITH BUILT-IN AUTO PUMP
Owner’s Manual
Royal Sovereign International, Inc. Please read and retain these instructions.
To register your product, please go to www.royalsovereign.com

Please read this manual carefully before operating. This manual will provide you with safety information instructions for optimal use
and proper care and maintenance for your product.
Safety Information 3
Description 6
Control Panel and Product Operation 8
Maintenance of Unit 12
Storing The Unit 12
Tips On Setting Humidity Levels 12
Trouble Shooting 13~14
Error Code 15
Warranty 16
Page en français 17
CONTENTS
2

3
SAFETY INFORMATION
1. Always place the unit on a level surface strong enough to support the unit with a full bucket of water.
2. Never use or store gasoline or other flammable vapor or liquid near this unit.
3. Do not block or cover air inlet or outlet grills. Minimum Installation: 17.7" (45cm) around the unit and 17.7" (45cm) above the unit.
4. The unit must be connected to a correctly grounded power supply.
5. Do not start or stop the unit by inserting or pulling out the power plug.
6. Do not use an adapter plug or extension cord.
7. Do not use the unit in the immediate surroundings of a bath, a shower, swimming pool, or clothes dryer.
8. Do not insert anything into the air outlet.
9. If the SUPPLY CORD is damaged, it must be replaced by a licensed electrician.
10. When cleaning the unit, always turn the unit off and unplug the power cord.
11. Do not use outdoors. Intended for indoor use only.
12. Place the product in an area where the temperature will not fall below 41℉(5℃). The coils can become covered with frost if the room temperature is too low, which may reduce
performance.
13. The unit shall be installed in accordance with national wiring regulations.
14. This unit not intended for use by persons (including children) with reduced physical, sensory or mental capabilities, or lack of experience and knowledge, unless they have been
given supervision or instruction concerning use of the unit by a person responsible for their safety.Children should be supervised to ensure that they do not play with the unit.
DANGER WARNING CAUTION
DANGER - Immediate hazards
which WILL result in severe
personal injury or death
WARNING - Hazards or unsafe
practices which COULD result in
severe personal injury or death
CAUTION - Hazards or unsafe
practices which COULD result in
minor personal injury
IMPORTANT SAFETY INSTRUCTIONS
SAVE THESE INSTRUCTIONS
4
ELECTRICAL REQUIREMENTS
1). It is recommended that a dedicated electrical outlet be used for the dehumidifier. The product is equipped with a 3-wire cord having a 3-prong grounding plug. It
must be plugged into a wall receptacle that is properly installed and grounded.
2). This unit must be grounded. In the event of an electrical short circuit, grounding reduces risk of electric shock by providing an escape wire for the electric current.
The cord provided with this unit is equipped with a grounding wire and a grounding plug.
3). The plug must be plugged into an outlet that is properly installed and grounded.
4). Avoid the use of three prong adapters or cutting off the third grounding prong in order to accommodate a two prong outlet. This is a dangerous practice since it
provides no effective grounding for the product and may result in shock hazard.
Consult a qualified electrician or serviceman if:
1) The grounding instructions are not completely understood.
2) You are unsure that the unit is properly grounded.
3) You have any questions about the grounding or electrical instructions.
1. Avoid the use of an extension cord because of potential safety hazards under certain conditions.
2. If it is absolutely necessary to use longer cord sets or an extension cord, extreme care must be exercised.
a) Use only a grounding type 3-wire extension cord that has a 3-blade grounding plug and a 3-slot receptacle .
b) The marked electrical rating of the cord set or extension cord must equal to or greater than the electrical rating of the unit. The longer cord should be arranged so
that it will not drape over the counter top or table top where it can be pulled on by children or tripped over unintentionally.
NOTE: Neither Royal Soverign nor the dealer can accept any liability for damage to the product or personal iniury resulting from failure to observe the electrical connection procedures.
GROUNDING INSTRUCTIONS
POWER SUPPLY CORD
Improper use of the grounding plug can result in a risk
of electric shock.
WARNING

5
CAN ICES-3 (B)/NMB-3(B)
This device complies with Part 15 of the FCC Rules. Operation is subject to the following two conditions:
(1) This device may not cause harmful interference, and (2) this device must accept any interference received, including interference that may
cause undesired operation.
Any Changes or modifications not expressly approved by the party responsible for compliance could void the user's authority to operate the
equipment.
Note: This equipment has been tested and found to comply with the limits for a Class B digital device, pursuant to Part 15 of the FCC Rules. These
limits are designed to provide reasonable protection against harmful interference in a residential installation. This equipment generates uses and
can radiate radio frequency energy and, if not installed and used in accordance with the instructions, may cause harmful interference to radio
communications. However, there is no guarantee that interference will not occur in a particular installation. If this equipment does cause harmful
interference to radio or television reception, which can be determined by turning the equipment off and on, the user is encouraged to try to
correct the interference by one or more of the following measures:
-Reorient or relocate the receiving antenna.
-Increase the separation between the equipment and receiver.
-Connect the equipment into an outlet on a circuit different from that to which the receiver is connected.
-Consult the dealer or an experienced radio/TV technician for help.
IC Warning
This device complies with Industry Canada's licence-exempt RSSs. Operation is subject to the following two conditions:
(1) This device may not cause interference; and
(2) This device must accept any interference, including interference that may cause undesired operation of the device.

6
This unit is factory equipped with a power supply cord that has a three-pronged grounded plug. It must be used in accordance with the National Electrical Code and
applicable local codes and ordinances. If the circuit does not have a grounding type receptacle, it is the responsibility and obligation of the customer to exchange
the existing receptacle in accordance with the National Electrical Code and applicable local codes and ordinances. The third ground prong should not, under any
circumstances, be cut or removed. Never use the cord, the plug or the unit when they show any sign of damage. Do not use your unit with an extension cord unless
it has been checked and tested by a qualified electrical supplier. Improper connection of the grounding plug can result in risk of fire, electric shock and/or injury to
persons associated with the unit. Check with a qualified service representative if in doubt that the unit is properly grounded.
IMPORTANT - GROUNDING METHOD
Before plugging the unit into an electrical outlet, check that:
•The electrical power supply corresponds to the value indicated on the rating plate on the back of the unit.
•The power socket and electrical circuit are adequate for the unit.
•The electrical power matches the plug. If this is not the case, have the plug replaced.
•The electrical power is adequately grounded. Failure to follow these important safety instructions absolves the manufacturer of all liability.
ELECTRICAL CONNECTIONS
DESCRIPTION
1. Control panel
2. Air outlet
3. Bucket
4. Window
5. Caster Wheels
6. Handle
7. Air intake grille
8. Drain Hole
9. Power cord

1. Remove the bucket. Rotate the handle (refer to below) and remove the handle.
2. Open the cover. Remove the plug and other accessories from the bucket.
3. Reinstall the cover and handle. Carefully place the bucket back into the unit.
BEFORE USE
Castors and
other accessories
7
1. Tilt the unit no more than 45° and push the caster wheels into position. Ensure that the plate of the caster
is flush with the bottom of the unit.
Installation of Caster Wheels
Plate on castor

CONTROL PANEL
PRODUCT OPERATION
ABCDEF
1 2 3 4 5 6 78
1.Clean Filter indicator
2.High Fan Speed Indicator
3.Digital Humidistat Display
4.Timer Off Indicator
5.Timer On Indicator
6.Bucket Full Indicator
7.Continuous Indicator
8.Pump Indicator
A.On/Off Button
B.Timer Button
C.Decrease humidistat Button
D.Increase Humidistat Button
E.Fan Speed Button
F.Filter Reset Button
Connect the power supply to an electrical outlet. The unit will go into stand by mode. The digital humidistat display
will be displayed as shown:
●“ ” button
On /Off Button
8
●Decrease / Increase button
- Press “ ” / “ ” to select the desired humidity level, or to set the time.
- The humidity adjustable range is 35%RH-80%RH. The screen will display the setting humidity, and after few seconds, turn to display the ambient humidity.
- If the ambient humidity is lower than the set humidity, the compressor will stop running and after a few minutes the fan will also stop running.
- Press the “ ” button until the “ ” appears on the screen and “ ” symbol is on. The unit will continuously run.
● Fan Speed Indicator
Press the “ ” button to select the fan speed. The “ ”symbol will be on in high fan setting.
● Timer button
The timer feature can be used to delay the unit from turning on or off.

● Fan speed button
Press the “ ” button to select the fan speed to high and low. Note: “ ”symbol on, means the unit is set to high speed setting.
● Timer button
This timer can be used to delay the unit start-up or shutdown. This avoids wasting electricity by optimising operating periods.
● Programming start-up
- Press the “ ” button. The screen starts to flash. Press the “ ” / “ ” to adjust the set time from 0.5-24 hours.
- Wait for 5 seconds. The “ ”symbol turns ON. Programming is now set.
- To cancel, press “ ” button. The “ ”symbol disappears.
● Programming shut down
- When the unit is running, press the “ ” button. The screen starts to flash. Press the “ ” / “ ” to adjust the set time from 0.5-24 hours.
- In 5 seconds without the operation, the timer start function, then the “ ” symbol turns ON. Programming is now set.
- To cancel, press the “ ” button. The “ ” symbol disappears.
● Bucket Full Alarm
- When the bucket is full, the compressor will shut off and the fan will stop for a few minutes. A 'beep' will sound to indicate that the bucket needs to be
emptied. The “ ” symbol will flash.
Important Note:
(1) The unit will not run again until the bucket is emptied and properly placed back inside the unit.
(2) The bucket should be cleaned every week to prevent the growth of mold, mildew and bacteria. Use a mild detergent to clean. Once clean, completely dry the
bucket and place it back inside unit.
9
The bucket
with handle
Important Note
1. Hold the bucket with both hands when emptying.
2. When the bucket is full or removed from the unit, the compressor will turn off but the fan will
continue to run for a few minutes. This is completely normal. The unit will not be removing
moisture from the air at this time.
3. During operation, it is normal for the unit to exhaust warm air from the top of the unit.
Caution: Do not place the bucket on the floor when it is full as it is uneven on the
bottom and water may spill.

● CONTINUOUS DRAIN OPTION
Connect the drain pipe to the back of the unit. The unit will continuously run
without the need of emptying the bucket.
1) Put the unit on level floor, unscrew the cap on the back of unit.
2) Connect a garden hose to the unit. Ensure that there are no kinks or knots in the garden hose.
3) Press "POWER" button to run the unit.
Garden Hose
Note: Install the drain pipe follow below picture. If the drain pipe is not installed
correctly water will not drain from the pipe.
Correct Incorrect
10
The patented heavy-duty pump system allows water removal of up to 16 Ft (4.9m) in height. If you want the water to flow directly to a drain, connect the condensation
discharge tube supplied to the connection pipe located on the lower front part of the unit. Select the dehumidifying function and press the PUMP button.
Note: With the condensation discharge hose missing and the pump switched ON, the PUMP symbol on the display will be blinking. The unit is not working. To correct
this problem:
• Check the hose is correctly positioned;
• Disconnect and reconnect the plug.
CONTINUOUS DRAINING USING AUTO PUMP
In the event frost builds up on the evaporator coils, the compressor will cycle off and the fan will continue to run until the frost disappears. When the coils
are completely defrosted, the compressor will automatically restart .
AUTOMATIC DEFROST

Location requirements:
The unit operating in a basement will have little no effect in drying out an adjacent enclosed storage area,
such as a closet, unless there is adequate circulation of air in and out of the area.
1. Do not use outdoors.
2. This dehumidifer is intended for indoor use only. Place the dehumidifer on a smooth, level floor surface that
is strong enough to support the unit with a full bucket of water.
3. Allow at least 45cm (18") of around and above space away from the wall for efficient working.
4. Place the dehumidifier in an area where the temperature will not fall below 5℃(41℉).
5. Use the dehumidifier in cooking, laundry, bathing and dish-washing areas that have excessive moisture.
6. Place the dehumidifier away from a clothes dryer.
7. Use the dehumidifier in a basement to help prevent moisture damage.
8. The dehumidifier must be operated in an enclosed area to be most effective, close all doors, windows and
other outside openings to the room.
9. Do not block the air inlet or outlet of the unit. Reduced air flow will result in poor performance and could
damage the unit.
11

MAINTAINANCE OF UNIT
Before cleaning or maintenance, turn the unit off by pressing the “POWER” button on the control panel, wait for a few minutes then unplug from the electrical outlet.
You should clean the unit with a slightly damp cloth then dry with a dry cloth.
●Never wash the unit with water, it could be dangerous.
●Never use alcohol or solvents to clean the unit.
●Never spray insecticide liquids or similar.
To keep your unit working efficiently, you should clean the filter every week of operation.
Cleaning the Filter.
Use a vacuum cleaner to remove dust accumulations from the filter. If it is very dirty, immerse in warm water
and rinse a number of times. The water should never be hotter than 40℃(104℉). After washing, leave the
filter to dry then reattach.
- Unplug the unit from the electrical outlet, empty the bucket, remove the cap.
- Run off all water left into a basin. When all the water has been drained, put the cap back in place.
- Clean the filter and dry thoroughly before putting back.
- Cover the unit prevent from dust.
- Store the unit upright in a dry location.
STORING THE UNIT
Basements or crawl spaces
Basements are often overridden with moisture. There is often a substantial amount of moisture coming through the concrete. For a basement, it is recommended to
keep moisture at least under 65% although the optimal room humidity would be between 40%-50%.
Bedrooms
For some people having too much humidity in their bedroom is very uncomfortable. It also affects a lot of people with asthma and allergies, some to the point where
it decreases their qu ality of sleep. The healthy humidity level for a bedroom is between 40% and 60%, although the recommended dehumidifier settings should be
between 40% and 50%.
TIPS ON SETTING HUMIDITY LEVELS
12

TROUBLE SHOOTING
Symptom Possible Causes Solutions
Dehumidifier does
not start
The dehumidifier is unplugged. Make sure the dehumidifier's plug is pushed completely into the outlet.
Not enough time allowed for unit to
remove moisture. When first installed, allow at least 24 hours to maintain the desired dryness.
Airflow is restricted. Make sure there are no curtains, blinds, or furniture blocking the front or
back of the dehumidifier. See the CHOOSING A LOCATION section.
Dirty filter. See the CLEAN FILTER section.
The fuse is blown/circuit breaker is tripped. Check the house fuse/circuit breaker box and replace fuse or reset breaker.
Bucket is not in the proper position. The bucket must be in place and securely seated for the dehumidifier to operate.
Power Failure. There is a protective time delay (up to 3 min.) to prevent trip-ping of the
compressor overload.For this reason, the unit may not start normal dehumidify
for 3 min after it is powered back on.
Dehumidifier has reached its present level
or the bucket is full. The dehumidifier automatically turns off when either condition occurs.
Change to a lower setting or empty the water bucket and replace properly.
Dehumidifier does
not dry the air as it
should
13

Symptom Possible Causes Solutions
Dehumidifier does
not dry the air as it
should
Unit runs too long
Frost apears on
heat-exchanger
Fan noise
Water on the floor
The humidity control
may not be set low enough.
For drier air, press the “ ” button to lower the percent humidity desired
in the room, or set the dehumidifier to “ ” for maximum dehumidify.
Doors and windows
may not be closed tightly.
The area is too large.
Doors and windows are open.
Moisture removal is best at higher room temperatures. Lower room
temperatures will reduce the moisture removal rate. This model is designed to
operate at temperatures above 5℃(41℉).
Check that all doors, windows, and other openings are securely closed.
The capacity of the unit can not meet the area of the room.
Unit run recently or the
room temperature is too low. This is normal, frost usually disappear in 60 min.
The air is passing through the unit. This is normal.
The drain connection
may be loose. Check the drain connection and the unit is placed level.
The drain pipe is connected,
but the water is not drained.
If using the bucket, remove the drain pipe and put back the drain cover;
or install the drain pipe correctly.
Close the door and window.
Install the dehumidifier away from the clothes dryer. The clothes dryershould
be vented outside.
14

ERROR CODE
If the following error code appears, contact Royal Sovereign customer service.
Error code EH E1 E2 E3
Description Humidity sensor failure Temperature sensor error Temperature sensor error Gas leakage
15

FULL ONE YEAR WARRANTY
Royal Sovereign warrants each Dehumidifier to be free from defects in material and workmanship. Our obligation under this warranty is limited tothe repair or replacement, free
of charge, when delivered to anauthorized Royal Sovereign service center, ofany defective part(s) thereof, other than parts damaged in transit. This warranty is in effect tothe
original purchaser, for a period of one year from the date of purchase and is not transferable. This warranty shall apply only ifthe dehumidifier is used on Alternating Current (AC)
circuit, in accordance with the factory provided instructions which accompany it.
EXCLUSIONS
This warranty excludesand does not cover defects, malfunctions or failures of your Royal Sovereign Dehumidifiers, caused by repairs by unauthorized persons or service centers,
mishandling, improper installation, modification or unreasonable use including incorrect voltage, acts of God, or failure to provide reasonable and necessary maintenance. This
warranty is in lieu ofany and all expressed warranties. In no event shall Royal Sovereign be liable for consequential or incidental damages. This limitation would not apply if you live
in a location that does not permit the exclusion of limitation of incidental or consequential damages. This warranty gives you specific legal rights and you may alsohave other rights
which vary from state to state.
RS INTERNATIONAL CANADA INC.
191 Superior Blvd., Mississauga, ON L5T 2L6 CANADA
TEL: +1) 905-461-1095 TF: +1) 866-961-6673
FAX: +1) 905-461-1096
www.royalsovereign.ca
ROYAL SOVEREIGNINTERNATIONAL, INC.
2 Volvo Drive Rockleigh, NJ 07647 USA
TEL : +1) 800-397-1025
FAX : +1)201-750-1022
www.royalsovereign.com
For product support and warranty questions, please visit us at:
https://www.royalsovereign.ca/support.html
16

Modèle : RDH-470P
DÉSHUMIDIFICATEUR
POMPE AUTOMATIQUE INTÉGRÉE
Guide d’utilisation
Royal Sovereign International, Inc. Veuillez lire et conserver ce guide d’utilisation pour consultation ultérieure.
Pour enregistrer votre produit, visitez le www.royalsovereign.com

Veuillez lire attentivement ce guide d’utilisation avant d'utiliser l'appareil. Ce guide vous fournira des consignes de sécurité pour une
utilisation optimale. ainsi que l'entretien et la maintenance de votre produit.
Consignes de sécurité 19
Description 22
Panneau de contrôle et fonctionnement du produit 24
Entretien de la tranche 28
Entreposage de l'unité 28
Conseils sur le réglage des niveaux d'humidité 28
Dépannage 29~30
Code d'erreur 31
Garantie 32
CONTENU
18

19
CONSIGNES DE SÉCURITÉ
1. Toujours placer l'appareil sur une surface plane suffisamment solide pour supporter l'appareil avec un bac d'eau plein.
2. Ne jamais utiliser ou entreposer de l'essence ou d'autres vapeurs ou liquides inflammables à proximité de cet appareil.
3. Ne bloquez pas ou ne couvrez pas les grilles d'entrée ou de sortie d'air. Installation minimale : 45 cm (17,7 po)autour de l'appareil et 45 cm (17,7 po) au-dessus de l'appareil.
4. L'appareil doit être branché à une source électrique correctement mise à la terre.
5. Ne mettez pas l'appareil en ou hors fonction en insérant ou en retirant la fiche d'alimentation.
6. N'utilisez pas d'adaptateur ni de rallonge.
7. N'utilisez pas l'appareil à proximité immédiate d'un bain, d'une douche, d'une piscine ou d’une sécheuse.
8. Ne rien insérer dans la sortie d'air.
9. Si le cordon d'alimentation est endommagé, il doit être remplacé par un électricien agréé.
10. Lors du nettoyage de l'appareil, toujours le mettre hors fonction et débrancher le cordon d'alimentation.
11. Ne pas utiliser à l'extérieur. Destiné à un usage intérieur uniquement.
12. Placez le produit dans un endroit où la température ne descendra pas en dessous de 5˚C (41℉. Les serpentins peuvent se couvrir de givre si la température ambiante est trop
basse, ce qui peut réduire les risques de gel. la performance.
13. 1L'appareil doit être installé conformément aux réglementations nationales en matière de câblage.
14. Cet appareil n'est pas destiné à être utilisé par des personnes (y compris les enfants) ayant des capacités physiques, sensorielles ou mentales réduites, ou un manque
d'expérience et de connaissances, sauf si elles ont été Les enfants doivent être surveillés pour s'assurer qu'ils ne jouent pas avec l’appareil.
DANGER
AVERTISSEMENT MISE EN GARDE
DANGER—Dangers immédiats
AVERTISSEMENT -Dangers ou
dangereux.
AVERTISSEMENT—Dangers ou pratiques
dangereuses qui POURRAIENT entraîner
des blessures graves ou la mort.
MISE EN GARDE—Dangers ou pratiques
dangereuses qui POURRAIENT entraîner
des blessures corporelles mineures.
CONSIGNES DE SÉCURITÉ IMPORTANTES
CONSERVEZ CES INSTRUCTIONS

20
EXIGENCES ÉLECTRIQUES
1). Il est recommandé d'utiliser une prise électrique dédiée pour le déshumidificateur. Le produit est équipé d'un cordon à 3 fils muni d'une fiche de mise à la terre à 3
broches. Il doit être branché dans une prise murale correctement installée et mise à la terre.
2). Cet appareil doit être mis à la terre. En cas de court-circuit électrique, la mise à la terre réduit le risque de choc électrique en fournissant un fil d'évacuation pour le
courant électrique. Le cordon fourni avec cet appareil est doté d'un fil de mise à la terre et d'une fiche de mise à la terre.
3). La fiche doit être branchée dans une prise de courant correctement installée et mise à la terre.
4). Éviter d'utiliser des adaptateurs à trois broches ou de couper la troisième broche de mise à la terre afin d'accommoder une prise à deux broches. Il s'agit d'une
pratique dangereuse puisqu’elle n'assure pas une mise à la terre efficace du produit et peut entraîner un risque d'électrocution.
Consulter un électricien ou un technicien qualifié si :
1). Les instructions de mise à la terre ne sont pas entièrement comprises.
2). Vous n'êtes pas sûr que l'appareil est correctement mis à la terre.
3). Vous avez des questions concernant la mise à la terre ou les
instructions électriques.
1. Évitez l'utilisation d'une rallonge électrique en raison de risques potentiels pour la sécurité dans certaines conditions.
2. S'il est absolument nécessaire d'utiliser des cordons plus longs ou une rallonge, il faut faire très attention.
a) N'utiliser qu'une rallonge à 3 fils de type mise à la terre avec une fiche de mise à la terre à 3 lames et une prise à 3 fentes.
b) La puissance électrique marquée de l'ensemble de cordons ou de la rallonge doit être égale ou supérieure à la puissance électrique de l'appareil. Le cordon le
plus long doit être disposé de manière à ce que qu'il ne s'enroulera pas sur le comptoir ou sur le dessus de table où il peut être tiré par les enfants ou trébuché par
inadvertance.
REMARQUE : Ni Royal Sovereign ni le revendeur ne peuvent être tenus responsables des dommages au produit ou de l'encastrement personnel résultant du non-respect des
procédures de connexion électrique.
CONSIGNES DE MISE À LA TERRE
CORDON D’ALIMENTATION
L'utilisation incorrecte de la fiche de mise à la terre peut
entraîner un risque d’électrocution.
AVERTISSEMENT
Table of contents
Languages:
Other Royal Sovereign Dehumidifier manuals

Royal Sovereign
Royal Sovereign RDH-300 Series User manual

Royal Sovereign
Royal Sovereign RDH-130 User manual

Royal Sovereign
Royal Sovereign RDH-045EA User manual

Royal Sovereign
Royal Sovereign RDH-130K User manual

Royal Sovereign
Royal Sovereign BDH-550 User manual

Royal Sovereign
Royal Sovereign RDH-M050 User manual

Royal Sovereign
Royal Sovereign BDH-450 User manual

Royal Sovereign
Royal Sovereign RDHC-110 User manual

Royal Sovereign
Royal Sovereign BDH-550 User manual

Royal Sovereign
Royal Sovereign RDH-M050 User manual