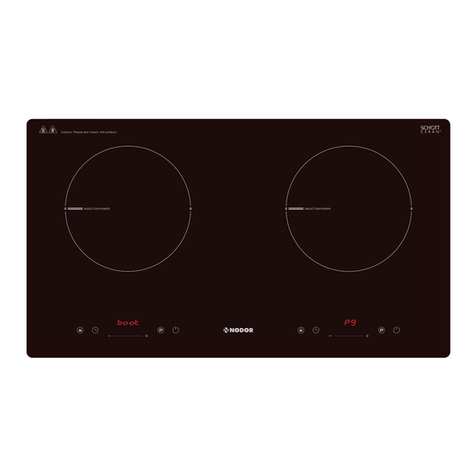
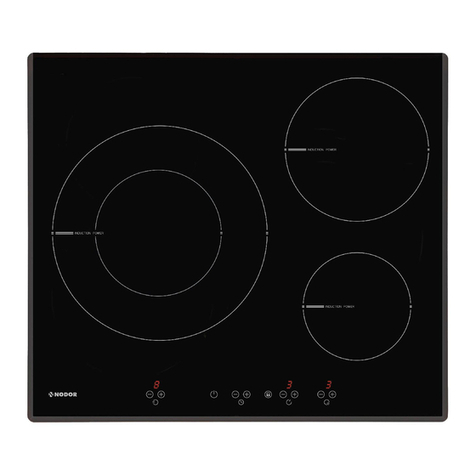
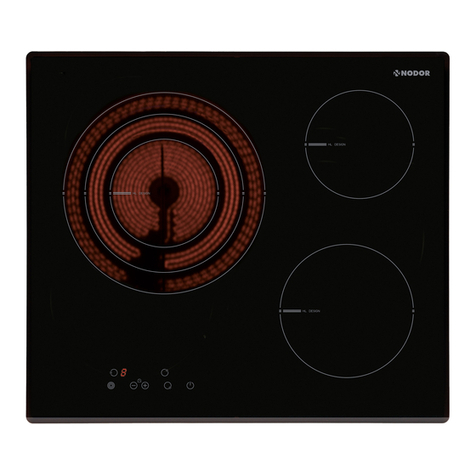
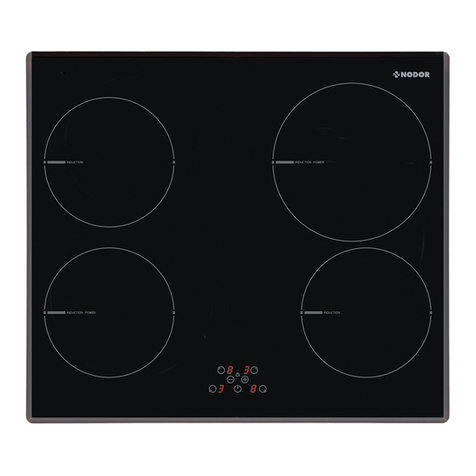
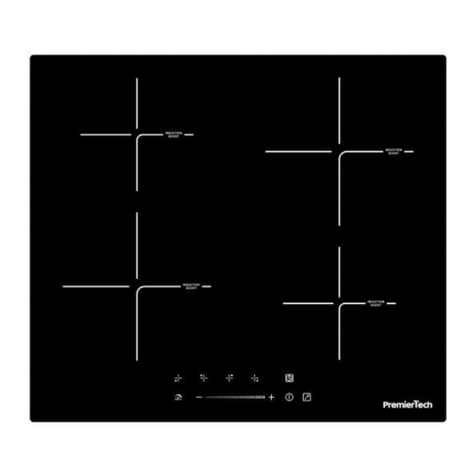
NODOR V2170SLBK Manual

HASZNÁLATI ÚTMUTATÓ

2
A KÉSZÜLÉK KIZÁRÓLAG HÁZTARTÁ-
SEMMILYEN KÁRÉRT, BALESETÉRT,
-
A gyártó tanúsítja, hogy a termék megfelel
-
re vonatkozó 2014/35/EU sz. irányelv, vala-
vonatkozó 2014/30/EU irányelv összes alap-
-
-
nyek használata javasolt.
ezért forralt állapot mellett, vagy amikor a
-
jesítményt.
-
-
san növeljük a teljesítményt.
-
-
-
-
mekhez.
-
– A készülék 8 éves vagy 8 év feletti gyer-
-
-
nálható, feltéve, hogy ezen személyek a
-
-
-
kek a készülékkel nem játszhatnak. A fel-
felügyelete mellett végezheti el.
-
vízzel eloltani. Ehelyett azonnal áramtala-
-
-
-
mellett történhet.
-
-
-
nák felületén.
-
elemek használhatók együtt a készülék-
okozhat.
– VIGYÁZAT!-
-

3
ak lehetnek. Égési sérülések, leforrázás el-
távol.
-
-
-
-
mények esetén teljes áramköri megszakítást
-
-
-
-
nyekre vonatkozóan.
-
által meghatalmazott szakszerviz, vagy meg-
Használati utasítások
Telepítés
-
személy, személyek hajthatják végre.
Használat
-
-
-
-
-
-
-
-
-
-
-
-
-
van zárva.
-
-
-
-
-

4
-
-
-
zat a
-
-
-
Egy adott főzőzóna kikapcsolása
-
-
-
-
-
jelennek meg.
Az összes főzőzóna kikapcsolása
-
-
-
Teljesítményfokozatok
-
-
-
-
-
-
-
-
-
-
-
-
-
-
-
határozása egy matematikai képlet alapján történik, és
-
alapján történik.
-
-
-
-
vagy
-
-
-
-
-
-
-

5
-
-
-
san nyomva van.
-
-
-
-
-
-
-
-
-
-
-
elemeket.
-
-
Több körös zóna külső köreinek kikapcsolása
-
-
-
-
-
-
Független időzítő használata
-
-
-
-
-
-
séig, külön hangjelzés kísérete nélkül.
-
-
-
-

6
-
A hangjelzés leállítása
és/vagy
-
Független időzítő kikapcsolása, átállítása
-
-
-
-
-
Főzőzónák időzítő funkciójának használata
-
-
-
-
-
-
-
-
-
-
-
-
-
-
-
Telepítés
-
-
-
1 - Elölnézet
-
– A hálózati áram karakterisztikája feleljen meg a készü-
-
-
-
let fölé.

7
Fig.2 - Abb.2 - Rys. 2 - 图2
Fig.6 - Abb.6 - Rys. 6 - 图6

8
Fig.4 - Abb.4 - Rys. 4 - 图4
Fig.5 - Abb.5 - Rys. 5 - 图5
Fig.3 - Abb.3 - Rys. 3 - 图3
A B C D E
700 350 680 330 67
Fig.4 - Abb.4 - Rys. 4 - 图4
Fig.5 - Abb.5 - Rys. 5 - 图5
Fig.3 - Abb.3 - Rys. 3 - 图3
A B C D E
700 350 680 330 67
Fig.4 - Abb.4 - Rys. 4 - 图4
Fig.5 - Abb.5 - Rys. 5 - 图5
Fig.3 - Abb.3 - Rys. 3 - 图3
A B C D E
700 350 680 330 67

Importőr:
MULTIKOMPLEX BUDAPEST KFT.
a páraelszívók szakértője... 1995 óta
H - 1211 Budapest, Mansfeld Péter u. 27
(volt Bajáki Ferenc utca)
tel.: +(36-1) 427 0325, +(36-1) 427-0326;
fax: +(36-1)427 0327
www.multikomplex.hu
60816290.14.11.2016
CATA ELECTRODOMÉSTICOS, S.L.
C. Ter, 2 - 08570 TORELLÓ (Barcelona) SPAIN
Tel. +34 938 594 100 - Fax +34 938 594 101

ES
Instrucciones de uso y mantenimiento para encimeras
EN
Operating and maintenance instructions for hobs
FR
Instructions pour l’usage et la maintenance des plaques
PT
Instruções de uso e manutenção para placas
DE
Bedienungs-und Wartungsanleitungen für kochherde
RU
PL
Instrukcja obsługi i konserwacji płyt grzejnych
ZH

V2170SLBK

THIS APPLIANCE IS DESIGNED
FOR DOMESTIC USE ONLY. THE
MANUFACTURER SHALL NOT IN ANY
WAY BE HELD RESPONSIBLE FOR
WHATEVER INJURIES OR DAMAGES
ARE CAUSED BY INCORRECT
INSTALLATION OR BY UNSUITABLE,
WRONG OR ABSURD USE.
The manufacturer declares that this
product meets all basic requirements
regarding low-voltage electrical
equipment established in the 2014/35/
EU Directive and electro-magnetic
compatibility established in the
2014/30/EU Directive.
PRECAUTIONS
- When one makes use of heating
elements, we advise receptacles with
flat bottom having same diameter or
lightly higher than that of the hot area.
- Avoid overflows of liquid, therefore
when boiling has happened, or in any
case when liquid is heated, reduce the
heat supply.
- Don’t leave the heating elements on
without receptacles on the top or with
void pots and pans.
- Do not use any aluminum foil or place
any foodstuffs wrapped in aluminum
foil directly on the hob - do not place
any metal objects such as knives,
forks, spoons and lids on the hob
surface as they will heat up.
- When cooking in a non-stick pan
without seasoning, do not exceed 1-2
minutes’ pre-heating time.
- When cooking food that may easily
stick, start at a low power output
level and then slowly increase while
regularly stirring.
- If the surface of the hob is damaged,
immediately disconnect the appliance
from the mains to prevent the
possibility of electric shock.
- Never use a steam cleaner to clean the
hob.
- The appliance and accessible parts
may be hot during operation.
- Take care to avoid touching the heating
elements.
- Children less than 8 years of age
should be kept at a safe distance
unless continuously supervised.
- This appliance may be used by
children aged 8 or over and by
persons with reduced physical,
sensory or mental capabilities or lack
of experience and knowledge, if they
are supervised and have received
suitable instructions on safe use of the
appliance and understand the dangers
involved. Children must not play with
the appliance. User maintenance and
cleaning should not be carried out
by children except under constant
supervision.
- Cooking with grease or oil may be
dangerous and cause a fire if left
unattended. NEVER try to extinguish a
fire with water. Rather, disconnect the
appliance and then cover the flames
with a cover or sheet, for example.
- The cooking process has to be
supervised. A short term cooking
process has to be supervised
continuously.
- Unattended cooking on a hob with fat
or oil can be dangerous and may result
in a fire.
- Fire hazard: do not store elements on
cooking surfaces.
- Only counter top protectors designed
for use with the cooking appliance and
listedinthemanufacturer’sinstructions
EN

should be used as suitable protection
for the counter top incorporated in the
appliance. Use of unsuitable protectors
may cause accidents.
- WARNING:Accessible parts will become
hot when in use. To avoid burns and
scalds children should be kept away.
Insert in the fixed wiring a mean for
disconnection from the supply mains
having a contact separation in all poles
that provide full disconnection under
overvoltage category III conditions, in
accordance with the wiring rules. The
plug or omnipolar switch must be easily
reached on the installed equipment.
This appliance is not intended to be used
via an external timer or a remote control
system.
The manufacturers decline any
responsibility in the event of non-
compliance with what is described above
and the accident prevention norms not
being respected and followed.
To avoid all risk, if the power cable
becomes damaged, it must only be
replaced by the manufacturer, by an
authorized service centre, or by a
qualified electrician.
User’s Instructions
Installation
All operations relative to installation (electric connection)
should be carried out by skilled personnel in conformity with
the rules in force.
As for the specific instructions see part pertaining to installer.
Use
TOUCH CONTROL HEATING ELEMENTS
Touch sensitive keys
All operations can be performed using touch sensitive keys
(capacitive sensors) located on the front of the control
board; each key has a corresponding display. All actions are
confirmed by an audible signal.
TOUCH CONTROL (Fig. 1)
1 Power ON/ Power OFF
2 Cooking zone
3 Setting display
4 Minus
5 Plus
6 Dual circuit
7 Timer
8 Timer display
9 Lock function
10 Dual circuit indicator light
11 Timer indicator lights
12 Lock indicator light
13 Decimal point
Switching the Touch Control ON/OFF
After mains voltage is applied the control initializes for
approx. 1 second before it is ready for operation.After a reset
all displays and LEDs glow for approx. 1 second. When this
time is over all displays and LEDs extinguish and the control
is in the stand-by mode.
By operating the ON/OFF key the control can be turned into
the ON-mode. The cooking zone displays show a static “0“.
If a cooking zone is in the “hot“ status, the display shows a
static “H“ instead of “0“.The bottom right dot is blinking in 1
second intervals on all cooking zone displays to indicate that
no cooking zone is selected at the moment.
After switching-ON the electronic control remains activated
for 10 seconds. If no cooking zone or timer selection follows
within this period of time, the electronic control automatically
switches back into the stand-by-mode.
The control can only be switched-ON if it identifies the ON/
OFF key (1) alone being operated. Should it recognize key
activation other than that, the control remains in the standby-
mode.
If the child safety feature is active when switching on, all
cooking zones show “L“, (LOCKED). (also refer to 1.11). If
the cooking zones are in a “hot“ status, the display shows
“L“ and “H“ in alternation. When the Touch Control is ON it
can be switched-
OFF at any time by operating the ON/OFF key (1). This is also
valid if the control has been locked (activated child safety
feature).
The ON/OFF key (1) has always priority in the switch-OFF
function.
Automatic switch-OFF
When the control is ON it automatically switches-OFF after
10 seconds if no cooking zone or select key has been
operated within this period of time.
Switching a cooking zone ON and OFF
If the control is ON the respective cooking zone can be
selected by operating a cooking-zone-select-key (2). There
is a static dot indication in the respective display. If the

cooking zone is “hot “0” is displayed instead of “H” . On all
other cooking zone displays the blinking dot extinguishes.
After selection of a cooking zone the setting can be
increased by continuously pressing the PLUS-key (5),
starting at step “1” it is increased by 1 step every 0,4
seconds. When setting “9” is reached the setting will not be
changed further (end stop).
If the selected cooking zone will be switched ON by
means of the MINUS key (4), the cooking zone starts at the
maximum setting “9“ (“reverse switching-ON”).
When the key is continuously operated, it decreases by
1 step every 0,4 seconds. When setting “0” is reached,
there will be no further setting changed (end stop). Only a
renewed operation of the MINUS (or PLUS) key changes the
setting.
Switching OFF an individual cooking zone
To switch off an individual cooking zone, the respective
cooking zone has to be selected with the cooking-zone-
select key (2). The selection is indicated with the static dot
(13) in the respective cooking zone display. If the control
recognizes that the PLUS (5) and the MINUS (4) key have
been activated simultaneously the setting of the selected
cooking zone will be put back to “0“. Alternatively, the
MINUS-key can be used to count down the setting to “0“.
If all cooking zones are at “0”, all decimal points in the
cooking zone displays are blinking. If a cooking zone is
“hot”, “H” will be displayed instead of “0”.
Switching-OFF all cooking zones
Immediate switching-OFF of all cooking zones can be
achieved anytime by means of the ON/OFF key (1). In
the standby- mode an “H“ appears on all cooking zones
which are “hot“. All other cooking zone displays are not
illuminated.
Wattage settings
The output of the cooking zones can be set in 9 steps which
are indicated by the figures “1“ thru “9“ by means of LED
sevensegment-displays.
Automatic heat-up function (selectable)
When the automatic heat-up function is activated the
wattage of the cooking zone is at 100 % ED for a
certain heat-up time which is dependent on the selected
(continuous) setting. At the end of the heat-up time
the electronic control switches back to the preselected
simmering setting.
Starting process of the automatic heat-up:
- Control is ON and a cooking zone will be selected
- The automatic heat-up will be activated by operating the
PLUS-key for a second time.
- The requested continuous setting will be selected with the
PLUS- and MINUS-key, the chosen setting appears in the
display.
- 3 seconds after the last key operation (selection of the
setting) and within 16 seconds after activation of the heat-
up function, the symbol “A“ (which stands for the heat-up
boost) appears on the display, in alternation with the chosen
setting.
- If a lower setting will be selected with the MINUS-key after
the “A” has appeared in the display, the automatic heat-up
function will be interrupted.
- By means of the PLUS-key a higher continuous setting can
be chosen, here the duration of the heat-up boost will be
automatically adapted to the actual selected setting.
- When the heat-up time is over, the selected (continuous)
setting will be indicated on the display.
Residual heat indicator
It is meant to indicate to the user that the glass ceramic
has a dangerous touch temperature in the circumference
of a cooking zone. The temperature will be determined
following a mathematical model and the remaining residual
heat will be indicated by means of “H” on the corresponding
7-segmentdisplay. Heating-up and cooling down will be
calculated dependent on
· the selected setting („0“ to „9“)
· the ON/OFF time.
After switching-OFF the cooking zone the respective display
shows “H” until the assigned cooking zone temperature is
mathematically in a uncritical level. (≤60°C).
Automatic power OFF function (operating time
limitation)
Dependent on the selected setting, every cooking zone will
be switched-OFF after a defined maximum operation time
if no operation of the assigned cooking zone follows within
this time period. Every change of the cooking zone condition
(by means of the PLUS-, MINUS- or BOOSTER key) puts
back the maximum operation time of this cooking zone to
the initial value of the operating time limitation.
Protection against unintended switching-ON
· If the electronic control realizes a continuous operation of
keys for approx. 10 seconds, it switches OFF automatically.
The control sends out an audible failure signal for 10
seconds, so that the user can remove the object which has
been mistakenly placed onto the operation surface. The
displays show the failure code “ E R 0 3 “ . If the failure
carries on for more than 10 seconds, only the code “E R 0 3
“ will be displayed as long as the failure will be recognized
by the electronic control. If the cooking zone is in the “hot”
status, “H“ will appear on the display in alteration with the
failure notice.
· If no cooking zone will be activated within 20 seconds
after switching-ON by means of the Power-key, the control
switches back from the ON-condition into the stand-by-
mode.

· When the control is switched- ON the ON/OFF-key
has priority over all other keys, so that the control can
be switched-OFF anytime, even in case of multiple or
continuous operation of keys.
· In the stand-by mode a continous operation will not be
signalized. However, before the electronic control can be
switched-ON again, it has to recognize that all keys are not
operated.
Key Lock
The actuation of the key lock key (9) in the wait or active
mode locks the keyboard and the assigned key-lock LED
(12) is statically illuminated. Here, the actuation times of
the key-lock key have to be taken into account. The control
continues to work in the set mode, but may no longer be
operated with any key, except the key-lock key (9) itself or
the on/off key (1).
The switching OFF with the on/off key (1) is also possible
in the locked condition. The assigned key-lock LED (12)
fades when switching off the control The key-lock function
included LED is active again when switching on (in wait
mode 10 s) until this is deactivated by a repeated actuation
of the key-lock key. The activation/deactivation of the key-
lock function in the off mode is not possible.
When programmed timers expire the respective timer
alarms may be confirmed by actuating any key without
needing to unlock the control.
The repeated actuation of the key-lock key in the wait or
active mode unlocks the keyboard and the assigned key-
lock LED fades. All sensor keys may be operated as usual
again.
Multi-circuit cut-off
Depending on the design it is possible to operate dual- or
triple-circuit radiant heating elements with the LITE-Touch
Control.
When a multi-circuit heating element is put into operation,
all heating circuits are switched-ON at the same time. If only
the inner heating circuits should be used, the outer heating
circuit can be switched-OFF by means of the multi-circuit
key or in individual steps.
By operating the multi-circuit key the respective outer
circuit of the assigned active cooking zone (setting π„0“)
can be cutoff anytime. An activated outer circuit will be
indicated by an additional LED. A renewed operation of the
multi-circuit key will add the outer circuit(s) at any time, the
assigned LED´s glow again (toggle-function)
If a cooking zone other than the one with multi-circuit
function will be selected, the multicircuit status will be
changed and all cooking zones will be deselected (the
decimal point extinguishes).
Behaviour of dual-circuit cut-OFF:
If the heating element to be controlled is a triple-circuit
heating element, the course of action is as follows:
· The first activation of the multi-circuit key cuts-off the
outer heating circuit and the top LED extinguishes.
· A second activation of the multi-circuit-key cuts-off the
middle heating circuit. (also the bottom LED extinguishes.)
· A third activation adds the middle heating circuit again. A
further activation adds the third heating circuit as well and
the assigned LEDs glow again.
Audible signal (buzzer)
While the control is in operation the following activities will
be signaled by means of a buzzer:
· normal key activation with a short sound signal.
· continuous operation of keys over a longer period of time
(10 seconds ) with a longer, intermittent sound signal.
Timer function (optional)
The timer function is realized in two versions:
· Stand-alone timer 1..99 min: sound signal when the time
is over (= minute minder). This function is only available
when the cooktop is not in operation, i.e. when there is no
cooking.
· Cooking zone timer 1..99 min: sound signal when the
time is over, four cooking zones can be programmed
independently.
Timer as minute minder (stand-alone):
· If the control is OFF the standalone- timer can be operated
by activating the timer key. The timer display shows “00”.
Operation of the Power-key puts the control back into the
stand-by mode and the stand-alone-timer will be cut-off.
· Adjustment range (0-99min), it can be set in 1-minute
steps with any key, starting at 1 up to 99 (end stop) with the
minus-key starting at 99 down to 0 (end stop)
· Continuous activation of the plusor minus-key results in a
dynamic increase of the adjustment speed up to maximum
value without sound signal.
· When the plus- or minus key is released in the meantime,
the adjustment speed starts again from a (low) initial value.
· Adjustment can be made with a continously activated
plus- or minus-key or by tip-operation (with sound signal)
After the timer is set the time runs down according to the
adjustment. When the time is over there is a sound signal
and the timer display blinks.
The sound signal will be stopped
· automatically after 2 minutes and/or
· by operating any key. Then the blinking of the timer display
stops and the display extinguishes.
Switching-OFF/changing the timer
· The timer can be changed or switched-off anytime by
operating the TIMER- or MINUS key (with sound signal).
The timer will be switched off by counting down to “0” with
the minus-key or by operating the TIMER- and MINUS-key
together, which sets the timer directly to “0”. For 6 seconds

the timer display remains at “0“ before it will be switched-
off.
· If the control will be switched- ON by means of the Power-
key, the stand-alone timer will be switched-off also.
Timer programming on cooking zones
When the control is switched- ON an independent timer can
be programmed for every cooking zone.
· By selecting a cooking zone with the cooking-zone-
selectkey, then selecting the setting and finally activating
the timerselect- key, the timer can be programmed as a
switch-off function for a cooking zone.Around the timer four
LEDs are arranged. These indicate for which cooking zone
the timer has been activated.
· As soon as the timer has been selected, the assigned
timer- LED blinks and the dot in the timer display glows. If
a cooking-zone-select-key will be operated, the dot in the
timer displays extinguishes and the LED does not blink any
longer.
· When switching-over from one cooking zone to another,
the timer display always shows the present timer value of
the respective cooking zone. However, the programmed
timers of other cooking zones remain active.
· The further setting behaviour corresponds to the
STANDALONE- TIMER. For increasing the adjusted time, the
PLUS-key of the respective cooking zone has to be used.
(setting π“0“)
· When the timer has run down, there is a sound signal
and the timer display shows “00“ statically, the assigned
cooking zone timer LED blinks. The programmed cooking
zone will be cut off and „H“ will be displayed if the coking
zone is hot, otherwise a stroke will show in the cooking zone
display.
The sound signal and the blinking of the timer LED will be
stopped
· automatically after 2 minutes
· by operating any key.
The timer display extinguishes.
The basic behavior follows the description of the “minute
minder” (stand-alone-timer).
Maintenance (Fig. 4)
By means of a scraper immediately remove any alluminium
foil bits, food spills, grease splashes, sugar marks and other
high sugarcontent food from the surface in order to avoid
damaging the hob.
Subsequently clean the surface with some towel and
appropriate product, rinse with water and dry by means
of a clean cloth. Under no circumstance should sponges
or abrasive cloths be used; also avoid using aggressive
chemical detergents such as oven sprays and spot
removers.
Installer’s Instructions
Installation
These Instructions are for the qualified technician,as a guide
to installation, adjustment and maintenance, according
to the laws and standards in force. These operations
must always be carried out when the appliance has been
disconnected from the electric system.
Positioning (Fig. 5)
1 Front view
2 Front side
The appliance can be fitted into a working area as illustrated
on the figure. Apply the seal supplied over the whole
perimeter of the working area.
Electrical connection
Prior to carrying out the electrical connection, please ensure
that:
the plant characteristics are such as to follow what is
indicated on the matrix plate placed at the bottom of the
working area;
- that the plant is fitted with an efficient earth connection,
following the standards and law provisions in force.
- The earth connection is compulsory in terms of the law.
Should there be no cable and/or plug on the equipment, use
suitable absorption material for the working temperature
as well, as indicated on the matrix plate. Under no
circumstance must the cable reach a temperature above
50°C of the ambient temperature.

Fig.2 - Abb.2 - Rys. 2 - 图2

Fig.4 - Abb.4 - Rys. 4 - 图4
Fig.5 - Abb.5 - Rys. 5 - 图5
Fig.3 - Abb.3 - Rys. 3 - 图3
A B C D E
700 350 680 330 67

Fig.6 - Abb.6 - Rys. 6 - 图6

Table of contents
Languages:
Other NODOR Hob manuals
Popular Hob manuals by other brands
KKT KOLBE
KKT KOLBE IND8000RL Instruction and installation manual

KKT KOLBE
KKT KOLBE KF772EDF Instruction and installation manual
Panasonic
Panasonic KY-T936SL Operating & installation instructions

NEFF
NEFF T13T42 Series instruction manual

Zanussi
Zanussi ZBG 509 SS Instruction booklet
Fagor
Fagor IO-TGC-0241/2 instruction manual
AEG
AEG IKB64301FB user manual
THOMSON
THOMSON THI3PLANCHA operating instructions
Creda
Creda S911E Instructions for installation and use
AEG
AEG 75300K-MN Operating and installation instructions
K&H
K&H SL-1800S User instruction manual
MASTER KITCHEN
MASTER KITCHEN MKHI 382-ED 1BR BK Instruction and installation manual
