Noirot MELODIE User manual

MELODIE
CONVECTOR HEATER
OPERATING INSTRUCTIONS
INSTALLATION
POSITION
The appliance should be mounted in a horizontal
position on the wall brackets supplied. It should only be
operated when in the upright position with the control
panel at the top.
Cable entry on the right
FIXING
Remove the wall mounting bracket from the rear of the
unit by depressing the clips at the top of the bracket
with a screwdriver.
Fix wall bracket to wall through the four screw holes
provided. (Three on some smaller output models).
Do NOT locate the heater immediately below a fixed
socket outlet or connection box.
ELECTRICAL CONNECTION
The electrical installation must be carried out by a
competent electrician in accordance with current IEE
regulations for Electrical Equipment in Buildings.
The heater is fitted with a length of flexible cable for
connection to the fixed wiring of the premises through a
suitable connection box incorporating a double pole
isolating switch with a contact separation of at least
3mm, positioned adjacent to the heater.
The black control wire is designed only to carry a
signal from a compatible remote programmer or
switching device.
If the black pilot wire is not being used with a
compatible programming or switching
device it
should be terminated and insulated within the
fused spur box.
IMPORTANT: Ensure that the wires are fitted correctly to
the connecting box terminals.
BROWN: LIVE/PHASE
BLUE : NEUTRAL
BLACK : CONTROL WIRE
WARNING: DO NOT CONNECT THIS
APPLIANCE TO EARTH AS IT IS DOUBLE
INSULATED.
BATHROOM INSTALLATION
These heaters are splash proof to IPX4 standard.
IMPORTANT – if the heater is installed in a room
containing a bath or shower, it must be installed so that a
person using a bath or shower cannot touch switches and
other controls.
OPERATION
MULTI-FUNCTION ELECTRONIC CONTROLS
The electronic controls for this appliance have been
designed to give you maximum economy.
A: FUNCTIONS WHEEL
Off Heat off
Comfort: Thermostat setting between 1-9
Economy: Temperature reduction mode. Room
temperature is reduced by amount shown on
button (Ref.D)
✻ Frost protection: the convector switches on when
the temperature falls to around 7°C. Gives
maximum econmomy with no risk of freezing
pipes or condensation for long periods of
absence.
Programming: when signalling through the pilot
wire to a remote programmer or switching
device.
B: TEMPERATURE
Use the thermostat dial (B) to select your desired room
temperature. The markings on the dial are in
approximately 3.5°C increments. The maximum setting
(9) is around 35 °C which means the heater will normally
remain on continuously. The easiest way to find your
comfort setting is to turn the dial to maximum. When the
temperature in the room has reached your ideal comfort
level, turn the dial back until the thermostat switches off
(the neon light will go out). Leave at this setting and the
heater will operate as necessary to maintain this room
temperature.
C: THERMOSTAT LIGHT
Light on = Element heating
Light off = Element reached required heating level
D: ECONOMY level adjustment button: for setting the
amount by which the temperature is to be reduced
(for
example, to reduce the temperature from 21°C to 16° C,
select –5).
For greatest economy switch the heater to
economy setback if you leave the room for long
periods or before going to bed. Normally 16 °C is
the ideal set back temperature, allowing the room
to reach comfort level again within a reasonable
time.
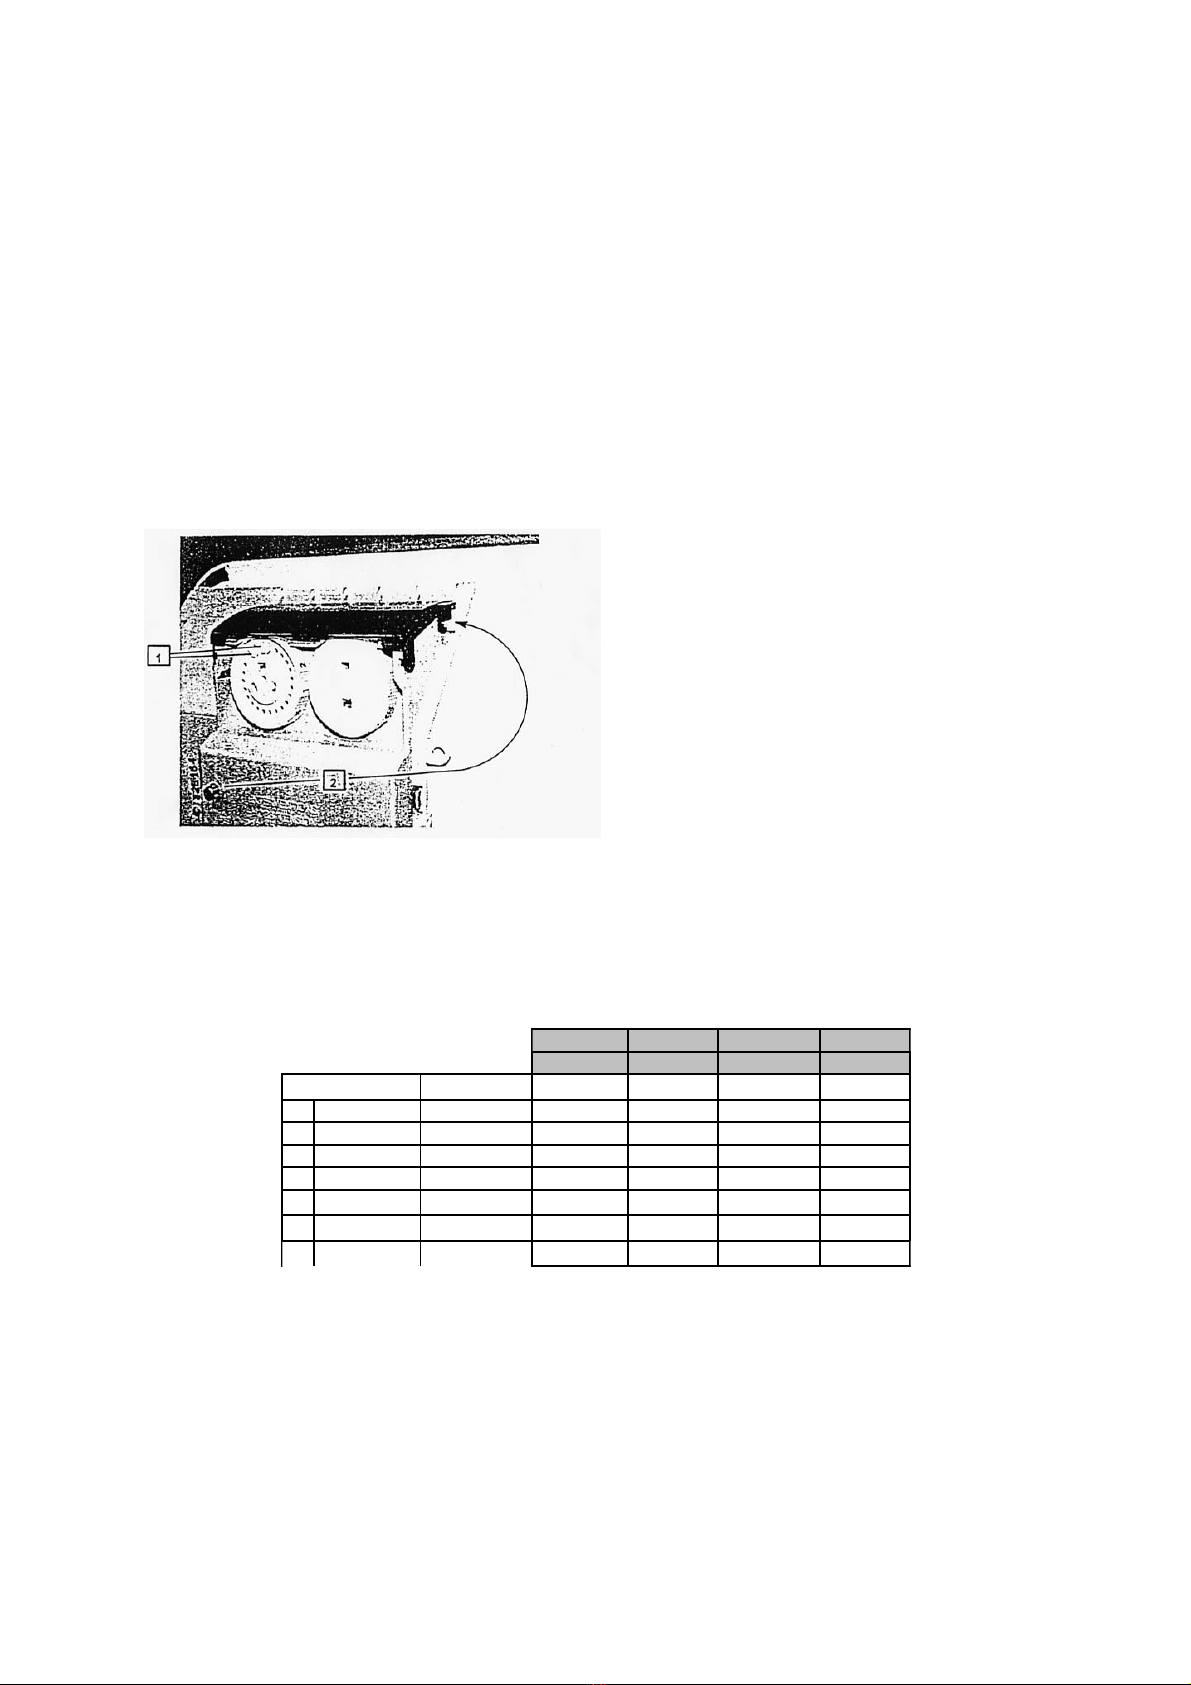
RESTRICTING THE TEMPERATURE RANGE
With the aid of the two pins (1) on the back of the unit
you can set the range of the thermostat wheel. One pin
determines the upper value and the other pin the lower
value. Move the pins back and forth to loosen them.
LOCKING THE CONTROLS
You can lock the controls flap to prevent unauthorised
tampering with the controls. Undo the screw (2) at the
back of the control panel and screw it in at the position
shown in the diagram below.
NOTE
This guide should be kept by all successive users for future
reference.
MAINTENANCE
The convector requires no special maintenance. To remove
dust, use a soft cloth. To remove marks, use a damp cloth.
Never use abrasive products which could damage the polyester
coating.
Periodically remove
dust which could collect in the
ventilation grids using a vacuum cleaner.
SERVICING
In the event of a fault, disconnect the unit from the main power
supply (switch off or unscrew fuse). Repairs are to be done only
by a qualified electrician.
IMPORTANT: DO NOT COVER THE APPLIANCE – FIRE
HAZARD
Avoid open doors against the ventilation grille or armchairs
pushed up against the appliance. Leave the air intake
underneath the heater clear. Otherwise, the overheating safety
cut-out will operate and the appliance will no longer heat until
back to normal conditions.
DO NOT INSERT ANYTHING INTO THE APPLIANCE
Watch children carefully. Do not insert objects of any kind
through the apertures in the unit. Caution! The unit is hot to the
touch when in operation.
GUARANTEE TERMS
The guarantee is strictly limited to replacing free of charge or
repairing on our premises the part or parts that are recognised as
being defective. Guarantee is for 5 YEAR against all
manufacturing defects. Once the manufacturer has agreed to
accept the parts, they should be sent free of charge within a
fortnight. Disassembly and assembly cannot be at the expense of
the manufacturer and no compensation can be claimed for
whatever reason. The manufacturer cannot be held liable for any
direct or indirect consequences of defects on either persons or
belongings, and it is specifically provided that he is in no way
responsible for installing the appliances.
The guarantee does not apply for appliances that have been
misused or used in conditions other than those for which
they were made. Nor will it apply in the event of damage or
accident resulting from negligence, lack of care or
maintenance or if the appliance has been modified in any
way or not installed in accordance with the manufacturers
instructions.
STAFF INSURANCE
In the event of an accident at any time and in any circumstances,
the manufacturer’s liability is strictly limited to its own staff and
equipment.
MAIN SPECIFICATIONS (Dimension in mm)
skirting-7381 low-7382 medium-7383 tall-7384
Height: 220 Height: 330 Height: 430 Height: 650
Rating (w) Amp. Width Width Width Width
1 500 2.2 580 420 340 260
2 750 3.3 820 500 340 300
3 1000 4.3 1060 580 420 340
4 1250 5.4 1060 820 500 420
5 1500 6.5 1300 820 580 500
6 1750 7.6
1060 660 580
7 2000 8.7
1060 740 660
Other manuals for MELODIE
1
This manual suits for next models
4
Other Noirot Heater manuals


