Nokeval Center 309 User manual


TestLink SE309 Software
Introduction
Tutorial - Quick Start
Main Menu
DataLogger(only for model with DATA LOGGER)
Graph
Frequently Asked Question

Main Menu
File | Oepn- Retrieve files from the disk.
Save - Save the active window(when the caption bar is highlighted) data to the disk.
Print - Print the data of the acitve window(graph or list).
Printer Setup - Select printer.
File | Exit: Terminates TestLink program.
View | Control Panel:
By opening the Panel Window, the user can control meter via the button in this window.
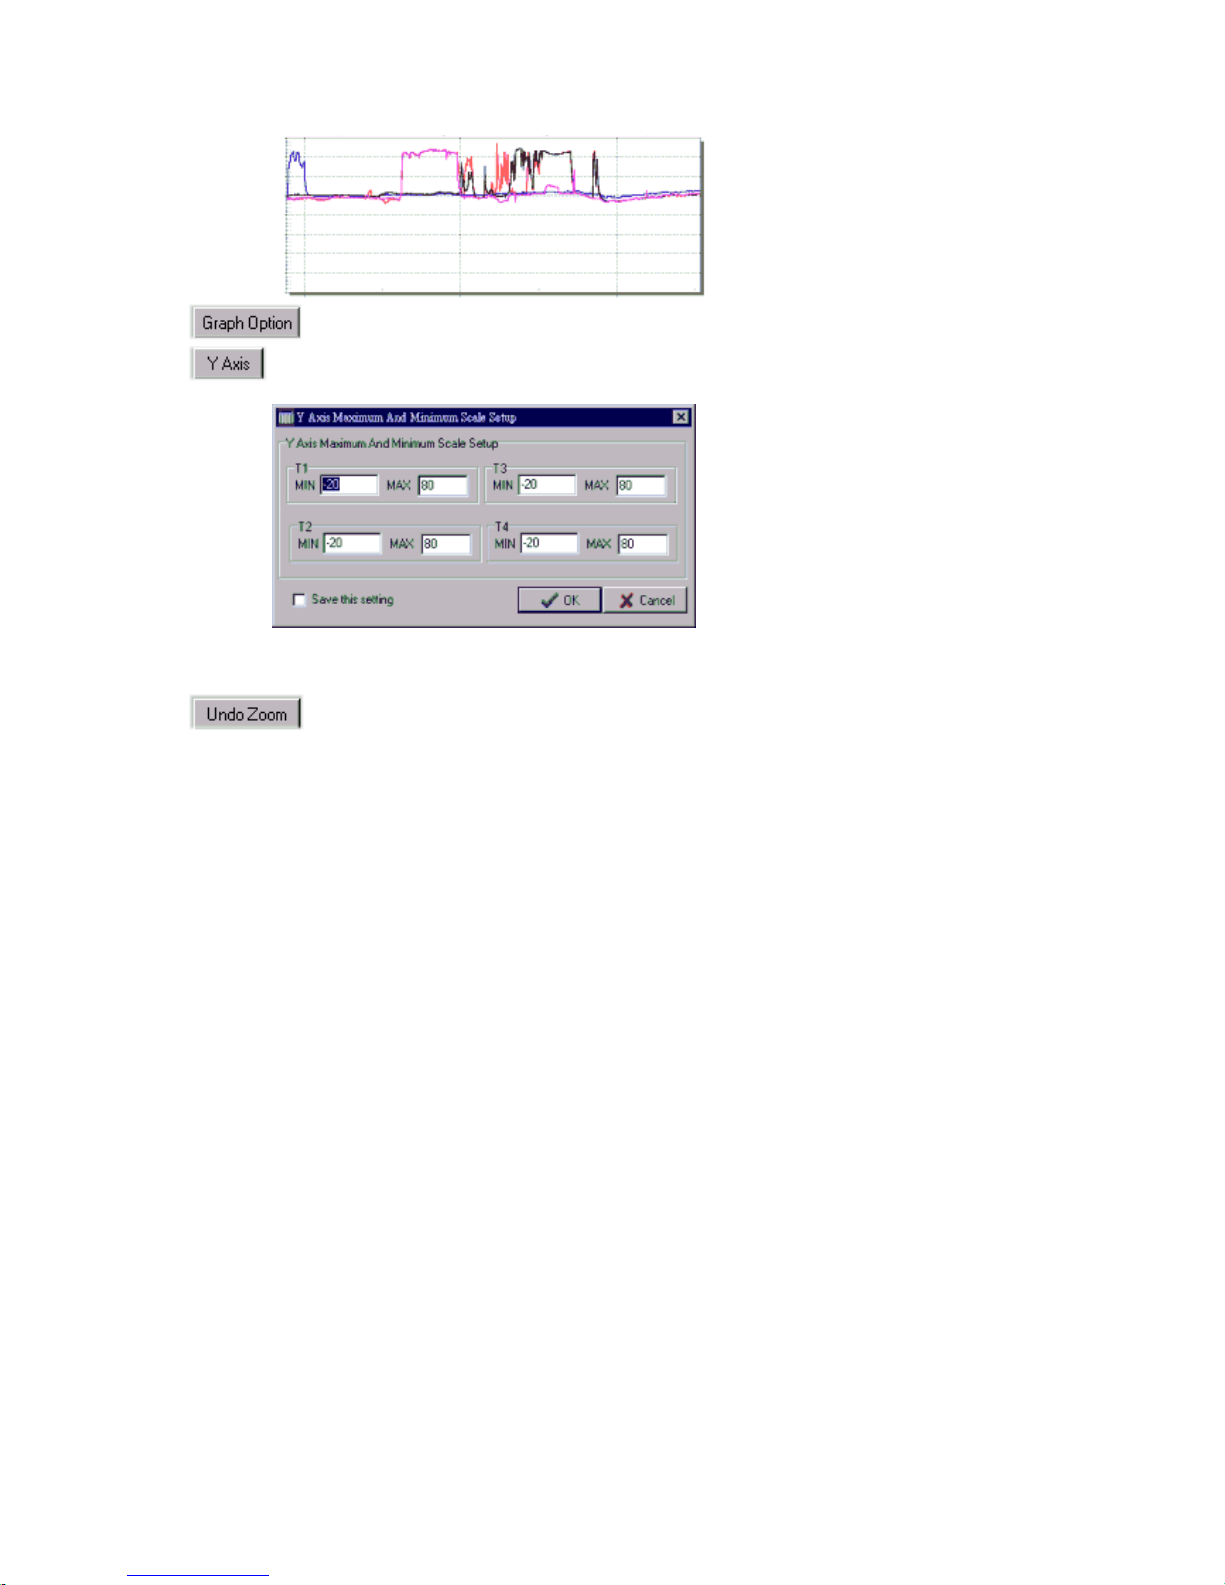
View | Real-Time Graph:
Open Real-Time Graph display to graph the present data.
Real Time Data | Run - Start collecting real time data .
Stop - Stop collecting real time data .
DataLogger:
By opening the DataLogger Window, the user can load recorded data of meter to PC in this
window.
Output To Graph - Graphing tabular data .

Graph
Tool Bar
- Display or hide Statistic1.
- Display or hide Statistic2.
- Normal cursor.
- When selected, the mouse cursor will become a cross sign when moving to the
graph, click on the graph to mark a cross sign on the graph. This is available only
when "Split " option is unchecked. And all the mark you make will exist with T1.
-When selected, the mouse cursor will become a "I" sign when moving to the
graph, click on the graph to annotate.This is available only when "Split " option is
unchecked. And all the text you make will exist with T1.
- Seperate the four channel.
- Combine the four channel.

-Graph Customization
-Change the Y axis extention
Note:When the Split is unchecked, graph will use T1 as the Y axis display range .
To Undo the Zoom
You can Zoom this graph by using mouse:
To Zoom:
1. Press the left mouse button and drag the cursor to select the new extents.
2. Release the mouse button.
You can choose channel number showing in the graph.
a.Click "Graph Option" to call Customization dialog.
b.Select Subsets tab.
c.Select a single channel or multiselect(hold Ctrl key, use mouse to choose)
channels .

DataLogger
When you have 4 Channel Thermometer Data Logger meter connected to PC
and select "DataLogger" from main menu or click from tool bar to load
recoreded data from the meter and there will be a progress indicator to show the
loading progress.if error occurs, just click "DataLogger" again.
After the data was loaded, the left hand side will show how many data sets
were loaded and detail infomation for each data set (start data, start time, recording
rate and record numbers).
for examples:
It will transfer first data set to grah and tabule on the right hand side every
time after you load recorded data from the Sound Level Meter and you can click at
any data set to change the set for graph.
On the right hand side is the waveform graph and statistic of the data set you
choose. In reference to graph, see Graph
.

Tutorial - Quick Start to Use TestLink
SE309
1.Recording real time data in waveform.
1.Power on the 4 Channel Thermometer first and connect it to a PC RS-232 serial
port wit the cable(SE-300),
2.Start SE309 program.
3.If the connection is successful the panel will display the same value as the 4
Channel Thermometer. If fail to connect the meter with PC, it will display "No
Connection" on the panel window in TestLink Se309.
4.Select sampling rate from Real-Time Graph window
note:If PC speed is slow , select sampling rate above 1 second. And if it is going
to sample a large amount data(more than 5000), at least 64 mega bytes ram is
recommended to keep PC running in good performance working well.
5.When the connection is successful , click to start recording real time data
and there will be a waveform on the Real Time Graph Window.
6.Click to start recording .
2.How to save the recorded real time data to a file ?
1.Click the graph window you want to save and the graph window will become
active , then choose File | Save from main menu or click from the tool bar .
2. There will be a save dialog window for you to choose the file name and file type
to save.There are three types of file name you can choose, binary file(*.ghf), text
file(*.txt) and EXCEL format file(*.csv). The *.ghf file use much fewer disk space to
save the data than the other two file format, but it can only be used in TestLink
SE309. Text file can be opened by TestLink SE309 and any other word processor
program like word, notepad etc. EXCEL format file can be opened by TestLink
SE309 and Microsoft EXCEL.

Frequently Asked Question
1.I had connected 4 Channel Thermometer to PC serial port and turned meter power on, but it
still show "NO CONNECTION".
Answer: It could be that all serial port are occupied by other application, close all other application .
If it still don't work. Restart your computer and run TestLink SE309 again. When program start, it will
search automatically from COM1 to COM4 to check connected 4 Channel Thermometer. You can
check the connection status from main window like the figure below, for example,the graph below
means Com1, Com2 and Com4 are available to this PC and 4 Channel Thermometer is connected to
Com2. You can manually change to another COM port when you find out that program can not find
the correct COM port which 4 Channel Thermometer is connected to.
2. How can I save the graph to a file which can be used in EXCEL ?
Answer: When you save a graph to a file , the default file format is "*.ghf" and you can select *.csv
to save files. CSV is an EXCEL file format.You can open it in EXCEL.
(note. If decimal separator is comma in your country, this file format will be disabled, because .CSV
file also use comma to be data separator. for example 78,6 will become 78 and 6 in EXCEL )
3.How to uninstall TestLink SE309 ?
Answer:Uninstall TestLink SE309 by launching the Add/Remove Programs applet out of the Control
Panel, highlighting the SE309, and clicking on the Add/Remove... push button, then it will remove the
SE309 folder and files from your computer.
4.Why loading data fail?
Answer:This might cause by the slow respond from some of the notebook PC system.
5.How to zoom the graph?
Answer: Press the left mouse button and drag the cursor to select the new extents,then release the
mouse button.
6.When I setup the real time sampling with a fast rate(eg. 1 sec), Some of the sampling data
might be lost.
Answer: THis might be caused by slow response time of the PC interface. For better result, the user
may close the panel window .

(note. If decimal separator is comma in your country, this file format will be disabled,
because .CSV file also use comma to be data separator. for example 78,6 will
become 78 and 6 in EXCEL )
3.How to load the recorded data from the memory of 4 Channel Thermometer and
save it to a file ?
(Only for the model with Data Logger)
1. Power on the 4 Channel Thermometer.
2. Press the REC button of the meter to start recording data .
3. After a while, press REC button again to stop recording data.
4. Connect the Sound Level Meter to PC
5. Start SE309 program.
6. Choose Data Logger from main menu or click from tool bar.
7.In reference to Data Logger , see DataLogger
(note. If decimal separator is comma in your country, this file format will be disabled,
because .CSV file also use comma to be data separator. for example 78,6 will
become 78 and 6 in EXCEL )


Table of contents
Other Nokeval Thermometer manuals