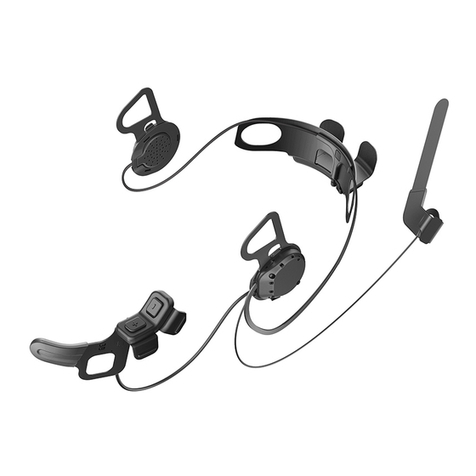
Nolan n-com B 601 R Series User manual

US-CA


EN
Fw 1.0.1-3 - 29/01/2021
USER INSTRUCTIONS AND SAFETY
Congratulat ons on your purchase of an N-Com product.
N-Com B601 was made us ng the most advanced technology and top-qual ty
mater als. Long-runn ng tests and thorough system development have made t
poss ble to ach eve the h ghest aud o qual ty.
For add t onal nformat on on the B601, to download the nstruct ons n PDF format
and nstall the latest ava lable F rmware vers on, please v s t the webs te www.n-com. t.
F rmware vers on: 1.0.1
REFERENCE STANDARDS
The products of the N-Com l ne comply w th standards as per the table below:
B601
The Bluetooth system compl es w th the ma n safety requ rements
and other appl cable prov s ons of D rect ve RED 2014/53/EU,
D rect ve 2009/65/EC, D rect ve 2011/65/CE, D rect ve 2012/19/EU
Battery
D rect ve
2001/95/CE
–
GPSD, 2013/56/UE BAT, 2014/30/EU
The Declarat ons of Compl ance can be downloaded from the webs te www.n-com. t (Download
sect on).
Model: B601 R
PMN: N-Com B601 R
FCC ID:
Y6MNCOM18
IC:
9455A-NCOM18
R-NZ
The Bluetooth® word mark and logos are reg stered trademarks owned by Bluetooth SIG, Inc.;
any use of such marks by N-Com s under l cense. Other trademarks and trade names are those
of the r respect ve owners.

Contents
1
WARNINGS AND SAFETY ....................................................................................................................... 5
1.1
Road safety ............................................................................................................................................................................ 5
1.2
Sw tch ng on the system n safe env ronments......................................................................................................... 5
1.3
Interferences ......................................................................................................................................................................... 5
1.4
Appropr ate use ................................................................................................................................................................... 5
1.5
Qual f ed personnel ............................................................................................................................................................ 6
1.6
Accessor es and batter es ................................................................................................................................................. 6
1.7
D sposal .................................................................................................................................................................................. 6
2
CONTENT OF THE PACKAGING ............................................................................................................ 7
3
INSTALLATION ON THE HELMET .......................................................................................................... 8
3.1
Install ng the B601 system on the helmet .................................................................................................................. 9
3.2
Adjust ng the m crophone ............................................................................................................................................ 13
3.3
Remov ng the B601 system from the helmet ......................................................................................................... 13
4
BASIC FUNCTIONS ................................................................................................................................ 14
4.1
Volume adjustment ......................................................................................................................................................... 14
4.2
Mult -language vo ce messages.................................................................................................................................. 14
4.3
N-Com EASYSET ............................................................................................................................................................... 14
5
CONFIGURATION MENU ..................................................................................................................... 15
6
PAIRING UP WITH MOBILE PHONES OR OTHER BLUETOOTH DEVICES ................................... 15
7
MOBILE PHONE ..................................................................................................................................... 16
7.1
Speed d al ........................................................................................................................................................................... 16
7.2
Conference call funct on ................................................................................................................................................ 16
8
MANAGING TWO MOBILE PHONES (OR BLUETOOTH DEVICES) ............................................... 17
9
SMART NAVI SYSTEM ........................................................................................................................... 17
10
MUSIC VIA BLUETOOTH ...................................................................................................................... 17
10.1
Shar ng mus c v a Bluetooth (A2DP Shar ng) .......................................................................................................... 18
11
SATELLITE NAVIGATOR FOR MOTORCYCLES ................................................................................. 18
12
N-COM INTERCOM ............................................................................................................................... 18
12.1
N-Com “900” / “600” Ser es Intercom pa r ng up ................................................................................................. 18
12.2
N-Com “900” / “600” Ser es Intercom funct on (one-to-one connect on) ................................................... 19
13
“UNIVERSAL INTERCOM” INTERCOM ............................................................................................... 19
13.1
Pa r ng up the Un versal Intercom .............................................................................................................................. 19
13.2
Un versal Intercom Funct on......................................................................................................................................... 19
14
BATTERY AND RECHARGE ................................................................................................................... 20
14.1
Low battery s gnal ............................................................................................................................................................ 20
14.2
Check ng the Battery Level............................................................................................................................................ 20
14.3
Charg ng the system ....................................................................................................................................................... 20
15
SUMMARY TABLE OF CONTROLS ...................................................................................................... 21
16
WARRANTY ............................................................................................................................................. 22
16.1
Warranty coverage and val d ty ................................................................................................................................... 23
16.2
Exclus ons and l m tat ons of coverage ..................................................................................................................... 23
16.3
Procedure for subm tt ng cla ms ................................................................................................................................. 23
16.4
Product dent f cat on ..................................................................................................................................................... 24
16.5
Val d ty of N-Com warranty .......................................................................................................................................... 25

5
1WARNINGS AND SAFETY
Read th s User Manual carefully, as well as the s mple rules l sted below. Fa lure to comply w th these rules may
lead to dangerous s tuat ons.
Caut on: The product cannot be used n off c al or non-off c al compet t ons, motordromes, c rcu ts, rac ng
tracks and the l ke.
Caut on: Installat on of the N-Com B601 system results n a we ght ncrease of approx mately 105 g, wh ch s
added to the we ght of the helmet and of the other accessor es.
Warn ng: The electron c components of the N-Com system mounted ns de the helmet are not waterproof.
Consequently, make sure the ns de of the helmet, nclud ng the comfort padd ng, does not get wet n order
to avo d damage to the system. If water seeps nto the helmet, remove the comfort padd ng from the
helmet and allow to a r dry.
1.1 Road safety
Always obey all Traff c Regulat ons n force. Wh le r d ng your motorcycle, your hands should always be
engaged n actually r d ng the veh cle. Any operat on to the N-Com system must be carr ed out w th the
motorcycle stopped. Spec f cally:
•Set your cell phone on automat c answer (see the cell phone nstruct ons to do th s).
•If your cell phone s not equ pped w th th s funct on, f rst stop your veh cle n a safe area, n compl ance w th
Traff c Regulat ons and then answer the call.
•Do not make any calls wh le r d ng. Stop your veh cle n a safe place n compl ance w th Traff c Regulat ons
and then make the call.
•Adjust the volume so that t does not cause a d sturbance or d stract on wh le r d ng and at the same t me
allows you to d st nct vely hear background no ses.
•Do not operate your cell phone or other dev ces connected to the N-Com system wh le r d ng your
motorcycle.
•In all cases, obey the Traff c Regulat ons and remember that r d ng the motorcycle has absolute pr or ty over
any other manoeuvre.
1.2 Sw tch ng on the system n safe env ronments
•When us ng the N-Com system, comply w th all l m tat ons and nstruct ons related to the use of cell
phones.
•Do not turn on your cell phone or the N-Com system whenever the r use s forb dden or when these dev ces
can cause nterference or dangerous s tuat ons.
•Turn off wh le refuell ng. Do not use the N-Com system at f ll ng stat ons. Do not use the dev ce near
combust ble mater als or chem cal products.
•Turn off when near explos ve mater als.
1.3 Interferences
All phones and dev ces w th w reless s gnal transm ss on are subject to nterferences that may affect the
performance of the dev ce connected to them. These nterferences are not ascr bable to a defect of the N-Com
system.
1.4 Appropr ate use
Use the dev ce only n the normal pos t on, as descr bed n the product documentat on. Do not attempt to
d sassemble, tamper w th, or mod fy any part of the N-Com system.
Caut on: Adjust the volume of the N-Com system and of the aud o sources connected to t before you use the
system on the road.
Caut on: Adjust ng the volume to exceed ngly h gh levels may cause damage to your hear ng.
Caut on: Incorrect nstallat on of the system n the helmet may alter the aerodynam c and safety character st cs
of the helmet tself, thus creat ng dangerous cond t ons. Install the N-Com system accord ng to the
nstruct ons prov ded n the product documentat on. In case of doubt, please contact your local N-Com
dealer.

EN
6
Warn ng: L sten ng to other equ pment should not nterfere w th r d ng your motorcycle, wh ch must be the
top pr or ty at all t mes. Carry out all operat ons on the electron c equ pment and on the N-Com system w th
the veh cle stopped, n compl ance w th Traff c Regulat ons.
1.5 Qual f ed personnel
•Only qual f ed personnel can carry out techn cal ass stance on th s product. In case of any malfunct on,
always turn to your local dealer.
•The helmet s a safety dev ce. Tamper ng w th t and/or w th the electron c system ns de the helmet can
result n dangerous s tuat ons, n add t on to nval dat ng the product warranty.
1.6 Accessor es and batter es
•Only use the type of batter es, battery chargers and accessor es approved by Nolangroup for the spec f c
model.
•Us ng a battery type d fferent from the recommended one may lead to dangerous s tuat ons and nval date
the warranty.
•Contact your local dealer to see about the ava lab l ty of approved accessor es.
•When d sconnect ng the power supply cable of any accessory or of the battery charger, always grab and
pull the plug, not the cable.
•Do not use batter es for purposes other than the prescr bed ones.
•Never use batter es or battery chargers that turn out to be damaged.
•Do not short-c rcu t the battery.
•Keep the battery at a temperature between 0° / +45°C (charg ng): -20° / +60°C ( n use).
•Danger of f re or explos on: do not throw the batter es nto a f re or expose them to h gh temperatures!
•Do not throw out batter es together w th household refuse. The batter es should be d sposed of n
compl ance w th local regulat ons
•Do not wear the helmet wh le the battery s recharg ng.
•The helmet should never be left w th n the reach of unsuperv sed ch ldren n order to prevent damage to
the r health caused by access to the batter es.
Battery PL743530P L Po 3,7V – 800 mAh
1.7 D sposal
Refer to th s user manual and to manuals related to other parts of the N-Com system n order to d sassemble
the system from the helmet. Once the system has been d sassembled, d spose of t accord ng to the follow ng
nstruct ons:
•The presence of a crossed-out wheel e b n nd cates that n the European Un on the product
s subject to separate collect on at the end of ts useful l fe.
•Do not d spose of these products together w th und fferent ated urban waste.
•The proper d sposal of obsolete equ pment contr butes to prevent ng poss ble negat ve consequences on
people’s health and on the env ronment.
•W th n the European Un on, the dealer, when supply ng the new equ pment, ensures that the used
equ pment w ll be collected free of charge, prov ded t s equ valent to a rat o of one to one.
•For more deta led nformat on on the d sposal of obsolete equ pment, contact your mun c pal ty, a waste
d sposal serv ce, or the store where the product was purchased.

7
2CONTENT OF THE PACKAGING
The N-Com B601 package conta ns:
N-Com B601 system
M n USB w re
M crophone w th cl p
Keypad adapters for N87, N100-5
Key
Adhes ve str ps for loudspeakers

EN
8
3INSTALLATION ON THE HELMET
Important: Pr or to nstall ng the N-Com system, t s recommended to wr te down the dent f cat on code
aff xed to the product (see chapter 16.3).
You can download the nstallat on v deo from www.n-com. t N-Com / Download sect on.
•Before you nstall the B601 system on the helmet, make sure t turns on properly. Press the “n” key for
about 2 seconds, unt l the blue LED on the key pad l ghts up and you hear a beep n the headset. Proceed
w th the nstallat on.
•Remove the cheek padd ng (see helmet nstruct ons).
•Remove the helmet edge gasket us ng the spec al tool (F g. 1).
•Completely remove the gasket as shown n F g. 1; by do ng so you also remove the padd ng.
•Remove the “N-Com” plugs found at the back of the shell gasket and on the left s de of the helmet.
F g. 1
F g. 1 – ONLY FOR N87 – N100-5 HELMET
•Pr or to nstall ng the N-Com system, remove any f ll ng foam mater al, f present, from the helmet (refer
to the user manual for your spec f c helmet).
Opt on 1
Opt on 2
N.B.: Keep the f ll ng mater al n case you w sh to use the helmet w thout the N-Com system n the future.

9
3.1 Install ng the B601 system on the helmet
F g. 2
•Hook up the m crophone connector to the other
end, follow ng the d rect ons of the arrows (F g.
2).
N.B.: You can adjust the pos t on of the m crophone.
For nstruct ons on how to do th s, please see
chapter. 3.2.
F g. 3
•Place the system n the spec al hous ng n the
back of the helmet, push ng t all the way nto
the groove (F g. 3).
F g. 4
N.B.: For pos t on ng of the w r ng and of the
m crophone n the N100-5 helmet, follow the
nstruct ons prov ded n the ded cated box.
•F x the cable ns de the helmet and make sure
the r ght f x ng cl p snaps nto ts hous ng (F g. 4).
F g. 5
•Pos t on the m crophone n the hous ng on the
r ght of the helmet, nsert ng the metal boom n
the groove found n the ch n guard coupl ng
frame (F g. 5).
Caut on: make sure that the s de of the
m crophone support w th the wr t ng “n” s fac ng
nward.

EN
10
F g. 6
N.B.: For pos t on ng of the keypad n helmets N87
and N100-5, follow the nstruct ons prov ded n the
ded cated box.
•F x the cable ns de the helmet and make sure
the left f x ng cl p snaps nto ts hous ng.
•Hook up the keypad to the helmet by cl ck ng n
the relevant hooks.
•Open the rubber cap of the B601 system.
•Reassemble the gasket and secure t w th the
spec f c screw.
ONLY FOR HELMET N100-5 – pos t on ng of w r ng and m crophone
Pos t on ng the r ght s de w r ng and the m crophone:
•L ft up the plast c l n ng of the cheek padd ng (F g. 7).
•Insert the m crophone nto the eyelet (F g. 8) and pos t on t n the spec al hous ng, then nsert ng the
metal boom n the groove found n the ch n guard coupl ng frame (F g. 9).
Caut on: make sure that the s de of the m crophone support w th the wr t ng “N-Com” s fac ng nward.
•F x the cable ns de the helmet and make sure the r ght f x ng cl p snaps nto ts hous ng (F g. 10).
•Repos t on the plast c l n ng of the cheek padd ng, arrang ng t beh nd the two small stop hooks (F g.
11).
F g. 7
F g. 8
F g. 9
F g. 10

11
F g. 11
ONLY FOR HELMET N100-5 – pos t on ng of w r ng and m crophone
Pos t on ng the left s de w r ng:
•L ft up the plast c l n ng of the cheek padd ng (F g. 12).
•F x the cable ns de the helmet and make sure the left f x ng cl p snaps nto ts hous ng (F g. 13).
•Repos t on the plast c l n ng of the cheek padd ng, arrang ng t beh nd the two small stop hooks (F g.
14).
F g. 12
F g. 13
F g. 14

EN
12
FOR N87 – N100-5 HELMENTS ONLY – pos t on ng the keypad
Important: Installat on of the keypad on the N87, N100-5 helmets requ res the use of the “KEYPAD ADAPTER”
accessory, wh ch s ncluded n the package.
•Insert the support spec f c for your helmet n the flex cable of the keypad (F g. 15).
•Rotate the keypad support so as to pos t on t l ke n F g. 16, then hook t to the keypad.
•F x the cable ns de the helmet and make sure the left f x ng cl p snaps nto ts hous ng (F g. 17).
•Open the rubber cap of the B601 system.
•Reassemble the gasket and secure t w th the spec f c screw.
•Hook up the keypad to the helmet by cl ck ng n the relevant hooks (F g. 18).
•The proper pos t on ng of the keypad s llustrated n F g. 19 and n F g. 20.
F g. 15
F g. 16
F g. 17
F g. 18
F g. 19
F g. 20
•Pos t on the left and r ght speakers n the respect ve hous ng obta ned n the polystyrene cheek padd ng.
If necessary, rotate the speakers sl ghtly n the r hous ng. If necessary, secure them us ng the adhes ve
str ps suppl ed as standard equ pment.
•Reassemble the padd ng.

13
3.2 Adjust ng the m crophone
The B601 system makes t poss ble to adjust the pos t on of the m crophone n order to fac l tate ts
pos t on ng n the d fferent helmet models. Proceed as follows:
•Open the cl p pos t oned on the m crophone boom, operat ng as nd cated n F g. 21.
•Adjust the m crophone (F g. 22).
•Close the cl p (F g. 23).
F g. 21
F g. 22
F g. 23
To ensure good vo ce transm ss on qual ty, t s recommended to pos t on the m crophone sponge at the s de
of your mouth.
3.3 Remov ng the B601 system from the helmet
F g. 24
Proceed as follows to remove the B601 system from
the helmet:
•Remove the cheek padd ng and the shell gasket.
•Remove the keypad from the shell, as shown n
F g. 24.
FOR N87 / N100-5 HELMENTS ONLY – remov ng the keypad
•Remove the keypad from the shell, as nd cated n F g. 25.
•Rotate the keypad n a counterclockw se d rect on (F g. 26).
•Remove the cheek padd ng and the shell gasket.
F g. 25
F g. 26

EN
14
F g. 27
•Unhook the r ght and left cl ps from the shell,
lever ng upward us ng a flat head screw (or a
s m lar tool), as shown n f gure 27.
F g. 28
•Completely remove the B601 system from
helmet us ng a flat head screwdr ver (or
s m lar tool) and re- nstall the cheek padd ng
and the edge gasket.
4BASIC FUNCTIONS
Note: Before us ng the N-Com dev ce for the f rst t me, recharge the battery completely for at least 10 hours.
To obta n best performances from the battery, t s recommended to completely recharge the battery the f rst
few t mes. Afterwards, you can recharge the battery for shorter per ods. Whenever poss ble, t s best to
recharge the battery completely.
System ON Press “n” and keep t pressed for about 2 seconds, unt l the LEDs turn on and
you hear the vo ce announcement.
System OFF Press “n” and keep t pressed for about 6 seconds, unt l the LEDs turn off and
you hear the vo ce announcement.
4.1 Volume adjustment
You can eas ly adjust the volume by tapp ng the “”or “” key. You w ll hear a beep when the volume reaches
the max mum or m n mum level.
The volume s ndependent for each sound source. Once t s set for a spec f c source (phone call, rad o, Mp3),
t w ll be rema n n memory even after the system s sw tched off.
However, f you adjust the volume dur ng stand-by mode, t w ll affect volume levels of every aud o source.
4.2 Mult -language vo ce messages
The N-Com system features vo ce messages that prov de nformat on on the system and on the act ve
funct ons. The language set by default s Engl sh. The language of the vo ce messages may be changed
through the spec f c f rmware nstallable w th the N-Com EASYSET program. Please refer to the onl ne HELP for
nstruct ons on how to change the language sett ngs.
Ava lable languages: Ital an, Engl sh, French, German, Span sh, Dutch.
The default funct on s enabled on the dev ce. You can enable / d sable the “VOICE
ANNOUNCEMENTS” funct on by us ng the N-Com EASYSET program.
4.3 N-Com EASYSET
“N-Com EASYSET” s the appl cat on that can be used to manage and conf gure the B601 system.
The programme can be downloaded from the Internet s te www.n-com. t, n the “Download”
sect on. The funct ons that can also be managed from the N-Com EASYSET are l sted here below
w th the spec f c con.

15
5CONFIGURATION MENU
All Bluetooth pa r ups and other adjustments are carr ed out n th s mode.
To put the system n “Conf gurat on mode” (start ng from a sw tched off system) press the “n” key and keep t
pressed for 4 seconds, unt l you hear the vo ce announcement “
Conf gurat on Menu
”.
Once n the “Conf gurat on” menu, press the “” and “”keys to scroll through the var ous menu tems. In the
tems marked w th an “*”, t s poss ble to enable / d sable the funct on or carry out the commands by press ng
the “n” key to conf rm.
The follow ng tems make up the “Conf gurat on” menu:
A. Mob le phone pa r ng (chapter 6)
B. Intercom pa r ng (chapter 12)
C. Un versal Intercom pa r ng (chapter 13)
D. Second mob le phone pa r ng (chapter 8)
E. Speed d al* (chapter 7.1)
F. Smart Nav System (chapter 9)
G. Delete all pa r ngs*
In order to delete all Bluetooth pa r ups stored n the dev ce, press the “” or “” key unt l you hear the
vo ce announcement “
Delete all pa r ngs
”.
Press the “n” conf rmat on key to delete all Bluetooth dev ces stored n memory.
H. Reset*
In order to restore the factory sett ngs of the dev ce, press the “” or “” key unt l you hear the vo ce
message “
Factory
Reset
”.
Press the “n” conf rmat on key to restore all the factory sett ngs of the dev ce.
I. Ex t ng the conf gurat on*
To ex t the “Conf gurat on” menu, press the “” or “” key unt l you hear the vo ce announcement “
Ex t
the conf gurat on
”.
Press the “n” conf rmat on key to ex t the “Conf gurat on” menu.
If no key s pressed w th n 10 seconds, the dev ce automat cally ex ts the “Conf gurat on” menu.
6PAIRING UP WITH MOBILE PHONES OR OTHER BLUETOOTH DEVICES
•Make sure the B601 s turned off.
•Put the system n the “Conf gurat on” mode: press the “n” key and keep t pressed for 4 seconds, unt l you
hear the vo ce announcement “
Conf gurat on Menu
”.
•Press the “” key to access the “Mob le phone pa r up mode”.
•Turn on the search for Bluetooth dev ces (smartphone, GPS, MP3 reader) on the dev ce.
•Select the N-Com dev ce. If a password s requested, enter 0000 (four zeros).
•Connect on between the two dev ces s establ shed after a few seconds.
Note: The aff l at on s stored n the helmet and n the cell phone and t s not lost when the two dev ces are
turned off. As a result t needs to be carr ed out only once.
Automat c Connect on Once the Bluetooth dev ce has been pa red up, connect on s automat c when the
system s turned on.
Manual Connect on
In case connect on s not automat cally n t ated after a few seconds, you can
connect from the Bluetooth dev ce or by press ng “n” and keep t pressed for
about 2 seconds.

EN
16
7MOBILE PHONE
To pa r up a mob le phone to the B601 system, follow the procedure llustrated n Chapter 6.
Answer ng a phone call Br efly press any key when you hear the ncom ng call s gnal.
Vocal answer (VOX phone)
When you hear the r ngtone, say any word out loud.
You can enable / d sable the “VOX phone” funct on by us ng the N-
Com EASYSET program. The funct on s not act ve dur ng the
ntercom connect on.
Vo ce call Press “n” and keep t pressed for about 2 seconds.
Hang ng up/reject ng a phone call Press “n” and keep t pressed for about 2 seconds.
Manual phone connect on Press “n” and keep t pressed for about 2 seconds.
7.1 Speed d al
Us ng the N-Com EASYSET program, you can store up to 3 of your favour te numbers, wh ch
you w ll be able to d al from the “
Speed D al
” menu.
Sav ng the Speed D al numbers
To ass gn one or more speed d all ng numbers:
•Put the system n the “Conf gurat on” mode: start ng from a sw tched off system, press the “n” key and
keep t pressed for 4 seconds, unt l you hear the vo ce announcement “
Conf gurat on Menu
”.
•Press the “” or “” key unt l you hear the vo ce command “
Speed d al
”.
•Press the “n” conf rmat on key. You w ll hear the vo ce announcements “
Speed d al 1
” and
“Phone
connected”
.
•Press the “” or “” keys to select the speed d all ng number to be ass gned. The saved pos t on s
conf rmed by the vo ce announcement “
Speed d al 1
“/ “
Speed d al 2” / “Speed d al 3
”.
•On your own mob le phone (pa red up and connected to the N-Com system), call the phone number you
w sh to ass gn to the selected speed d all ng pos t on. The call s nterrupted before t goes through, and the
selected number w ll be saved; at th s po nt you w ll hear the spec al vo ce announcement conf rm ng the
select on (“
Save Speed D al 1
” / “
Save Speed D al 2
” / “
Save Speed D al 3
”).
Us ng the stored numbers
To access the “Speed D al” menu, press at the same t me the “n” and “” keys (“
Speed D al
”), then use the “”
and “” keys to scroll through the menu tems.
Then press the “n” key to conf rm the select on of one of the follow ng tems:
•
Last number red al
•
Speed D al 1
•
Speed D al 2
•
Speed D al 3
•
Cancelled
If you w sh to ex t the “Speed D al” menu, press the “” and “” keys unt l you hear the command
“
Cancelled
”, then press “n” to conf rm.
N.B.: If no key s pressed w th n 15 seconds, the system ex ts the “Speed D al” menu.
7.2 Conference call funct on
When a call comes n on a mob le phone connected v a Bluetooth to B601, the ntercom s temporar ly turned
off. However, f you w sh to share the phone call w th the other helmet, s mply turn on the ntercom manually
dur ng the phone call.

17
Turn ng on the phone conference
call funct on
Dur ng the phone call, br efly press “n” (channel 1).
Dur ng the phone call, press the “n” key tw ce (channel 2).
Dur ng the phone call, press the “n” key three t mes (channel 3).
Turn ng off the phone conference
call funct on Dur ng the phone call, br efly press “n”.
N.B.: “Telephone Conference” funct on can only be used w th the N-Com ser es “900” / “600”.
8MANAGING TWO MOBILE PHONES (OR BLUETOOTH DEVICES)
The B601 system can be hooked up to two phones (or Bluetooth) dev ces at the same t me.
The second phone (secondary dev ce) can rece ve calls but not make them.
To pa r up the second Bluetooth phone (secondary dev ce):
•Make sure the B601 s turned off.
•Put the system n the “Conf gurat on” menu: press the “n” key and keep t pressed for 4 seconds, unt l you
hear the vo ce announcement “
Conf gurat on Menu
”.
•Press the “” key unt l you reach the opt on “
Second mob le phone pa r ng
”.
•Turn on the search for Bluetooth dev ces (smartphone, GPS, MP3 reader) on the dev ce.
•Select the N-Com system from the l st. If a password s requested, enter the code 0000 (four zeros).
•After a few seconds, the connect on between the two dev ces s act vated.
Once the Bluetooth dev ce has been pa red up, connect on s automat c when the system s turned on.
If you w sh to connect a mob le and a satell te nav gator for motorb kes, t s recommended to pa r up the
mob le as the MAIN DEVICE (chapter 6) and the nav gator as the SECONDARY DEVICE, follow ng the procedure
descr bed above.
9SMART NAVI SYSTEM
The “SMART NAVI SYSTEM” funct on allows you to l sten to nav gator d rect ons com ng from the smartphone
even dur ng an ntercom call.
The aud o stops to allow transm ss on of the nav gator d rect ons from the smartphone and s automat cally re-
establ shed at the end of sa d nstruct ons.
The “SMART NAVI SYSTEM” funct on s d sabled by default on the dev ce.
You can enable / d sable the funct on from the Conf gurat on Menu (Chapter 5).
N.B.: W th the Smart Nav System enabled, all aud o nformat on com ng from the smartphone (for example,
not f cat on sounds) temporar ly stops the aud o under way.
You can enable / d sable the “SMART NAVI SYSTEM” funct on by us ng the N-Com EASYSET
program.
10 MUSIC VIA BLUETOOTH
To pa r up an Mp3 dev ce to the B601 system, follow the procedure llustrated n Chapter 6.
Play mus c (Play) Press “” and keep t pressed for about 2 seconds.
Pause funct on (Pause) When the player s play ng mus c, press “” for about 2 seconds.
Next track (Sk p) When the player s play ng mus c, press “” for about 4 seconds.
Prev ous track (Rew) When the player s play ng mus c, press “” for about 4 seconds.

EN
18
10.1 Shar ng mus c v a Bluetooth (A2DP Shar ng)
Dur ng the ntercom connect on, you can start play ng mus c by br efly press ng the “” key for about 2
seconds. The mus c w ll be played n both systems.
Mus c shar ng temporar ly cuts off the ntercom conversat on; however, th s can be automat cally restored by
stopp ng the mus c (th s s done by press ng the “” key for about 2 seconds).
N.B.: Mus c shared through the ntercom can be managed by both systems, for example, both systems can
change the track by press ng the relat ve command.
N.B.: the “Mus c Shar ng” funct on can be used w th the N-Com ser es “900” / “600”.
11 SATELLITE NAVIGATOR FOR MOTORCYCLES
B601 system s compat ble w th the most common satell te nav gators for motorcycles. For a l st of compat ble
models and add t onal deta ls, v s t the webs te www.n-com. t
To pa r up a satell te nav gator to the B601 system, follow the procedure llustrated n Chapter 8.
N.B.: Intercom connect on s automat cally cut off every t me the nav gator g ves d rect ons and restored at the
end of the message from the nav gator.
12 N-COM INTERCOM
The N-Com B601 system allows commun cat on w th other N-Com systems, up to a max mum d stance of
about 250 m ( n open f eld, w th no obstacles). The range of the commun cat on var es depend ng on the N-
Com systems used.
Important: The procedure descr bed below refers exclus vely to the pa r ng up and operat on between the
B601 and the “900” / “600” ser es N-Com systems.
To pa r up to N-Com systems of a range other than the “900” / “600” ser es, please refer to the procedure
descr bed n chapter 13 “Un versal Intercom”.
N.B.: The range and qual ty of the commun cat on may vary s gn f cantly depend ng on the presence of
obstacles, weather cond t ons, magnet c f elds.
12.1 N-Com “900” / “600” Ser es Intercom pa r ng up
The TWIN PACK ncludes two N-Com systems already pa red on CHANNEL 1. To connect the systems, please
refer to chapter 12.2.
•Make sure the systems are turned off.
•Put the systems n “Conf gurat on” mode: press the “n” key and keep t pressed for 4 seconds, unt l you
hear the vo ce announcement “
Conf gurat on Menu
”.
•On both systems, press the “” key unt l you reach the opt on “
Intercom pa r ng
”.
•On system A, press the key perta n ng to the “pre-sett ng pos t on” where you w sh to save system B.
Pa r ng up CHANNEL 1 Br efly press “n”.
Pa r ng up CHANNEL 2 Press the “n” key tw ce.
Pa r ng up CHANNEL 3 Press the “n” key three t mes.
The Intercom connect on w th the selected channel s automat cally act vated at the end of the pa r up
procedure.

19
12.2 N-Com “900” / “600” Ser es Intercom funct on (one-to-one connect on)
To establ sh an Intercom connect on w th one of the systems stored n memory, s mply press the command
related to the channel where the system was saved.
Connect on CHANNEL 1 Br efly press “n”.
Call CHANNEL 2 Press the “n” key tw ce.
Call CHANNEL 3 Press the “n” key three t mes.
D sconnect on of act ve ntercom Br efly press “n”.
N.B.: In case the pre-sett ng pos t on s empty, or the system be ng called cannot be reached w th n the
max mum range or t s already engaged n a phone call, you w ll hear an error vo ce message.
N.B.: In case the Intercom connect on system falls outs de the range (Intercom connect on nterrupted), the
B601 system w ll automat cally try to reconnect every 8 seconds. Double beeps w ll be em tted unt l the
Intercom connect on s not restored.
If you do not want automat c reconnect on, press the “n” key to stop the automat c reconnect on attempts.
13 “UNIVERSAL INTERCOM” INTERCOM
The N-Com B601 system can be connected v a Bluetooth to ntercom systems of other brands or to N-Com
systems other than the “900” / “600” ser es
1
, thanks to the UNIVERSAL INTERCOM funct on.
Important: N-Com systems other than the “900” / “600” ser es must be pa red up to the N-Com B601 by
follow ng the procedure “Pa r ng up the Un versal Intercom”.
13.1 Pa r ng up the Un versal Intercom
The N-Com system can be pa red up to the other ntercom (from now on referred to as Intercom B) as f t was
a mob le phone.
•Make sure the B601 s turned off.
•Put the system n the “Conf gurat on” mode: press the “n” key and keep t pressed for 4 seconds, unt l you
hear the vo ce announcement “
Conf gurat on Menu
”.
•Press the “” key unt l you reach the opt on “
Un versal ntercom pa r ng
”.
•Put ntercom B n the mob le phone pa r ng up mode (refer to the Intercom B manual).
•After a few seconds, Intercom B w ll em t the conf rmat on beep.
N.B.: The system pa red up us ng the UNIVERSAL INTERCOM s saved n the f rst ava lable channel.
13.2 Un versal Intercom Funct on
To turn on and off the aud o between two helmets, proceed as follows:
From the N-Com B601 system:
Connect or d sconnect Intercom B as you would for a regular N-Com ntercom (chapter 12).
Intercom B may rece ve a d al ng tone that must be answered w th a phone reply command.
From ntercom B
Press the “
Vo ce call / D al last number called
” command.
To d sconnect the ntercom, press “
Hang ng up/reject ng a phone call
” command.
Note:
•Dur ng use of the UNIVERSAL INTERCOM, the B601 system keeps the connect on act ve to the MAIN
DEVICE only (and not to the SECONDARY DEVICE).
•The ntercom system connected to N-Com B601 may not allow s multaneous connect on to a mob le
phone.
•Only one system pa red up n Un versal Intercom mode can be stored.
1
Except for Bluetooth k t and Bluetooth k t2, wh ch are not compat ble

EN
20
14 BATTERY AND RECHARGE
14.1 Low battery s gnal
Dur ng ts operat on, the system alerts the user w th a vo ce message when the battery s low. From the f rst
message, the system has a 1-hour autonomy. Warn ng s g ven every 10 m nute.
14.2 Check ng the Battery Level
LED Ind cator
When the system s power ng on, the r blue LED flashes rap dly nd cat ng the battery level.
4 flashes = H gh, 70 ~ 100%
3 flashes = Med um, 30 ~ 70%
2 flashes = Low, 0 ~ 30%
Vocal Ind cator
Start ng from the system turned off, press at the same t me the “n” and “” keys for about 3 seconds unt l you
hear three, h gh toned beeps. Then you w ll hear a vo ce prompt nd cat ng the battery level. However, f you
release the keys as soon as the system turns on, you w ll not hear a vo ce prompt for the battery level
nd cat on.
14.3 Charg ng the system
•To charge the system, hook t up to the battery charger or
to a USB outlet powered w th the USB-m n USB cable
suppl ed as standard equ pment. The charge w ll take
place as follows:
F g. 29
B601 system
turned off
When the B601 system s connected to the battery charger, the blue LED starts to flash
qu ckly. When the battery s charged, the blue LED becomes steady.
B601 system
turned on
When the B601 system s connected to the battery charger, the blue LED starts to flash
qu ckly. When the battery s charged, the blue LED goes back to ts standard flash ng.
In case you don’t plan to use the N-Com system for a long t me, you need to fully recharge the dev ce before
stor ng t away.
In case the dev ce s not used for a long t me, carry out a complete recharg ng cycle of the dev ce at least once
every 6 months to avo d poss ble damage to the battery.
In case the N-Com system s left for more than 6 months w thout ever be ng recharged, the dev ce may not
sw tch on; n th s case, recharge the N-Com system for at least 24 hours (even f the blue s gnall ng LED s not
flash ng), then try to sw tch on the dev ce aga n.
This manual suits for next models
3
Table of contents
Languages:
Other Nolan Conference System manuals
Nolan
Nolan N-com B601 X Series User manual
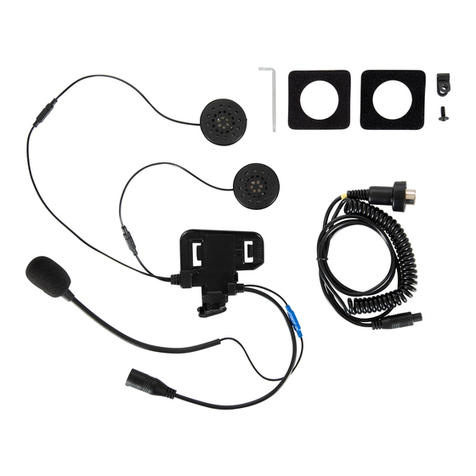
Nolan
Nolan N-Com R Series Installation instructions
Nolan
Nolan X Series Instruction Manual
Nolan
Nolan N-Com MCS II Installation instructions
Nolan
Nolan N-Com Basickit N32 User manual

Nolan
Nolan N-Com S Series Installation instructions
Nolan
Nolan N-Com Installation instructions
