Nomadio Sensor User manual

USERS GUIDE
Version 1.0.2
Published July 2005

Sensor Quick Reference
Display Screen
Antenna
Speaker
Throttl
e
Trigger
Headphone &
PC Connections
Steering Trim
Shift Buttons
Batter
y
Compartment /
Receiver Programming
Cable
Steering W heel
Display Screen
Navigation
Controls
(T1) Throttle Dual
Rate Trim (T2) Steering Dual
Rate Trim (T3) ThrottleTrim
(TR) Steering Trim
(TL) Steering Trim
Menu Button
On/Off Switch
Selection Buttons

Transceiver Quick Reference
Receptacle for:
Car Battery Sensor
Receptacles for:
RXBattery(power)
Steering (Ch1)
Throttle(Ch2)
Shift Servo (Ch3)
Receptacle for:
Digital Sensor (e.g.,
RPM/Speed ) /Receiver
Programming Cable
BIND button
(recessed)
Indicator LED
Receptacle for:
Analog Sensors
(e.g., Temp)

Sensor Quick Reference.................................. II
Transceiver Quick Reference.........................III
Statement of Compliance ................................ 2
Getting to know your Sensor........................... 3
PowerSwitch......................................................3
Display Screen....................................................3
MenuButton.......................................................3
NavigationButtons...............................................3
SelectionButtons.................................................4
Trim Buttons.......................................................4
GripButtons.......................................................4
ConnectionPorts.................................................4
Charging and Installing Batteries ...................5
Charging the SuppliedNiMH Batteries......................5
Installing the Batteries..........................................5
Adjusting the Screen........................................ 6
Converting for Left Handed Use...................... 7
Installing the Transceiver................................ 9
Mounting the Transceiver......................................9
Connecting the Transceiver....................................9
Installing the Sensors....................................10
Receiver Battery Sensor...................................... 10
Voltage Sensor.................................................. 10
Temperature Sensor........................................... 10
Connecting the Temperature Sensor...................... 11
Binding the Transceiver.................................12
How the BindingProcess Works............................ 12
Bindingyour transceiver the first time.................... 14
Sensor Controls ..............................................15
Top Menu Level................................................. 16
SteeringFunctions............................................. 16
Throttle Functions.............................................. 30
ShiftServo Functions.......................................... 46
ModelManagement............................................ 56
ControllerSetup................................................ 60
Failsafes.......................................................... 64
Sensor Digital RC Desktop.............................66
Minimum System Requirements............................ 66
Installing the RC Desktop.................................... 66
Connecting the Sensor to yourComputer................ 73
Using theSensorDigitalRC Desktop...................... 73
Registration...................................................... 74
Receiving SettingsFrom the Sensor....................... 76
EditingSettings................................................. 77
Saving Settings................................................. 77
SendingSettings to the Sensor............................. 78
Installing Sensor Firmware.................................. 78
Specifications .................................................79
SensorController............................................... 79
Transceiver...................................................... 79
Support ...........................................................80
Nomadio 3 Year Limited Warranty................81
Warranty Coverage............................................ 81
Exclusions and Limitations................................... 81

Statement of Compliance
FCC Compliance Statement
This equipment has been tested and found to comply with the limits for a Class B digital device, pursuant to Part
15 of the FCC Rules. These limits are designed to provide reasonable protection against harmful interference in a
residential installation. This equipment generates, uses and can radiate radio frequency energy and, if not
installed and used in accordance with the instructions, may cause harmful interference to radio communications.
However, there is no guarantee that interference will not occur in a particular installation.
If this equipment does cause harmful interference to radio or television reception, which can be determined by
turning the equipment off and on, the user is encouraged to try to correct the interference by one or more of the
following measures:
– Reorient or relocate the receiving antenna.
– Increase the separation between the equipment and receiver.
– Connect the equipment into an outlet on a circuit different from that to which the receiver is connected.
– Consult the dealer or an experienced technician for help.
• This device complies with Part 15 of the FCC Rules and with RSS-210 of Industry Canada.
Operation is subject to the following two conditions:
1) this device my not cause harmful interference, and
2) this device must accept any interference received, including interference that may cause undesired operation.
• The users manual or instruction manual for an intentional or unintentional radiator shall caution the user that
changes or modifications not expressly approved by the party responsible for compliance could void the user's
authority to operate the equipment.
Warning: Changes or modifications made to this equipment not expressly approved by Nomadio may void the
FCC authorization to operate this equipment.
RF Exposure Statement
This transmitter has been tested and meets the FCC RF exposure guidelines when used with the Nomadio
accessories supplied or designated for this product, and provided at least 20 cm separation between the antenna
and the user's body is maintained. Use of other accessories may not ensure compliance with FCC RF exposure
guidelines.
Sensor and its software are designed and manufactured in the United States of America.

3
Getting to know your Sensor
Power Switch
This switch turns the Sensor on and off.
Display Screen
Driving screen
This is the screen you’ll be seeing 95% of the time
while using the Sensor. It displays radio andbattery
status, telemetry data that you select, and your
servo information.
Menu screen
This screen is the gateway to the Sensor’s menu
system, which is described in detail later. You can
alwaysgo back to the driving screen by just
pressing the menu key.
Menu Button
men
u
Pressing this button toggles Sensor between the driving screen
and the top level function menu, or returns to the previous
level from a sub-menu.
Navigation Buttons
Button In the driving screen In the function menu
Moves to next higher menu item.
Moves to next lower menu item.
OK
Displays previous reading. Decreases selected value.

4
Displays next reading. •Increases selected value.
•Goes to next sub-menu.
OK
•Goes to selected sub-menu
•Saves the change to the
selected setting.
Selection Buttons
In the function menu
Sets the currently edited value to its maximum
value.
Sets the currently edited value to its minimum
value.
Cancels any changes made and resets value to
where it was before you started editing.
Resets the value to the factory default
Trim Buttons
T1 Adjusts the throttle dual rate setting.
T2 Adjusts the steering dual rate setting.
T3 Adjusts the throttle trim setting.
Left steering trim
button Adjusts the steering trim to the left or
right
Right steering trim
button Adjusts the steering trim to the left or
right.
Grip Buttons
Performsshifting action on channel 3.
Connection Ports
Headphone
port Accepts a 1/8” stereo headphone jack. The
output is the same in each ear (mono).
Computer port This connects to the USB port ofyour
computer using the supplied cable.

5
Charging and Installing Batteries
The Sensor is powered by fourAA-size batteries (1.2~1.5V). You may use the fourAA-size
1.2V NiMH batteries provided with the Sensor, or you may use AA-size alkaline batteries
(1.5V). Before using your Sensor, make sure the batteries are fully charged.
The Sensor is reverse voltage protected: installing batteries backwards cannot damage it. If
the batteries are backwards, simply reverse the batteryconnector.
Also inside the batterycompartment is the 4 wire ReceiverProgramming Cable. This cable
can be plugged into the receiver’sTACH pins in orderto upgrade the software on the receiver.
The RC Desktop will instruct you when a software upgrade is available.
Charging the Supplied NiMH Batteries
When using the supplied NiMH batteries, charge the batteries for 12-14 hours (using the
supplied charger) before using the Sensor. Be sure to get the polarity correct when installing
the batteries into the charger.
Installing the Batteries
1. Slide and remove the battery compartment cover at the bottom of the
Sensor.
2. Remove the battery holder.
NOTE:
The battery holderwires connect toa receptaclein the battery compartment.
It is not necessary to unplug the connectorwhen you remove the battery holder.
However, if you do unplug the connector, note its orientation first. Ifyou plug it
in wrong,your Sensor will not turn on - no damage will be done to your
Sensor, just remove and reverse it.
3. Install the batteries in the battery holder. Observe proper polarity.
4. Plug the battery holder connector into the receptacle in the battery
compartment.
5. Place the battery holder in the battery compartment. Make sure the
wires do not pinch.
6. Slide the battery compartment cover into place.

6
Adjusting the Screen
The display screen atthe top ofthe Sensor canbe repositioned for easier viewing.
Tools needed:
7/64” hexwrench
1. Make sure Sensor is turned off before
moving the screen.
2. Using the hex wrench, loosen the two
screws holding the display screen.
3. Reposition the display screen.
4. Retighten the screws

7
Converting for Left Handed Use
You can easily convert the Sensorto left-handed use.
Tools needed:
#2 Phillips screwdriver,
7/64” hex wrench
A: Removethe Steering Wheel Assembly
A1: Make sure the Sensor is turned off
A2. Carefully removethe Nomadio emblem in the
center of the steering wheel. It is held in place by
friction and pulls toward you, it does not twist.
A3. Use the Phillips screwdriver to loosen and remove
the screw holding the steeringwheel. Remove the
steering wheel.
A4. Usethe hexwrenchtoremove thethree screws
holding the steering wheel assembly.
A5. Carefully pull the steering wheel assembly away
from the Sensor body.
A6. Carefully unplug the connector fromthe steering
wheel assembly.
B: Remove the Speaker Assembly B1. Usethe hex wrench to remove the four screws
holding the speaker assembly.
B2. Pull the speaker assembly away from the Sensor
body.
B3. Use the Phillips screwdriver to remove the two
speaker clamp screwsholding the speakerto the plastic
cover.
C: Swap the Assemblies C1. Pass the steering wheel connector wire through the
Sensor body so it comes out the LEFT side hole (where
the speakerused to be).
C2. Pass the speaker through the Sensor body so it
comes out the RIGHT side hole (where the steering
wheelusedtobe).

8
D: Re-assemble D1. Reattachthe speakertothe plastic coverusing the
two screws. Becarefulnot to overtighten andbreak
the speakerclamp.
D2. Reconnect the steeringwheelwire connectorto the
steering wheel.
D3. Reattach the speaker assembly to the RIGHT side
of the Sensor body.
D4. Reattachthe steering wheel assembly to the LEFT
side of the Sensor body.
D5. Reattachthe steeringwheel.
Make sure the steering wheel has full left-and-right
movement.
D6. Reinsert the Nomadio emblem in the center ofthe
steering wheel.

9
Installing the Transceiver
Mounting the Transceiver
•Install the transceiver so it is protected from vibration or shock.
•Use double-sided tape or Velcro® to mount the transceiver.
•Position the transceiver where it will not contact other solid components.
•Mount the transceiver away from moving parts, sharp corners, and possible contaminants (fuel, dirt,
etc.).
•When possible, waterproof and protect the transceiver by wrapping it in foam rubber and placing it in a
rubber balloon or plastic bag. If you accidentally get moisture or fuel inside the transceiver, intermittent
or erratic operation may result.
•Position the transceiver so the sensors can be easily connected to it.
Antenna
•The thinner portion at the end of the antenna wire must be outside the vehicle body
•DO NOTCUT the antenna wire
Connecting the Transceiver
Servo Input Plugs
The transceiver is designed to use Futaba J-style input plugs
with wiring order asshown in the diagram.
Servo lead wires MUST be in this order.If the servo wires are
in a different order,you must re-order the wires in the input
plug. Check with your servo manufacturer about the color and
order of the servo lead wiring.
When you insert the servo input plug into the transceiver, note
that the input plug may have an alignment tab. Orient the
alignment tab properly before inserting the input plug.
To remove in input plug from the transceiver, pull the input
plug rather than the servo wires.
Servo Connection
Connect the servostothe appropriate positions inthe transceiver:
Connect… …into transceiver receptacle
Receiver battery “Power”
Steering servo “Steering”
Throttle servo or ESC “Throttle”
Shifting servo “Shft/CH3”

10
Installing the Sensors
Your Sensor radio system comes with several sensors that you can install in your vehicle and
connect tothe transceiver. Whenproperly installed and connected, these sensorswill send
information backto the Sensor so that you can monitorthe readingswhile you drive.
Receiver Battery Sensor
The transceiver monitorsthe receiverbattery voltage fromthe POWER receptacle. There is no
installation necessary for this sensor.
Voltage Sensor
The voltage sensor is used to monitorthe voltage of a separate batterypack(forexample, an
electric car’s main battery pack). In a Nitro car, this sensor is not needed.
1. Connect the REDwire of voltage sense to the positive
terminal of your battery pack and the BLACK wire ofthe
voltage sense tothe negative terminalof the battery pack
you want to monitor.
2. Carefully route, protect, and secure the sensor wires.
3. Plugthe voltage sensor intothe BATT receptacle.
Temperature Sensor
The temperature sensor is used to monitorthetemperature
of a vehicle component such as a main battery pack, electric
motor, or nitro engine.
Installation
The tip ofthe triangular temperature sensor is the active
measuring element. Installthe sensor sothat this tip is
pressed againstthe item whose temperature you wish to
measure.
The sensor has been designed to be thin enough to fit between the fins on aheat sink. Two
sets of holes are provided to wire-tie the sensor in place if desired. Alternately, a high-
temperature epoxy may be used to securethe sensor.
When installing on a nitro motor, place the sensor as low as possible on the head, opposite
the exhaust port. The sensor may also be installed on an electric motor, battery pack, or ESC
heat sink.

11
Connection
Connecting the Temperature Sensor
After you install the temperature sensor in
the vehicle, plug it into the “Sensor 1” or
“Sensor 2” receptacle.
The four-pin connector onthe sensor cable
has only three wires populated. The
unpopulated pin should be the one furthest
from the connector key in the receiver
plastic.
The Sensortransceiverwill automatically
detect which sensors are installed.
Unused Pin
Connected Pins

12
Binding the Transceiver
The binding process “locks” the Sensor and atransceivertogether sothat they listen onlyto
each other.
Since the Sensor has eight model memories, it is possible that your Sensorwill be used to
communicatewitheight transceivers.You must therefore performthe binding process once for
each transceiver that will communicate with your Sensor.
Note thatthe Sensorcannot communicate with allofthe transceivers at the same time, but
rather the Sensor will communicate only with the transceiver associated with the Sensor’s
currently active model. For more information, see “Managing Models” later in this instruction
manual.
How the Binding Process Works
The binding process is set in motion by depressing the “bind” button on the transceiverwhen
the Sensor is in “bind mode.”The transceiverbroadcasts an inquiry message, indicating that it
is looking for a Sensor to bind to.
The Sensor responds backtothe transceiver, indicating its ID number(forexample,the
Sensor ID may be 123456789). Thetransceiver responds back to the Sensor, indicating its
own VIN number(forexample,the VIN may be 987654321). After that, the binding process is
complete.

13
Now, everytime youturn on the Sensor and set it to the appropriate modelID (see “Managing
Models” later in this manual), the Sensor goes to a special “lookup channel” and searches for
messages from the appropriate VIN.
When you turn on the vehicle’stransceiver, thetransceiver goesto the lookup channel and
broadcasts its VIN so it can be found by the appropriate Sensor.
Whenthe Sensor findsthe appropriate VIN, the connection is made.The Sensorthen searches
for a clear frequency channel;when one is found,the Sensor “tells” thetransceiverto jump to
that clear frequency channel.

14
Binding your transceiver the first time
1. Install a transceiver into your vehicle.
(For this example, install a transceiver into your electric touring car, which will be known to
the Sensor as “Model 1.”)
2. Inthe Sensor’s “Manage Models” function menu, go to“Active Model” and select the
appropriate model ID forthe vehicle you are going to bindto. (Forthis example, select “Model
1.”)
3. After putting your model on a stand to prevent runaways, power upthe vehicle and
transceiver.
4. Bring the Sensor close to the model. This will help the transceiver and Sensor to “find”
each other more easily.
5. In the Sensor’s “Manage Models” function menu, select “Rebind.”
6. Using an extended paperclip, depress and hold the transceiver’s “bind” button until the
onboard LED illuminates.
7: Confirm binding on your Sensor by pressing the “OK”asthe transceiverVIN number is
displayed.
The binding process is now complete!

15
Sensor Controls
The functions of the Sensor are controlled through the function menu and/ortrim controls.
To performthis action… Press…
Toggles between the driving screen and the function
menu or returns to the previous level from a sub-
menu
menu
Menu: Go to the selected sub-menu
OK
Menu: Move to the nexthigher menu item.
Menu: Move to the next lower menu item.
Menu: Go to the selected sub-menu.
Drive: Display next statistic.
Menu: Decrease the selected value setting.
Drive: Display previous statistic.
Menu: Set currently edited value to maximum.
Menu: Set currently edited value to minimum.
Menu: Cancel changes made to the current
parameter.
Menu: Reset currently edited value to factory default.

16
Top Menu Level
The following illustration shows the function menu structure for the top level menu. All main
sub-menus may be accessed from the top menu level.
Top Level Menu
Stee rin g (Ch1)
Throttle (Ch2)
Shift (Ch3)
Advanced
ManageModels
ControllerSetup
Statistics
Steering Functions
The following illustration shows the function menu structure for the steering functions:
Steering
(
Ch
1
)
Trim
Dual Rate
Expo
Left End Point
ServoReverse
Servo Type
Right End Point
-
100
to
100
0
-
100
0
to
100
Off
,
On
A
nalog
,
Digital
-
100
to
100
0
to
100
Trim Increment
1
-
20
1
-
20
DRIncrement
Sub Trim
-
100
to
100
Servo Speed
Input,Return,Trigger
,

17
Steering Trim
Steering trim adjusts the
center point ofthe steering
servo by adjusting the
center point within the
steering servo’s total travel
range. Unlike steering sub-
trim, the steering left and
right end points are
unaffected by steering trim;
by moving the center point
of the steering servo using
trim, the center position
moves closer to one end
point orthe other.
Steering trim should be
used only after you have
initially adjusted steering
sub-trim.
Steering (Ch1)
Throttle (Ch2)
Shift (Ch3)
Steering Trim
On the driving screen,
steering trim is represented
by the position of the
pointer on the upper bar.
As you change the steering trim, it is shown graphically on the driving screen trim indicator
bars:
Steering trim is centered in range (value = 0)
Steering trim is offset to the RIGHT (+ve value)
Steering trim is offset to the LEFT (-ve value)
If you find that you haveto use a large amount of steering trim to get the vehicle to
drive straight, you should consider resetting the steering trim to 0 and re-adjusting the
servo horn on the servo output shaft.
Other manuals for Sensor
1
Table of contents
Other Nomadio Remote Control manuals
Popular Remote Control manuals by other brands

Philips
Philips SBC RU 220/00 Instructions for use

Porter
Porter 12002 Sportsonic II Installation & operation manual
Nautamatic
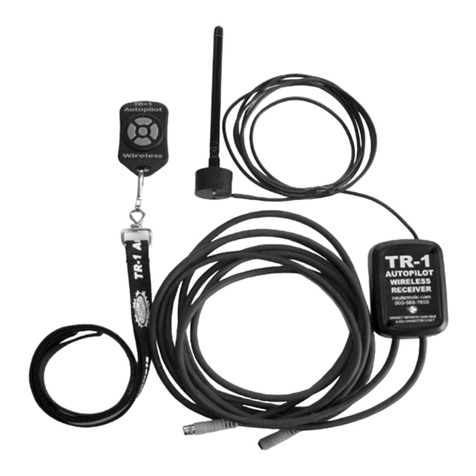
Nautamatic TR-1 Gold owner's manual

StarLogixs
StarLogixs GateKeeper RR-07 operating instructions

RadioLink
RadioLink RC8X quick start guide
HomeMatic
HomeMatic HM-RC-12-B operating manual
