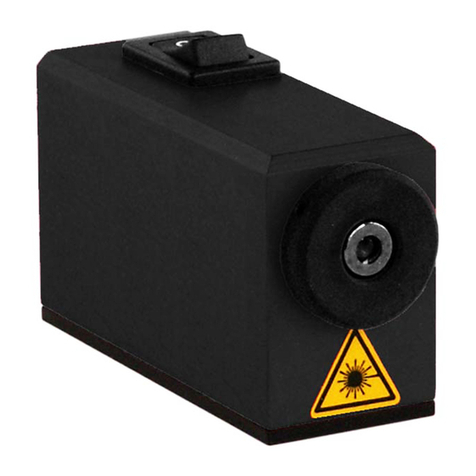
Norland 388S631 Manual

REPAIR PROCEDURE 388S631 REV Q
NORLAND PAGE 1
REPAIR PROCEDURE FOR
CENTRAL BONE DENSITOMETERS
388S631
Norland Medical Systems
W6340 Hackbarth Road
Fort Atkinson, WI USA
53538-8999
Main Phone Line:
1-800-333-8456
1-920-563-8456
FAX 1-920-563-8626
Customer Service:
1-800-444-8456
1-920-568-4206
FAX 1-920-568-4216
E-Mail:
service@norland.com

REPAIR PROCEDURE 388S631 REV Q
NORLAND PAGE 2
1 SCOPE........................................................................................................................................................................3
2 APPLICABLE DOCUMENTS ..................................................................................................................................3
3 DEFINITIONS ...........................................................................................................................................................3
4 RESPONSIBILITIES.................................................................................................................................................4
5 PROCEDURE.............................................................................................................................................................4
6 SERVICE SOFTWARE.............................................................................................................................................5
7 TESTING REQUIREMENTS....................................................................................................................................7
8 TEST PROCEDURE QUICK REFERENCE GUIDE .............................................................................................10
9 REPLACING THE SOURCE CONTROL BOARD................................................................................................14
10 SOURCE REPLACEMENT PROCEDURE............................................................................................................14
11 FILTER ASSEMBLY REPLACEMENT.................................................................................................................17
12 PMT TUBE IDENTIFICATION AND REPLACEMENT ......................................................................................17
13 LASER DIODE REPLACEMENT ..........................................................................................................................18
14 MAIN BOARD IDENTIFICATION.......................................................................................................................18
15 MOTOR DRIVER BOARD CONFIGURATION....................................................................................................19
16 LEVEL SCANNER..................................................................................................................................................20
17 WIRING DIAGRAMS.............................................................................................................................................20
18 SOURCE/DETECTOR ALIGNMENT PROCEDURE ...........................................................................................23
19 LASER ALIGNMENT PROCEDURE ....................................................................................................................29
20 SET PMT GAINS.....................................................................................................................................................29
21 SOURCE COUNT RATE CHECK..........................................................................................................................34
22 BEAM STABILITY TEST.......................................................................................................................................36
23 TABLE (RAIL ALIGNMENT) TEST .....................................................................................................................38
24 FUNCTION TESTS .................................................................................................................................................40
25 CURRENT LEAKAGE TEST .................................................................................................................................41
26 SKIP TEST...............................................................................................................................................................41
27 FILTER TEST..........................................................................................................................................................42
28 DAILY CALIBRATION..........................................................................................................................................44
29 INITIAL CALIBRATION........................................................................................................................................45
30 QC SPINE PHANTOM SCANS..............................................................................................................................47
31 FINAL FACTOR......................................................................................................................................................49
32 REGULATORY LABEL LOCATIONS..................................................................................................................50
33 PREVENTIVE MAINTENANCE............................................................................................................................53
34 XMAKEPRD............................................................................................................................................................54
35 FDA FORM 2579 – USA ONLY.............................................................................................................................55
36 SERVICE REPORT FORM.....................................................................................................................................57

REPAIR PROCEDURE 388S631 REV Q
NORLAND PAGE 3
1SCOPE
1.1 To establish a uniform procedure for testing/repairing a X-Ray Bone Densitometer to ensure a properly operating
instrument, a satisfied customer, and compliance with regulatory requirements.
2APPLICABLE DOCUMENTS
2.1 Control of Static Sensitive Material, SOP-G004
2.2 Form 2579 Procedure SOP-R009
2.3 Return Authorization (RA), SOP-N004
2.4 Return Authorization Tag Procedure 900S023
2.5 Completing the Service Report Form 900S064
2.6 Installation Procedure 433S146
2.7 On-site Assembly Procedure 432S055
2.8 Computer Replacement Procedure 398S039
3DEFINITIONS
3.1 Service Agent: Service personnel that have completed technical training and demonstrated their ability to
complete the requirements for installation and service support. This includes Service Center Technicians,
Technical Support Engineers, and Third Party Service Engineers.
3.2 Devices: any units, assemblies, and accessories.
3.3 Complaint: Actual or potential safety hazard, death or injury above and beyond the intended use.
3.4 Problem: Software/hardware maintenance and/or repair.
3.5 Certified Component: Any component that would require the unit to have a certification label for that part, and
when replaced, would be required to have an FDA 2579 form filled out. (i.e. HV Supply, X-Ray Source, Power
Supply Assembly, and M.I.D. Board)
3.6 HID: Hardware Identification Device.
3.7 RA: Return Authorization number.
3.8 4-Channel or QS: Any system using 3.X.X host software, QuikScan device, any scanner equipped with QS
hardware.
3.9 2-Channel: Any scanner using 2.5.X or lower revision host software.
3.10 Autoset: Scanners with autoset hardware can be identified by selecting SCOM from the XSST menu and entering
AD. If the response is “My” then autoset hardware is installed.
3.11 PMT: Photo Multiplier Tube
3.12 Indicates general caution, safety hazard, or information.
3.13 Indicates radiation from laser apparatus.
3.14 The “READY” light on the scanner front panel indicates the power is applied to the x-ray source.
3.15 The “X-RAY” light on the scanner front panel indicates the shutter is open and x-rays are being emitted.
3.16 The “Laser” light on the scanner front panel indicates the laser is turned on.

REPAIR PROCEDURE 388S631 REV Q
NORLAND PAGE 4
4RESPONSIBILITIES
4.1 The Service Agent is responsible for :
4.1.1 Repairing devices in accordance with this document.
4.1.2 Verifying all tests meet the specifications that are listed.
4.1.3 Completing the paperwork.
4.1.4 (USA only) Delivering the completed Form 2579 to Norland within one week of the activity if a certified
component has been replaced or a stationary scanner is moved to a different location. A replica of this form
is included in this document.
4.1.5 Reporting to Product Support if these assembly instructions do not permit proper support for any device
and/or it’s certifiable components for any reason.
4.1.6 Handling static sensitive devices with proper precautions.
4.1.7 Exercising electrical, x-ray and mechanical safety precautions when operating or repairing the device.
4.1.8 Returning all defective devices to Norland with a Return Authorization number.
4.2 The Service Agent is not permitted to make any modifications to certified components that could adversely affect
their performance.
5PROCEDURE
5.1 After a problem is reported and it is determined that on-site support is required a Service Agent is dispatched.
5.2 Customer Service Dispatch will give the Service Agent all necessary repair information.
5.3 All repairs must be authorized by Norland Customer Service
5.4 To obtain the authorization the customer must talk to Norland technical support, to determine that on-site support
is necessary.
5.5 An authorization number is given to the Service Agent.
5.6 Once on site, the Service Agent notifies Norland dispatch that they have arrived.
5.7 Service Agent allows the customer to communicate his/her concerns with the equipment.
5.8 The problem is recorded on the Service Report.
5.9 Service Agent begins his/her investigation of the customer’s reported problem, after which the Service Agent
determines the failure/malfunction and records the diagnosis on the Service Report.
CAUTION: Exercise care whenever working around x-ray sources. Avoid unnecessary x-ray exposure. Do not
permit the beam to impinge on any part of your body at any time, especially your hands, arms and head. It is
recommended that you wear a radiation dose badge to monitor any radiation exposure.
CAUTION: Exercise caution while testing the mechanical movement. Keep hands and all objects clear of the
arm assembly while in motion to avoid pinch points.
CAUTION: Exercise caution when working with the covers removed. To prevent electrical shock use caution
to avoid contact with exposed components.
5.10 Service Agent proceeds to correct the malfunction. The Service Agent will describe the corrective action taken to
resolve the problem on the Service Report. Including all parts replaced.
5.11 If applicable, when a filter assembly or a source is replaced, the existing certification label for that component is
removed from the scanner. The new label is applied.
5.12 The Service Agent signs the Service Report indicating the scanner is working as intended and the test results
meet the listed specifications. Complete the service report using the Service Report Form Procedure, 900S064.

REPAIR PROCEDURE 388S631 REV Q
NORLAND PAGE 5
5.13 Identify all unused or defective devices returning to Norland with a Return Authorization tag. Refer to the RA
Tag Procedure, 900S023 to complete the RA tag information.
5.14 The Service Agent notifies Norland customer service that the repair is complete before leaving the customer site.
5.15 The authorization number is referenced on the Service Report and invoice.
5.16 The Service Agent sends Norland the appropriate documentation. For USA, send a completed FDA Form 2579
to Norland within seven working days when a stationary scanner is moved or if a source, computer, or beam
limiter is replaced.
6SERVICE SOFTWARE
SUPPLIES NEEDED:
388A334 XR-Series Service Disk (for 2-channel scanners)
398A020 Generic Tools Disk (for 4-channel scanners)
433A165 Service Scanner Tools Disk (for 4-channel scanners)
394A067 Service File Tools Disk (all scanners)
!2-Channel:
Testing for 2-channel scanners will be performed from C:\BD\XRAY directory, using 388A334 XR-Series Service
Disk revision 1.7.0. Type SERVICE to obtain the service tools in the BD\XRAY directory, or change to that
directory (cd\bd\xray) and then type SERVICE. To select a command, type the corresponding number and press
ENTER. The computer’s communication cable must be on COMM 1 for the 1.7.0 Service tools. If the 1.7.0 Service
Disk is re-installed it is also necessary to reinstall the latest revision of the Service File Tools AFTER the 1.7.0
Service Disk.
388A334 XR-Series Service Disk, revision 1.7.0 installation instructions:
1. Place the disk in the 'A' drive.
2. At the DOS prompt type A:INSTALL, then press the enter key. When the XR Series Service Software
Installation screen appears, press any key to continue. Using the up and down arrow keys select appropriate
printer, then press ENTER to continue. When the Installation Complete screen appears press any key to
return to the DOS prompt.
3. Install the latest revision of the Service File Tools. See instructions below, under “All Scanners”.
!4-Channel:
For 4-channel scanners the testing is performed from the Service Scanner Tools menu. Type XSST to access the
menu. To select a command, press the corresponding letter. Update all 4-channel scanners to the latest revision of
the 433A165 Service Scanner Tools. The latest revision of Generic Tools must be loaded BEFORE the Service
Scanner Tools.
398A020 Generic Tools installation instructions:
1. Insert the 398A020 GT disk into drive 'A'. Type A:INSTALL and press ENTER to begin installation. At
the first screen reading “Norland GT Disk Installation”, press any key (except ESC) to continue.
2. After the installation has finished, press any key to exit to the DOS prompt. Remove the diskette from the
drive.
433A165 Service Scanner Tools (SST) installation instructions:
1. Insert the Service Scanner Tools disk 1 of 2 into the ‘A’ drive. Type A:INSTALL and press ENTER to
begin installation. At the installation screen, press any key (except ESC) to continue.
2. You will be prompted for which type of printer you have installed. Use the arrow keys to select your
printer from the menu, and press ENTER. If you have any printer from the HP DeskJet series, select “HP
DeskJet 500C”.
3. At the “tools resolution” screen select “800 X 600” and press ENTER.
4. The files will decompress to the hard drive.

REPAIR PROCEDURE 388S631 REV Q
NORLAND PAGE 6
5. Insert disk 2 when prompted.
6. After the installation has finished, press any key to exit. The software will check your computer
configuration for the proper settings. Press ENTER to confirm and ENTER to return to the DOS prompt.
After upgrading the SST software reconfigure the system:
1. If the file “Service.fil” does not exist in the C:\XR26\SERVICE directory then create one by selecting
Servfil –c -s from the XSST menu. Follow the on-screen prompts. If the scanner does not have an
arm serial number, press enter to leave it blank.
2. Redefine table limits by selecting TLimit from the XSST menu.
3. Perform an initial peak by selecting PeakPick from the XSST menu, then press Cto select
characterize, and press Yto confirm. When the graph is complete press ENTER to continue. For
DOS computers perform the next step before attempting to print.
4. For computers with a DOS operating system: edit the Autoexec.bat file to place the line “if exists
C:\XAUTO.BAT call XAUTO” to the last command.
4.1 At the C:\ prompt type CD\ and press ENTER.
4.2 Type Edit autoexec.bat and press ENTER.
4.3 Use the arrow keys to move to the beginning of the “if exists C:\XAUTO.BAT call XAUTO”
line.
4.4 Press the Shift, Cntl, and right arrow keys to select (highlight) that line.
4.5 Press the Shift and Del keys to remove the line.
4.6 Press the Del key again to remove the empty space.
4.7 Use the arrow keys to move the cursor below the last line.
4.8 Press the Shift and Ins keys to reinsert the “if exists C:\XAUTO.BAT call XAUTO” line. It
should now be the last line of text.
4.9 Press Alt to activate the menus, press Fto select File, press Xto exit, and press ENTER to save
the changes and exit.
4.10Press Cntl, Alt, and Del keys to reboot the computer.
!All Scanners:
For all scanners, upgrade to the latest revision of Service File Tools software.
394A067 Service File Tools installation instructions:
1. Insert the 394A067 SFT disk into drive 'A'. Type A:INSTALL, and press ENTER. At the installation
screen press ENTER to continue.
2. When installation is complete press any key to continue, remove the disk from drive 'A', and reboot the
computer.
Type XSFT to access the Service File Tools menu. To select a command press the corresponding letter.
!WIN98 Computers:
To obtain a DOS prompt click on the Window’s desktop Tools icon.
To re-initiate the host software, enter EXIT at the DOS prompt, and click on the host software icon.
!DOS Computers:
To obtain a DOS prompt (C:\>) click on Exit in the host software.
To re-initiate the host software, type XR, and press ENTER.

REPAIR PROCEDURE 388S631 REV Q
NORLAND PAGE 7
7TESTING REQUIREMENTS
The following is a list of the recommended tests to be performed after replacing major components. Refer to the
appropriate section for detail instructions on how to perform the following tests.
All test data and calibration files should be copied to a disk after each repair or scanner move. This disk should be
created after all the testing has been completed. To create this disk, at the C:\ prompt type XMAKEPRD. This disk
should then be labeled with the facility name, scanner serial number, date and reason for the repair. This disk should
be included with all the paperwork and sent back to Norland Customer Service.
(The test specifications are in parenthesis.)
X-ray Source Filter Assembly
1. Source Replacement Procedure 1. Source/Detector Alignment Procedure
2. Source/Detector Alignment Procedure
3. Laser Alignment
4. Set PMT Gains
5. Source Count Rate Check (Low energy 550k to 750k)
6. Beam Stability Test (Voltage ≤.1, Current ≤1.5 for2-
channel) (V≤.25 and I ≤3.0 for4-channel)
7. Table Test [differential and integral min/max ≤(+/-) .4]
8. Function Tests
9. Initial Calibration
10. QC Spine Phantom Scans
11. Final Factor ( precision and accuracy ‘OK’)
12. If applicable, remove the existing source certification
label from the outside of the scanner and apply the new
one.
13. XMAKEPRD
14. Service Report
15. FDA Form 2579
2. Laser Alignment
3. Set PMT Gains
4. Source Count Rate Check (Low energy 550k to 750k)
5. Table Test [differential and integral min/max ≤(+/-) .4]
6. Remove the existing Beam limiter certification label on
the outside of the scanner and apply the new one.
7. Filter Test
8. Initial Calibration
9. QC Spine Phantom Scans
10. Final Factor (precision and accuracy ‘OK’)
11. XMAKEPRD
12. Service Report
13. FDA Form 2579
Main Board
1. Function Tests
2. Daily Calibration (precision and accuracy ‘OK’)
3. Function Test – Emergency Shutoff Test – Laser and X-
ray On Tests
4. Move HID device to new board
5. XMAKEPRD
6. Service Report
Motor Driver Board
1. Motor Driver Board Configuration (RA101, RB101,
RC101, RD101)
2. Skip Test
3. Daily Calibration (precision and accuracy ‘OK’)
4. XMAKEPRD
5. Service Report
Power Tray
1. Function Tests
2. Daily Calibration
3. XMAKEPRD
4. Service Report
Power Supply Board
1. Function Tests
2. Daily Calibration (precision and accuracy ‘OK’)
3. XMAKEPRD
4. Service Report
Photo Multiplier Tubes
1. Source/Detector Alignment Procedure
2. Set PMT Gain
3. Laser Alignment
4. Source Count Rate Check (Low energy 550k to 750k)
5. Table Test [differential and integral min/max ≤(+/-) .4]
6. Initial Calibration
7. QC Spine Phantom Scans
8. Final Factor (precision and accuracy ‘OK’)
9. XMAKEPRD
10. Service Report
Lower Cable
1. Function Tests
2. Daily Calibration (precision and accuracy ‘OK’)
3. XMAKEPRD
4. Service Report

REPAIR PROCEDURE 388S631 REV Q
NORLAND PAGE 8
Charge Amplifier Board
1. Source/Detector Alignment Procedure
2. Set PMT Gain
3. Laser Alignment
4. Source Count Rate Check (Low energy 550k to 750k)
5. Initial Calibration
6. QC Spine Phantom Scans
7. Final Factor (precision and accuracy ‘OK’)
8.XMAKEPRD
9.Service Report
High Voltage Board
1. Source/Detector Alignment Procedure
2. Laser Alignment
1.Set PMT Gain
4. Source Count Rate Check (Low energy 550k to 750k)
5. Initial Calibration
6. QC Spine Phantom Scans
7. Final Factor (precision and accuracy ‘OK’)
8. XMAKEPRD
9. Service Report
Upper Cable
1. Function Tests
2. Daily Calibration (precision and accuracy ‘OK’)
3. XMAKEPRD
4. Service Report
Computer Replacement
Refer to the 398S039 Computer Replacement Procedure
X-axis Motor or Belt
1. Source/Detectors Alignment Procedure
2. Laser Alignment
3. Daily Calibration or Initial Calibration
4. QC Phantom Scans
5. Final Factor (precision and accuracy ‘OK’)
6. Service Report
PMT Bias Board
1. Source/Detector Alignment Procedure
2. Laser Alignment
3. Set PMT Gain
4. Source Count Rate Check (Low energy 550k to 750k)
5. Initial Calibration
6. QC Spine Phantom Scans
7. Final Factor (precision and accuracy ‘OK’)
8. XMAKEPRD
9. Service Report
Complete PMT Assembly
1. Source/Detector Alignment Procedure
2. Laser Alignment
3. Set PMT Gain
4. Source Count Rate Check (Low energy 550k to 750k)
5. Table Test [Differential & Integral Min/Max ≤(+/-) .4]
6. Initial Calibration
7. QC Spine Phantom Scans
8. Final Factor (precision and accuracy ‘OK’)
9. XMAKEPRD
10. 10. Service Report
Scanner Move
1. Level Scanner
2. Source/Detector Alignment Procedure
3. Laser Alignment
4. Set PMT Gains
5. Source Count Rate Check (Low energy 550k to 750k)
6. Table Test [differential & integral min/max ≤(+/-) .4]
7. Function Tests
8. Current Leakage Test
9. Initial Calibration
10. QC Spine Phantom Scans
11. Final Factor (precision and accuracy ‘OK’)
12. FDA 2579 Form
13. XMAKEPRD
14. Service Report
Miscellaneous Repairs
1. Daily Calibration
2. XMAKEPRD
3. Service Report
Preventive Maintenance
1. Computer:
1.1 Scandisk and Xfcheck on all storage media
1.2 Optimize hard drives
1.3 Update service software as required
1.4 AnitVirus check if software is available
2. X-ray Source:
2.1. Check desiccant material [Lorad source only]

REPAIR PROCEDURE 388S631 REV Q
NORLAND PAGE 9
2.2. Verify proper oil pump operation [Lorad source
only]
2.3. Check fan operation.
2.3. Function Test - Radiation leakage check (<15 mR)
2.4. Perform Beam Stability Test (Voltage ≤.1,
Current ≤1.5 for 2-channel) (V≤.25 and I ≤3.0 for
4-channel)
3. Scanner:
3.1. Clean and lubricate the rails
3.2. Table Test [differential & integral min/max ≤(+/-) .4]
3.3. Check Laser Alignment
3.4. Current Leakage Test
3.5. Check all cables for wear and proper connections
3.6. Check belts for proper tension.
3.7. Tighten all hardware and make sure all brackets are
installed.
3.8 Check Xdrift for long term performance
3.9. Set PMT Gains
3.10. Source Count Rate Check.
3.11. Perform a Daily Calibration (Precision and
Accuracy ‘OK’)
4. XMAKEPRD
5. Service Report

REPAIR PROCEDURE 388S631 REV Q
NORLAND PAGE 10
8TEST PROCEDURE QUICK REFERENCE GUIDE
This is a quick reference guide for performing the tests. Refer to the appropriate sections for specific details.
SOURCE/ DETECTOR ALIGNMENT
CAUTION: EXERCISE CARE WHENEVER WORKING AROUND X-RAY SOURCES. IT IS
RECOMMENDED THAT YOU WEAR A RADIATION DOSE BADGE TO MONITOR ANY RADIATION
EXPOSURE. DO NOT PERMIT THE BEAM TO IMPINGE ON ANY PART OF YOUR BODY AT ANY TIME,
ESPECIALLY YOUR HANDS, ARMS AND HEAD.
!2-Channel Scanners:
1. Type, SERVICE, then IS to initialize scanner.
2. Type IDLE to bring source to idle power (70 kV).
3. Position scanner arm to middle of table.
4. Type PEAK to run the peak program, press enter twice the graph is complete.
5. MAKE SURE THE SHUTTER IS CLOSED, THEN PUT THE ALIGNMENT COLLET IN.
6. Type CG to run count graph. Enter min/max. 0,180000. Type Y then press enter for scanner serial number
over 600.
7. Align source, detectors, and filter assembly for maximum counts (typically 90,000-180,000)
8. MAKE SURE THE SHUTTER IS CLOSED, THEN REMOVE THE COLLET.
!4-Channel Scanners:
1. MAKE SURE THE SHUTTER IS CLOSED, THEN PUT THE ALIGNMENT COLLET IN.
2. Select the ALIGN command from the XSST menu.
3. Align source, detectors, and filter assembly for maximum counts (typically 90,000-180,000).
4. MAKE SURE THE SHUTTER IS CLOSED, THEN REMOVE THE COLLET.
PMT GAIN ADJUSTMENT
CAUTION: CARE MUST BE EXERCISED WHILE PERFORMING THIS PROCEDURE TO AVOID
UNNECESSARY X-RAY EXPOSURE. STAY CLEAR OF THE BEAM PATH.
!For Scanners With Autoset Hardware:
1. From the XSST service menu select GainPeak.This will ramp the source to full power and move the source
to the correct peak location. Verify there is nothing in the beam path.
2. A peak graph will be drawn. The high-energy (1/FL) peak channel should be 2250 ±50 and the low energy
(1/IL) peak channel should be 1150 ±50.
3. If they are correct press Qto quit. Select PeakPick from the XSST menu. Press Cto characterize the system.
After peak has completed then press P to print. Attach the printout to the Service Report.
4. If they are not correct, select PAutoSet -R from the XSST menu. This will automatically adjust the gains.
When it is finished select PeakPick from the XSST menu. Press Cto characterize the system. After peak has
completed then press Pto print. Attach the printout to the Service Report.
!4-Channel Scanners Without Autoset Hardware:
CAUTION: EXERCISE CAUTION WHEN WORKING WITH THE COVER REMOVED. TO PREVENT
ELECTRICAL SHOCK USE CAUTION TO AVOID CONTACT WITH EXPOSED COMPONENTS.

REPAIR PROCEDURE 388S631 REV Q
NORLAND PAGE 11
Scanners with S/N 3600-5000 and 6600-8000:
1. Select GainPeak from the SST menu.
2. Adjust R23 on the Bias Board until the difference between the peaks is approximately 1100.
3. Adjust R1 on the High Voltage Board until 1/FH peak is 2250 ±50 and the 1/IH peak is 1150 ±50.
4. Repeat the GainPeak after each adjustment of R23 or R1.
5. When it is finished select PeakPick from the XSST menu. Press Cto characterize the system. After peak has
completed then press Pto print. Attach the printout to the Service Report.
Scanners with S/N 1000-2000:
1. Select GainPeak from the XSST menu.
2. Adjust R3 (right) on the PMT HV/Laser PS board until the difference between the peaks is approximately
1100.
3. Adjust R1 (left) on the PMT HV/Laser PS board until 1/FH peak is 2250 ±50 and the 1/IH peak is 1150 ±50.
4. Repeat the GainPeak after each adjustment of R1 or R3.
5. When it is finished select PeakPick from the XSST menu. Press Cto characterize the system. After peak has
completed then press Pto print. Attach the printout to the Service Report.
!PMT Gain Adjustment For 2-Channel Scanners:
CAUTION: EXERCISE CAUTION WHEN WORKING WITH THE COVER REMOVED. TO PREVENT
ELECTRICAL SHOCK USE CAUTION TO AVOID CONTACT WITH EXPOSED COMPONENTS.
1. Enter the following commands, SERVICE, IS
2. Enter 12 to select Gains from the 1.7.0 Service menu.
3. Position the arm to a convenient location
4. Set the oscilloscope to 1 volt/div., .2 us/div, and AC input coupling
5. Measurement will be taken on the 398A001 main board at TP5 & TP6 and ground at TP1; and at R19 and
R37 on the 388A004 main board.
6. Adjust R23 on the PMT Bias board to obtain equal amplitudes, and adjust R1 on the PMT HV Bd to obtain
amplitude of 2 volts for 398A001 main board; or 4 volts on the 388A004 main board.
SOURCE COUNT RATE CHECK
CAUTION: CARE MUST BE EXERCISED WHILE PERFORMING THIS PROCEDURE TO AVOID
UNNECESSARY X-RAY EXPOSURE. STAY CLEAR OF THE BEAM PATH.
!2-Channel:
1. Place the tabletop on the scanner, and put the calibration standard in place.
2. Position the laser over point A on the calibration standard
3. At the DOS prompt enter SERVICE, then FULL to bring the source to full power, PEAK to run the peak
program, press enter twice when the graph is complete, and CR to start the count graph program.
4. When prompted enter 5for the interval and 7for the filter number.
5. Let the program run for approx. 6 lines, then press enter to stop the program and press the “Print Screen” key
to obtain the printout.
6. The limits for low energy (second column) are 550000 – 750000.
!4-Channel Scanners:
1. Select CRcheck from the XSST menu.
2. With the tabletop in place, position the laser over point A on the calibration standard. Press MARK.
3. Verify the “Init 1” is 550000 – 750000.

REPAIR PROCEDURE 388S631 REV Q
NORLAND PAGE 12
STABILITY TEST
CAUTION: CARE MUST BE EXERCISED WHILE PERFORMING THIS PROCEDURE TO AVOID
UNNECESSARY X-RAY EXPOSURE. STAY CLEAR OF THE BEAM PATH.
!2-Channel Scanners:
1. Enter SERVICE, and then FULL to bring the source to full power.
2. Make sure the tabletop is on, place the QC Phantom in the middle of the table, turn the laser on and position it
through just the acrylic part of the QC phantom.
3. MAKE SURE THE SHUTTER IS CLOSED, THEN PUT THE STABILITY COLLET IN.
4. Type PEAK to run the peak program, press enter twice when the graph is complete.
5. Type PA to set the DAC’s
6. Type MON to start the program, follow the prompts to press ENTER to continue. Press F1 to create a new
file, and then enter the source S/N. Let test run for ½ hour.
7. Press ENTER to exit the test.
8. To obtain the printout type MON then press F1 to obtain menu the hidden menu, F1 for auto scaled limit, F4
to view last file, then F7 to print.
9. The limits are voltage should be less than .1 and current less than 1.5
10. MAKE SURE THE SHUTTER IS CLOSED AND REMOVE THE COLLET.
!4-Channel Scanners:
1. Select MON_STAB from the XSST menu.
2. Follow the on-screen prompts, and press Yto characterize the scanner and 0(zero) for cool down time.
3. MAKE SURE THE SHUTTER IS CLOSED, THEN PUT THE STABILITY COLLET IN.
4. After 30 minutes press Qto quit.
5. Verify theVoltage ≤
≤≤
≤.25 %, and Current ≤
≤≤
≤3.0%.
6. MAKE SURE THE SHUTTER IS CLOSED AND REMOVE THE COLLET.
TABLE TEST (RAIL ALIGNMENT)
CAUTION: EXERCISE CAUTION WHILE TESTING THE MECHANICAL MOVEMENT. KEEP HANDS
AND ALL OBJECTS CLEAR OF THE ARM ASSEMBLY WHILE IN MOTION TO AVOID PINCH POINTS.
CAUTION: CARE MUST BE EXERCISED WHILE PERFORMING THIS PROCEDURE TO AVOID
UNNECESSARY X-RAY EXPOSURE.
!2-Channel Scanners:
1. Type SERVICE and then press ENTER to access the service menu.
2. Type 3to begin the table test. This will set the x-ray to full power, run the peak program and find the table
limits. Follow the on-screen prompts.
3. When prompted for the following questions, press ENTER at each question to accept the default.
Rfor rail alignment, Ato acquire, type in the scanner serial number, and Cfor coarse scan.
4. Follow the on-screen prompts to remove the calibration standard and the tabletop. Press the MARK button to
mark the reference point.
5. Upon completion of the graph press F5 differential/integral, press F5 again for min/max, then press F7 to
print. When done printing press F9 to exit. The limits are .4/-. 4 for the two bottom graphs.
!4-Channel Scanners:
1. Select TLimit from the XSST menu.
2. Select TABLE –w from the XSST menu.
3. When the test is complete press ENTER twice to display plots. Press Pto print.
4. The limits are ±
±±
±.4.

REPAIR PROCEDURE 388S631 REV Q
NORLAND PAGE 13
SKIP TEST
CAUTION: EXERCISE CAUTION WHILE TESTING THE MECHANICAL MOVEMENT. KEEP HANDS
AND ALL OBJECTS CLEAR OF THE ARM ASSEMBLY WHILE IN MOTION TO AVOID PINCH POINTS.
!2-CHANNEL:
1. Enter SERVICE, and then SKIPTEST to begin the program
2. Follow the on-screen prompts, answer Yif it is a full-length table (XR36 or XR26) and Nif it is a not a full-
length scanner (Eclipse). Answer Nto “loop continuously”.
3. When prompted, mark the reference point. Put a piece of tape on the tabletop and mark where the laser hits it.
4. When the test is done, verify that the laser is back at the marked location.
!4-CHANNEL:
1. Select TLimit from the XSST menu.
2. Select SkipTest from the XSST menu.
3. Enter 1for number of times to run the test.
4. Enter Nto check each portion of test.
5. Enter Hfor high speed.
6. Mark laser location on tabletop.
7. When the test is done, verify that the laser is back at the marked location.
FILTER TEST
!2-CHANNEL:
1. Enter SERVICE, FULL, PEAK and 10 to select Filttest from the 1.7.0 Service menu.
2. Mark points ‘A’ and ‘B’ on the calibration standard.
3. Perform test and print results (press P) for filter 1, 2, and 3.
4. Verify that filter 1 moves into the beam path in 7 ms and out within 6.5 ms. Verify that filters 2 and 3
move into the beam path in 8 ms and out within 6.5 ms.
!4-CHANNEL:
1. Select FiltTest from the XSST menu.
2. Enter A for ALL.
3. Mark points ‘A’ and ‘B’ on the calibration standard.
4. On all 4 printouts, verify that the samarium has moved completely into the beam path within 8 ms. (bottom
plateau edge). Verify that the samarium has moved completely out of the beam path within 8 ms. (upper
plateau edge). Confirm that here is no plateau shift in the 8 to 20 ms timeframe. While viewing the 1-3
max/min plots, verify that there are no count rage variations that exceed 50% of the count rate range.
5. Press any key to continue.
6. Press Qto quit. Press any key to continue.
7. Attach the printouts to the Service Report.
INITIAL CALIBRATION AND FINAL FACTOR
1. At the DOS prompt, type FF_SET. Set the BMC (and optional Fat and Lean) factor to the default of 1.000.
2. The calibration file needs to be renamed. At the C:/XR26 prompt type: REN CALIB.FILL
CAL(DATE).FIL. (i.e. ren calib.fil cal1020.fil, if the done on Oct 20th.)
3. Initiate the host software and under the Setup Menu , select FIND TABLE DIMENSIONS
4. When it completes defining the table dimensions, select BEGIN QA to start the calibration. Clear tabletop of
everything except for the calibration standard.
5. IMPORTANT: POST SIGNS THAT ARE CLEARLY VISIBLE THAT INDICATE X-RAYS ARE
BEING EMITTED AND THE SCANNER MUST NOT BE DISTURBED DURING THE INITIAL
CALIBRATION.
6. When the calibration is complete, select CANCEL to cancel the QC Scan. Go to the QA menu and select
SCAN QC PHANTOM. Enter 25 for the number of repetitions. .
7. Exit to DOS. At the C:/ prompt type FF_SET, answer Yfor yes to have anew BMC Factor (lean and fat if
applicable) computed, answer Yagain to accept the propose factor.

REPAIR PROCEDURE 388S631 REV Q
NORLAND PAGE 14
8. Initiate the host software and under the QA menu select Scan QC Phantom. If time permits enter 16, otherwise
enter 3 or more. Verify the precision and accuracy for BMD (and optional fat and lean) are OK.
9REPLACING THE SOURCE CONTROL BOARD
Before replacing the source control board measure the test points listed below to determine if replacing the source control
board will fix the problem or ensure the new source control board will not be damaged.
9.1 Measure the following voltages on the source control board. The source can be at full x-ray power or zero power.
If any of the voltages are missing, and the correct voltage is at the P10 (red/black and white/green wires),
replacing the control board will fix the problem:
TEST POINT (TP) VOLTAGE RANGE DESCRIPTION
1 +24 to 40 Main Power Input
19 +9 to 11 +10 Volt Reference
26 +4.98 to 5.02 +5 Volt Reference
27 -9 to –11 -10 Volt Supply
31 -14 to –16 -15 Volt Supply
21 14.9 to 15.1 +15 Volt Supply
Pin 4 of U18 5.87 to 6.11
9.2 Before replacing the source control board check the components listed below to ensure the new control board does
not get damaged. If the following checks fail then replace the entire source.
9.2.1 Verify Q1, Q2, Q3, and Q3 are not shorted:
Note: Q1 and Q2 will only have 15 ohms of resistance from leads 1 to 3, Pin 3 of Q3 and Q4 should be at
ground potential. All other leads should have at least 5 K ohms when testing from one lead to the other.
9.2.2 Verify the accumulator bag does not have air in it.
Note: This can be inspected visually by looking at the tube running from the accumulator bag to the tank of
the source. If the tube has more than ½ inch of air there may be air in the source tank. Air in the tank will
cause problems with the voltage transformers in the source.
9.3 If the control board is replaced, the following voltages should be checked immediately. If the voltages are
incorrect, the system should be powered down and the source replaced.
TEST POINT (TP) VOLTAGE RANGE DESCRIPTION
20 +3.92 to 4.08 X-ray Voltage
25 -3.6 to –4.4 X-ray Voltage
22 -4.85 to –5.14 X-ray Current Anode
29 4.77 to 5.23 X-ray Current Anode
23 4.89 to 5.18 X-ray Current Cathode
24 4.88 to 5.19 X-ray Current Cathode
10 SOURCE REPLACEMENT PROCEDURE
CAUTION: Exercise care whenever working around x-ray sources. It is recommended that you wear a radiation
dose badge to monitor any radiation exposure. Do not permit the beam to impinge on any part of your body at any time,
especially your hands, arms and head.
IDENTIFICATION:
Lorad X-ray Source = Model number TXR26
Norland X-ray Source = Model numbers 391A051, 391A051J, or 391A168

REPAIR PROCEDURE 388S631 REV Q
NORLAND PAGE 15
REPLACEMENT PROCEDURE:
10.1 Refer to Source Wiring Diagram Section
10.2 If the original source is a Lorad and has desiccator tubes, turn the valve to the closed position.
10.3 For all models, disconnect and remove the original source from the scanner.
10.4 Place the new x-ray source onto the source mounting plate on the arm carriage. Align the source so the bottom
mounting tabs fit into the notches on the source mounting plate. Temporarily center the source on the plate.
10.5 Attach source to the mounting plate, using the following hardware, but do not tighten:
#6020371 - Screw - socket hd 1/4"-20 x 1-3/8" (Qty. 2)
#6460006 - Washer - 1/4 flat washer, SAE (Qty. 2)
10.6 Remove the source top cover.
CAUTION: DO NOT OPERATE THE NORLAND SOURCE WITHOUT THE TOP COVER INSTALLED,
BECAUSE THE FAN GUARD IS NOT IN PLACE.
10.7 If replacing a Lorad source with a Norland source configure filter assembly and source correctly:
•If it is installed, remove the lead filter plate from the bottom of the filter casting assembly.
•Push the roll pin flush to the bottom surface of the filter casting assembly.
10.8 If installing a Norland source into a scanner with S/N lower than 600 (Low Intensity) and that has not been
upgraded to High Intensity or High Speed, configure the attenuator plugs accordingly (refer to chart). Remove
the snap ring in the well of the source, and remove the samarium canister. For scanner serial numbers less than
500 install the smaller plastic plug provided. If scanner serial number is 500 to 599 install the larger plastic plug.
Reinstall the snap ring. Cut one end of R195 on the source control board (not necessary for source 391A051J, the
resistor is already cut). R195 is located between R187 and TP33.
Secure or protect the resistor from shorting to another component, and cut the resistor so it may be reattached for
future use if necessary.
SCANNER SERIAL NUMBER NORLAND SOURCE
Scanner S/N lower than 500 or that has NOT
been converted to New Beam Geometry,
High Intensity (Mark II) or High Speed.
Remove the samarium canister, install
the smaller of the two plugs
provided, and cut one end or R195.
Scanner S/N 500 to 599, or any scanner upgraded
to New Beam Geometry. (Finland and USA) Remove the samarium canister, install
the larger of the two plugs provided,
and cut one end of R195.
Scanner S/N higher than 600 or that has been
converted to High Intensity (Mark II) or
High Speed.
No change to the source is required.
10.9 Referring to SOURCE WIRING DIAGRAM section, center the filter casting assembly on the source with the
filter wiring exiting to the right side of the source. Secure the filter assembly using the following hardware:
6604206 - Screws (Qty 3)
6460006 - Washers (Qty 3)
10.10 Referring to diagrams below, connect the various connectors and wires to specified locations as shown. Secure
the middle cable assembly to the source.
CAUTION: Exercise caution when working with the cover removed. To prevent electrical shock use caution to
avoid contact with exposed components.
10.11 Attach the red connector to the source control board P11.
10.12 Attach the ground wire to the right side of the source with screw and lock washer.

REPAIR PROCEDURE 388S631 REV Q
NORLAND PAGE 16
10.13 Attach the red/black and green/white wires.
10.13.1 For sources with the terminal block on the back cover: Loosen the source back cover enough to attach the
red/black and green/white wires to the terminal block on the source back cover. The red/black should be
on the left side when standing in front of the scanner (same side as the red wire on the terminal below).
The green /white wires should on the right side (same side as the white wire).
White Wire
10.13.2 For all other scanners attach the wires directly to P10 of the source control board. The red/black wires go
to the top pin and green/white wires go to the bottom. The middle pin is not used. See diagram below.
10.14 Secure the scanner middle cable to the source back panel using two cable ties.
10.15 Place the lead filter cover over the filter assembly and secure in place with top cover.
10.16 If there is an extra source certification label taped to the top of the source, apply it to the outside of the scanner.
If there is an existing source certification label on the scanner it must be removed or covered with the new label.
For scanners with S/N 1000-2000 and higher than 8000, apply it to the right side panel, below the last label
under the power switch. For scanners with S/N 3000-8000 apply it to the back riser, under the scanner
certification label. Refer to the Regulatory Label Location section.
NOTE: BEFORE RAMPING UP THE X-RAY TO ANY CURRENT OR VOLTAGE THE X-RAY SOURCE
MUST BE ALLOWED TO REACH ROOM TEMPERATURE. FAILURE TO DO SO MAY RESULT IN
PERMANENT DAMAGE TO THE X-RAY TUBE.
CAUTION: TO PREVENT RADIATION EXPOSURE DO NOT RUN THIS OR ANY OTHER TEST THAT
REQUIRES THE X-RAY SOURCE TO OPERATE WITHOUT THE LEAD FILTER COVER IN PLACE.
Ground
Strap
Red Connector to P11
Green Connector, P10
Red and Black wires
Green Connector, P10
Green and White wires
Red Wire

REPAIR PROCEDURE 388S631 REV Q
NORLAND PAGE 17
10.17 Perform the recommended tests as outlined in the “Testing Requirements” section.
10.18 For USA, complete a FDA 2579 form. Send the 2579, printouts, XMAKEPRD, and the Service Report to
Norland within 7 days.
11 FILTER ASSEMBLY REPLACEMENT
There are three part numbers:
388A053 Mark I (Original Beam Geometry)
388A350 Mark II (New Beam Geometry)
387A044 High Speed (Dynamic Filtration)
These parts are not compatible and the replacement filter assembly must be the same part.
The 387A044 is a filter assembly with matching circuit board. The board is attached to the top of the scanner main
board. They are matched at the factory and must remain a set. If the filter assembly is replaced the board must also
be replaced.
11.1 Remove the original filter assembly, and matching board (only for 387A044). Keep the original hardware.
11.2 If the filter assembly is being replaced in a system with a Lorad source (Model number TXR26) then remove the
lower lead cover from the bottom of the original filter assembly and attach it to the new one.
CAUTION: TO PREVENT RADIATION EXPOSURE DO NOT OPERATE THE X-RAY SOURCE
WITHOUT THE FILTER ASSEMBLY AND THE LEAD FILTER COVER IN PLACE.
11.3 Center the new filter assembly on the source and secure with the original mounting hardware.
11.4 Replace the lead filter cover.
11.5 Remove the original beam limiter certification label from the outside of the scanner. Fill in the appropriate
information on the new label and apply it where the original label was removed.
11.6 Perform all the tests listed in the Testing Requirements section of this procedure.
11.7 For USA, complete a FDA 2579 form. Send the 2579, printouts, XMAKEPRD, and the Service Report to
Norland within 7 days.
12 PMT TUBE IDENTIFICATION AND REPLACEMENT
IDENTIFICATION:
NORLAND PART
NUMBERS MODEL NUMBER
(on label) PART NUMBER
(on label)
Top PMT (High Energy) 4909050 1 XM.276/1.5A-X or 300-1082 300-1128
4909051 1 XM. 010/1.5A-XX or 300-1081 300-1127Bottom PMT (Low Energy) 433D110 Only to be used in QS (4-Channel scanners)
If the low energy PMT has a model number “1 XM. 010/1.5A-X” (one X at the end) and a serial number with letters
before “JJ” then it can only be used for two channel (non-QS) scanners.
If the low energy PMT has a part number 433D110 written on it. It can only be used for QS scanners.
All other PMT’s can be used in any scanner.
Note: For scanners with S/N <300 replace both tubes to accommodate the difference in length between the original and
new PMTs.

REPAIR PROCEDURE 388S631 REV Q
NORLAND PAGE 18
REPLACEMENT PROCEDURE:
12.1 To make sure the new PMTs are reseated completely, mark the placement of the tube that is not being replaced.
12.2 Remove the hardware that secure the boards to the PMT holder.
12.3 Slide the boards and PMTs out of the holder.
12.4 CAUTION: DO NOT DISCONNECT THE UPPER CABLE CONNECTOR FROM THE BOARD IF
POSSIBLE.
12.5 NOTE: CAREFUL NOT TO DROP THE INTER BOARD SPACERS.
12.6 Replace the defective PMT. Make sure the PMTs are the same length.
12.7 Replace the original hardware.
12.8 CAUTION: IF THE UPPER CABLE HAD BEEN REMOVED FROM THE BOARD, VERIFY THAT
IT IS NOT RECONNECTED ONE PIN OFF.
12.9 Perform the recommended tests as outlined in the “Testing Requirements” section.
13 LASER DIODE REPLACEMENT
CAUTION: DO NOT STARE INTO THE LASER BEAM.
13.1 Remove the defective laser diode by removing the two set screws on the bottom of the shutoff block and
disconnecting the connector.
13.2 Install the new laser diode module into the shutoff block with the dimple on the front ring facing either of the
slots in the block.
13.3 Secure laser diode with the two set screws. DO NOT OVER TIGHTEN OR IT WILL SHORT THE
LASER DIODE.
13.4 Reattach the connector.
13.5 Align the laser, perform a daily calibration, and complete a Service Report.
14 MAIN BOARD IDENTIFICATION
2-Channel and a 388A004 Main Board – Replace with a 388A004 main board. If a 388A004 board is not available
it can be replaced with a 398A001 QS main board if a 398A003 QS charge amp board, and a 388A002 Bias board
revision H or higher are also installed. The jumpers J1 and J2 must be installed on the Charge Amp board. The
398A003 QS charge amp board and the 388A004 main board are not compatible.
Eclipse With Serial Numbers higher than 3500 and XR36 With Serial Numbers higher than 6500 – Part number
398A001 main board.
If the original main board has a HID (hardware identification device) make sure to move it to the new board or
special options will not be enabled.
Scanners with S/N 1000 to 2000 or over 8000 – Part number 433A080. (The 433A080 and the 398A001 QS main
board look the same, but are not compatible. The easiest way to identify a 433A080 main board is to verify the
firmware is 433A082 and 433A081.)
If the original main board has a HID (hardware identification device) make sure to move it to the new board or
special options will not be enabled.

REPAIR PROCEDURE 388S631 REV Q
NORLAND PAGE 19
15 MOTOR DRIVER BOARD CONFIGURATION
CAUTION: Exercise caution while testing the mechanical movement. Keep hands and all objects clear of the
arm assembly while in motion to avoid pinch points.
The 387A017 motor driver board is backward compatible with all scanners.
Use the 387A075 upgrade kit to replace a 388A006 motor driver board.
For scanners with 2 amp motors the 387A017 motor driver board must be programmed. Refer to table below to
remove the correct resistors.
Stepper
Motor Output
Current 0 Ohm Resistors
To cut and
remove
X-Axis 2A 1.33A RA101, RB101
Y-Axis 2A 1.33A RC101, RD101
Approximate location of the 0-ohm resistors on the motor driver board.
P3
RC101
P1
P2
RD101
RA101 RB101
VR2

REPAIR PROCEDURE 388S631 REV Q
NORLAND PAGE 20
16 LEVEL SCANNER
16.1 MODEL XR26:
16.1.1 Level the scanner by placing a bubble level on the source plate, and moving the arm source plate to the
center of the scanner. Adjust all four corner levelers until the rollers are off the floor or the frame is 2"
off the floor and the frame is level in the X and Y-axis. Place the level on each perimeter edge of the
frame and verify that all four positions are level. If the scanner is not level, adjust the appropriate levelers
and also re-verify that the source plate is level in the X and Y-axis.
16.1.2 Lower the center levelers until they touch the floor. Re-verify the scanner is level.
16.2 ALL OTHER MODELS:
16.2.1 Set the scanner in its selected location, and move the arm to the center of the table. Adjust both left and
right rear levelers to a height of approximately 1.5 inches below the bottom of the frame.
16.2.2 Place the bubble level in the Y axis direction on top of the arm base-plate and adjust rear levelers until the
scanner is level.
16.2.3 Next move the bubble level to the X axis direction (while still on the arm base-plate) and adjust the front
middle leveler(s) until bubble position is correct.
16.2.4 Now turn down the remaining levels, two front outside and the middle level(s) in the rear, just enough to
relieve any excessive stress points. Re-verify the scanner is level in both X and Y-axis.
17 WIRING DIAGRAMS
Limit Switch Wires for XR26, XR36, and Eclipse Scanners
Wire Colors (from left):
BLACK, GREEN, WHITE, RED
Table of contents
Other Norland Measuring Instrument manuals
Popular Measuring Instrument manuals by other brands
Endress+Hauser
Endress+Hauser Deltapilot M FMB50 Brief operating instructions
Endress+Hauser
Endress+Hauser Micropilot FMR51 Brief operating instructions

Endress+Hauser
Endress+Hauser Proline Prowirl F 200 Brief operating instructions

Pixsys
Pixsys RH96 quick start guide
Apera Instruments
Apera Instruments LabSen 753 user manual
Fluke
Fluke 3310-PR instruction sheet
