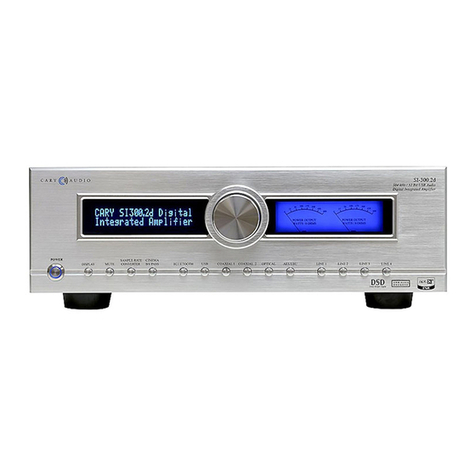
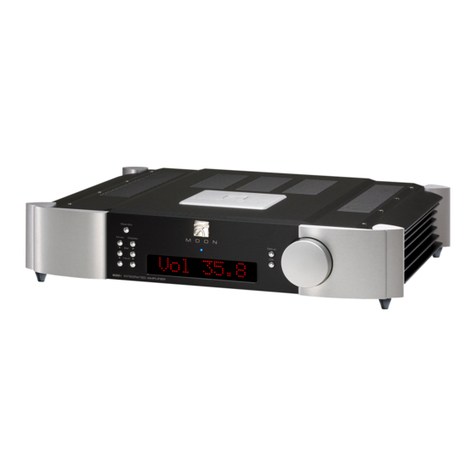
Norma REVO IPA-80 User manual

Safety manual
REVO IPA-80

Contact informations
Make sure you register your purchase.
Visit: http://www.normaudio.com/normaudio/
Documentation Conventions
This document contains general safety and operation instructions for your
Norma product. It is important to read this document before attempting to use
this device. Please pay particular attention to safety instructions.
The information that the manual contains is subject to change without notice.
NORMA assumes no responsibility for errors that may appear within this
document and is restricted for use by NORMA Audio.
Copyright and Acknowledgements
Copyright © 2020 Norma Audio. First edition March 2020.
Opal Electronics - Via Persico, 26 - Loc. Bettenesco
Persico Dosimo (Cremona)
Italy
All rights reserved. No part of this publication may be reproduced, stored in
a retrieval system, or transmitted, in any form or by any means, electronic,
mechanical, photocopying, recording, or otherwise, without the prior written
permission of the publisher.
Printed in Italy.
NORMA has the right to make changes to this document without notice.

I • Introduction
Thank you for purchasing a NORMA Audio product.
Please read this manual thoroughly before making
connections and plugging in the unit to the mains
power supply.
Following the instructions in this manual will enable you
to obtain optimum performance and listening enjoyment
from your new NORMA unit.
Please retain this manual for future reference.
CAUTION
RISK OF ELECTRIC SHOCK
DO NOT OPEN
WARNING:
TO PREVENT FIRE OR ELECTRIC SHOCK, DO NOT EXPOSE THIS
APPLIANCE TO RAIN OR MOISTURE.
The lightning flash with arrowhead symbol, within an
equilateral triangle, is intended to alert the user to the
presence of uninsulated "dangerous voltage" within the
products enclosure that may be of sufficient magnitude to
constitute a risk of electric shock to persons.
The exclamation point within an equilateral triangle is
intended to alert the user to the presence of important
operating and maintenance (servicing) instructions in the
literature accompanying the appliance.
CAUTION:
TO REDUCE THE RISK OF ELECTRIC SHOCK, DO NOT REMOVE
COVER (OR BACK). NO USER-SERVICEABLE PARTS INSIDE.
REFER SERVICING TO QUALIFIED SERVICE PERSONNEL.
II • Unpacking
Follow these steps to safely unpack the NORMA unit:
• Open the shipping box and remove the top layer of foam.
Be careful not to damage the inside of the package with
the knife.
The packaging must contain the following items:
1 NORMA;
1 Remote control unit;
1 AC power cord (in some countries);
1 User manual;
1 Warranty police and registration card.
• Grab the underside of the NORMA unit and lift it straight
out of the packing box;
• Place the NORMA unit in a safe location and remove the
protective plastic wrapping.
Note:
If any accessories are missing, or if the unit is damaged or
fails to operate, notify your dealer immediately. If the unit
was shipped to you directly, notify your shipper immediately.
NORMA recommends that you retain the original carton
and packing materials in case you need to move or ship
the unit in the future. Neither NORMA or the shipper can
be held responsible for damages incurred during transit if
the original factory packing is not used. All factory returns
require that a previous return authorization number be
issued by NORMA prior to shipment.
Keep this manual handy for future reference.
Register your NORMA unit online at www.normaudio.com
within 15 days of purchase. Retain the original, dated
sales receipt as proof of warranty coverage.
Caution:
Keep the carton box, the foam protection and the PET
sheet out of the reach of children, choking hazard.
REVO IPA-80 / Safety manual I / II • Introduction / Unpacking I

III • Before use
IMPORTANT SAFETY INSTRUCTIONS
Read this section carefully to ensure safe operation
III.I General
III.I.I • Read these instructions
All the safety and operating instructions should be read
before the product is operated.
III.I.II • Keep these instructions
The safety and operating instructions should be retained
for future reference.
III.I.III • Heed all warnings
All warnings on the product and in the operating
instructions should be adhered to.
III.I.IV • Follow all instructions
All operating and use instructions should be followed.
III.I.V • Preventing hearing loss
Caution, excessive sound pressure from earphones and
headphones can cause hearing loss.
III.I.VI • The labels containing information about safety
must be always visible and in good conditions
III.II Positioning
III.II.I • Environment and space requirements
Operating environment temperature and humidity: +5 ºC
to +35 ºC (+41 ºF to +95 ºF); less than 80% RH (cooling
vents not blocked). Do not install this unit in a poorly
ventilated area, or in locations exposed to excessive
humidity or direct sunlight (or strong articial light).
Due to stray magnetic elds, turntables,
ampliers and CD players should not be
located nearby due to possible interference.
Do not use this product in an explosive
atmosphere.
Keep electrical device out of the reach of
children. Injuries and shock hazard.
Avoid locations subject to vibration and
excessive dust. The dust could accumulate
and cause overheating.
III.II.II • Stands
The important weight of our products require
that they are placed only on an adequate
mechanical structure. We are not responsible for injuries
or damages due to a wrong positioning. Do not put
NORMA devices on high places, to avoid injury from tip-
over or falling. This product cannot be mounted to a wall
or ceiling.
III.II.III • Object and Liquid Entry
Do not use this apparatus near water
This product shall not be exposed to dripping
and splashing, for example near a bath tub, wash bowl,
kitchen sink, laundry tub, in a wet basement, near a
swimming pool and the like. Do not place an object
containing liquid, such as a ower vase, on the appliance
even if it is switched o.
Never spill liquid of any kind on the product.
Internal condense can be formed if the amplier is carried
from an extremely cold environment to an extremely hot
one. Please wait at least for an hour before operating it
again. Never push objects of any kind into the apparatus
through openings as they may touch dangerous voltage
points or short-out parts that could result in a re or
electric shock.
Never use this product with wet hands, shock and injury
hazard.
III.II.IV • Flame
Do not place a aming object, such as a candle
or lantern, or near the product. Do not use
free ames or amable substances near this appliance.
III.II.V • Ventilation
Slots and openings in the cabinet are provided
for ventilation and to ensure reliable operation
of the product and to protect it from overheating. Do not
block any ventilation openings. Install in accordance with
the manufacturers instructions. Ventilation should not
be impeded by covering the ventilation openings with
items such as newspapers, table cloths, curtains and so
on. The openings should never be blocked by placing the
product on a bed, sofa, rug, or other similar surface. This
product should not be placed in a built-in installation
such as a bookcase or rack unless proper ventilation is
provided or the manufacturers instructions have been
adhered to. Ensure that there is adequate ventilation.
Leave 20 cm (8”) of free space at the top and sides and
10 cm (4”) at the rear. The rear edge of the shelf or board
above the apparatus shall be set 10 cm (4”) away from
the rear panel or wall, creating a ue-like gap for warm
air to escape.
III.II.VI • Heat
Do not install near any heat sources such
as radiators, heat registers stoves, or other
apparatus (including ampliers) that produce heat.
REVO IPA-80 / Safety manual
II III • Before use

III.II.VII • Batteries
The remote control batteries cannot be
exposed to excessive heat such as sunshine,
any improper use may result in re or personal injuries.
III.III Power
III.III.I • AC fuse
The AC fuse inside the unit is not user-serviceable. If you
cannot turn on the unit, contact your NORMA dealer.
III.III.II • Power sources
This product should be operated only from the type of
power source indicated on the product. If you are not
sure of the type of power supply to your home, consult
your product dealer or local power company.
AC outlet voltages vary from country to country. Make
sure that the voltage in your area meets the voltage
requirements printed on the unit’s rear panel (e.g. AC
230 V, 50 Hz or AC 120 V, 60 Hz). The power cord plug is
used to disconnect this unit from the AC power source.
Make sure that the plug is readily operable (easily
accessible) at all times.
The unit is of class 1 construction and must be connected
to a mains socket outlet with a protective earthing
connection.
III.III.III • Mains cord
The mains cord is intended to be the safely disconnected
to the device for this apparatus and shall remain readily
operable at all times.
Be sure to insert each power cord securely. To prevent
hum and noise, do not bundle the interconnect leads
with the power cord or speaker leads.
To completely disconnect this product from the mains,
disconnect the plug from the wall socket outlet. The
mains plug is used to completely interrupt the power
supply to the unit and must be within easy access by the
user.
III.III.IV • Power plug / Wall outlet
• If the AC plug of this unit does not match the AC
outlet you want to use, the plug must be removed and
appropriate one tted.
• Replacement and mounting of an AC plug on the power
supply cord of this unit should be performed only by
qualied service personnel.
Contact your NORMA dealer for more information.
• If connected to an AC outlet, the cut-o plug can cause
severe electrical shock. Make sure it is properly disposed
of after removal.
To avoid re hazard or other problems, the equipment
should be disconnected by removing the mains plug
from the wall socket when left unused for a long period
of time (for example, when on vacation).
• This product must be terminated with a three-
conductor AC mains power cord that includes an earth
ground connection. To prevent shock hazard, all three
connections must ALWAYS be used.
III.III.IV.I • UK plug-tting instructions (UK only)
This appliance is supplied with a moulded three pin
mains plug for your safety and convenience. A 13 amp
fuse is tted in this plug. Should the fuse need to be
replaced, please ensure that the replacement fuse has a
rating of 13 amps and that it is approved by ASTA or BSI
to BS1362. Check for the ASTA mark or the BSI mark
on the body of the fuse.
If the plug contains a removable fuse cover, you must
ensure that it is retted when the fuse is replaced. If
you lose the fuse cover the plug must not be used until
a replacement cover is obtained. A replacement fuse
cover can be obtained from your local dealer. If the tted
moulded plug is unsuitable for your socket outlet, in any
case cut the cord for repalce the plug. There is a danger
of severe electrical shock if the cut o plug is inserted
into any socket. Please contact your local dealer for the
appropriate power cord with appropriate plug.
How to replace the fuse
Open the fuse compartment with a
screwdriver and replace the fuse.
III.III.V • Mains switch
When the switch is in the OFF position, the equipment is
not completely switched o from mains.
The STANDBY mode on this unit will not completely
shut o all power from the AC outlet. Since the power
cord serves as the main disconnect device for the unit,
you will need to unplug it from the AC outlet to shut
down all power. Therefore, make sure the unit has been
installed so that the power cord can be easily unplugged
from the AC outlet in case of an accident.
III.III.VI • Power supply
If an external power supply is required, the equipment
shall be installed near the power supply so that the
power supply is easily accessible.
III.III.VII • Power cord protection
Protect the power cord from being walked on or pinched
particularly at plugs, convenience receptacles, and the
point where they exit from the apparatus. Do not handle
the mains cord with wet hands.
III.III.VIII • Overload protection and prevention
Do not overload wall outlets, extension cords, or integra
convenience receptacles as this can result in a risk of re
or electric shock.
Be sure that the used wall outlet and the circuitry above
it can provide the correct amount of current without
signicant voltage drop. It can result in a risk of re or
electric shock.
REVO IPA-80 / Safety manual III • Before use III

III.III.IX • Lightning protection
Always unplug this apparatus during lightning storms.
For additional security, remove all connections from the
unit when unused for long periods of time.
III.IV Servicing
III.IV.I • Do not try to repair this product
Do not attempt to service this product yourself as opening
or removing covers may expose you to dangerous voltage
or other hazards. Refer all servicing to qualified service
personnel.
For technical assistance, please contact a qualified
technician or a NORMA dealer.
III.IV.II • Damage requiring service
• Refer all servicing to qualified service personnel.
• Servicing is required when the apparatus has been
damaged in any way, such as power-supply cord or plug
is damaged, liquid has been spilled or objects have fallen
into the apparatus, the apparatus has been exposed to
rain or moisture, does not operate normally, or has been
dropped.
III.IV.III • Service warning
Unplug the apparatus from the wall outlet and refer
servicing to qualified service personnel under the
following conditions:
• When the power-supply cord or plug is damaged;
• If liquid has been spilled, or objects have fallen into the
apparatus;
• If the apparatus has been exposed to rain or water;
• If the apparatus does not operate normally by following
the operating instructions. Adjust only those controls that
are covered by the operating instructions as an improper
adjustment of other controls may result in damage and
will often require extensive work by a qualified technician
to restore the apparatus to its normal operation;
• If the apparatus has been dropped or damaged in any
way;
•When the apparatus exhibits a distinct change in
performance this indicates a need for service.
III.IV.IV • Replacement parts and accessories
When replacement parts are required, be sure the
service technician has used replacement parts specified
by the manufacturer or have the same characteristics as
the original part. Unauthorized substitutions may result
in fire, electric shock, or other hazards.
Use only accessories and optional boards specified by
the manufacturer. Clone or non-original accessories may
result in fire, electric shock or other hazards.
III.IV.V • Safety check
Upon completion of any service or repairs to this product,
ask the service technician to perform safety checks
to determine that the product is in proper operating
condition.
III.IV.VI • Never disassemble or modify the unit
Do not use this product with any covers removed, shock
hazard. Do not bypass any fuse, it may cause damages
and fire.
III.V Care & maintenance
III.V.I • Cleaning
Unplug this product from the wall outlet before
cleaning.
• Do not use liquid cleaners or aerosol cleaners;
• Use a damp cloth for cleaning;
• Do not let insecticides, benzene, and thinner come
in contact with the unit, absolutely do not use these
substances to clean the unit.
REVO IPA-80 / Safety manual
IV III • Before use

IV • Operating
IV.I Connections
Warning:
When making connections to this or any other
component, make sure all components are o. Turn o
all systems power before connecting the NORMA unit to
any other component. For additional security, remove
the power cord before making the connections.
Make sure all cable terminations are of the highest
quality, free from frayed ends, short circuits, or cold
solder joints.
• Before making any connections, make sure all power
is turned o and only use suitable interconnects. For
additional security, remove the power cord before
making the connections;
• Before attempting any system interconnection, please
familiarize yourself with the front and rear panel controls
of the NORMA unit;
• Do not connect the NORMA unit speakers output
terminals to any device other than a loudspeaker. Do
not short-circuit the amplier’s output terminals. Never
connect the output terminals of one amplier to the
output terminals of another amplier.
IV.II Warming up
This unit’s top, bottom and lateral heatsinks may get hot
after prolonged use. This is normal but avoid touching
them.
IV.III Running in time
Electronic audio components have a running in time
of around a 200 - 300 hours. This will allow the new
components to settle down and the sonic properties will
improve over this time.
IV.IV Long time do not use
If you do not use this unit for a long time, it may not work
properly the next time you turn it on, so be sure to use it
occasionally.
If you intend not to use the remote controller for a long
time, remove the batteries to prevent damage from
leakage or corrosion. Remove expired batteries as soon
as possible to prevent damage from leakage or corrosion.
Do not leave rubber or plastic items on this unit for a long
time, because they may leave marks on the case.
IV.V Application elds
This product is for general household purposes. Any
failure due to use for other than household purposes
(such as long-term use for business purposes in a
restaurant or use in a car or ship) and which requires
repair will be charged for even during the warranty
period.
REVO IPA-80 / Safety manual IV • Operating V

V • Recycling & waste
V.I Notes about recycling
This products packaging materials are
recyclable and can be reused. Please dispose
of any materials in accordance with the local
recycling regulations. When discarding the unit, comply
with local rules or regulations.
Batteries should never be thrown away or incinerated
but disposed of in accordance with the local regulations
concerning battery disposal. This product and the
supplied accessories, excluding the batteries, constitute
the applicable product according to the WEEE directive.
Products and batteries with the symbol (crossed-out
wheeled bin) cannot be disposed as household waste.
Old electrical and electronic equipment and batteries
should be recycled at a facility capable of handling these
items and their waste byproducts. Contact your local
authority for details in locating a recycle facility nearest
to you.
V.II Information on disposal for users
(private households)
V.II.I • In the European Union
Attention:
If you want to dispose of this equipment, please do
not use the ordinary dust bin. Used electrical and
electronic equipment must be treated separately and
in accordance with legislation that requires proper
treatment, recovery and recycling of used electrical and
electronic equipment.
Following the implementation by member states, private
households within the EU states may return their used
electrical and electronic equipment to designated
collection facilities free of charge. In some countries your
local retailer may also take back your old product free of
charge if your purchase a similar new one.
If your used electrical or elctronic equipment has batteries
or accumulator, please dispose of these separately
before and according to local requirements.
By disposing of this product correctly you will help ensure
that the waste undergoes the necessary treatment,
recovery and recycling and thus prevent potential
negative effects on the environment and human health
which could otherwise arise due to inappropriate waste
handling.
V.II.II • In other countries outside th EU
If you wish to discard this product, please contact your
local authorities and ask for the correct method of
disposal.
For Switzerland:
Used electrical or electronic equipment can be returned
free of charge to the dealer, even if you don’t purchase a
new product. Further collection facilities are listed on the
home page of www.swisco.ch or www.sens.ch .
V.III Information on disposal
for business user
V.III.I • In the European Union
If this product is used for business purposes and you
want to discard it:
Please contact your NORMA dealer who will inform you
about the take-back and recycling. Small products (and
small amounts) might be taken back by your local
collection facilities.
For Spain:
Please contact the established collection system or your
local authority for take-back of your used products.
V.III.II • In other Countries outside the EU
If you wish to discard of this product, please contact
your local authorities and ask for the current method of
disposal.
Attention:
Yourproduct is marked withthis symbol.It means
that used electrical and electronic products
should not be mixed with general household
waste. There is a collection system for these products.
REVO IPA-80 / Safety manual
VI V • Recycling and waste

User manual
REVO IPA-80

CONGRATULATIONS
First of all, we would like to thank you for the trust you have placed in NORMA. The product
you purchased is the result of a long research and development process in which we have put
our technical experience, and our passion for music. This products will oer you the best that
technology has expressed for high quality sound reproduction. In front of the choice of what
to oer as the possibility of customizing the product functions, there are two ways: the rst is
a simply and immediate user menu, but inevitably with limited possibilities. The second one
is wider and able to adapt its functioning (and the sound performance) to the user’s desire.
Our decision was to oer you the possibility of customization as much as possible the functions
that inuence the nal result. We are sure that you can appreciate this way. In virtue of this,
the menus are wide. You will nd interesting to read and to study how to use it in detail, in
order to better adapt it to your desire. We hope that this manual is clear and that it will answer
to each your questions; however we will be pleased to answer to any questions or doubt
that you will have. We are condent that you will nd great satisfaction from the use of our
products, which, if treated with care, will give you lasting reliability. Before use, it is essential
to read and learn the entire contents of this document.

REVO IPA-80 / User manual 1 • Controls and connections 1
1.1 Commands and front indicator list
Indicators of input selection
A • IN 1 indicator
If the IN 1 input is selected [also by remote control] the
indicator is on.
B • IN 2 indicator
If the IN 2 input is selected [also by remote control] the
indicator is on.
C • IN 3 indicator
If the IN 3 input is selected [also by remote control] the
indicator is on.
D • IN 4 indicator [PHONO]
If the IN 4 input is selected [also by remote control] the
indicator is on.
Input IN 4 can be used as phono input through optional
board.
Select this input to use the USB input board.
E • IN 5 indicator
If the IN 5 input is selected [also by remote control] the
indicator is on.
Only via IR the IN 5 can be used as REC-OUT, in this way
the selected input, with the exception of the direct input
DIR, can be send as an output to a recorder.
F • DIRECT indicator [AV IN]
If the input DIR is selected [also by remote control] the
indicator is on.
This input is congured as a direct input to the nal
section. In this case the listening volume is not adjustable
by the volume control, but depends only on the level of
the input signal.
G • POWER indicator
If the unit is turned on, [even by remote control] the
indicator is illuminated at high intensity.
In STANDBY the indicator is illuminated at low intensity.
In case of intervention of the protection circuits the
indicator ashes at low intensity.
When the MUTE function is active the indicator ashes at
high intensity.
H • SEL Multifunctional control
Selection command used to power on the amplier and
for input selection.
I • Infrared receiver for remote control [IR]
Optical receiving window for the infrared sensor of the
remote control.
L • Listening VOLUME control
Control speaker volume. Is also actuated by infrared
remote control.
1 • Controls and connections
IL H GBDF
E
C
A
Fig. 1 Front panel

REVO IPA-80 / User manual
21 • Controls and connections
1.2 Controls and rear connections
A • Mains Switch, Power ON / OFF
B • Power connector
AC power inlet. Housing for mains cable connection
according to IEC / CEE 22 (VDE C13 connector). Check that
the mains voltage corresponds to that indicated on the
label on the rear panel.
C • Fuse
AC mains fuse. Verify that the voltage, the type and value
coincides with that indicated on the rear panel.
Attention:
For any reason the user must replace the fuse, it is
a operation reserved for qualied personnel in the
service centers.
D • Heatsink
Device used to dissipate the heat generated by the
amplier.
During normal operation of the amplier, and for a long
time after it is turned o, the heatsink can be very hot
and therefore dangerous to touch. Never touch the
heatsink during operation and for at least one hour after
shutdown.
E • Speakers output [positive] right channel
Output jack for positive power.
F • Speakers output [negative] right channel
Output jack for negative power.
G • Speakers output [positive] left channel
Output jack for positive power.
To connect the speakers use only “Y” fork plugs. Do not
use banana plugs, loose or wrapped wires. Short circuit
and shock hazard.
H • Speakers output [negative] left channel
Output jack for negative power.
To connect the speakers use only “Y” fork plugs. Do not
use banana plugs, loose or wrapped wires. Short circuit
and shock hazard.
I / L • IN 1: RCA connection sockets
Input socket for signal IN 1 [phono] channel right / left.
M / N • IN 2: RCA connection sockets
Input socket for signal IN 2 channel right / left.
O / P • IN 3: RCA connection sockets
Input socket for signal IN 3 channel right / left.
Q / R • IN 4 [PHONO]: RCA connection sockets
Input socket for signal IN 4 [Phono or USB] channel right /
left. The input IN 4 can be congured as an input for the
pick-up [phono] MM / MC by inserting inside the appliance
the appropriate form of signal preamplication. If the
USB board is tted you can’t use the RCA input 4. When
this input isn’t used keep it shorted with the supplied RCA
shorting plugs.
S / T • IN 5 [REC OUT]: RCA connection sockets
Input socket for signal IN 5 channel right / left. The input
IN 5 can be congured (only via remote control), as an
output OUT REC; in this way the selected source, with
the exception of the direct input DIR, can be sent as an
output to a recorder.
U / V • IN DIRECT [AV IN]: RCA connection sockets
This input is congured as a direct input to the nal
section. In this case the listening volume is not adjustable
by the volume control, but depends only on the level of
the input signal.
X • USB input B type for digital input
For use with the internal USB DAC stage if tted [optional].
Y • GND: GND Phono Screw
Ground socket for turntable in the case of use of internal
phono stage [optional].
DESIGNED BYENRICO ROSSI
HANDCRAFTED IN CREMONA, ITALY
BYOPAL ELECTRONICS
RIGHT
LEFT
GND
RIGHT
TO PREVENT ELECTRIC SHOCK
DISCONNECT SUPPLY CORD BEFORE
REPLACING FUSE
REPLACE FUSE WITH SAME TYPE AND
RATING
NO USER SERVICEABLE PARTS INSIDE
REFER SERVICING TO QUALIFIED SERVICE
PERSONNEL
DONOT EXPOSE THIS EQUIPMENT TO RAIN
OR MOISTURE
THIS EQUIPMENT MUST BE EARTHED
ACPOWER
ACINPUT
FUSE
LEFT
A
B
E F HG
Q S U
R
Y
TV
XI M O C
PNL
D
IN 1IN 2IN 3IN 4IN 5
PHONO
Fig. 2 Rear panel

REVO IPA-80 / User manual 1 • Controls and connections 3
1.3 Technical notes
1.3.1 • Technical notes about inputs
The REVO IPA-80 amplier has 6 inputs, 2 of them are
congurable by the user.
The input IN 4, as well as being a normal input line, can
be congured as a Phono stage input for either MM / MC
The MC stage load can be adjusted internally using the
supplied phono stage manual.
The input IN 5, as well as being a normal input line, can
also be switched to a xed REC OUT by the remote control
pressing for 5 seconds the “SET” button. If you turn o the
amplier the REC OUT will switch back to IN 5.
The input “AV” (DIRECT) is useful, for example to connect
an external audio-video processor, only with integrated
volume control (home theatre, TV, DVD player). When
this input is selected the volume knob can’t control the
output level, it depends only on the input signal.
NORMA is not responsible of improper use of this input.
1.3.2 • Technical notes about connections
The device must be able to make the most of their features.
Nothing in the listening chain should be overlooked,
starting with the interconnect cables, which must be of
excellent quality, very transparent and neutral. NORMA
products are of extremely high quality and will benet
greatly with the use of appropriate cables.
Nothing in the listening chain should be underestimated,
from the quality of the cables to the position of the
speakers. For example, if cables used are of a low quality,
the resulting sound will be much less than the potential
of the device.
1.4 Warm up and run in
The warm up is a fundamental factor. For the best sound
performance we recommend an initial run of about 200
to 300 hours of operation with speakers connected and
music played at a normal listening level. After a long
period of inactivity, the unit will require at least 3 to 4
hours operation to reach the optimum performance
levels.
1.5 The problem of hum
Frequently the connection of multiple devices can cause a
certain amount of hum, even when the individual devices
are entirely silent. Connecting equipment together can
create ground loops which can introduce in the audio
signal path a certain amount of network harmonics. This
problem, which also aects professional installations,
is long-standing and not easy to solve. Its inuence is
particularly evident in the case of high gain ampliers
and in the presence of signals of very low amplitude. The
situation may sometimes be particularly noticeable with
phono stages, turntables and cartridges.
We point out some possible remedies:
• Reduce the connection cables length;
• Change signal cables and power cables position;
• Increase the distance between units, or arrange them
in a dierent way;
• Avoid using devices that can induce electromagnetic
elds or interference, such as electric motors, uorescent
lights or halogen lamp low voltage transformers;
• It may be useful to increase the signal connection
shielding from one side of the termination. If a device
proves to be involved in hum problems and / or ground
loops contact the manufacturer to try to solve the
problem;
• The electrical safety is due to its connection to safety
ground. Before connecting and using the device, make
sure that the grounding system is ecient.
NORMA is not responsible for any damage caused
resulting from wrong system grounding, or failure
to follow safety procedures and regulations or a
disconnection made in any way to the ground security
equipment;
• Check that the mains power cable has a ground
connection and do not remove it, for any reason;
• LED TV’s or PLASMA TV’s emit large amounts of infrared
rays that can interfere with the IR remote control signal;
• Most of the Revo IPA-80 produced since 2020 have an
internal DC lter in order to eliminate the DC oset on
the mains, normally this feature is disabled. For DC lter
activation contact NORMA or your supplier.

REVO IPA-80 / User manual
42 • Start to use
2 • Start to use
2.1 NORMA IR remote description
The IR remote can access all operating functions,
also contains controls for volume setting, built at two
speeds, standard (fast, VOL - - / VOL + +) and ne (slower
VOL - / VOL +) . On the remote control is also present
the MUTE key that completely mute the output signal.
This condition is indicated by the ashing of the POWER
indicator to high intensity.
Some of the controls on the remote IR may be inactive,
reserved for future uses.
See Remote controls manual at page 17.
2.2 Turn ON / OFF
The REVO series ampliers are equipped with a
sophisticated power on system, integrated with the
system remote control and electronic protections. This
system consists of three phases: POWER OFF, STAND-BY,
POWER ON [OPERATE].
2.2.1 • Power OFF
In this phase, the rear control switch is in the OFF position
and the amplier is o.
2.2.2 • Power OFF to standby
Placing the rear control switch in the ON position, the
amplier is active in STAND-BY POWER indicator on the
front panel will be on with a low intensity. This condition
can be maintained indenitely, the amplication stages
are not powered, but the amplier is ready to receive the
command switch.
2.2.3 • Power ON [operate]
The power is on to all intents and purposes, this can
be determined by the prolonged action on the front
SEL button or IR remote POWER button. In both cases,
initially the indicator ashes for a period of time equal
to approximately 10 seconds. Subsequently, the light
indicator turns solid, indicating the complete operation
of the amplier and the connection to the speakers.
2.2.4 • Power ON to standby
To put the amp in STANDBY mode, press the SEL button
[or the POWER button on the remote control], the
indicator will switch to low-intensity lighting.
2.2.5 • Standby to power OFF
To POWER OFF the amplier, press the POWER button,
on either the remote control or the front panel of the
amp, and then put the rear control switch into the OFF
position. Never work directly on the rear control without
rst placing the amplier into STANDBY.
2.3 Protection circuit
Inside the amplier REVO IPA-80 there are some
sophisticated protection circuits that control the
temperature of the heatsinks, the presence of any oset
current exceeding the limit value and the abnormal
supply of output current (short circuit).
2.3.1 • Thermal protection
In case of activation of the thermal protection the
amplier will automatically shut down and the power
indicator lights will go completely o. The amplier
cannot be turned back on until the temperature has
returned to the correct value, and this will be indicated
by the POWER light in a low intensity. Only then can you
repeat the POWER ON procedure. The amplier will not
automatically restore the last used state.
2.3.2 • DC oset protection
In case of protection for the presence of a DC component
in the output signal, the amplier will turn o and the
power indicator switches to low intensity ashing. You
can turn it back on only after switching o the appliance
at the rear and leaving it o for at least 10 seconds. If the
fault persists, the amplier will run again in protection
mode. In this case disconnect all signal cables and repeat
the process of restarting the unit. Should the situation
persist, contact your service representative.The amplier
will not automatically restore its original state.
2.4 Inputs selection
Input selection takes place with a quick tap on the multi-
function control SEL switch. The inputs will be selected in
sequence IN 1, IN 2, IN 3, IN 4, IN 5, DIRECT. It is possible
to select the required input using the remote control
or via direct access with the numeric keys 1 - 5 or in
sequence with the SEL - / SEL +. For added convenience,
the REVO series ampliers have a resume function [the
state saved before shutting down], so that for each start
(from STAND-BY) the amplier is ready to use the input
selected before turning o. The stored conguration is
lost if you turn o the main power.
2.5 Selection of REC output
REVO series ampliers have the ability to connect a
recorder to the output REC OUT. It is possible to activate
and deactivate this connection only via remote control
with the prolonged action on SET (or short action on REC
button, if present) button on IR remote control. In order
to not introduce any noise, we recommend you keep the
REC OUT under OFF whenever it is not in use.
2.6 Selection of direct input (AV IN)
This input is congured as a direct input to the nal
section, for example to connect to an external Audio
Video processor. It is activated by remote control by
pressing the 6 key or by sequential selection. Selecting
this input, the listening volume is not adjustable by the
volume control, but depends only on the level of the
input signal. Pay attention to the input level, To avoid
sending too much power to the speaker.

REVO IPA-80 / User manual 3 • Maintenance 5
2.7 Listening volume control
The listening volume can be adjusted by the front
knob or the remote control, using the function keys
VOL - / VOL + (ne tuning) or VOL - - / VOL + + (quick
adjustment). To avoid damage to your speakers, before
turning on we recommend to always turning the control
fully counter clockwise to MIN. It is also advisable to set
the volume to a minimum during each input selection
and/or change of connection.
2.8 Connecting the speakers
The speakers are connected by cables to the SPEAKERS
OUTPUT sockets. Cables must be of adequate quality (at
least 4 mm ²).
In addition:
• The connection cables must have the same length for
both channels even if the distance between the speakers
and the amplier is dierent;
• The cables must not be piled up or rolled;
• Safety regulations require that the cables must not be
pushed into or wrapped around the 4mm banana plug
sockets of the amplier;
• In order to not overload the amplier, the speaker
impedance cannot be lower than 4 ohms;
• The speakers should not be connected in parallel with
each other.
Caution:
To prevent damage, each connection must be carried
out when the appliance is switched o and unplugged
from the mains.
3 • Maintenance
3.1 Cleaning
Before cleaning the unit, turn it o and unplug it from the
electricity supply and wait at least 10 minutes. Your device
has been designed with the best technical solutions
combined with an aesthetic nish of the highest quality,
but for it to remain unchanged over time, it is essential to
observe the following procedures:
• Do not dry-clean surfaces and in particular the front
panel;
• Lightly dampen a cloth with a small amount of warm
water (40 - 50 degrees);
• Make circular movements and do not press hard on the
panel;
• Dry o gently, always with cotton or a soft cloth, using a
very delicate circular motion;
• Be very careful to avoid that no water penetrates into
the unit, the cloth should be moist but not wet;
• Do not reconnect the unit until it is completely dry;
• Under no circumstances use alcohol, solvents, petrol or
any type of chemical product;
• Please note that the nish and aesthetic components
are in no way covered by the warranty.
3.2 Repairs
For any issues please refer to the safety manual. NORMA
products are the result of precision engineering with
sophisticated circuitry and extremely high-quality
components. In the unlikely event of failure, make sure
to refer to a highly qualied assistant that has genuine
original spare parts. NORMA is contactable for any
customers who have an issue which needs to be resolved.
NORMA is not responsible for any errors, omissions or
incompleteness of this manual, and is not responsible
for accidents or damage of any kind that may result
from non-compliance, even partial, of the information
provided in this manual. Despite the eort to identify all
possible situations, NORMA is not responsible for any
damage that may be caused to people or from improper
use.


Aux overview
REVO IPA-80
RISK OF ELECTRIC SHOCK
DO NOT OPEN
WARNING:
As indicated in the safety manual, we remind you that the actions
described below must be performed only by highly qualified personnel.
There are very high and dangerous electrical voltages inside the device.
It also exists at the possibility of damaging the product and the other
components connected to it in case of wrong operations. We are not
responsible for any type of injury or damage due to incorrect operation.

84 • Aux overview REVO IPA-80 / Aux overview
4 • Aux overview
DIR
FILT
J1AJ1B
DC lter setting Jumper positionFig. Aux 2 Fig. Aux 3
DIR
Fuse 2Fuse 2
Fuse 2
Fuse 1
FILT
J1AJ1B
Fuse 2
Fuse 2
Fuse 3
Fuse 2
Fuse 2
Fuse 2
Fuse 1
Fuse 1
Fuse 1
Location
Fuse 1
Fuse 2
Fuse 3
F2,5 A
T315 mA
F1,6 A
Fast
Slow
Fast
Value Type
Fuse specifications
DC lter, jumper and fuse positionFuse specications Fig. Aux 1Tab. Aux 1

4 • Aux overview 9
REVO IPA-80 / Aux overview
J1AJ1B
Jumper positionFig. Aux 3
4.1 Output - input conguration
Note
1Default, IN4 as LINE Input YES
J1A J1BDescription
Default configuration
Note
2
IN 4 as PHONO Input or USB module fitted
NO
J1A J1BDescription
Phono input configuration
Tab. Aux 2
Tab. Aux 3
Default conguration
Phono input conguration
The Jumpers J1A, J1B are located under the optional
phono board or under the USB board, if one of those
boards is tted and you have to operate under that you
have to remove it. Some spare jumpers are supplied in
the spare fuse bag, attached to the device instruction
manual.
1 • Default conguration
When J1A and J1B are tted the input IN4 is a normal LINE
input.
2 • Phono input conguration
If you want to t an optional phono board or an USB
board you have to remove both the jumpers.
Caution:
When you insert the PHONO board or the USB board,
be sure that jumpers J1A- J1B are removed, otherwise
may arise problems caused by the self-oscillation of
the board.
Note:
when the USB board is tted the Input IN4 cannot be used
as a LINE input.
Caution:
The conguration of the inputs involves the removal
of the top cover, therefore it is a potentially
dangerous operation. It must be carried out by
qualied personnel in compliance with all safety
standards. In particular, but not only, the device must
be disconnected from the mains and disconnected
from any other equipment, must be turned o for
at least 30 minutes and you must make sure that
all capacities are discharged. To be sure that the
capacitors are discharged there are 8 LEDs on the
main board, if the LEDs aren’t lit the capacitors are
completely discharged. If the conguration jumpers is
incorrect, the amplier can enter into self-oscillation,
this may cause damage to the speakers and the
amplier itself. Use extreme caution and possibly
connect the speakers after checking the correctness
of the conguration. We are not responsible for
wrong or partial congurations of these jumpers.
4.1.1 • Fuse replacing
Supplied with this device there is a small bag with some
spare screws, jumpers and fuses. If a fuse blows up there
is the possibility of replacing it but only with the same
type, voltage rating , current rating and most importantly
the action speed (slow “T” or fast “F”).
Caution:
Never bypass a fuse and never replace a blown fuse
with a dierent one. This may cause re and electric
shock. We are not responsible for any injury or
damage due to a wrong fuse replacing or any type of
tampering.
4.1.2 • DC lter
If you want to activate the DC lter you have to disconnect
the female Faston connector from the male plug DIR, then
connect it to the male plug FILT. This operation must be
carried out only with the power cable disconnected from
the mains.
Caution: shock hazard, this part of the
circuit is directly powered from the mains
and its capacitors could hold the charge for
long time after the shutdown. Disconnect this unit
from the mains and wait at least 30 minutes before
opening the top cover. The operation must be carried
out only by qualied personnel authorised service
centers. Wea re not responsible for any injury or
damage due to a wrong operation.
DIR
FILT
DC lter settingFig. Aux 2
This manual suits for next models
1
Table of contents
Other Norma Amplifier manuals

