Nouveau 353057 User manual
Heater Oil Column 1500W
SKU: 353057

PLEASE READ THE FOLLOWING INSTRUCTIONS CAREFULLY BEFORE USING THE
APPLIANCE.
Safety
1. This appliance can be used by children aged from 8 years and above and persons
with reduced physical, sensory or mental capabilities or lack of experience and
knowledge if they have been given supervision or instruction concerning use of
the appliance in a safe way and understand the hazards involved. Children must
not play with the appliance. Cleaning and user maintenance of the appliance
must not be made by children without supervision.
2. Children of less than 3 years should be kept away from the appliance unless
continuously supervised. Children between the ages of 3 and 8 may only switch
on/off the appliance provided that it has been placed or installed in its intended
normal operating position and they have been given supervision or instruction
concerning use of the appliance in a safe way and understand the hazards
involved. Children between the ages of 3 and 8 must not plug in, regulate and
clean the appliance or perform user maintenance.
3. CAUTION: Some parts of this product can become very hot and cause burns.
Particular attention must be given where children and vulnerable people are
present.
4. If the supply cord is damaged, it must be replaced by the manufacturer, its
service agent or similarly qualified persons in order to avoid a hazard.
5. WARNING: In order to avoid overheating, do not cover the heater.
6. The heater must not be located immediately below a socket-outlet.
7. Do not use this heater in the immediate surroundings of a bath, shower or
swimming pool.
8. This heater is filled with a precise quantity of special oil. Repairs that require
opening of the oil container are only to be made by the manufacturer or his
service agent who should be contacted if there is an oil leak.
9. When scrapping the heater, follow the regulations concerning the disposal of oil.
Do not dispose of the heater in household waste and recycle the heater where
local facilities exist for electrical goods and oil.
10. Do not use the appliance for anything other than its intended use. This appliance
is for domestic indoor use only.
11. Place the appliance on a flat, stable, heat-resistant surface. Operating the product
in any other position could cause a hazard.
12. There may be trace of odour during the first few minutes of initial use. This is
normal and will quickly disappear.
13. Do not attempt to repair, disassemble or modify the appliance. There are no

user-serviceable parts inside.
14. CAUTION: if using an extension lead please ensure you do not exceed the
maximum rated running wattage/load of the extension lead.
15. Do not recharge non-rechargeable batteries.
16. Do not dismantle, open or shred cells.
17. Do not expose cells to heat or fire. Avoid storage in direct sunlight.
18. Do not short-circuit a cell. Do not store cells or batteries haphazardly in a box or
drawer where they may short-circuit each other or be short-circuited by other
metal objects.
19. Do not remove a cell from its original packaging until required for use.
20. Do not subject cells to mechanical shock.
21. In the event of a cell leaking, do not allow the liquid to come in to contact with
the skin or eyes. If contact has been made, wash the affected area with copious
amounts of water and seek medical advice.
22. Observe the plus (+) and minus (–) marks on the cell and equipment and ensure
correct use.
23. Do not use any cell which is not designed for use with the equipment.
24. Do not mix cells of different manufacture, capacity, size or type within a device.
25. Cells usage by children should be supervised.
26. Seek medical advice immediately if a cell has been swallowed.
27. Always purchase the correct cell recommended by the device manufacturer for
the equipment.
28. Keep cells clean and dry.
29. Wipe the cell terminals with a clean dry cloth if they become dirty.
30. Retain the original product literature for future reference.
31. Use only the cell in the application for which it was intended.
32. When possible, remove the cell from the equipment when not in use.
WARNING: The thermostat of this heater is not equipped with a device to control the
room temperature with accuracy. It is recommended not to use this heater in small
rooms when they are occupied by persons not capable of leaving the room on their
own, unless constant supervision is provided.
CAUTION: In order to avoid a hazard due to inadvertent resetting of the thermal
cutout, this appliance must not be supplied through an external switching device,
such as a timer, or connected to a circuit that is regularly switched on and off by the
utility.
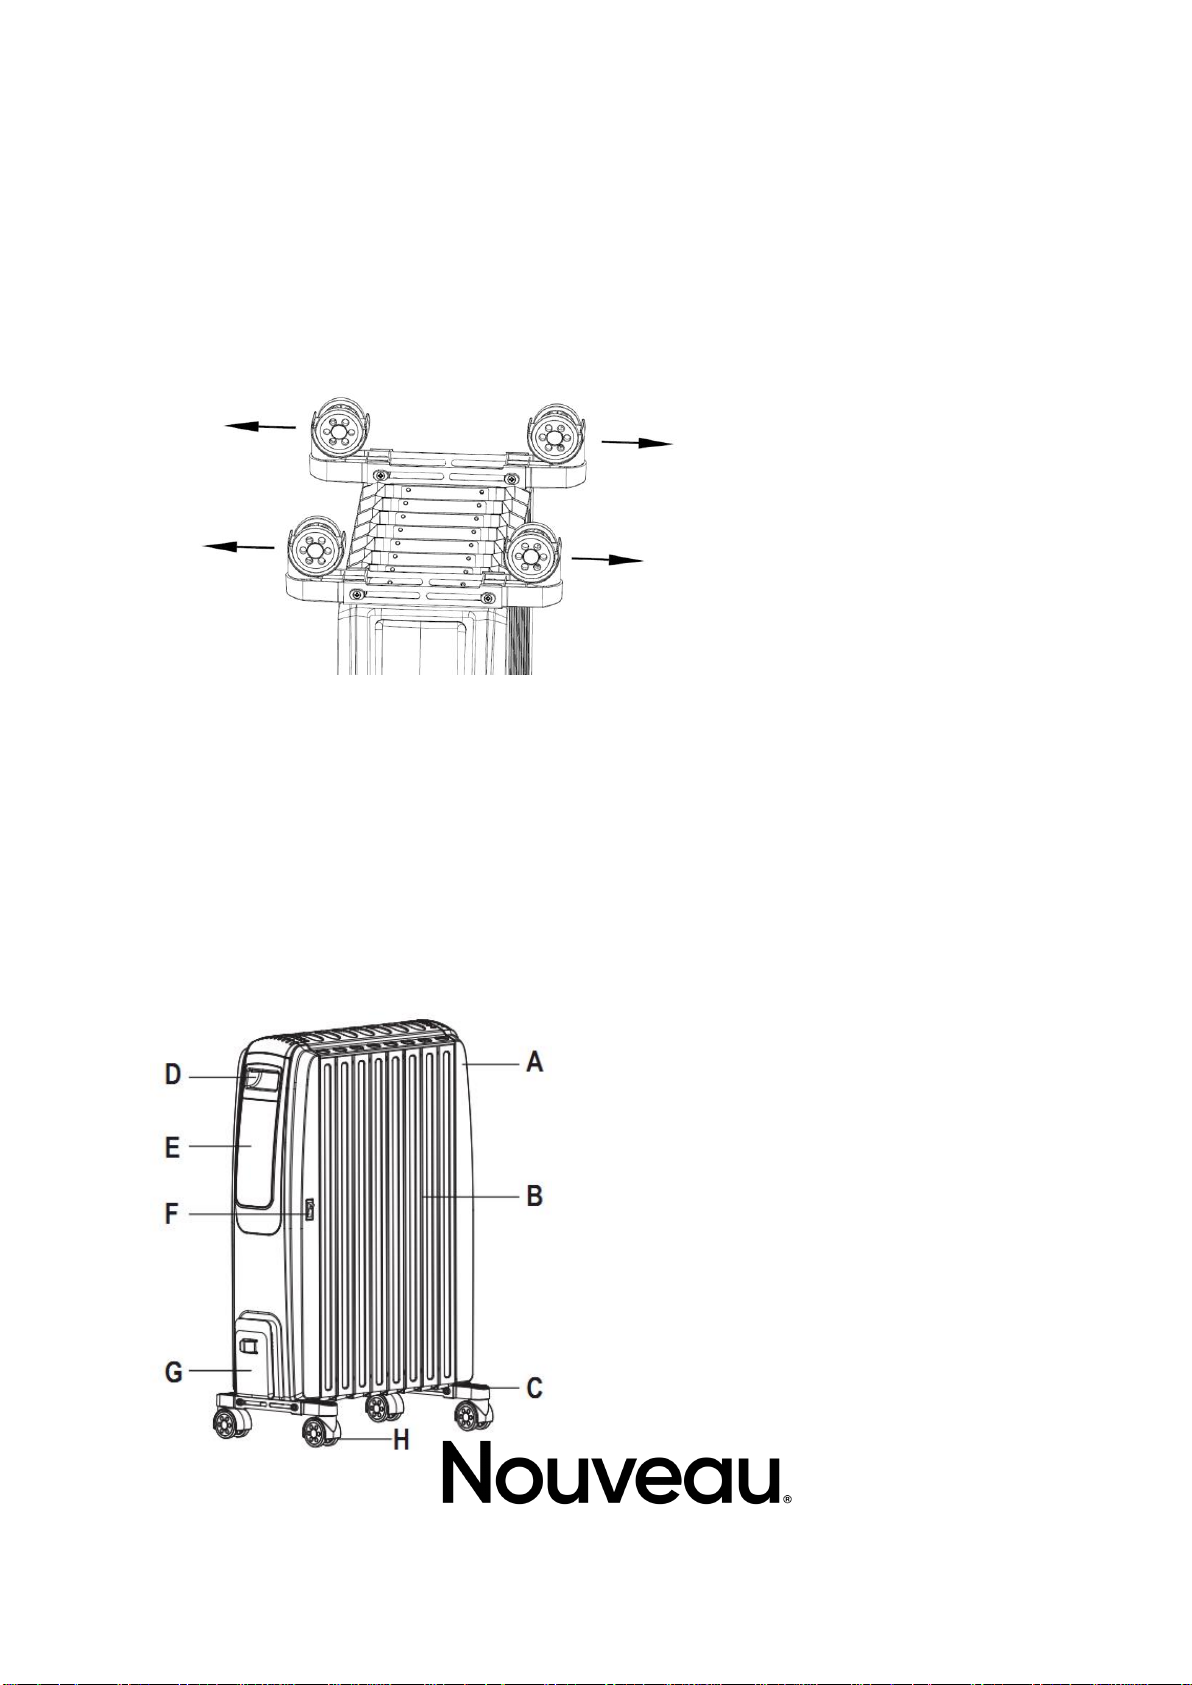
Assembly Instructions
Turn the radiator upside-down on a scratch-free and stable surface to prevent
damage to the paint finish or your floor surfacing.
-Turn the radiator upside-down
-Pull out the wheelbases to both outmost sides, (see Fig 1).
Only operate the radiator in normal upright position with wheels assemblies
attached to the bottom.
Figure 1
Fig 1
Remote controls
The remote control requires one 2025 - 3V cell (supplied).
Follow the +/- polarity indicated on the remote control.
The remote control must be pointed towards the remote sensor on the control
panel.
If the remote control doesn’t operate as expected, replace the cell.
Controls
A.Rear handle and Remote
control storage slot
B.Heater body
C.Wheel base
D.Front handle
E.Control panel
F.On/off power switch
G.Cable storage
H.Wheel

Move the appliance using the integrated handle.
The remote control can be stored in the slot integrated into the appliance at the rear
cover if not used.
Switching On
Press the on/off power switch [F] to turn the appliance on. The product is now in
standby awaiting a mode to be selected via the buttons on the appliance or the
remote control.
The appliance emits a beep sound.
The light on ( ) will turn on.
The following settings can be performed using the touch pad or the remote control.
A beep sound is emitted at every key press.
Press the stand-by button [f] to exit the stand-by mode and begin selection of the
different modes. Heater will start working under low power ( ).
a. Thermostat button
b. +: Temperature & hours increase
button
c.Power/Mode button
d.Timer button
e. -: Temperature & hours decrease
button
f.Stand-by button
Remote controls
Battery (2025 - 3V)
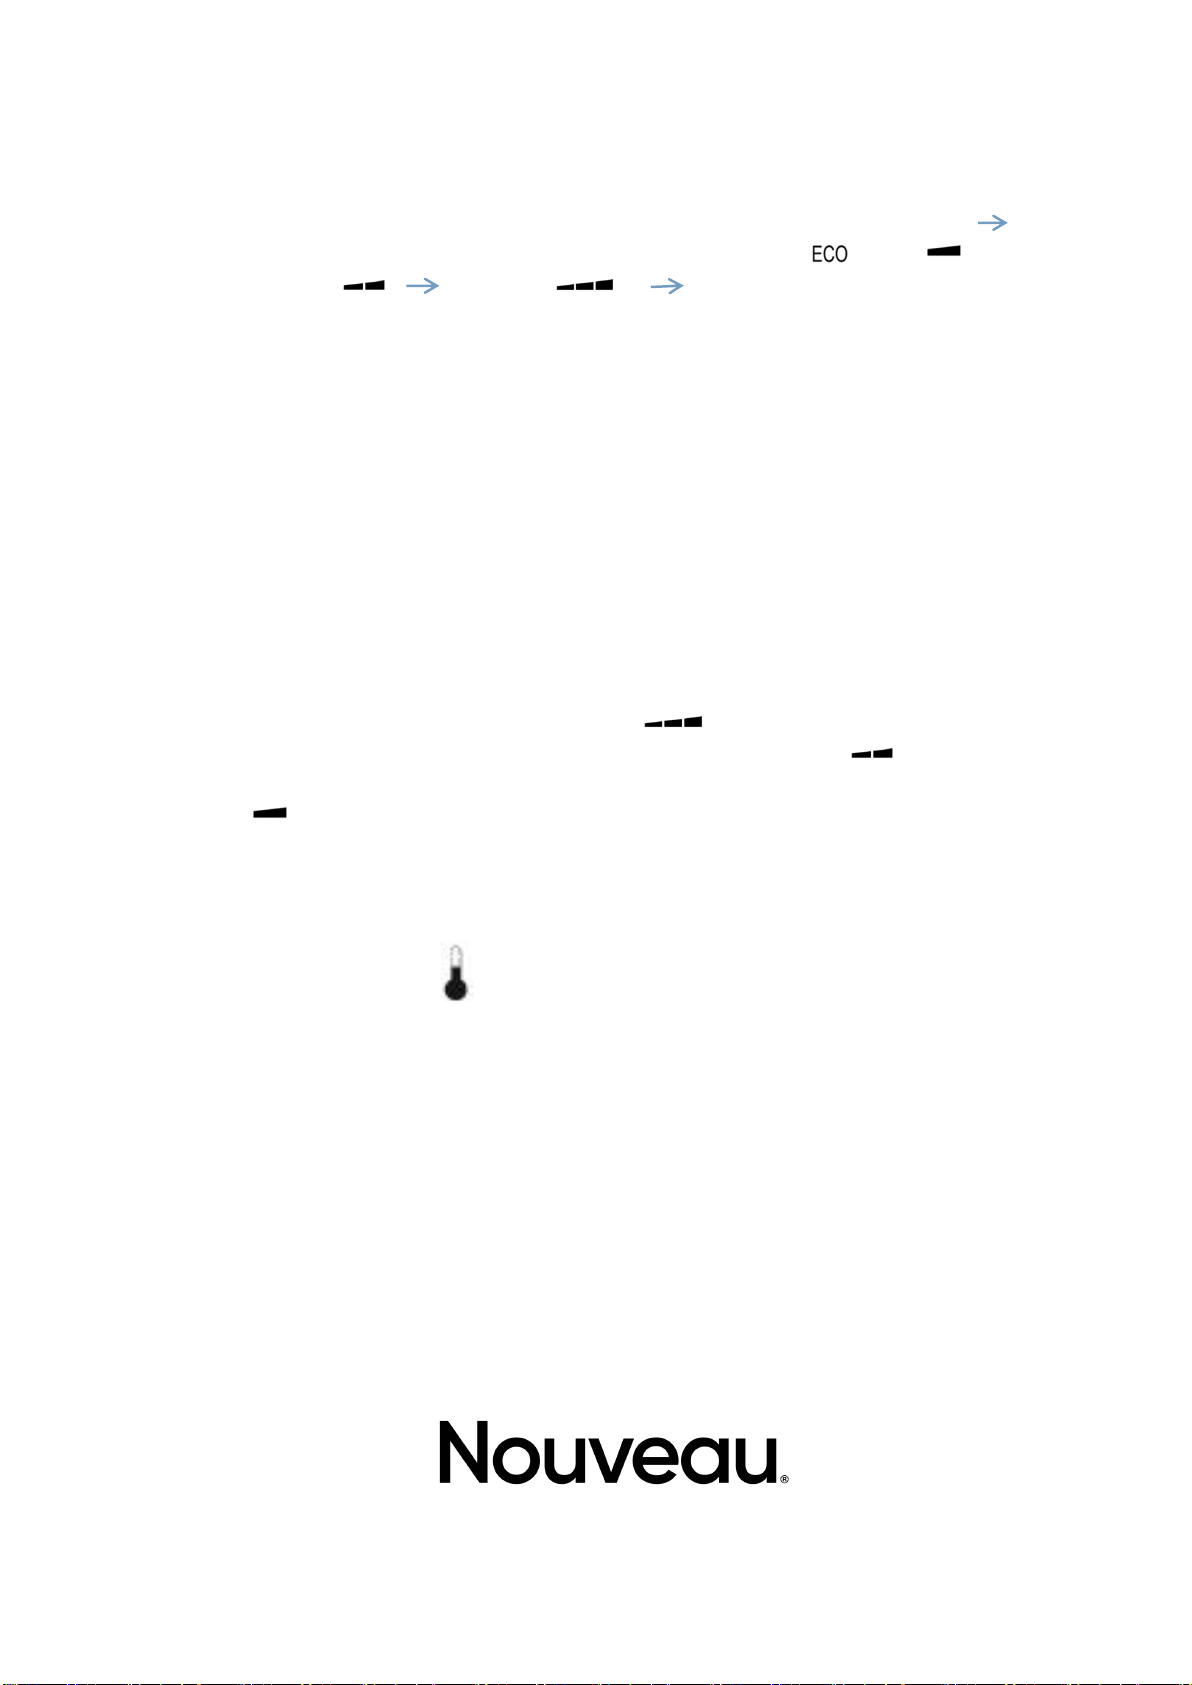
Heating Power Level and Eco Mode Setting
Heating Power
Press the Power/Mode button(c), it will cycle from DEFAULT Low Power( )
Medium Power ( ) High Power ( ) Eco mode( ).
Under Low power(600W), Medium power(900W) and High power(1500W) setting,
the heater will keep working controlled by thermal cut-out.
Note:
The higher the power is, the quicker the desired temperature will be achieved but
the power consumption will be higher.
Lower power levels are recommended when the heater is being used for an
extended period.
Eco mode
Press the Power/Mode button (c), until the “ECO” light turns on.
Under Eco mode, the heating power will adjust automatically when the room
temperature is approaching the setting temperature.
Example: The setting temperature is 25℃. When the room temperature is less than
22℃, the heater will work under High power ( ). When the room temperature
rises to 23℃, the heater will change to work under Medium power ( ). When the
room temperature rises to 24℃, the heater will change to work under Low
power( ). When the room temperature reaches to the setting temperature 25℃,
the heater will switch off automatically. And when the room temperature is lower
than setting temperature, the heater will switch on again under Eco mode.
Remark: if no thermostat setting, the default temperature is 23℃under Eco mode.
Thermostat Setting t
Only under Eco model can make the thermostat setting.
Desired temperature setting rang:10 °C--30 °C
1. Press the Power/Mode button (c), until the “ECO” light turn on.
2. Press the thermostat button (a), the temperature digit will blink.
3. Use the “+” and “-” [b] and [e] buttons to set the desired temperature.
4. The setting temperature digit will stop blinking and the current room temperature
will appear after the desired temperature is set.
5. The heater will maintain the air temperature in the room by switching on and off
automatically.

Timer: Auto Power on
This function should only be set if you require the heater to be automatically turned
on after a certain period (1 to 24 hours from the time the function is set). Only
change timer power setting under standby mode.
1. Press the on/off power switch [F] to turn the appliance on. The light on( )
will turn on. The appliance will be in Stand-by mode.
2. Press the Timer button(d), the light on( ) will turn on, and the start hour
digit (0.0) will blink.
3. Use the “+” and “-” buttons [b] and [e] to set the heater operation time
between 1 and 24 hours. 0.0-5.0 hours increase by 0.5 hour, 5.0-24 hours
increase by 1 hour. This function will activate once the hour digit stops
blinking. The countdown digits will show on the display.
4. The heater will automatically turn on when the time runs out.
5. Remark: After the timer power on setting, make the power and ECO mode
settings. And under ECO mode, make the temperature settings. So that the
heater will turn on at the desired temperature or power setting.
6. Note : When using timer modes, consideration should be given to the fact
that the heater may come on whilst unattended. Always follow the safety
instructions provided.
Timer : Auto power off
This function should only be set if you require the heater to be automatically shut off
after a certain period (1 to 24 hours from the time the function is set).
1. When heater working, press the Timer button(d), the light on( ) will turn on,
and the start hour digit (0.0) will blink.
2. Use the “+” and “-” buttons [b] and [e] to set the heater operation time
between 1 and 24 hours. 0.0-5.0 hours increase by 0.5 hour, 5.0-24 hours
increase by 1 hour. This function will activate once the hour digit stops
blinking. The countdown digits will show on the display.
3. The heater will automatically shut off when the time runs out.
Off
Press the stand-by button [f] until sleep mode is selected and the control panel
screen goes off.
Press the on/off switch [F] to turn the appliance off completely.
To disconnect the appliance, remove the plug from the socket.

PRECAUTIONS FOR USE AND MAINTENANCE
1. Always unplug the appliance and keep it away from any socket before
cleaning.
2. To clean the outer surface of the appliance, use a lightly damp cloth. Then,
dry it thoroughly with a soft, dry cloth before using again.
3. Do not use any cleaning or chemical products of any kind. Do not let water
enter the openings on the heater. Do not use wax or products that create a
shine as they can react to heat and cause discoloration.
4. When the appliance is not being used for prolonged periods, ensure that it is
fully unplugged from the socket and store in its packaging for simple storage
and later use. Clean your radiator as mentioned above and remove the
wheels bases.
Table of contents
Other Nouveau Heater manuals


Popular Heater manuals by other brands


DutchWest
DutchWest 2460CE Installation and operating manual

Minib
Minib DP CONVECTOR installation guide

Truma
Truma Ultraheat S 3004 installation instructions

Bimar
Bimar Ghibli FH215 Instruction booklet

Scheppach
Scheppach EPH1200 Translation of original instruction manual

Holmes
Holmes HCH8305 owner's guide


