NovaJack 2T9FM Series Installation guide

NovaJack On-Road/Off-Road Trailer
Assembly Manual
2002 Edition
Serial number: 2T9FMXXXXXXXXXXX

2
NovaJack On-Road/Off-Road Trailer
Assembly Manual
2002 Edition
Table of content
Parts List (Trailer - Complete Kit)………………….……………………….…..3
Parts List (Trailer - Forestry Kit)…………………..….…………………...……4
Parts List (Trailer - Haul & Dump Kit)……………...………………………..…5
Tools Needed For Trailer Assembly ……………………………………..……6
Trailer Assembly………………………………………………………………….7
Loading Mast Assembly…………….……………………………………….…10
Loading Pivot Assembly………………..……………………………………...11
Read carefully this manual before beginning the assembly
of your brand new NovaJack trailer.
Please check with the parts list that all the parts
included in your kit are there.
NovaJack
375, Courcelette
Sherbrooke, QC, Canada, J1H 3X4
Phone : (819) 562-4189
Toll Free : (800) 567-7318
Fax : (819) 562-4256
Web Site: www.novajack.com

3
Parts List
Trailer - Complete Kit
Description Qty
Axle 1
Tire 4
Tandem 2
Rear frame 1
Front frame 1
Spring loaded swivel tow bar 1
Protection grating 1
Safety chains with quick links 2
Loading mast 1
Loading mast swivel pulley 1
Polyester cable 3/8" x 25' 1
5/16" Flat hook 1
Hand winch with brake 1
Boom extension for dumpbox 1
V-chain 1
Curved log post 4
Loading pivot 1
Metal box (88" x 51 1/2") 1
Removable front & rear gate 2
Front metal box support 1
Rear metal box support 1
Trailer jack 1
Tire conical nut 16
Metal rings (for tandem) 2
Bolt 1/4-20 x 2 1/2 (axle) 2
Nut 1/4-20 (axle) 2
Bolt 1/2-20 x 2 1/2 (axle) 4
Nut 1/2-20 (axle) 4
Flat washer (axle) 8
Shock absorber springs 5" 1
Shock absorber springs 7" 1
Bolt 1/2-13 x 2 1/2 (tow bar) 1
Nut 1/2-13 (tow bar) 1
Bolt 5/8-11 x 2 (front frame) 4
Nut 5/8-11 (front frame) 4
Carriage bolt 1/2-13 x 4 (protection grating) 2
Nut 1/2-13 (protection grating) 2
Locking pin (metal box supports) 2
Bolt 3/8-16 x 2 (manual winch) 2
Nut 3/8-16 x 2 (manual winch) 2

4
Trailer - Forestry Kit
Description Qty
Axle 1
Tire 4
Tandem 2
Rear frame 1
Front frame 1
Spring loaded swivel tow bar 1
Protection grating 1
Loading mast 1
Loading mast swivel pulley 1
Polyester cable 3/8" x 25' 1
5/16" Flat hook 1
Hand winch with brake 1
V-chain 1
Curved log post 4
Loading pivot 1
Trailer jack 1
Tire conical nut 16
Metal rings (for tandem) 2
Bolt 1/4-20 x 2 1/2 (axle) 2
Nut 1/4-20 (axle) 2
Bolt 1/2-20 x 2 1/2 (axle) 4
Nut 1/2-20 (axle) 4
Flat washer (axle) 8
Shock absorber springs 5" 1
Shock absorber springs 7" 1
Bolt 1/2-13 x 2 1/2 (tow bar) 1
Nut 1/2-13 (tow bar) 1
Bolt 5/8-11 x 2 (front frame) 4
Nut 5/8-11 (front frame) 4
Carriage bolt 1/2-13 x 4 (protection grating) 2
Nut 1/2-13 (protection grating) 2
Bolt 3/8-16 x 2 (manual winch) 2
Nut 3/8-16 x 2 (manual winch) 2

5
Trailer - Haul
&
Dump Kit
Description Qty
Axle 1
Tire 4
Tandem 2
Rear frame 1
Front frame 1
Spring loaded swivel tow bar 1
Safety chains with quick links 2
Unloading boom 1
Unloading boom support 1
Unloading boom swivel pulley 1
Polyester cable 3/8" x 25' 1
5/16" Flat hook 1
Hand winch with brake 1
Metal box (88" x 51 1/2") 1
Removable front & rear gate 2
Front metal box support 1
Rear metal box support 1
Trailer jack 1
Tire conical nut 16
Metal rings (for tandem) 2
Bolt 1/4-20 x 2 1/2 (axle) 2
Nut 1/4-20 (axle) 2
Bolt 1/2-20 x 2 1/2 (axle) 4
Nut 1/2-20 (axle) 4
Flat washer (axle) 8
Shock absorber springs 5" 1
Shock absorber springs 7" 1
Bolt 1/2-13 x 2 1/2 (tow bar) 1
Nut 1/2-13 (tow bar) 1
Bolt 5/8-11 x 2 (front frame) 4
Nut 5/8-11 (front frame) 4
Carriage bolt 1/2-13 x 4 (boom support) 2
Nut 1/2-13 (boom support) 2
Locking pin (metal box supports) 2
Bolt 3/8-16 x 2 (manual winch) 2
Nut 3/8-16 x 2 (manual winch) 2
If any item is missing, contact us immediately.

6
Tools Needed For Trailer Assembly
-1/2 drive ratchet
-7/16, 9/16, 3/4, 13/16, 15/16 Sockets
-7/16, 9/16, 3/4 Wrenches
-Torque wrench
-Hammer or Crowbar (for the crate)
-Adjustable wrench 1’’ capacity (i.e. vise-grip, crescent wrench, etc.)

7
Trailer Assembly
1. Install two (2) wheels on each tandems with sixteen (16) conical nuts (conical shape
towards the wheel). Make sure that the valve stems are on the outside. Follow this
procedure:
1.1) Torque sequence
1.2) Torque by steps:
- First, tighten each bolt following the torque sequence up to 20-25 lb.-pi (27-34 Nm)
- Then, tighten each bolt following the torque sequence up to 35-40 lb.-pi (47-54 Nm)
- Finally, tighten each bolt following the torque sequence up to 50-60 lb.-pi (68-81 Nm)
ATTENTION: Check the torque after 10, 20 & 40 miles (15, 40 & 80 km), and
periodically afterwards.
2. Install the two (2) tandems on the axle with two (2) metal rings, two (2) 1/4-20 x 2 1/2
bolts and two (2) 1/4-20 nuts. Make sure
that the round tubes behind the wheels
face upward. Position the nut
underneath.
ATTENTION: Make sure that the loading
pivot supports (behind the tires) are
facing up.
1.
2.
3.
4.

8
3. Install the assembled axle on the rear
f
rame with
f
our
(
4
)
1
/
2-20 x 2 1
/
2 bolts,
f
our
(4) 1/2-20 nuts and eight (8) flat washer 1/2. The basic position of the axle is in the
middle of the log post supports (the axle is movable in order to get different weight
distribution). Progressively apply 75 lb.-pi (100 Nm) of torque on each bolt.
IMPORTANT: Please re-torque the bolts after the first use and periodically after.
4. Install the spring mounted swivel tongue on the front pole. Make sure that the
shorter spring is in front. Fasten it with the 1/2-13 x 2 1/2 bolt and the 1/2-13 nut.
Then insert the jack and secure it with it's pin.
Fasten, with the two (2) fast links, the two (2) safety chains in the round opening at
the end of the pole (not shown). (not included in the forestry kit).
5. Fasten the front pole assembly to the rear frame assembly with four (4) 5/8-11 x 2
bolts and four (4) 5/8-11 nuts.
Centre

9
6. Install the protection grating
(
or the unloading mast support i
f
you have the Haul
&
Dump Kit) on the front pole assembly with two (2) 1/2-13 x 4 carriage bolts and two
(2) 1/2-13 nuts. Position the grating about 12" (30 cm) of the assembly joint.
ATTENTION: Insert the carriage bolts with nuts underneath.
30 cm
12"
10
Loading Mast Assembly
In order to facilitate this procedure, we suggest that you insert the mast tubing in
the support placed at the bottom of the protection grating.
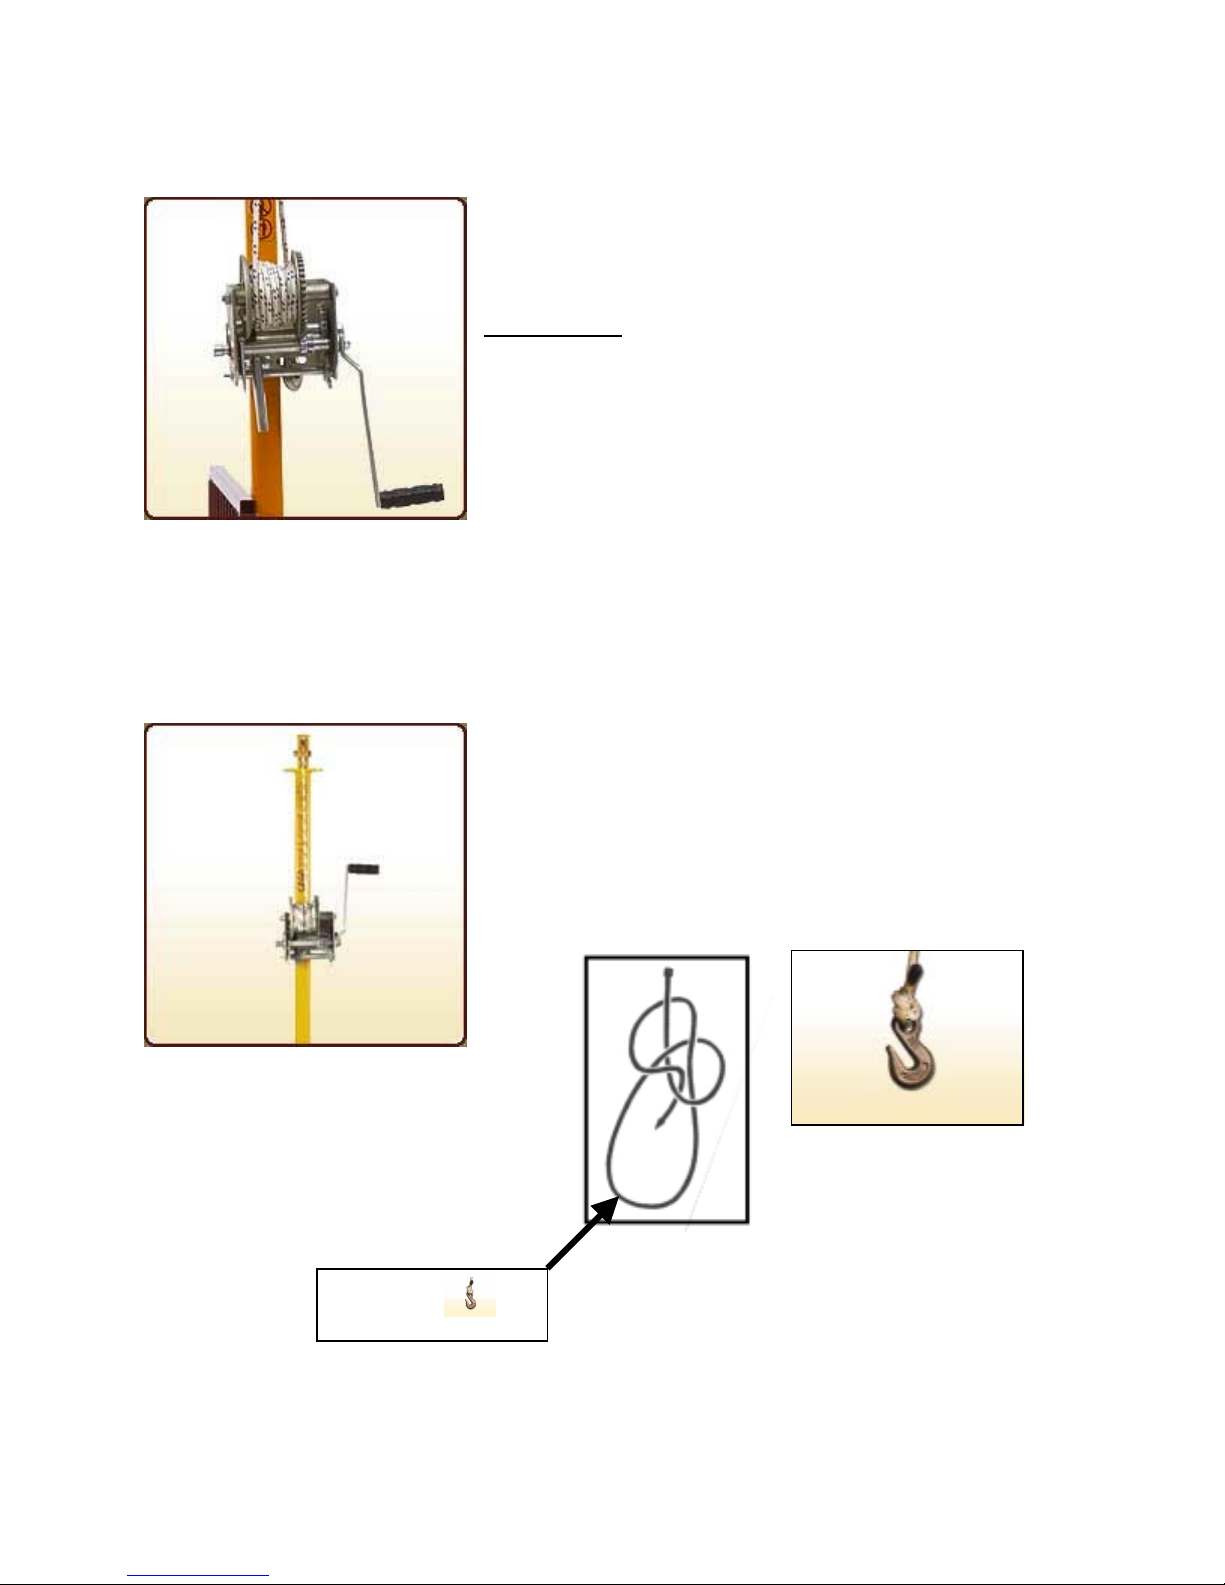
1. Fasten the winch handle to the winch with the nut
provided. Then, fasten the winch to the loading mast
with two (2) 3/8-16 x 2 1/2 bolts and two (2) 3/8-16 nuts.
ATTENTION: The winch must be installed on the same
side as the Warning sticker on the mast.
2. Install the 25' polyester rope onto the winch reel. First, insert the end of the cable
into one opening on the left side of the reel (from inside the reel). Thread the cable
back inside the reel through a second opening. Keep app. 3 in. (8 cm) of rope free
inside the reel. Roll the cable on the winch but always keep tension on the cable
while doing so.
3. Thread the other end of the rope through the swivel
pulley that you've previously inserted in the loading
mast.
4. Knot the 5/16'' flat hook to the rope with the bouline
knot shown below.
Hook

11
Loading Pivot Assembly
1. Insert the trident into the metal tube.
2. Fasten it with the hitch pin provided.
Please refer to the Operations Manual for instructions on installing/removing
the metal box, log loading, dumping the box, etc.
Table of contents


