Novoferm NovoDock L550i User manual

1
Diese Montage-, Bedienungs- und Wartungsanleitung ist während der gesamten Nutzungsdauer aufzubewahren! 30039_V13
Assembly instructions - NovoDock L550i
Montageanleitung - NovoDock L550i
Notice de montage - NovoDock L550i
Montagehandleiding - NovoDock L550i
Instrucciones de montaje - NovoDock L550i
EN
DE
FR
NL
ES

EN
Assembly instructions
NovoDock L550i
Englisch

1
This installation manual must be given to the customer and kept safely during the entire period of use!
EN
1. Introduction ........................................1
2. General instructions...........................2
3. Site provisions (third party supply).....4
4. Preparations for installation ..............5
5. Installation instructions, frame CX ....6
6. Electrical connections ........................8
7. Final installation actions ..................10
8. Optional front plate...........................11
9. Optional docking buffers ..................11
10. Installation instructions, frame BX....12
11. Commissioning .................................13
Notes.................................................70
Copyright ..........................................72
1. Introduction
Dear customer,
Thank you for choosing a Novoferm product.
We hope that you are satisfied and that the
product meets all of your expectations.
Proper operation and maintenance
significantly increase the performance and
lifespan of the leveller. Operator errors
and poor maintenance will inevitably result
in malfunctions. In addition, reliable and
safe operation can only be guaranteed if
the unit is operated properly and
conscientiously maintained.
Contents
Depending on the choice of accessories,
the scope of supply may include
additional installation manuals, for
example for the leveller control unit.
Please read these manuals carefully and
completely. Please observe the
instructions and comply with all safety
notices and warnings.
Note the following:
++ WARNING +++ WARNING +++ WARNING ++

This installation manual must be given to the customer and kept safely during the entire period of use!
2
EN
General instructions
• Please read the installation manual
completely before using the product for
the first time! Take note of the comments
and comply with the safety notices and
warnings!
Make sure that all generally acknowledged
legal and other binding regulations for the
prevention of accidents and protection of the
environment, national regulations and ack-
nowledged engineering and technical rules
for safe and correct execution of the work
are observed.
• Check that the fasteners and fixing
materials provided are suitable for the
site conditions. Only use suitable
fasteners and fixing materials.
• Perform each step in sequence in
accordance with the installation
drawings!
• Only use proper and suitable tools!
• Only work on the leveller when it has
been made non-operational.
• Failure to observe these precautions
may result in serious injury and material
damage!
• The components that are to be used are
manufactured from high-grade, durable
and solid materials. Even so, care must
be taken during installation in order to
avoid damage.
• If parts suffer damage, always replace
them with OEM parts. If you fail to do so,
correct operation of the leveller can no
longer be guaranteed! Furthermore,
this voids the warranty!
Check the following before installation:
Check the following items before installation:
• Does the electrical supply that is
available correspondto the requirements
for the leveller?
• Are suitable cables and fuses available?
• In the case of models that are to be
installed in a prepared pit: Does the pit
correspond to the relevant installation
drawings and has an empty conduit
measuring 70 mm in diameter been
provided to allow insertion of the cable?
Only start installation work if all of the
conditions are satisfied.
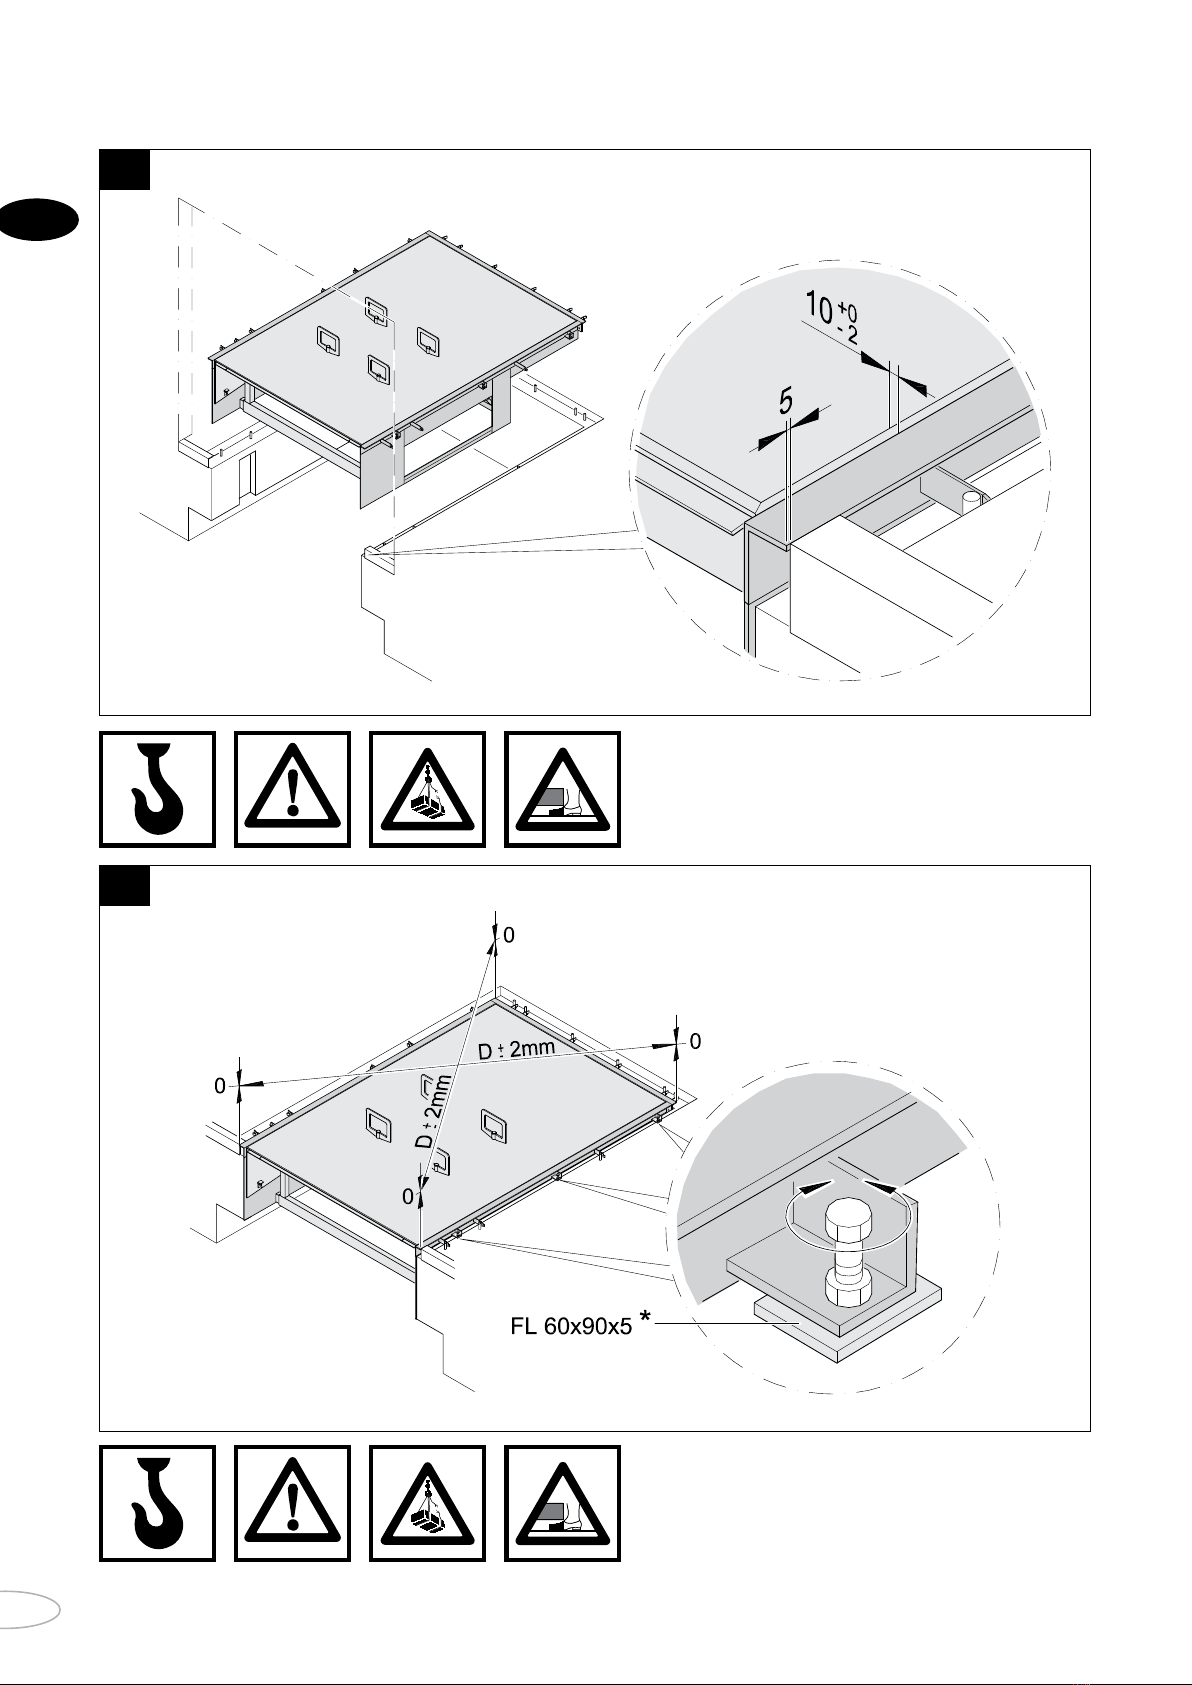
To check dimensional accuracy, measure
the length and width of the pit, the height of
the front and rear sides and the diagonals.
The length of the diagonals (X) may not differ
from each other by more than 10 mm.
Instruction: The leveller must be installed so
that it is perfectly horizontal across its
width. If not, leveller operation may be
adversely affected. There is also a risk of
damage to the leveller.
Tools required for installation
You require the following tools for the instal-
lation work:
• ESAB caddy 200 (5¬200A) welder
(typical example).
• ESAB OK 48.00 3.25 welding rod
(typical example).
Lifting equipment
• Forklift truck: Lifting capacity of at least
35 kN, fork length 2000 mm, or
• Crane: Lifting capacity of at least 35 kN
in the area where work must take place.
Electrical connections
• Cable: 7 x 0.75mm²
• Motor cable: 4 x 1.5mm²
Functional check
• Check all operating modes of the leveller
upon completion of the installation work.
To do so, use the leveller test report.
• Fill out the test report truthfully and
sign the entry.
• After doing so, hand this installation
manual together with the other docu-
ments to the customer.
Commissioning
• The leveller may only be used for the
first time after handing over the decla-
ration of conformity.
• Give the users instruction in how to
operate the leveller. Do not allow third
parties (e.g. visitors) to operate the leveller.
• This installation manual must be given
to the customer and kept safely during
the entire period of use!
• Do not make any changes to the software
for the programmable control unit.
• Changes or additions to the product that
has been delivered may only be made by
the supplier.
2. General instructions
A malfunctioning leveller may cause
personal injury and material damage to
goods. Only use the leveller when in proper
operating condition.
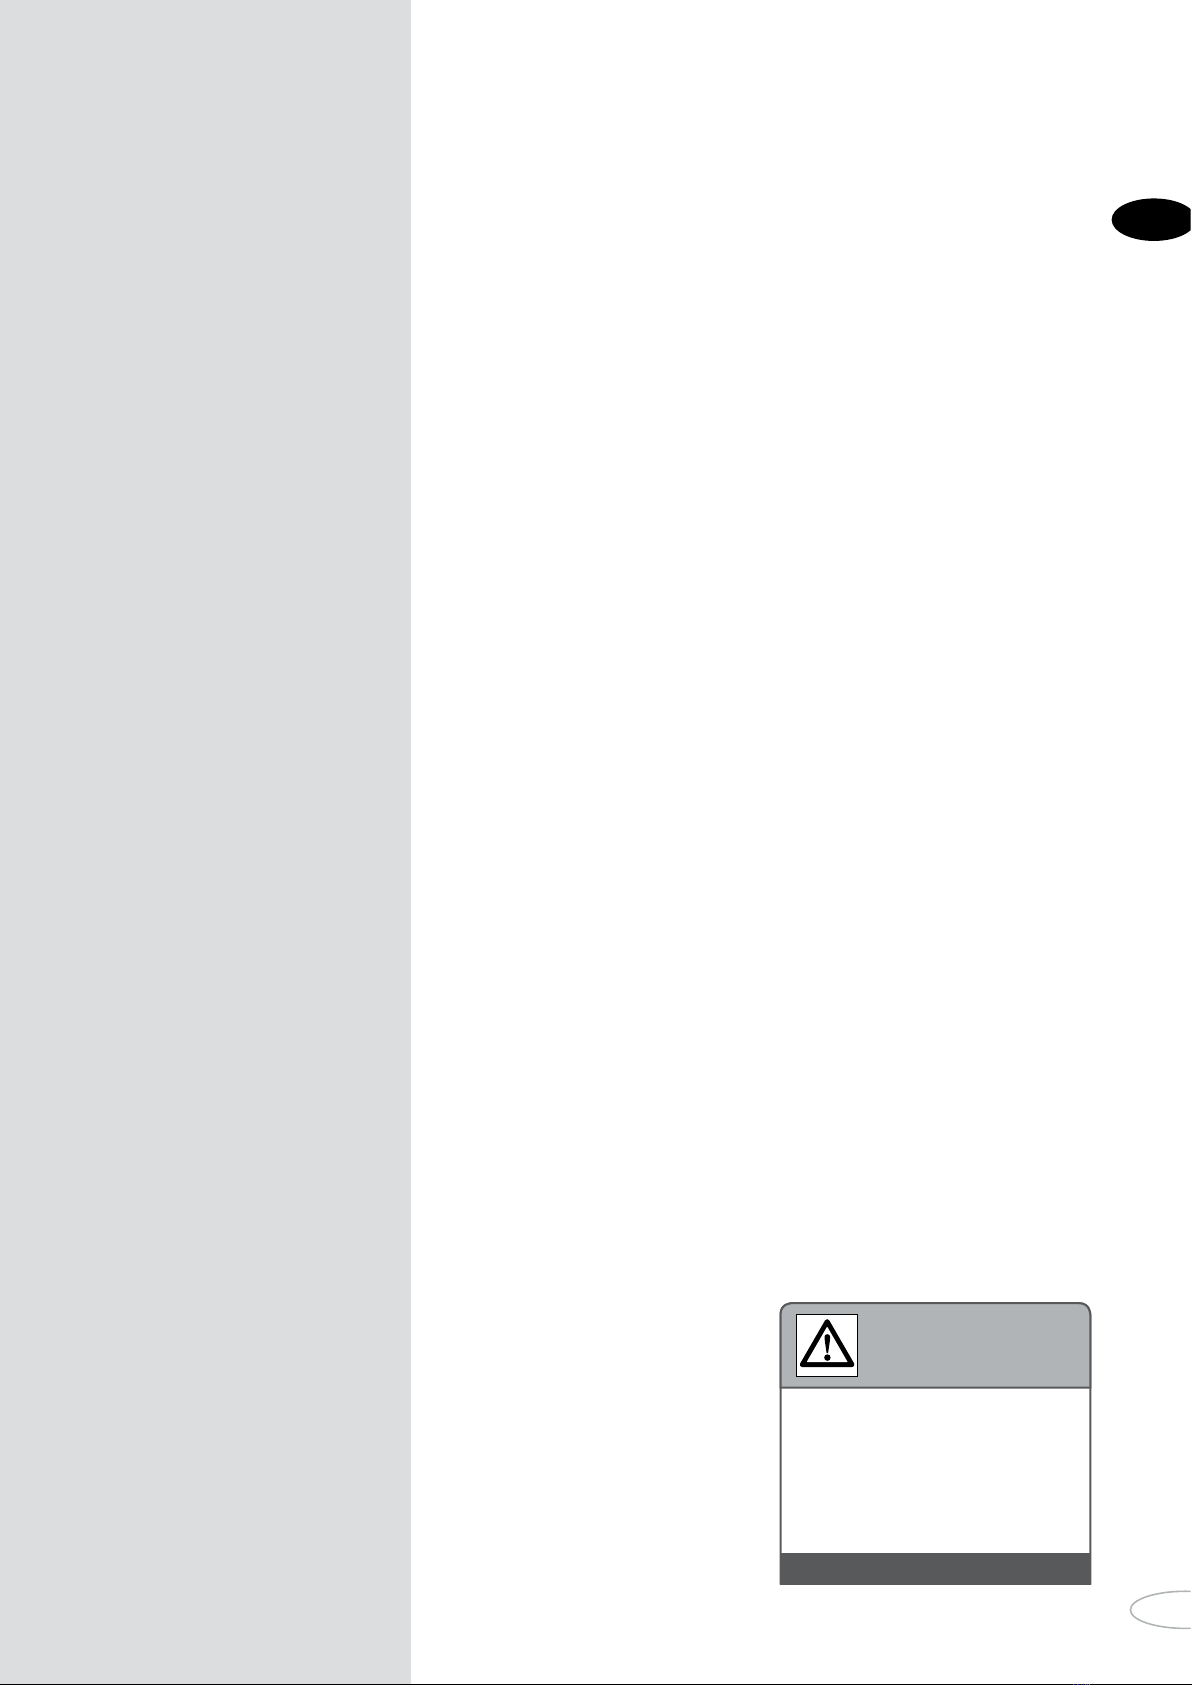
Warning
++ WARNING +++ WARNING +++ WARNING ++
Movements performed by the leveller
may cause injury to people and damage
to goods.
• Make sure that no people or objects
are in the vicinity of the leveller when
it is moving.
• Never use the leveller to raise people
or objects.
Warning
++ WARNING +++ WARNING +++ WARNING ++
• The area of application of this leveller
is described in the EN 1398 standard.
• Installation, repairs, maintenance
and dismantling must be carried out
by qualified professionals.
• During commissioning, the qualified
technician doing the work must be
alert to possible hazards and check
that the leveller operates correctly.
Read this first!
++ WARNING +++ WARNING +++ WARNING ++
2.7
2.1
2.5
2.6
2.4
2.2
2.3
• When performing all installation
tasks, switch off the power supply
and secure the system to prevent it
from being switched on by an autho-
rised person.
• During installation, parts can drop,
which may result in injury to people
and damage to goods.
• Contact with electrically live compo-
nents may result in electric shock.
Make sure that the customer's elec-
trical system has been installed in
accordance with valid safety requi-
rements.
• Never connect a mains voltage supply
to the control unit; this will result in
irreparable damage to the electronics.
• Only perform welding and grinding
tasks on the leveller if expressly
permitted in the position in question.
Ensure adequate ventilation in order
to prevent build-up of an explosive
atmosphere of dust and other
combustible materials.
Warning
++ WARNING +++ WARNING +++ WARNING ++
X1
X2
X1 = X2
(± 10 mm)

3
This installation manual must be given to the customer and kept safely during the entire period of use!
EN
Instruction!
Only attach lifting equipment to the points indicated by this symbol!
Always use all four lifting eyes (with a forklift truck: at least two lifting eyes)!
Caution, deadly danger!
Only use lifting equipment that is in good operating order. The lifting equipment must be used in the prescribed way and
have a capacity of at least 35 kN.
Observe the accident prevention regulations in force at the company!
Never stand or work under a suspended load!
Caution!
Keep away from the pit edge in order to avoid foot injuries!
Instruction!
Make sure that the lateral gap between the frame and deck amounts to 10 mm (+0, -2mm).
The frame must be aligned horizontally.
Caution!
Before carrying out any work on electrical equipment, the power supply to the leveller must be switched off and locked to
prevent it from being switched back on!
Only fully qualified and authorised staff may work on the electrical components of the leveller!
Caution!
Always observe the valid safety regulations!
Electrical connection must be carried out by a qualified electrician in accordance with the wiring diagram.
Only open the housing if the main switch is turned to the off position "0".
Instruction!
Make sure that all leveller functions can be observed from the operator station. The electrical controls must be installed in
a way that ensures protection against splashing water. If any malfunctions are observed, secure the leveller immediately and
inform the Novoferm customer service organisation that is responsible for your company.
Painting welded and damaged surfaces:
Surfaces that are to be painted must be dry and free of dirt, grease, rust, etc.
Use a wire brush and thinner.
• Spray cold galvanising paint on the surfaces and allow to dry for approximately 30 minutes
• After installation, apply a final coat of paint to all areas of paint damage using the touch-up paint provided.
• The manufacturer is not liable for damage
caused by non-observance of the instal-
lation manual or improper use.
• Please note that the valid regulations
require the leveller to be inspected by an
expert once a year.
• Maintenance must be performed each
year or every 5000 cycles.
Dismantling
If the leveller is to be dismantled and removed,
a qualified technician must carry out the
steps described in section 4 in reverse order.
Staff qualifications
Installation requires adequate qualifications
for performing both mechanical and electrical
work and, depending on the model, welding
work and/or concrete work.
All work on the leveller requires in-depth
professional knowledge and may only be
performed by authorised persons. Autho-
rised persons are professional technicians
from the manufacturer who have been inst-
ructed and trained appropriately.
2. General instructions
2.8 2.9

This installation manual must be given to the customer and kept safely during the entire period of use!
4
EN
3. Site provisions (third party supply)
10
13
11
12
1350
3.1
3.2
Site provisions (third party supply)
10 Mains power supply: 3 / N / PE AC 50Hz 230/400V
Mains fuse: D0 10A gl, Motor capacity: 1.5kW
11 Tube for electrical cable, inner diameter minimum of 70 mm,
curved through ≤ 45°
12 CEE power socket 16A
13 Door position sensor (optional)
General instruction: The image may differ at detail level.
Required for installation
1Leveller
2Controls
3Installation and user manual, control system
4Quick start guide
5Plastic plug
6Cable clamp
7Cable conduit (not included in the scope of supply)
General instruction: The image may differ at detail level.
1

5
This installation manual must be given to the customer and kept safely during the entire period of use!
EN
4. Preparations for installation
5
4.1
4.2
Instruction
• Wooden beam not included in the scope of supply.
General instruction: The image may differ at detail level.

This installation manual must be given to the customer and kept safely during the entire period of use!
6
EN
5. Installation instructions, frame CX
5.1
5.2
General instruction: The image may differ at detail level.
*not included in scope of supply

7
This installation manual must be given to the customer and kept safely during the entire period of use!
EN
*
*
*
*
*
*
*
*
*
5. Installation instructions, frame CX
5.3
General instruction: The image may differ at detail level.

This installation manual must be given to the customer and kept safely during the entire period of use!
8
EN
6. Electrical connections
6.1
6.2
(DE) (EN) (FR) (NL)
L1 = Braun (1) Brown (1) Brun (1) Bruin (1)
L2 = Schwarz (2) Black (2) Noir (2) Zwart (2)
L3 = Grau (3) Grey (3) Gris (3) Grijs (3)
N = Blau (4) Blue (4) Bleu (4) Blauw (4)
PE = gelb/grün yellow/green jaune/vert geel/groen
Instruction
Check that the hydraulic hose connections are all firmly tightened.
General instruction: The image may differ at detail level.

9
This installation manual must be given to the customer and kept safely during the entire period of use!
EN
6. Electrical connections
6.3
6.4 6.5
General instruction: The image may differ at detail level.
General instruction:
The image may differ at detail level.

This installation manual must be given to the customer and kept safely during the entire period of use!
10
EN
C20/25
7.1
7.2
Instruction
Weld the anchors on the leveller to the reinforcement or the dowels.
Health hazard when welding galvanised components:
Welding galvanised parts produces vapours which can be harmful to health if inhaled. To avoid this, grind the zinc coating
off the parts that are to be welded.
General instruction: The image may differ at detail level.
Instruction
Before pouring the liquid concrete, the area adjoining the leveller must be shuttered in on site. We recommend covering
the platform with a protective film before pouring the concrete. Pour the liquid concrete. Ensure use of a suitable grade of
concrete, at least C20/25. In the case of a significant casting height, make sure that the side loads caused by pouring and
compacting do not become excessive. Excessive loads could distort the side walls.
General instruction: The image may differ at detail level.
7. Final installation actions

11
This installation manual must be given to the customer and kept safely during the entire period of use!
EN
II
8.1
Docking buffers (not included in the leveller scope of supply).
Protect the docking platform and vehicles with suitable docking buffers. Docking forces in excess of 100 kN may require
special measures. Please ask your supplier or the manufacturer.
Instruction
Paint the welded seams with the touch-up paint included in the scope of supply in order to prevent rust formation.
The front plate shown in the figure may not be required in combination with certain options. When docking buffers are
installed, the front plate is not used. Depending on the design, the docking buffer plate included in the scope of supply
should be welded in place. Please refer to the corresponding assembly instructions for this.
General instruction: The image may differ at detail level.
9. Optional buffers
8. Optional front plate

This installation manual must be given to the customer and kept safely during the entire period of use!
12
EN
10. Installation instructions, frame BX
a4
a4
10.1
10.2
Instruction
Pre-fame can be constructed on site or delivered by
Novoferm.
* Remove the braces before installing the leveller.
General instruction: The image may differ at detail level.
*
*

13
This installation manual must be given to the customer and kept safely during the entire period of use!
EN
11. Commissioning
Fittings
• Remove the lifting eyes before com-
missioning.
• Remove the transportation immobili-
sers and spacers.
• Return parts that can be reused to the
manufacturer or supplier.
Functional test
Levellers are tested and delivered including
the hydraulic oil.
The following must be taken into considera-
tion during commissioning:
• Check that the leveller platform and
the loading bay floor are at the same
height.
• Make sure that the operators receive
instruction.
• Perform a trial run.
• When doing so, refer to the separate
manual for the controls.
• Check that the leveller operates
smoothly and without excessive noise.
• Have the safety features tested.
11.1 11.2

14
DE
Montageanleitung
NovoDock L550i
Deutsch

15
Diese Montageanleitung ist dem Kunden zu übergeben und während der gesamten Nutzungsdauer aufzubewahren!
DE
1. Einführung ........................................15
2. Allgemeine Hinweise........................16
3. Bauseitige Vorbereitung...................18
4. Montage Vorbereitung ......................19
5. Montageanleitung Rahmen CX.........20
6. Elektrische Anschlüsse....................22
7. Fertigstellung Montage ....................24
8. Option Frontplatte.............................25
9. Option Puffer.....................................25
10. Montageanleitung Rahmen BX.........26
11. Inbetriebnahme.................................27
Notizen..............................................70
Copyright ..........................................72
1. Einführung
Sehr geehrter Kunde,
Wir danken Ihnen für die Wahl eines
Novoferm Produkts. Wir hoffen, dass Sie
zufrieden sind und dass es alle Ihre
Erwartungen erfüllt.
Der ordnungsgemäße Betrieb und die
Wartung steigern die Leistung und
Le-bensdauer der Überladebrücke zu
einem großen Teil. Bedienungsfehler und
man-gelhafte Wartung führen zu
unvermeid-lichen Störungen. Darüber
hinaus ist der nachhaltige und sichere
Betrieb nur bei normaler Bedienung und
sorgfältiger Wartung gewährleistet.
Inhalt
Je nach gewähltem Zubehör kann die
Lieferung zusätzliche Montagean-
leitungen umfassen, zum Beispiel für
die Steuerung der Überladebrücke.
Lesen Sie diese Anleitungen sorgfältig
und vollständig. Bitte beachten Sie die
Hinweise und befolgen Sie die Sicher-
heits- und Warnhinweise sorgfältig.
Beachten Sie:
++ WARNUNG +++ WARNUNG +++ WARNUNG ++

Diese Montageanleitung ist dem Kunden zu übergeben und während der gesamten Nutzungsdauer aufzubewahren!
16
DE
Allgemeine Hinweise
• Lesen Sie die Montageanleitung
vollständig durch, bevor Sie das Produkt
in Gebrauch nehmen! Beachten Sie die
Bemerkungen und halten Sie sich an
die Sicherheits-und Warnhinweise!
Beachten Sie, dass allgemein anerkannte,
gesetzliche und sonstige verbindliche Rege-
lungen zur Unfallverhütung und zum Um-
weltschutz, nationale Vorschriften und
anerkannten Regeln der Technik für die
sichere und ordnungsgemäße Ausführung
der Arbeiten eingehalten werden.
• PrüfenSiedie Eignung der mitgelieferten
Befestigungsmittel entsprechend der
baulichen Gegebenheiten. Verwenden
Sie nur geeignete Befestigungsmittel.
• Führen Sie die Schritte entsprechend
den Montagezeichnungen der Reihen-
folge nach aus!
• Verwenden Sie nur ordnungsgemäße
und passende Werkzeuge!
• Führen Sie nur Arbeiten an der Über-
ladebrücke durch, wenn die Überlade-
brücke außer Betrieb gestellt ist.
• Nichtbeachtung dieser Maßnahmen
können ernsthafte Verletzungen sowie
Materialbeschädigungen zur Folge haben!
• Die zu verwendenden Komponenten
sind aus hochwertigen, dauerhaften und
soliden Werkstoffen gefertigt. Trotzdem
muss während der Montage vorsichtig
vorgegangen werden, um Beschä-
digungen vorzubeugen.
• Tauschen Sie eventuell beschädigte
Teile immer gegen Originalersatzteile
aus. Anderenfalls ist die ordnungs-
gemäße Funktion der Überladebrücke
nicht gewährleistet! Außerdem entfällt
die Gewährleistung!
Vor der Montage prüfen:
Prüfen Sie vor der Montage folgende Gege-
benheiten:
• Entspricht der vorhandene Netz-
anschluss den Erfordernissen der Über-
ladebrücke?
• Sind geeignete Kabel und Sicherungen
vorhanden?
• Bei Ausführungen, die in eine vor-
bereitete Grube montiert werden: Ent-
spricht die Grube den entsprechenden
Einbauzeichnungen und ist ein Leerrohr
mit einem Durchmesser von 70mm zur
Verlegung des Kabels vorgesehen?
Beginnen Sie erst mit der Montage, wenn alle
Voraussetzungen erfüllt sind.
Zur Kontrolle der Maβgenauigkeit messen
Sie Länge und Breite der Grube, die Höhe an
der Vorder- und Rückseite sowie die
Diagonalen. Die Länge der Diagonalen (X)
dürfen nicht mehr als 10 mm von einander
abweichen.
Hinweis: In der Breite muss die Über-
ladebrücke exakt waagerecht eingebaut
werden. Andernfalls kann die Funktions-
fähigkeit der Überladebrücke eingeschränkt
sein. Ebenso besteht die Gefahr einer
Beschädigung der Überladebrücke.
Montagewerkzeug
Für die Montage benötigen Sie folgendes
Montagewerkzeug:
• Schweißgerät ESAB caddy 200
(5¬200A) o. ä..
• Schweißstab ESAB OK 48.00 3,25 o. ä.
Hebezeuge
• Gabelstapler: Traglast von mindestens
35 kN, Gabellänge 2000 mm, oder
• Kran: Traglast von mindestens 35 kN im
benötigten Arbeitsbereich.
Elektrische Anschlüsse
• Kabel: 7x 0,75mm²
• Motorkabel: 4 x 1,5mm²
Funktionsprüfung
• Überprüfen Sie alle Betriebszustände
der Überladebrücke nach Abschluss der
Montage. Benutzen Sie dafür das Prüf-
buch für Überladebrücken.
• Füllen Sie das Prüfbuch wahrheitsge-
mäß aus und unterschreiben Sie dieses.
• bergeben Sie dann diese Montage-
anleitung zusammen mit den anderen
Unterlagen an den Kunden.
Inbetriebnahme
• Die Überladebrücke darf erst nach
Ab-gabe der Konformitätserklärung in
Gebrauch genommen werden.
• Leiten Sie die Benutzer an, wie die
Überladebrücke zu bedienen ist. Lassen
Sie nicht zu, dass Dritte (zum Beispiel
Besucher) die Überladebrücke bedienen.
• Diese Montageanleitung ist dem Kunden
zu übergeben und während der gesamten
Nutzungsdauer aufzubewahren!
• Ändern Sie nichts an der Software der
programmierbaren Steuerung.
• Änderungen oder Erweiterungen des
gelieferten Produkts dürfen nur durch
den Lieferanten erfolgen.
2. Allgemeine Hinweise
Eine defekte berladebrücke kann zu
Verletzungen von Personen und Beschä-
digungen von Gegenständen führen.
Verwenden Sie die berladebrücke nur,
wenn diese im einwandfreien Zustand ist.
Warnung
++ WARNUNG +++ WARNUNG +++ WARNUNG ++
Bewegungen der Überladebrücke kön-
nen Verletzungen bei Menschen oder
Sachschaden verursachen.
• Stellen Sie sicher, dass sich wäh-
rend der Bewegung keine Personen
oder Gegenstände im Bereich der
Überladebrücke befinden.
• Verwenden Sie die Überladebrücke
nie, um Personen oder Gegenstände
zu heben.
Warnung
++ WARNUNG +++ WARNUNG +++ WARNUNG ++
• Das Anwendungsgebiet dieser
Überladebrücke ist in der EN 1398
beschrieben.
• Montage, Reparaturen, Wartung und
Demontage sind von einem sach-
kundigen Fachmann durchzuführen.
• Bei Inbetriebnahme muss der
sachkundige Monteur auf mögliche
Gefahren achten und sich davon
überzeugen, dass die berlade-
brücke einwandfrei funktioniert.
Lesen Sie dies zuerst!
++ WARNUNG +++ WARNUNG +++ WARNUNG ++
2.7
2.1
2.5
2.6
2.4
2.2
2.3
• Schalten Sie bei allen Arbeiten
während der Installation den Strom
ab und sichern Sie die Anlage gegen
unbefugtes Einschalten.
• Bei Montage können Teile herunter-
fallen, was zu Verletzungen von
Personen und Beschädigungen von
Gegenständen führen kann.
• Bei Kontakt mit Strom besteht die
Gefahr eines Stromschlags. Stellen
Sie sicher, dass die elektrische
Installation beim Kunden laut
geltenden Sicherheitsanforderun-
gen hergestellt wurde.
• Niemals Netzspannung an die
Steuereinheit anschliessen, dies
führt zu irreparablen Schäden an
der Elektronik.
• Führen Sie Schweiß-und Schleif-
arbeiten an der Überladebrücke nur
aus, wenn es ausdrücklich an dieser
Stelle gestattet ist. Sorgen Sie für
ausreichende Belüftung um die
Explosionsgefahr von Staub und
anderen brennbaren Materialien zu
verhindern.
Warnung
++ WARNUNG +++ WARNUNG +++ WARNUNG ++
X1
X2
X1 = X2
(± 10 mm)

17
Diese Montageanleitung ist dem Kunden zu übergeben und während der gesamten Nutzungsdauer aufzubewahren!
DE
Hinweis!
Schlagen Sie Hebezeuge nur an den durch dieses Symbol gekennzeichneten Stellen an!
Benutzen Sie immer alle vier Transportösen (mit Gabelstapler: mindestens zwei Transportösen)!
Vorsicht, Lebensgefahr!
Verwenden Sie nur Hebezeuge in einwandfreiem Zustand sowie in
vorgeschriebener Weise und mit einer Tragfähigkeit von mindestens 35 kN.
Beachten Sie die für Ihr Unternehmen gültigen Unfallverhütungsvorschriften!
Niemals unter schwebenden Lasten aufhalten oder arbeiten!
Vorsicht!
Bleiben Sie vom Grubenrand zurück, damit keine Fußverletzungen auftreten!
Hinweis!
Beachten Sie das seitliche Spaltmaß von 10 mm (+0, -2mm) zwischen Rahmen und Plateau.
Der Rahmen muss horizontal ausgerichtet werden.
Vorsicht!
Vor allen Arbeiten an der elektrischen Ausrüstung muss die Überladebrücke
spannungslos sein und gegen Wiedereinschalten gesichert werden!
Arbeiten am elektrischen Teil der Überladebrücke dürfen nur von besonders
sachkundigem und autorisiertem Personal ausgeführt werden!
Vorsicht!
Beachten Sie immer die gültigen Sicherheitsvorschriften!
Der Anschluss muss von einem Elektrofachmann und nach Verdrahtungsplan erfolgen.
Öffnen des Gehäuses nur, wenn sich der Hauptschalter in Stellung „0“ befindet.
Hinweis!
Stellen Sie sicher, dass sich alle Funktionen der Überladebrücke vom Bedienplatz
aus beobachten lassen. Die Einbaustelle der Elektrosteuerung soll Spritzwasser¬
geschützt sein. Sollten Sie irgendeine Fehlfunktion bemerken, sichern Sie sofort die
Überladebrücke und informieren Sie den für Sie zuständigen Kundendienst von Novoferm.
Nachstreichen von geschweißten und beschädigten Oberflächen:
Zu bearbeitende Flächen müssen trocken und von Schmutz, Fett, Rost o. ä. befreit sein.
Benutzen Sie Drahtbürste und Verdünnung.
• Kaltverzinkung auf die Flächen sprühen und ca. 30 Minuten trocknen lassen
• Nach der Montage sind alle Lackschäden mit der beigefügten Ausbesserungsfarbe nach zulackieren.
• Für Schäden, die durch Nichtbeachtung
der Montageanleitung oder unsachge-
mäße Nutzung hervorgerufen werden,
haftet der Hersteller nicht.
• Bitte beachten Sie, dass die geltenden
Vorschriften eine jährliche Prüfung der
Überladebrücke durch einen Sachkundi-
gen verlangen.
• Jedes Jahr oder alle 5.000 Zyklen ist eine
Wartung durchzuführen.
Demontage
Bei der Demontage der Überladebrücke muss
Kapitel 4 entsprechend der Ausführung von
einem sachkundigen Monteur in umgekehrter
Reihenfolge durchgeführt werden.
Qualifikation des Personals
Die Montage erfordert ausreichende Qualifi-
kationen zur Durchführung von mechani-
schen und elektrotechnischen Arbeiten
sowie je nach Modell Schweiβ- und/oder
Betonarbeiten.
Jegliche Arbeiten an der Überladebrücke
setzen eingehende Fachkenntnisse voraus
und dürfen nur von autorisierten Personen
durchgeführt werden. Autorisierte Personen
sind eingewiesene und geschulte Fachkräf-
te des Herstellers.
2. Allgemeine Hinweise
2.8 2.9

Diese Montageanleitung ist dem Kunden zu übergeben und während der gesamten Nutzungsdauer aufzubewahren!
18
DE
3. Bauseitige Vorbereitung
10
13
11
12
1350
3.1
3.2
Bauseitige Vorbereitung
10 Netzanschluss: 3 / N / PE AC 50Hz 230/400V
Netzsicherung: D0 10A gl, Motorleistung: 1,5kW
11 Rohr für Elektroleitung, Innendurchmesser min. 70,
Rohrbögen ≤ 45°
12 CEE Steckdose 16A
13 Sensor Position Tor (Optional)
Allgemeiner Hinweis: Darstellung kann im Detail abweichen.
Montagematerial
1Überladebrücke
2Steuerung
3Montage- und Bedienungsanleitung Steuerung
4Kurzbedienungsanleitung
5Plastikstopfen
6Kabelschelle
7Kabelkanal (nicht im Lieferumfang enthalten)
Allgemeiner Hinweis: Darstellung kann im Detail abweichen.
1
Table of contents
Languages:
Other Novoferm Docking Station manuals