NOVOTEST UT-3K-EMA User manual

EMA Thickness Gauge
NOVOTEST UT-3K-EMA
Postal address and registered address:
51200, Novomoskovsk, Spasskaya Str., 5
Sales office:
landline: +38-056-767-23-25 (multichannel)
mobile: +38-067-565-82-33
http://novotest.ua/
Warranty repair and servicing:
tel. +38-056-767-20-25
Operating manual

Operating manual
EMA Thickness Gauge NOVOTEST UT-3K-EMA
RDC.ED.UT-3K-EMA.000 OM
Page 2
CONTENTS
1 Description and operation of the device and its components.................................................................4
1.1 Intended use ....................................................................................................................................4
1.2 Specification....................................................................................................................................4
1.3 Package ...........................................................................................................................................4
1.4 Configuration..................................................................................................................................4
1.5 Design and operating principle.......................................................................................................5
1.6 Means of measurement, device, and accessories............................................................................5
1.7 Packaging........................................................................................................................................6
2 Intended use ...........................................................................................................................................6
2.1 Operating restrictions......................................................................................................................6
2.2 Preparation of the device for the use...............................................................................................6
2.2.1 Visual inspection......................................................................................................................6
2.2.2 Battery charging.......................................................................................................................6
2.3 Calibration.......................................................................................................................................6
2.4 Operation.........................................................................................................................................7
2.4.1 Thickness measurement...........................................................................................................7
2.4.2 Selection of the amount of coherent integration......................................................................7
2.4.3 Specifics of the operation.........................................................................................................8
2.4.4 Replacement of the probe ........................................................................................................8
3 Safety precautions and warranty............................................................................................................8
3.1 Safety precautions...........................................................................................................................8
3.2 Verification .....................................................................................................................................9
3.2.1 Preconditions for verification...................................................................................................9
3.2.2 Steps of verification and accessories .......................................................................................9
3.2.3 Visual inspection......................................................................................................................9
3.2.4 Testing....................................................................................................................................10
3.2.5 Measurement error calculation...............................................................................................10
3.2.6 Execution of verification........................................................................................................10
3.3 Warranty........................................................................................................................................10
3.3.1 Basic warranty........................................................................................................................10
3.3.2 Warranty on repaired or replaced parts..................................................................................11
3.3.3 Wearing parts.........................................................................................................................11
3.3.4 Owner obligations..................................................................................................................11
3.3.5 Scope of warranty ..................................................................................................................11
3.3.6 Cases uncovered by warranty ................................................................................................12
3.3.7 Warranties and consumer law................................................................................................12
3.4 Maintenance..................................................................................................................................12
4 Running repairs....................................................................................................................................14
5 Storage .................................................................................................................................................14
6 Transportation......................................................................................................................................14
7 Disposal................................................................................................................................................14

Operating manual
EMA Thickness Gauge NOVOTEST UT-3K-EMA
RDC.ED.UT-3K-EMA.000 OM
Page 3
Caution!
Please read this manual carefully before using EMA Thickness Gauge NOVOTEST UT-3K-EMA.
Operating manual (hereinafter referred to as OM) includes the information required to inform
operator about the performance and operating procedure of the device –EMA Thickness Gauge
NOVOTEST UT-3K-EMA (hereinafter referred to as device or thickness gauge). The document
contains the specification, description of the design and operating principle, as well as the information
necessary for the right product operation. Before using the device, you must read this manual, as the
device must be operated by persons acquainted with the operating principle design of the device.
The right and efficient use of the device requires:
measurement technique;
conditions of measurement that correspond to the measurement technique;
a trained operator who read this operating manual.
NOVOTEST reserves the right to make minor changes that do not impair the technical
specification of the product. These changes may not be mentioned in this document.
The delivery set of the device includes the operation documents that are a part of this manual and
the device registration certificate.
This OM applies to all product modifications.

Operating manual
EMA Thickness Gauge NOVOTEST UT-3K-EMA
RDC.ED.UT-3K-EMA.000 OM
Page 4
1 DESCRIPTION AND OPERATION OF THE DEVICE AND ITS COMPONENTS
1.1 Intended use
EMA Thickness Gauge NOVOTEST UT-3K-EMA is intended for measuring the wall thickness of
steel pipes, rolled sheets, rods and other steel products, as well as aluminum and other metals, without
the use of couplant and preliminary surface preparation, with a working gap between the probe and
metal of up to 2 mm. The gap might be a layer of rust, a layer of salt deposits or another non-
conductive coating (paint, varnish, enamel, plastic, etc.).
The thickness gauge works both independently and connectively to an Android-based tablet and
displays the real-time radio signal on the screen in the thickness gauge of flaw detector mode (А-scan).
1.2 Specification
The technical specifications of the device are given in the tab. 1.1.
Table 1.1 –Principal specifications of the device
Measurement range for steel, mm
260
Thickness measurement error, mm
0,08
The permissible gap between the probe and the test object, mm, max
2
The permissible deviation of the probe from the normal to the
surface of the test object,
25
The minimum permissible radius of curvature of the test surface, mm
10
Maximum number of measurements per second
16
Ultrasound velocity range
10009999 m/s,
with 1 m/s increment
Frequency range
35 MHz
Worktime without charging, h
5
Operating temperature, С
from -20 to +50
Dimensions, mm
163х39х32
1.3 Package
The electronic unit of thickness gauge with probe ................................................................1 pc.
Charger....................................................................................................................................1 pc.
Transportation case.................................................................................................................1 pc.
Operating manual RDC.ED. UT-3K-EMA.000 OM..............................................................1 pc.
Registration certificate RDC.ED.UT-3K-EMA.000 PS .........................................................1 pc.
* By a customer request, additional equipment or parts can be included in the package. The exact
information on the scope of delivery is indicated in the device certificate.
1.4 Configuration
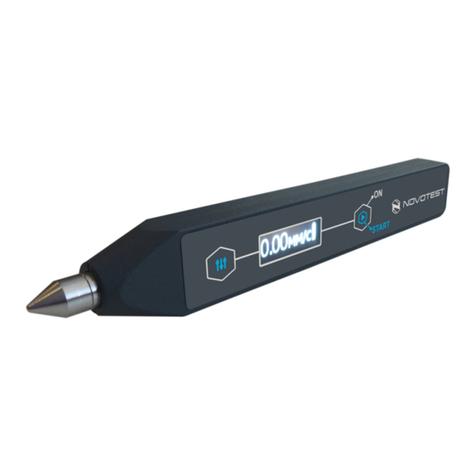
The device is enclosed in a plastic casing with a removable probe in the front part (fig. 1.1).

Operating manual
EMA Thickness Gauge NOVOTEST UT-3K-EMA
RDC.ED.UT-3K-EMA.000 OM
Page 5
1 –probe; 2 –digital display; 3 –power button;
4 –calibration button; 5 –“Up” button; 6 –“Down” button; 7 –mini-USB connector.
Figure 1.1 –EMA Thickness Gauge NOVOTEST UT-3K-EMA
The device is equipped with a digital display to show the readings. The buttons located to the right
side of the display perform the following functions:
“OK” button – switching the device on and off, navigation through the menu;
“Calibration” button, entering the menu;
“Up” button –increasing the parameter value;
“Down” button – decreasing the parameter value.
The mini-USB socket is designed for connection of charger and connection of outer devices such
as an Android-based tablet or a smartphone.
1.5 Design and operating principle
The device operation is based on the measurement of the time of flight of the acoustic wave
through the tested material. The measured time is recalculated into the thickness value by the preset
ultrasound velocity value.
The acoustic wave is formed by electromagnetic acoustic transduction directly on the surface of
the test object and avoiding the contact media between probe and test object. Thanks to this, the wave
is not disrupted in this media. The testing gap can be 2-3 mm and might be in the form of air, liquid,
rust, paint, plastics, etc.
The special data processing algorithm allows correct measuring of the thickness of the test object
in the presence of interfering factors, such as metal anisotropy, the presence of several reflectors, and
the presence of external interference. The device allows eliminating the human factor completely and
making measurement fully automatic.
1.6 Means of measurement, device, and accessories
The device operability must be checked with the reference block included in the package.
In normal operating conditions, the indicated value of the device must correspond to the value of
the reference block. If the readings are wrong, the device must be calibrated according to the c. 2.3.

Operating manual
EMA Thickness Gauge NOVOTEST UT-3K-EMA
RDC.ED.UT-3K-EMA.000 OM
Page 6
If any malfunction is found, the adjustment and setting of the device must be done by
NOVOTEST.
1.7 Packaging
The device and its components are shipped in a case to avoid possible damage during
transportation.
2 INTENDED USE
2.1 Operating restrictions
The device must be used with consideration of environmental factors and characteristics of test
objects and in line with the specified technical specifications, as well as the own technical
specifications.
The device must be used only by users acquainted with the operating manual.
If the device is transported at sub-zero temperature and operated at the temperature above zero, it
should be kept in a package for at least 2 hours to avoid malfunctioning due to moisture condensation.
2.2 Preparation of the device for the use
2.2.1 Visual inspection
Before using the device, inspect the device carefully and make sure that it is not damaged.
2.2.2 Battery charging
If the battery is discharged, the device must be charged via the charger. If the battery charge is less
than 25%, the device readings will flash on and off. When the charger is connected to the device, the
display shows the level of the battery charge.
In order to check the battery charge level, do the following:
1.
Turn the device on by pressing “ ”;
2.
Press “ ” or “ ”, and the letter “В” will appear on the display and three figures
indicating the battery charge level.
For example: “В025” –the battery is discharged by 25 %.
Charging the battery completely takes at least two hours. The device is recommended to charge
with the power off.
Caution!
If the device battery is fully discharged for a long time, this can reduce the battery capacity and service
life. If the battery is fully discharged, it is advised to charge it as soon as possible. This requirement
must be fulfilled during the long-term storage of the device.
2.3 Calibration
The device features two calibration methods: by the known test object thickness and known sound
velocity.
2.3.1 Calibration by the known thickness:
1. Turn the device on by pressing “ ”.
2. Install the device on the test object with the known thickness.
3.
Start calibration by pressing “ ”. The readings will start flashing.
4.
Set the known thickness value of the reference block by pressing “ ” or “ ”.

Operating manual
EMA Thickness Gauge NOVOTEST UT-3K-EMA
RDC.ED.UT-3K-EMA.000 OM
Page 7
Note –Holding “ ” or “ ” button will change the increment of the value.
5.
Press “ ”.
2.3.2 Calibration by the known ultrasound velocity:
1. Turn the device by pressing “ ”.
2. Press “ ” twice. The figures on the indicator will start flashing.
3. Set the known ultrasound velocity using “” or “ ”.
Note –Holding “ ” or “ ” button will change the increment of the value setting.
4. Press “ ”.
Caution!
The device employs a transversal wave. The typical value of transversal wave propagation in steel is
3250 m/s.
2.4 Operation
2.4.1 Thickness measurement
To perform the thickness measurement, take the following steps:
1. Turn the device on by pressing “ ”. If there is no object near the probe, the thickness values
on the device display will change randomly.
2. Calibrate the device if it is necessary, according to c. 2.3.
3. Place the device on the surface of the test object. The device will display the thickness value
within a period from 100 milliseconds to 3 seconds, depending on the selected amount of
integration.
2.4.2 Selection of the amount of coherent integration
The device can measure the thickness using the coherent integration algorithm that allows
increasing signal/noise ratio and improves the accuracy of thickness measurement.
When the device is issued with a big gap for the objects with poor quality of the surface, it is
recommended to increase the amount of integration to improve the measurement accuracy.
To change the amount of integration, take the following steps:
1. Turn the device on by pressing “ ”.
2. Press “ ” three times. The display will show A0XX inscription, where
ХХ –the amount of integration.
3. Set the needed amount of integration with “ ” or “ ” button.
The amount of integration can be: 16, 32, 64, 128, 256, 512, 1024.

Operating manual
EMA Thickness Gauge NOVOTEST UT-3K-EMA
RDC.ED.UT-3K-EMA.000 OM
Page 8
4. Press “ ” button.
It should be noted that the measurement time increases with the increase of the amount of
integration. By default, 32 integrations are set in the device.
2.4.3 Specifics of the operation
The probe contains the permanent magnet which implies specific requirements to the device
operation:
1. If the device is moved near a knife, fork, needle, and other sharp metal objects, operator should
exercise care. Such objects may get magnetized to the probe housing and harm operator. To
avoid this, operator should hold the device should by the middle and rear part, as far from the
probe as possible.
Note –If the device is placed in proximity of a plastic magnet card, this might lead to failure of
the card.
2. If the device is placed on a loose and relatively lightweight sample, operator should hold it with
hand.
3. If operator puts the device on a test object quickly and carelessly, it might bump against due to
additional acceleration caused by the magnetic field. To save the service life of the probe, it is
recommended to place the device on a test object smoothly and hold the device meanwhile.
4. It is recommended to put the device on the test object at a 60angle. Once the probe touches the
test object, the device should be put upright.
Throughout the device operation, operator should check the integrity of the plastic protector of the
probe. If plastic protector is damaged and the emitting coil is opened, the probe should be replaced.
Caution!
If the device is used with the probe damaged, this may lead to device failure. When the damaged probe
(and exposed coil wires) contacts metal, this may lead to sparkling.
2.4.4 Replacement of the probe
If the plastic coating of the probe is worn, the probe should be replaced.
The probe can be replaced at the NOVOTEST service center, or operator can do it individually.
To replace the probe of the probe, take the following steps:
1) Unscrew four screws holding the probe on the body;
2) Remove the damaged probe;
3) Put the new probe into the body;
4) Fix it with screws.
3 SAFETY PRECAUTIONS AND WARRANTY
3.1 Safety precautions
After commissioning of the device, it is recommended to inspect it periodically to check the
following:
operability;
compliance with the operating requirements;
absence of damage to the device components.
The device shall be operated by persons instructed and certified under ІІ qualification category by
safety guidelines when using electrical measuring devices.

Operating manual
EMA Thickness Gauge NOVOTEST UT-3K-EMA
RDC.ED.UT-3K-EMA.000 OM
Page 9
3.2 Verification
Once the device is commissioned, its primary verification must be done. Periodic verification
should be done during the use of the device and after its repair. It is recommended to verify the device
at least once a year.
The method of verification, hereinafter referred to as verification, applies to EMA Thickness
Gauge NOVOTEST UT-3K-EMA and prescribes the methods and means of primary and periodic
checking.
The device verification must be done by State Metrology Service or other authorized bodies and
organizations having the right of verification.
3.2.1 Preconditions for verification
The following requirements must be fuilfilled at the verification:
–ambient air temperature: from +5оС to +30 оС;
–relative air humidity: max 80% at the temperature +25 С;
–air pressure: from 86 kPa to 106 kPa.
3.2.2 Steps of the verification and accessories
When performing the verification, take the following steps and use accessories specified in Tab.
3.1.
Table 3.1 –Steps of the verification and accessories
Verification steps
Clause
Verification accessories
Necessity after
commissioning
and repair
operation and
storage
1. Visual inspection
3.2.3
Yes
Yes
2. Verification
3.2.4
Yes
Yes
3. Determination of
the measurement error
3.2.5
Set of ultrasonic thickness reference
blocks KUSOT-180 or the set of
thickness reference blocks KMT-
176M-1 (KMTC-97);
set of plane-parallel blocks (tab. 3.2).
Yes
Yes
4. Execution of
verification
3.2.6
Yes
Yes
Table 3.2 –Parameters of plane-parallel reference blocks made of the same steel sample.
Thickness, mm
Roughness RZ, mcm, less
2 ± 0,01
10
10 ± 0,015
20
60 ± 0,03
20
3.2.3 Visual inspection
The device must be equipped according to c. 1.3 of Operating manual of EMA Thickness Gauge
NOVOTEST UT-3K-EMA.

Operating manual
EMA Thickness Gauge NOVOTEST UT-3K-EMA
RDC.ED.UT-3K-EMA.000 OM
Page 10
Probe and connection cable should be checked visually, the insulation and labels must be free of
damage. The connectors should be clean, and there must be no disconnected or loose elements (device
should be shaken to check, and the connector of the probe must tightly sit in the slot of the electronic
unit.
3.2.4 Testing
The device must be prepared for operation under c. 2.2 of Operating manual of EMA Thickness
Gauge NOVOTEST UT-3K-EMA.
To check the operability, take the following steps:
1. Calibrate the device using a reference block;
2. Measure the thickness of the reference block. The thickness value of the reference block
should be different from the actual meaning (10 mm) by more than 0.04 mm.
3.2.5 Measurement error calculation
Measurement error is calculated using the set of blocks made of the same billet as follows:
1. Put device should be put on the 2 mm reference block;
2. Calibrate the device using the known thickness of the test object;
3. Make 5 measurements of thickness in five different points of 2 mm reference block;
4. Define the maximum measurement error ∆ by the formula:
∆= max(Hi–Hо)
where Нi–measured value; Но–thickness of reference block;
5. Repeat steps in clauses 1 –4 for 10 and 60 mm reference blocks.
Verification is considered acceptable if the measurement error of the device for all reference
blocks is not more than ± 0,04 mm.
3.2.6 Execution of verification
The verification of the device recognized operational shall be executed by a verification certificate
of the approved form and stamping.
The failure of verification is executed by a certificate of inoperability with the reason and
cancellation of certification of the previous verification.
3.3 Warranty
The warranty covers all NOVOTEST products.
NOVOTEST warrants the compliance of the device with the technical regulations provided that
operator fulfill the requirements to the transportation, storage, and operation, and performs timely
service maintenance at the NOVOTEST facility at least once a year.
3.3.1 Basic warranty
Your new NOVOTEST device purchased from NOVOTEST or the authorized dealer is covered
by the 1-year basic warranty.
If any component of the device fails due to a defect in material or workmanship, it shall be
repaired free of charge or replaced by NOVOTEST or by an authorized dealer of NOVOTEST,
regardless of transfer of the right of ownership of the device during the warranty period.
The warranty on batteries and chargers is provided directly by manufacturers of batteries and
chargers, so they are not covered by NOVOTEST warranty. However, your authorized dealer of
NOVOTEST will assist you in making warranty claims regarding batteries and chargers.

Operating manual
EMA Thickness Gauge NOVOTEST UT-3K-EMA
RDC.ED.UT-3K-EMA.000 OM
Page 11
The warranty on the device starts from the date of purchase of the device, usually from the
shipment of the device to the customer. If the device is acquired by an intermediary company, the
warranty period shall start upon the transfer of the device to an intermediary company.
3.3.2 Warranty on repaired or replaced parts
All branded parts of NOVOTEST installed during the warranty service are covered by the
NOVOTEST warranty (up to the end of warranty period).
The spare parts replaced during the warranty service shall not be returned to the device owner.
3.3.3 Wearing parts
The components worn during the device operation fall into two main categories. The first category
includes the parts that require replacement or adjustment with a frequency stipulated by the device
maintenance schedule, and the second category includes the wearing parts whose replacement or
adjustment frequency depends on the operating conditions of the device.
The parts listed below either have a limited life or may require replacement (adjustment) due to
damage. However, the following parts are covered by the 12-month basic warranty of NOVOTEST:
probes and their components;
connecting cables;
parts and mechanisms exposed to mechanical impact during operation.
Note: The parts worn due to friction (such as knives, cutters, movable parts of measuring probes,
ultrasonic piezoelectric probes, support rings, etc.) are not covered by NOVOTEST basic warranty of
these parts fail due to wear and tear during the device operation. However, if these parts fail during
the warranty period due to a defect in material or workmanship, they will be repaired or replaced
under the basic warranty.
3.3.4 Owner obligations
The operating manual and registration certificate of the device specifies the information about the
proper operation and maintenance of your device.
A proper operation and maintenance of the device will help you avoid costly repairs caused by
incorrect operation, negligence or improper maintenance. In addition, following our recommendations
will extend the service life of the device. Therefore, the device owner should:
If any defect or fault is found, submit the device to NOVOTEST or authorized dealer of
NOVOTEST for a warranty repair as soon as possible. This can minimize the repair
required for your device.
Use only branded spare parts and couplants of NOVOTEST (with appropriate labels)
during the device maintenance.
Make records of the device maintenance in the registration certificate and keep receipts
and bills. If necessary, they will prove that the maintenance was made in time (according
to periodicity specified in the registration certificate), using the recommended spare parts
and couplants. This will help you in making warranty claims to defects that might occur
due to a deviation from the device maintenance schedule or the use of unauthorized parts
or materials.
Clean the casing of the device and probe according to recommendations of NOVOTEST.
Fulfill the operation and storage requirements of devices in line with NOVOTEST
recommendations.
3.3.5 Scope of warranty
The NOVOTEST warranty shall not apply if a repair or replacement of parts was caused by one of
the following factors (in the absence of manufacturing defects):

Operating manual
EMA Thickness Gauge NOVOTEST UT-3K-EMA
RDC.ED.UT-3K-EMA.000 OM
Page 12
Damages caused by negligent/incorrect operation of the device, natural disaster, water
intrusion into device, probe, accessories, and parts of the device, accident or misuse of the
device;
Wear and tear of parts;
Non-observance of NOVOTEST recommendations regarding periodicity of the device
maintenance;
Non-observance of requirements to the device operation recommended by NOVOTEST;
Changing of the configuration of the device or its components, intrusion into systems of
the device, etc. without the approval of NOVOTEST;
Use of inappropriate batteries and accessories;
Changing of power supply in the grid;
Refusal from repair of any damages found during the regular maintenance;
Factors outside the scope of control of NOVOTEST, for example, air pollution, hurricanes,
chips resulting from shocks, scratches, and use of unsuitable cleaning fluids;
Use of the repair methods not approved by NOVOTEST;
Use of third-party spare parts and couplants of NOVOTEST.
All repairs covered by the NOVOTEST warranty shall be performed by the authorized service
center of NOVOTEST.
3.3.6 Cases uncovered by warranty
The basic warranty of NOVOTEST and extended warranty of NOVOTEST shall not hold
NOVOTEST accountable for any unexpected or indirect damage resulting from a defect covered by
the above warranties. Such damage includes (but is not limited to the following):
reimbursement for inconveniences, phone calls, posting and shipping expenses the device,
loss of profit or damage to property;
all warranties shall become void if the device is officially recognized unserviceable.
3.3.7 Warranties and consumer law
The basic warranty of NOVOTEST and extended warranty of NOVOTEST shall not harm your
rights provided by the sale agreement that is executed with selling the device to the manufacturer or
authorized dealer of NOVOTEST; and the applicable law stipulating the requirements to sales and
servicing of consumer goods.
3.4 Maintenance
The information about the maintenance applies to all NOVOTEST products.
The maintenance shall be performed during the device operation and is categorized into:
preventive maintenance;
regular maintenance.
Preventive maintenance shall be performed at least once in a quarter and includes visual
inspection, cleaning, and greasing.
Regular maintenance shall be performed by NOVOTEST at least once a year and is mandatory to
save the warranty of NOVOTEST.
It is very important to maintain the device during the entire operation period.
The list of steps performed during each maintenance will depend on the device model, year of
production, and run to failure. By your request, the authorized service center of NOVOTEST may
provide you the information about steps to be taken when servicing the device.
The records of regular maintenance of your device shall be made in the registration certificate of
the device. The information about maintenance is very important; it can be needed to exercise your
rights for warranty repair of the device. So, always make sure that the authorized service center of
NOVOTEST puts a stamp in the right place under the record about the performed procedure.

Operating manual
EMA Thickness Gauge NOVOTEST UT-3K-EMA
RDC.ED.UT-3K-EMA.000 OM
Page 13
If any failure in the device is found, it shall be submitted to NOVOTEST for maintenance. The
table 3.3 lists the failures that operator can eliminate individually.

Operating manual
EMA Thickness Gauge NOVOTEST UT-3K-EMA
RDC.ED.UT-3K-EMA.000 OM
Page 14
Table 3.3 –Possible failures and methods of elimination
Name of failure, signs, and
additional evidence
Possible reason
Method of elimination
No digits on the display after
turning on
The battery is fully discharged
Charge the battery
When checking the performance
of the thickness gauge on a
reference block, the
measurement error is bigger than
the permissible error
The device is not calibrated
Set and calibrate the device
under c. 2.3 or c. 2.5.4.3 of
RDC.ED.UT-3K-
EMA.000.OM.

Operating manual
EMA Thickness Gauge NOVOTEST UT-3K-EMA
RDC.ED.UT-3K-EMA.000 OM
Page 15
4 RUNNING REPAIRS
By design and operating conditions, the device belongs to the devices that should be repaired by
specialized companies or a manufacturer.
To submit the device to the service center (SC) for warranty service, the registration certificate of
the device must be submitted. SC shall make a record in the registration certificate about the warranty
service of the device and sends the copy to the manufacturer.
The device shall be submitted for warranty (after-warranty) repair or verification along with the
registration certificate of the device. The accompanying documents shall state the contact details,
phone number, and fax of the sender, and the method and address of delivery.
The warranty repair is performed upon the presence of the filled in registration certificate.
5 STORAGE
The storage conditions of the device belong to category 1 according to GOST 15150 at the
ambient temperature from +5 °С to +40 °С and relative humidity up to 80 % at the temperature of 25
°С. During short-term storage and in the periods between applications, the device shall be stored in the
intended packaging container. The place of storage should be free from vapors of aggressive media
(acids, alkali) and direct sunlight. The device shall not be exposed to rapid shocks, falls or strong
vibrations.
The devices shall be placed on storage racks or in palletized in the transportation container.
For a long-term storage, the device must be preserved.
6 TRANSPORTATION
The packed devices can be transported by any kind of carrier upon the fulfilment of the following
requirements:
transportation is performed in the factory container;
no direct moisture influence;
the temperature does not go outside the range from -50 °С to +50 °С;
humidity does not exceed 95 % at the temperature up to 35 °С;
vibration is in the range 10-500 Hz with an amplitude up to 0.35 mm and acceleration up to 49
m/c2;
shocks of peak acceleration of up to 98 m/s2;
the devices in the vehicle are fastened to avoid falling and mutual bumps.
To avoid the moisture buildup inside the device after transportation from the sub-zero
environment to a warm place, the device should be held in a container for 6 hours at room temperature.
7 DISPOSAL
The device does not contain dangerous or harmful substances that could harm a human health or
environment and are not dangerous for life, public health and environment upon expiration of the
service life. Due to this fact, device disposal can be done according to common waste disposal
practice. Disposal shall be done by the type of components: plastic, metal, and fastening components.
The content of precious metals in the device components (electronic boards, connectors, etc.) is
very low, so recycling is not expedient.

Operating manual
EMA Thickness Gauge NOVOTEST UT-3K-EMA
RDC.ED.UT-3K-EMA.000 OM
Page 16
Notes
__________________________________________________________________________________
__________________________________________________________________________________
__________________________________________________________________________________
__________________________________________________________________________________
__________________________________________________________________________________
__________________________________________________________________________________
__________________________________________________________________________________
__________________________________________________________________________________
__________________________________________________________________________________
__________________________________________________________________________________
__________________________________________________________________________________
__________________________________________________________________________________
__________________________________________________________________________________
__________________________________________________________________________________
__________________________________________________________________________________
__________________________________________________________________________________
__________________________________________________________________________________
__________________________________________________________________________________
__________________________________________________________________________________
__________________________________________________________________________________
__________________________________________________________________________________
__________________________________________________________________________________
__________________________________________________________________________________
__________________________________________________________________________________
__________________________________________________________________________________
__________________________________________________________________________________
__________________________________________________________________________________
__________________________________________________________________________________
__________________________________________________________________________________
__________________________________________________________________________________
__________________________________________________________________________________
__________________________________________________________________________________
__________________________________________________________________________________
__________________________________________________________________________________
__________________________________________________________________________________
__________________________________________________________________________________
__________________________________________________________________________________
__________________________________________________________________________________
__________________________________________________________________________________
__________________________________________________________________________________
__________________________________________________________________________________
__________________________________________________________________________________
__________________________________________________________________________________
__________________________________________________________________________________
__________________________________________________________________________________
__________________________________________________________________________________
__________________________________________________________________________________
__________________________________________________________________________________
__________________________________________________________________________________
__________________________________________________________________________________
Table of contents
Other NOVOTEST Measuring Instrument manuals
Popular Measuring Instrument manuals by other brands
AW
AW 200 Operator's manual
Shaw
Shaw SADP operating instructions
Badger Meter
Badger Meter Blancett QuickSert B131C-038 user manual

Spectro-UV
Spectro-UV Spectroline AccuPRO XP-4000 Operator's manual

Bühler technologies
Bühler technologies BCI 24-D Series Brief instructions
OmniMetrix
OmniMetrix TrueGuard-Pro installation guide
