NL INSTALLATIE
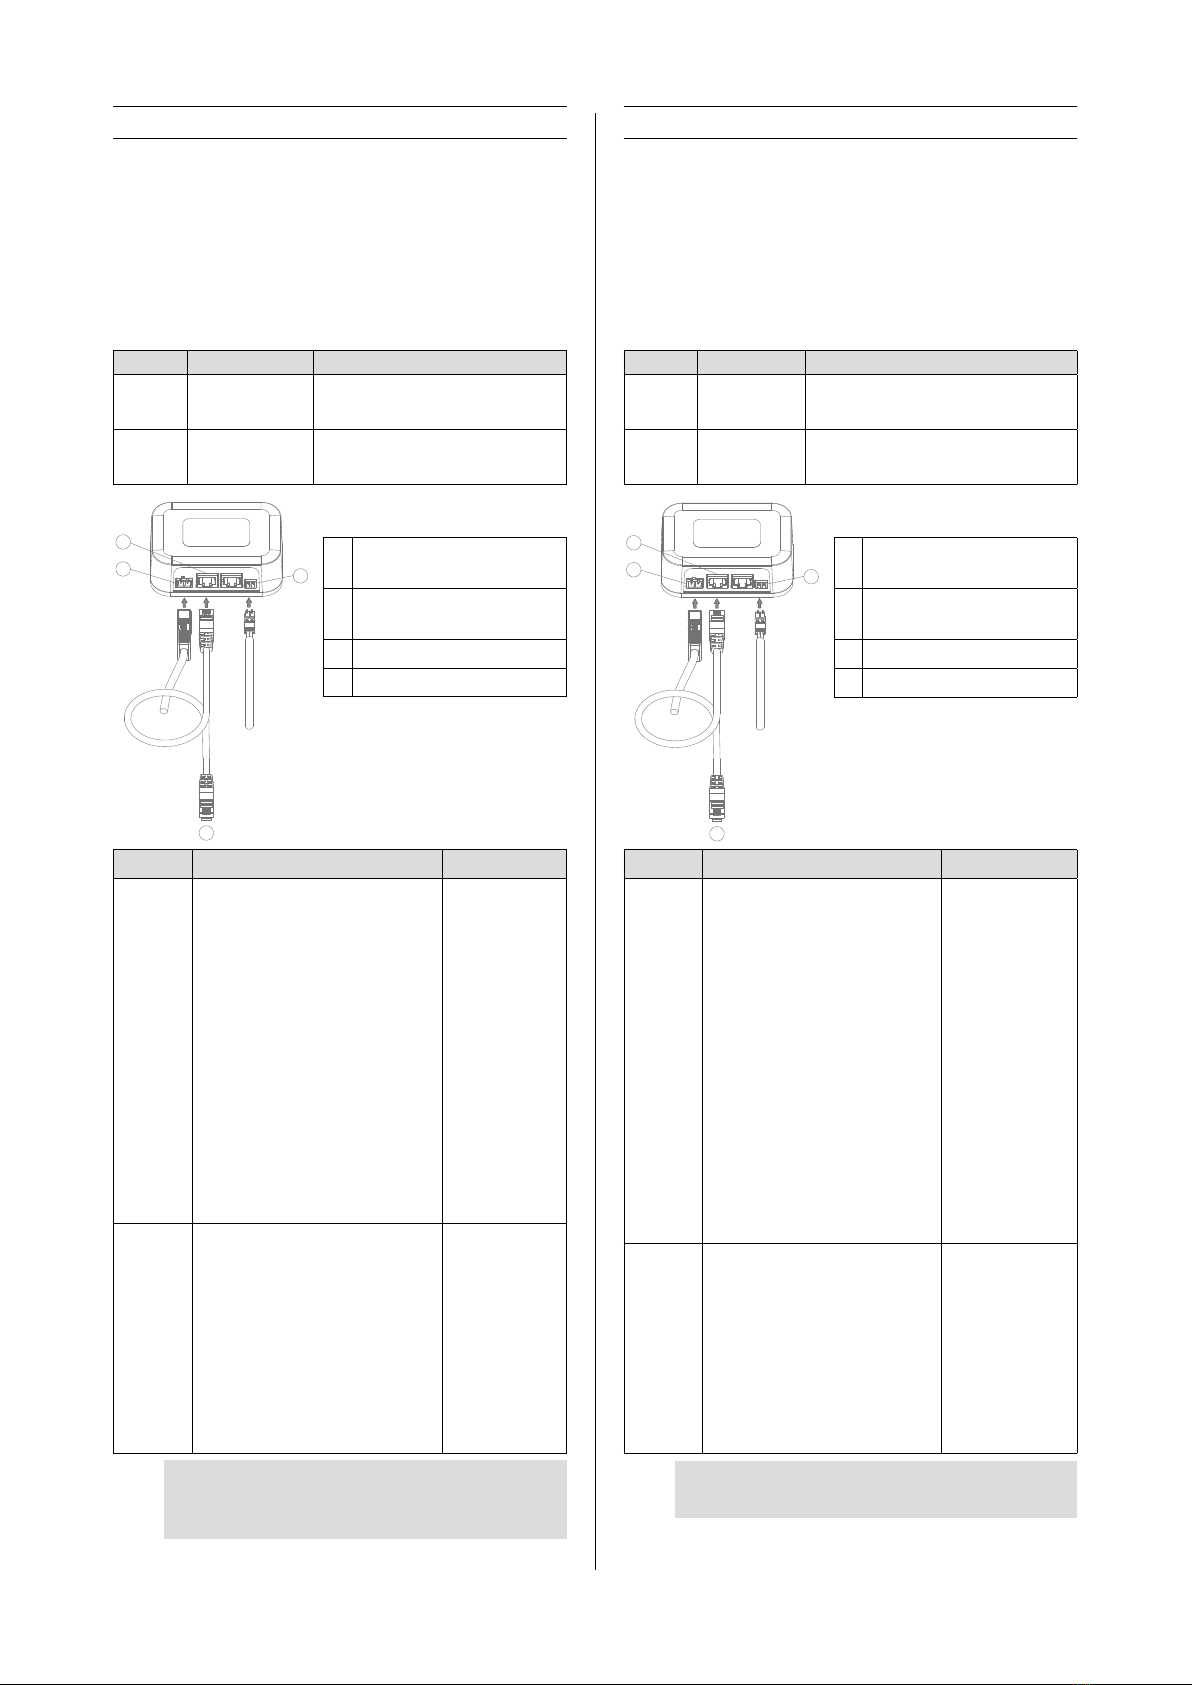
1Lokaliseer de aansluiting connector van het appa-
raat en maak deze vrij (zie installatiehandleiding
apparaat)
2
Verbind de I/O module met de afzuigkap via de
meegeleverde verbindingskabel.
3
Controleer de aansluiting volgens uw installatiesituatie
volgens het elektrische schema op pagina 10.
INPUT: Sluit de potentiaalvrije contacten van de
ingangskabel aan op de meegeleverde losse 2-polige
input connector.
Verwijder hierbij de bescherming van de draadader
voor 10mm
4
OUTPUT: Sluit de potentiaalvrije contacten van
de uitgangskabel aan op de meegeleverde losse
2-polige output connector. Verwijder hierbij de
bescherming van de draadader voor 10mm.
Plaats daarna de bescherming rondom de connector.
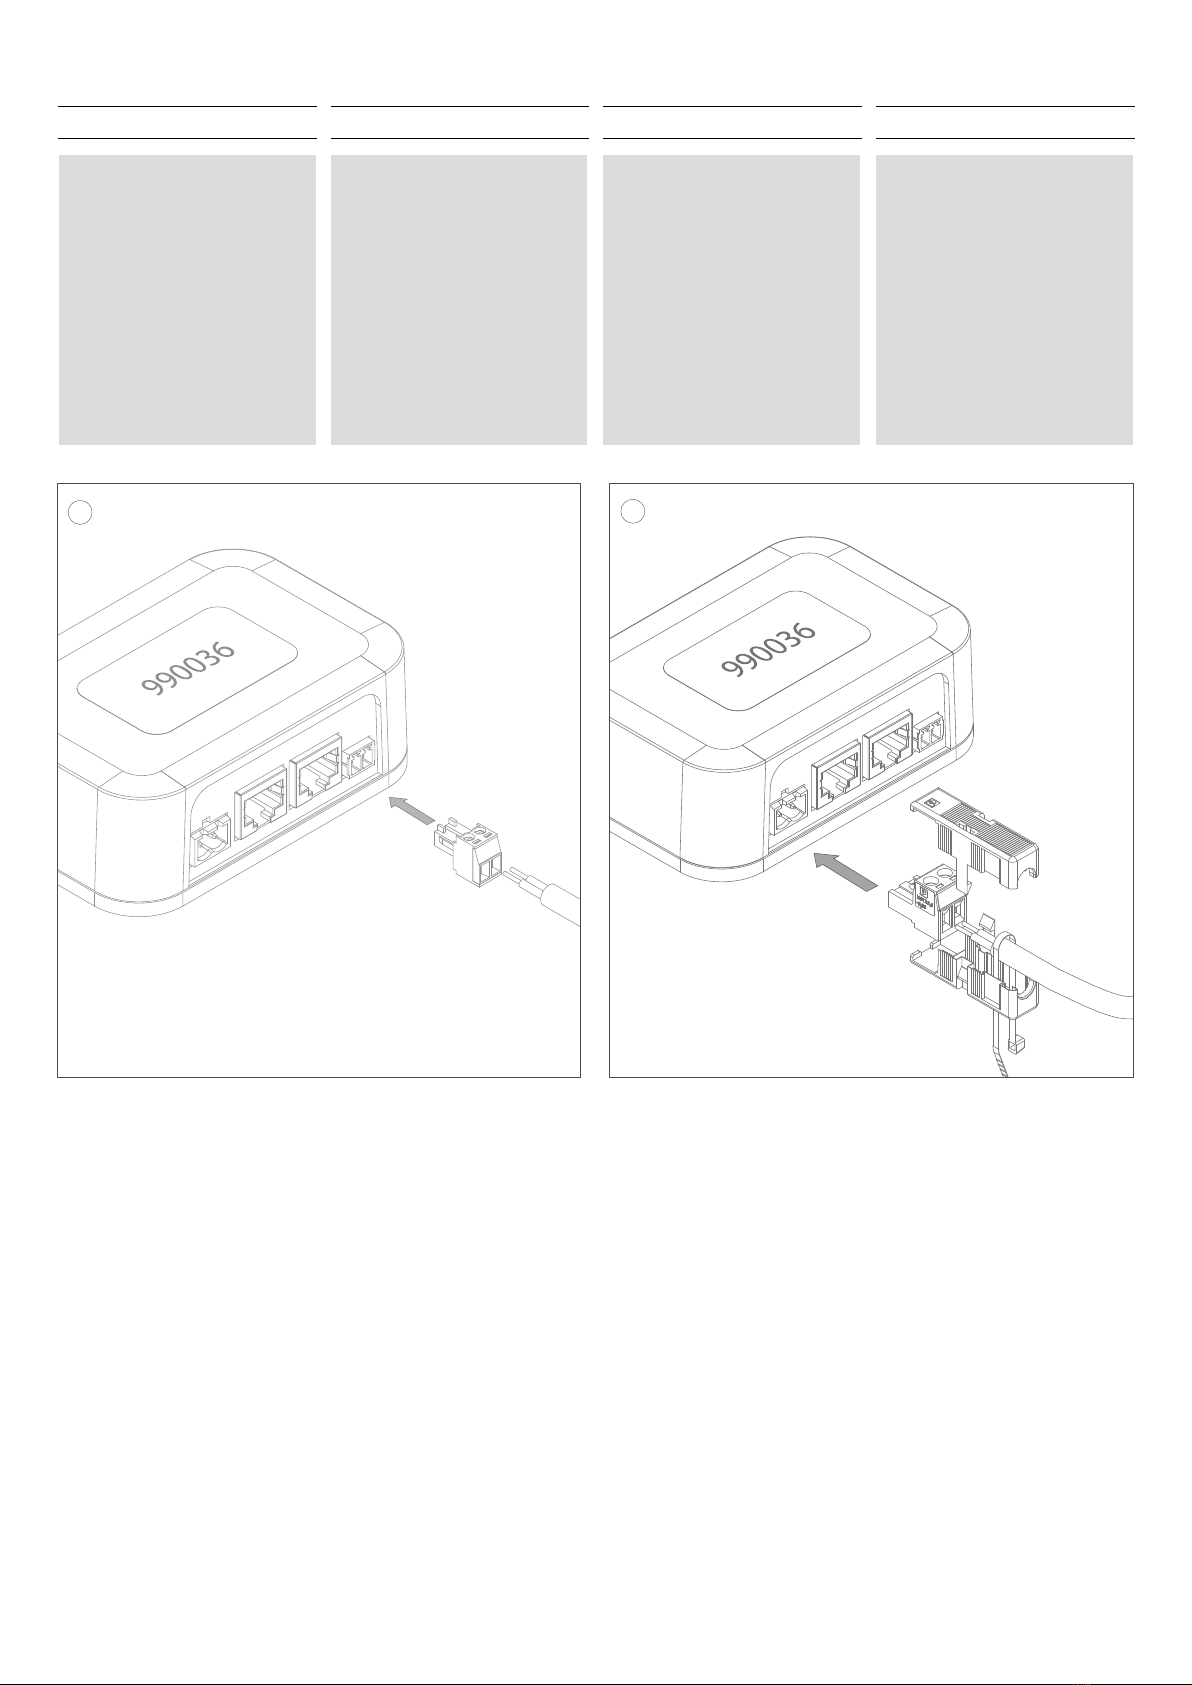
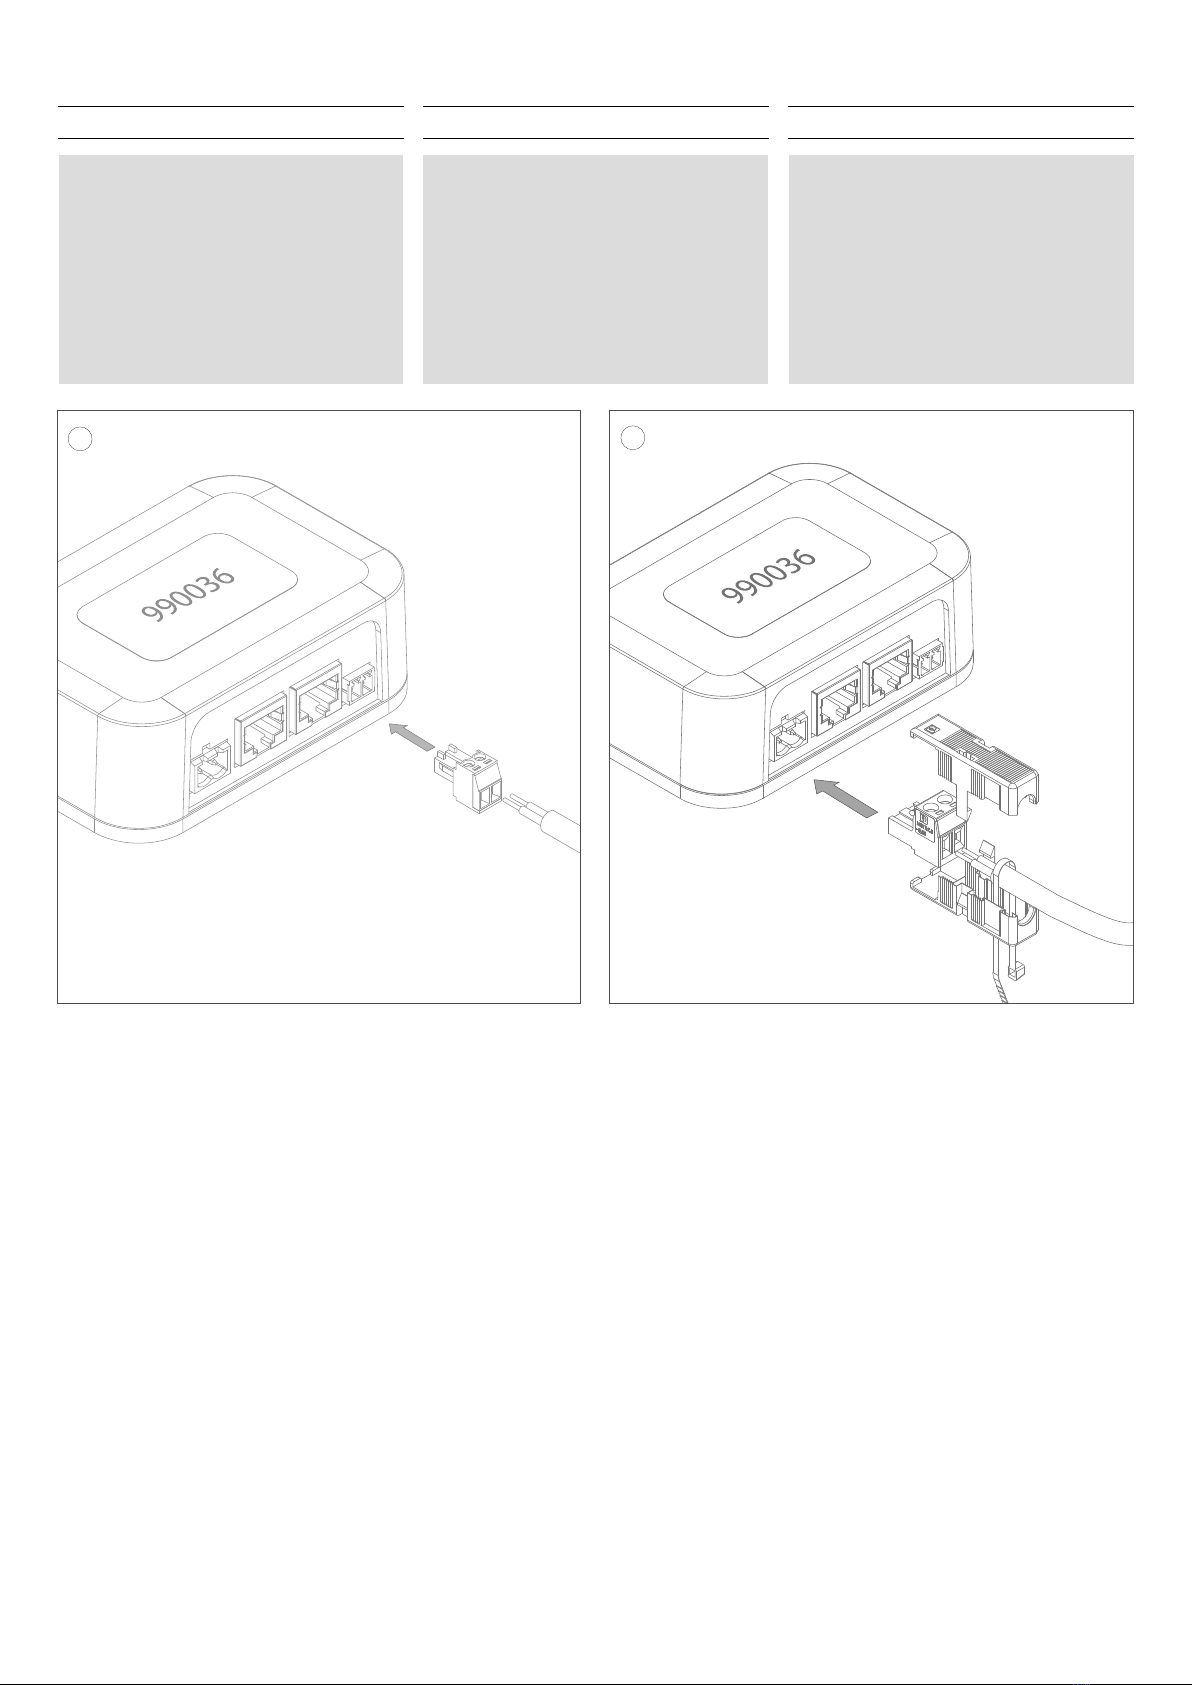
5
Controleer de correcte montage van de nieuwe
verbindingen
6
Kleef indien nodig de I/O module vast op het
apparaat of kastwand met het bijgeleverde stukje
tape. Ontvet eerst het te kleven oppervlak met het
bijgeleverde ontvettingsdoekje.
7Schakel het stroomcircuit van het apparaat terug
in.
DE INSTALLATION
1Suchen Sie den Stecker des Geräts und machen
Sie es frei (siehe Installationsanleitung)
2
Verbinden Sie das E/A-Modul mit der Dunstabzugs-
haube über die Anschlusskabel mitgeliefert.
3
Überprüfen Sie die Verbindung entsprechend Ihrer
Installationssituation gemäß dem elektrischen
Schaltplan auf Seite 10.
EINGANG: Verbinden Sie die potentialfreien Kontakte
das Eingangskabel mit dem mitgelieferten 2-poligen
Gegenstecker.
Entfernen Sie die Insolierung des Kabels um ca.
10mm.
4
AUSGANG: Verbinden Sie die potentialfreien Kontakte
das Ausgangskabels mit dem mitgelieferten 2-poligen
Gegenstecker. Entfernen Sie die Isolierung des
Kabels um ca. 10mm.
Dann platzieren Sie die Schutz um den Steckverbinder
herum.
5Überprüfen Sie die korrekte Installation der neuen
Verbindungen.
6
Falls erforderlich, kleben Sie das I/O-Modul mit
dem mitgelieferten Klebeband auf die Geräte-
oder Schrankwand. Entfetten Sie zunächst die
zu verklebende Fläche mit dem mitgelieferten
Entfettungstuch.
7
Schalten Sie den Stromkreis des Gerätes wieder
ein.
FR INSTALLATION
1
Localiser le connecteur de l’appareil et le libérer
(voir le manuel d’installation)
2Connectez le module E/S à la hotte aspirante via
le câble de connexion fourni.
3Vérifiez la connexion en fonction de votre situation
d‘installation selon le schéma électrique de la page
10.
ENTRÉE: Connectez les contacts libres de potentiel
du câble d’entrée au connecteur d’entrée bipolaire.
Enlever la protection de l’âme du fil sur 10mm.
4
SORTIE: Connectez les contacts libres de potentiel
du câble de sortie au connecteur de sortie bipolaire.
Enlever la protection de l’âme du fil sur 10mm
Ensuite, placez la protection autour du connecteur.
5Vérifier la conformité des nouvelles connexions.
6
Si nécessaire, Coller le module I/O sur l’appareil ou
sur la paroi de l’armoire à l’aide du ruban adhésif
fourni. Dégraissez d’abord la surface à coller avec
le chiffon dégraissant fourni.
7
Remettre le circuit d’alimentation de l’appareil sous
tension.
EN INSTALLATION
1
Locate the connector of the device and make it
free (see installation manual)
2Connect the I/O module to the extractor hood via
the supplied connection cable.
3
Check the connection according to your installation
situation according to the electrical diagram on
page 10.
INPUT:Connect the potential-free contacts of the
input cable on the supplied 2-pole input connector.
Remove the protection of the wire core for 10mm.
4
OUTPUT: Connect the potential-free contacts of
the output cable on the supplied 2-pole output
connector.
Remove the protection of the wire core for 10mm.
Then place the protection around the connector.
5
Check the correct installation of the new connections.
6If necessary, stick the I/O module onto the device
or cabinet wall with the supplied piece of tape. First
degrease the surface to be glued with the supplied
degreasing cloth.
7Switch the power circuit of the device back on.
7