NSS Predator CXC Operating instructions

ToOrderPartsCall1-888-702-5326-https://monsterfloorequipmentparts.com
1
INFORMATION
&
OPERATING
INSTRUCTIONS
4093741 Rev. 111711
READ AND UNDERSTAND THESE INSTRUCTIONS
BEFORE OPERATING THE MACHINE
Predator
CXC and CXH Spotter

ToOrderPartsCall1-888-702-5326-https://monsterfloorequipmentparts.com
2
Machine Specifications . . . . . . . . . . . . 2
Record Important information: . . . . . . 2
Safety Information & Cautions . . . . . . 3
Your New Machine. . . . . . . . . . . . . . . 4
Normal Use. . . . . . . . . . . . . . . . . . . . 4
Chemicals . . . . . . . . . . . . . . . . . . . . . 4
Tools & Accessories . . . . . . . . . . . . . . 4
RECORD AND RETAIN THIS IMPORTANT INFORMATION
And don’t forget to register your purchase to activate your warranty
Serial Number: __________________
Model: CXC CXH
Purchase Date: __________________
Write the name and phone number of your distributor:
_____________________________________________
_____________________________________________
MACHINE AND PURCHASE INFORMATION:
Care & Maintanence. . . . . . . . . . . . . . 4
Views of Machine. . . . . . . . . . . . . . . . 5
Set up & Operating Instructions . . . . . 6
CXC Part List & Schematic . . . . . . . . . 7
CXH Part List & Schematic . . . . . . . . . 8
Troubleshooting. . . . . . . . . . . . . . . . . 9
Notes . . . . . . . . . . . . . . . . . . . . . . . 10
CONTENTS:
MACHINE SPECIFICATIONS:
CXC CXH
Pump 55 psi, oscillating 55 psi, oscillating
Vacuum 2-stage, 90” lift, 97 cfm 2-stage, 90” lift, 97 cfm
Heater N/A 750 watt
Solution Tank Capacity 2.5 Gal 2.5 Gal
Recovery Tank Capacity 2 Gal 2 Gal
Vaccum Shut-off Ball Float Ball Float
Dimensions 28 -5/16”H X 11-1/8” W X
15-1/2” L 28-5/16” H X 11-1/8” W X
15-1/2” L
Weight 22 lbs 24 lbs

ToOrderPartsCall1-888-702-5326-https://monsterfloorequipmentparts.com
3
WARNING!
READ AND SAVE THESE INSTRUCTIONS
To reduce the risk of personal injury or property
damage, follow these procedures:
• Connect to a properly grounded outlet only.
• Do not operate the machine in an explosive
environment.
• Do NOT use Solvents.
• Never add water over 120º F/49 ºC to the
solution tank.
• Do not pick up anything that is burning
or smoking, such as cigarettes, matches,
or hot ashes, or any health endangering
dusts. Do not use to pick up flammable or
combustible liquids such as gasoline or use
in areas where they may be present.
The acceptable use of this machine is
for commercial/professional cleaning, for
example, in hotels, schools, hospitals, offices
and automobiles rather than for personal
housekeeping.
NOTE: Read all instructions before using this
machine. Improper use or misuse of the
machine can result in personal or property
damage.
• To avoid electric shock, do not expose to
rain or snow and keep from extremes in
temperature. Store
in a heated location.
Use the machine indoors. Do not use
outdoors.
• Do not use with damaged cord or plug. If
the machine is not working as it should,
has been dropped, damaged, left outdoors
or flooded with water, return it to a service
center.
• Do not use this machine to dry vacuum
before wet cleaning.
• Do not leave the machine unattended
when it is plugged in. Unplug the unit
from the outlet when not in use and before
servicing.
• Do not allow to be used as a toy. Close
attention is necessary when used near
children.
• Use only as described in this manual. Use
only the manufacturer’s recommended
attachments.
• Do not handle the plug, the cord, or the
machine with wet hands.
• Extension cords must be 14/3 and no
longer than 50 feet. Replace the cord
or plug immediately if the ground prong
becomes damaged.
• Do not put any object into openings. Do
not use with any opening blocked; keep
free of dust, lint, hair, and anything that
may reduce air flow.
• Keep loose clothing, hair, fingers, and all
parts of body away from openings and
moving parts.
• Liquid ejected at the spray nozzle could be
dangerous as a result of its temperature,
pressure, or chemical content
CRITICAL SAFETY INFORMATION & CAUTIONS
READ ALL!

ToOrderPartsCall1-888-702-5326-https://monsterfloorequipmentparts.com
4
YOUR NEW MACHINE:
The manufacturer thoroughly tests every
machine it sells before it is packaged. When
you receive your new machine, examine the
packaging for signs of shipping damage.
Carefully unpack the machine and inspect it. If
you see evidence of damage to the container
or the contents, contact the freight carrier
immediately.
Additionally, ensure all parts and accessories
are present; if you notice anything missing,
contact your distributor without delay.
NORMAL USE:
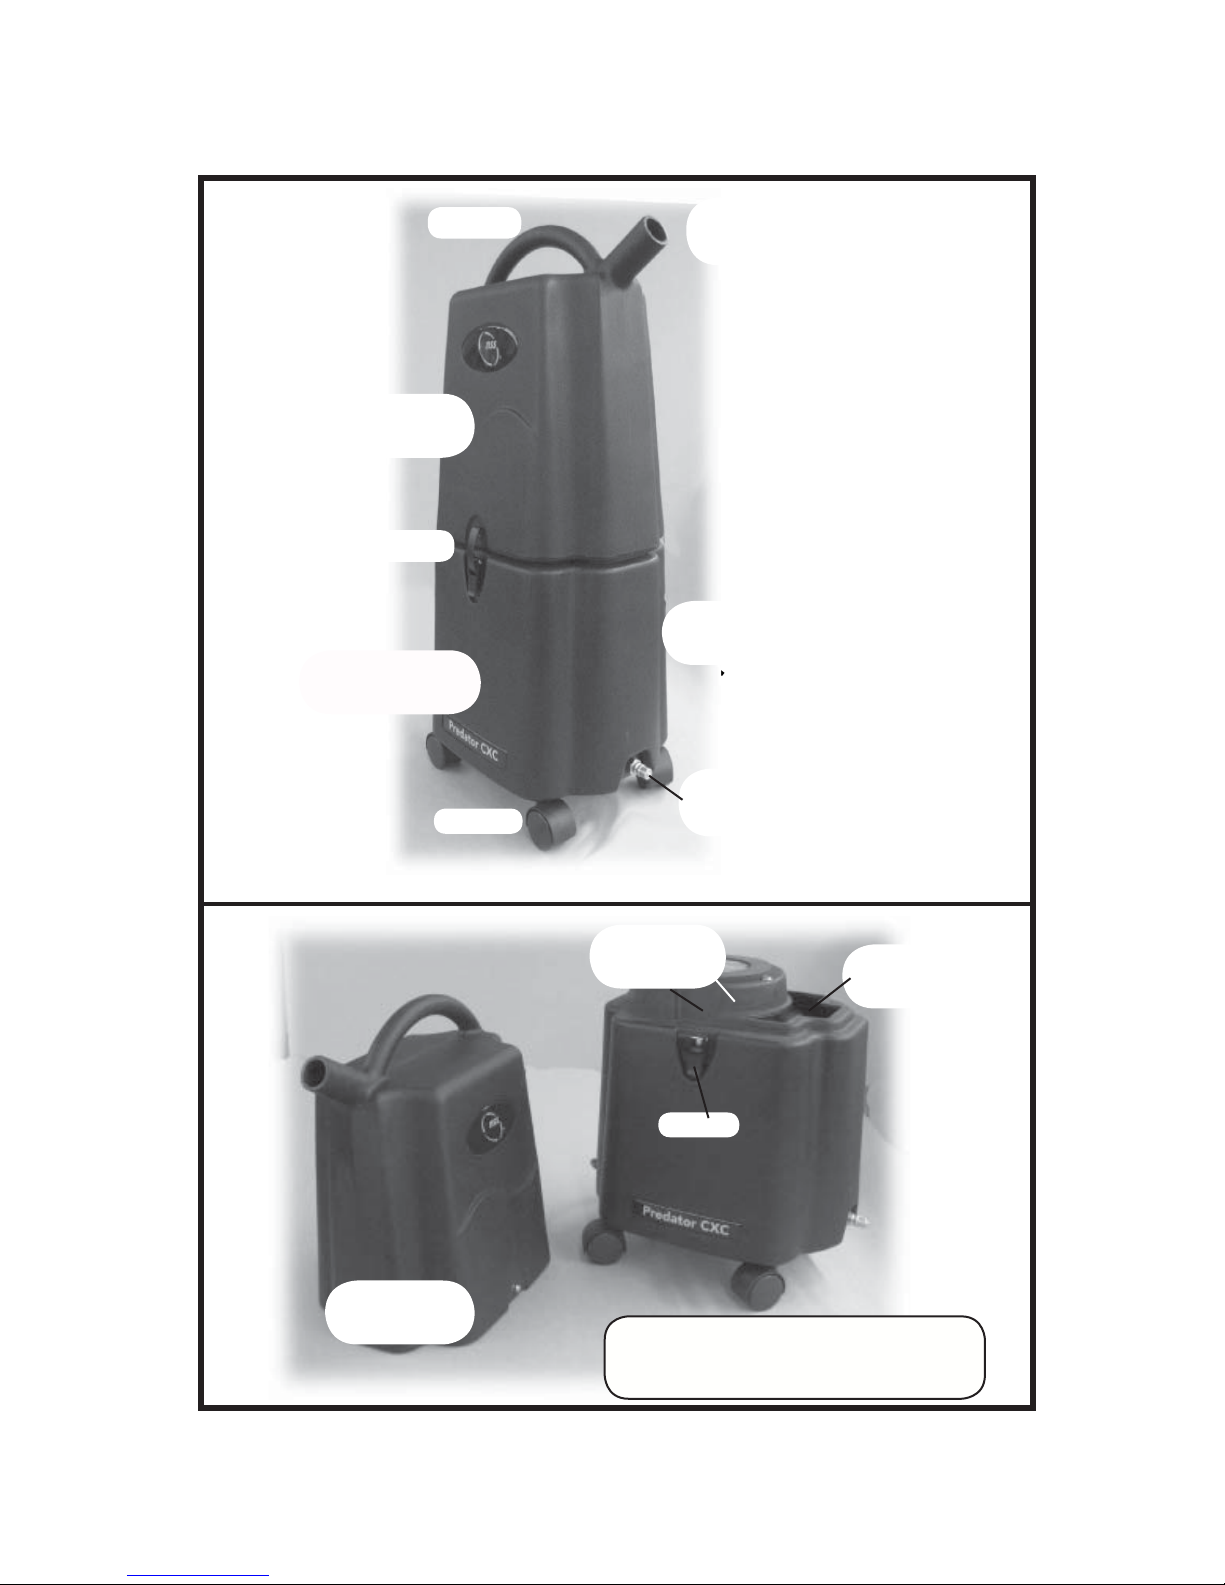
The CXC & CXH Spotters are designed to
clean small areas like furniture, area rugs,
and spots in carpets. These machines are
not suited for cleaning the carpet in an
entire room.
CHEMICALS:
The use of clear water in the machine is
recommended, with the use of properly diluted
cleaner applied as a pre-spray on the area to
be cleaned; however, you may mix water and
cleaning chemicals in a bucket -- according to
directions on the chemical label -- and then
pour into the solution tank. If you chose to use
chemicals in the machine, always use a cleaner
with a pH as close to neutral as possible to
avoid premature wear of the pump, seals, and/
or other components. Damage caused by the
use of strong chemicals is not covered by the
warranty.
The use of powder chemicals is discouraged;
unless they are mixed very thoroughly and
rinsed out completely at the end of the job,
powdered cleanerscould causea build-upin the
pump, lines, heater and/or quick disconnects.
Any problem caused by a chemical build-up is
not covered by warranty.
If foaming occurs as you clean, use a defoamer,
either in the recovery tank or on the area being
cleaned, to prevent overflow which can cause
water damage.
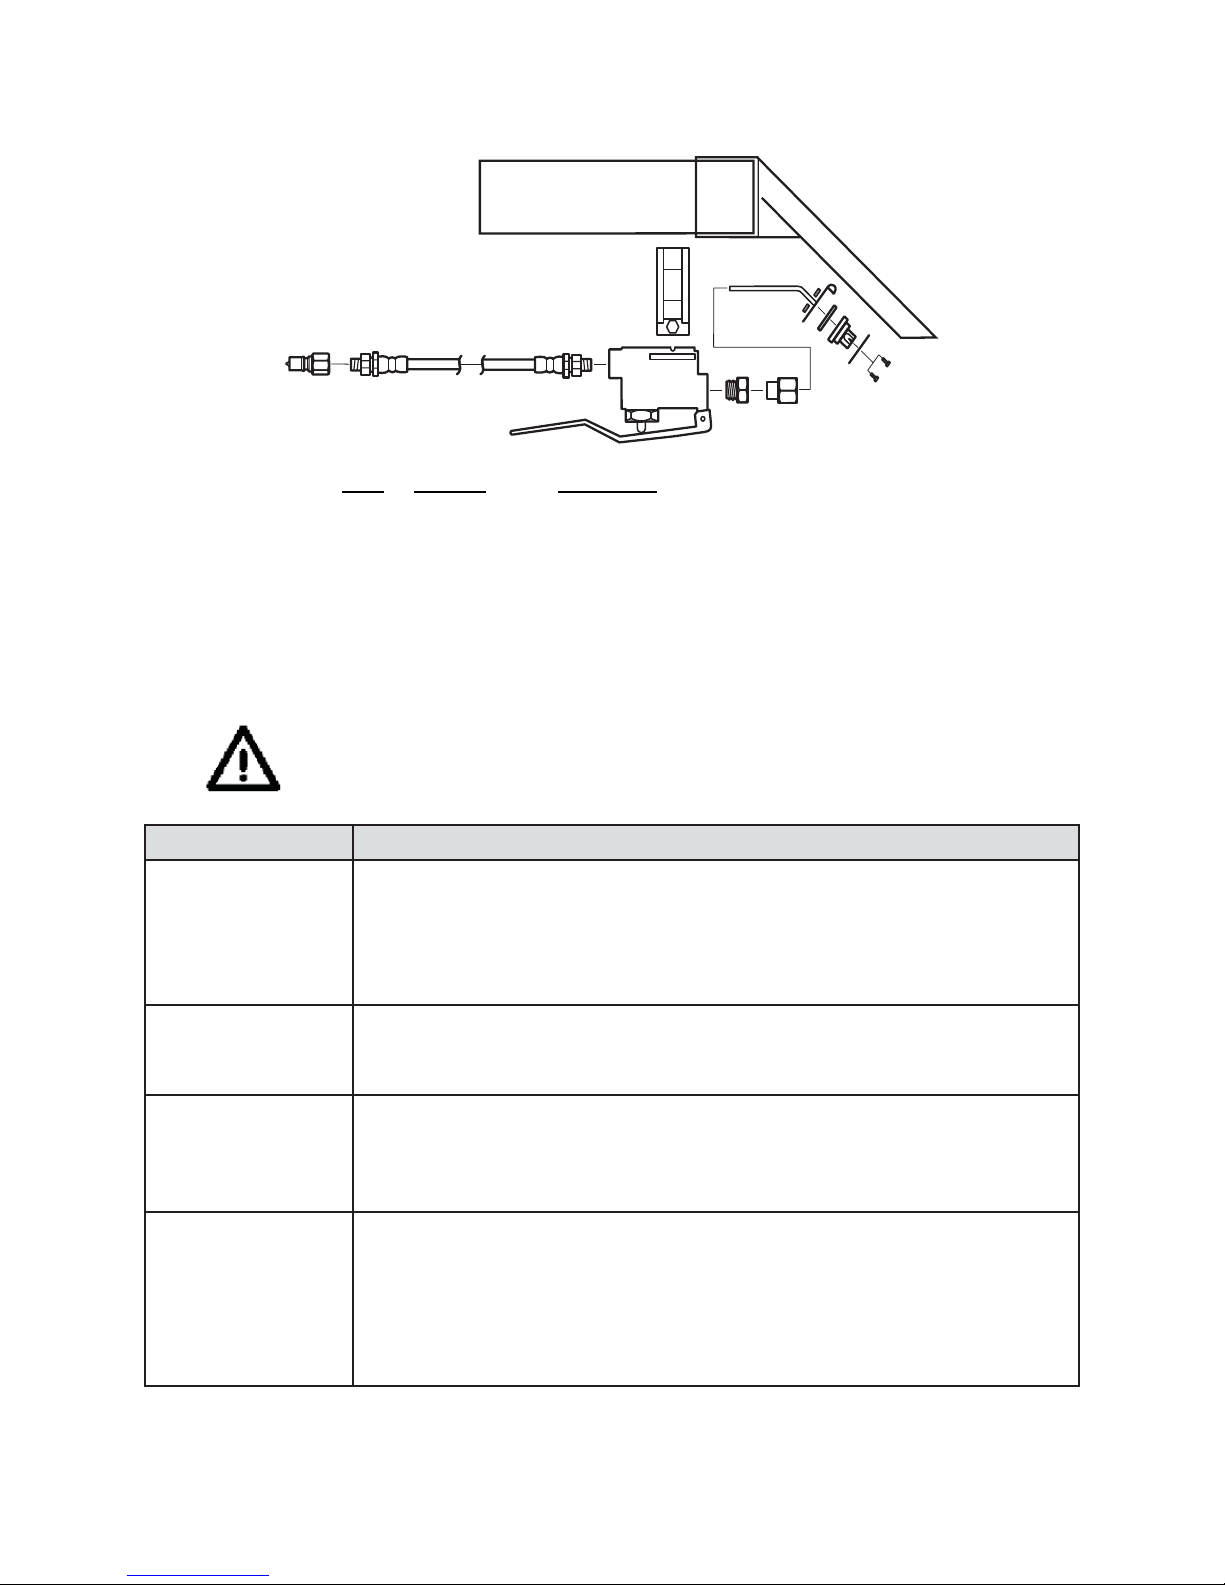
TOOLS & ACCESSORIES:
Use only manufacturer’s recommended
tools and accessories. The hand tool is
made from stainless steel and will provide
years of trouble-free use. If the spray valve
begins to leak or if the spray tip gets worn
and is no longer providing a nice even spray
pattern, order a replacement part from your
distributor.
The solution line and vacuum hose are made
of durable and long-lasting components and,
with proper care, they both should last for
years. Use a spray silicone to keep the quick
connect couplings moving freely.
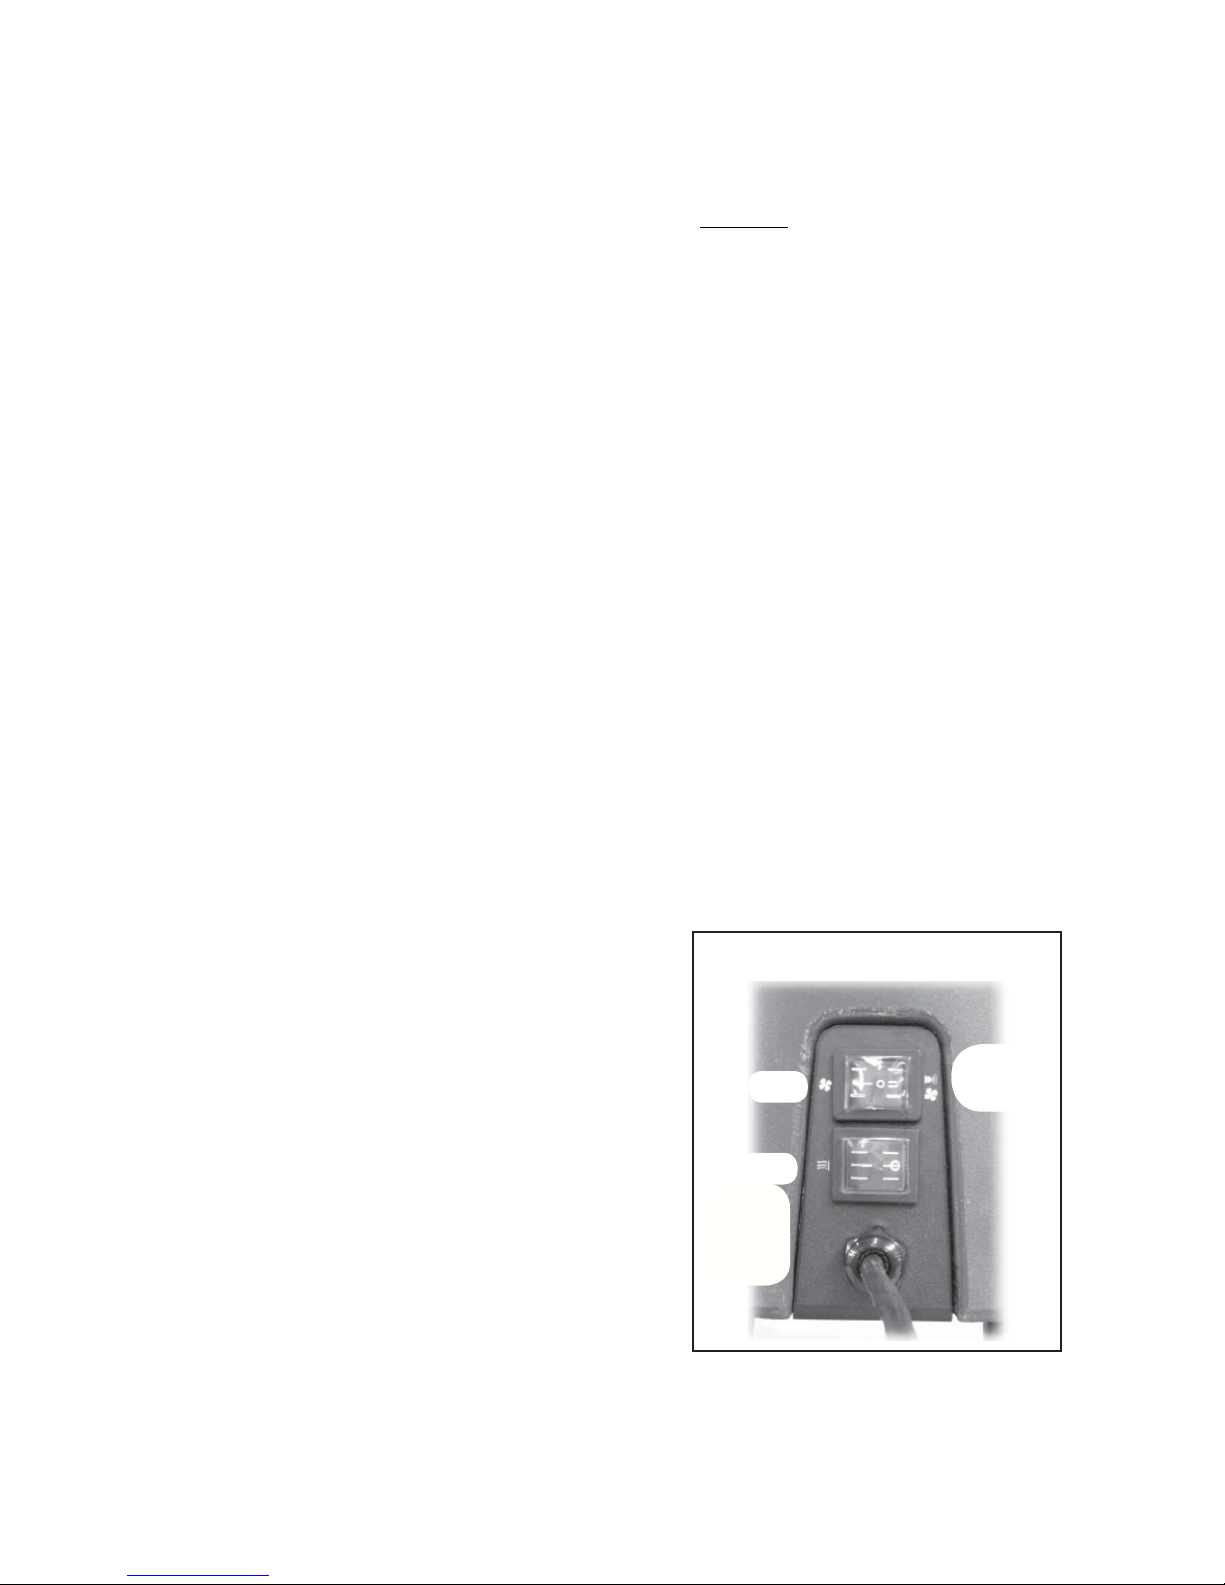
CARE & MAINTENANCE:
For optimum performance flush the machine
with clear water at the end of each working
day. Once a month, minimum, run a flushing
compound through the machine to break up
any mineral or chemical build-up that may have
formed from the use of hard water or chemicals.
The vacuum motor and the pump do not require
any scheduled maintenance; however, the
vacuum motor may require replacement brushes
after 700 - 1000 hours.
To maintain a professional image, clean the
body with an all purpose detergent, and protect
it with automobile interior polish. Lubricate the
wheels, castors, and quick disconnects with an
all purpose, silicone spray.

ToOrderPartsCall1-888-702-5326-https://monsterfloorequipmentparts.com
5
Figure 1
Motor
Compartment
Caster
Recovery
Tank
Latch
Solution
Tank
Handle Vac Hose
Goes Here
Vac Inlet
Filter
Recovery
Tank
Latch
Solution
Fill Hole
VIEWS OF MACHINE
Solution Hose
Goes Here
Open the latches to separate the
machine to fill the solution tank or
empty the recovery tank

ToOrderPartsCall1-888-702-5326-https://monsterfloorequipmentparts.com
6
Figure 2
1. Inspect the machine, hoses and tool for
cleanliness and readiness for use.
2. Release the two latches, grasp the
handle on top of the recovery tank, and
pull the recovery tank up (Figure 1) and
off the solution tank. Set the recovery
tank aside.
3. Fill the solution tank with up to 2 gallons
of clean, warm water. NOTE: do not use
water with a temperature exceeding
120° F (49° C) in the solution tank.
CAUTION: do NOT use solvents.
The Predator CXH Spotter has a built-in
heater that will supply continuous hot
water at the spray tip.
4. Replace the recovery tank back onto the
solution tank and secure both latches.
5. Connect the solution hose to the quick
coupling on the machine and connect
the other end of the solution hose to
your cleaning tool. Push the vacuum
hose onto the vacuum inlet port on the
machine’s recovery tank and the other
end onto the tool.
6. Plug the power cord into a properly
grounded outlet.
7. Turn on the pump (Figure 2, set the
switch to the right to turn on both
the pump and the vacuum and to
the left to turn on only the vacuum.
Middle position is off) and spray
through your cleaning tool and heater
for a few seconds to fill the lines with
water, then turn the switch off.
8. CXH only - Turn on the heat switch
(Figure 2) to allow the heater two
minutes to reach operating temperature.
9. Pre-spray the area to be cleaned with a
high quality, non-foaming cleaner
mixed to product specifications.
NOTE: if foaming occurs, use a
defoaming agent to prevent damage to
electrical components. Water damage is
not covered by the warranty.
10. Turn on both the pump and vacuum
(Figure 2).
11. Begin cleaning. NOTE: the machine has
a suction shut-off float in the recovery
tank to prevent over-flow. If the suction
stops, turn off the machine, remove and
empty the recovery tank.
12. When the job is finished, empty the
recovery tank and rinse it clean. Remove
any remaining liquid from the solution
tank.
SET-UP AND OPERATING INSTRUCTIONS
Switches
Vac &
Pump
Vac
Heater
non
heated
models
have a
plug here

ToOrderPartsCall1-888-702-5326-https://monsterfloorequipmentparts.com
17
1
2
5
6
12
7
8
9
11
13
14
16
15
16
15
17
21
22
23
1 4096651 1 Tank, recovery, Spotter
2 4096661 1 Tank, solution, Spotter
3 4097781 1 Vacuum air inlet assembly
4 4096461 1 Ball oat
5 4096721 1 Screen, vac inlet, 5”
6 4096731 1 Gasket,
7 4092291 1 Switch, rocker, vacuum & pump
8 4092381 1 Plug
9 4096501 1 Cord retainer, for power cord
10 4096741 1 Filter, pump inlet
11 4096441 2 Latch
11A 4096431 2 Catch for latch
12 4096451 4 Caster
13 4096391 1 Power Cord, 25 ft
14 4094191 1 Pump, 55 psi, 230V
15 4096621 2 Hose barb/elbow, nylon
16 4096471 2 Bracket, pump mounting
17 4092391 4 Hose clamp, 3/4”
18 4096701 1 Hose, measure dimensions (tell me)
21 4093411 1 Hose, 2”X 13”, wire reinforced
22 4094151 1 Vac motor, 230V
23 4096521 1 Gasket, vac motor
24 4092491 1 Quick disconnect, male
25
4096541 1 Solution line assembly, 10 ft
26 4096531 1 Vac hose assembly, 10 ft
19
Item No. Part No. QTY Description
24
Predator CXC Spotter, 230V
7
25
26
Rev 042412
4
3
11A
10
18

ToOrderPartsCall1-888-702-5326-https://monsterfloorequipmentparts.com
1
2
5
6
32
7
8
9
10
11
12
13
14
15
16
17
18
19
20
21
21A 21B
22
23
24
25
24
25
20
27
30
31
1 4096651 1 Tank, recovery, Spotter
2 4096661 1 Tank, solution, Spotter
3 4097781 1 Vacuum inlet air assembly
4 4096461 1 Ball oat
5 4096721 1 Screen, vacuum inlet
6 4096731 1 Gasket
7 4092291 1 Switch, rocker, vacuum & pump
8 4092281 1 Switch, rocker, heat
9 4096501 1 Cord retainer, for power cord
10 4096741 1 Filter, pump inlet
11 4096441 1 Latch
11A 4096431 1 Catch for latch
12 4096751 1 Switch, low pressure detection
13 4096761 1 Bushing, brass
14 4096631 1 Hose barb, brass
15 4096811 1 “T,” brass
16 4096591 1 Elbow/Hose barb
17 4096591 1 Power cord, 25 ft
18 4096711 1 Hose, 3/8” X 8”
26
Item No. Part No. QTY Description Item No. Part No. QTY Description
29
28
Predator CXH Spotter, 230V
33
34
4
3
11A
19 4096701 1 Hose, measure for length
20 4092391 6 Hose clamp
21 4096821 1 Heater, complete, 230V
21A 4096781 1 Hose barb/elbow, brass
21B 4096791 1 Hose barb
22 4093391 1 Heat repair kit
23 4094191 1 Pump, 55 psi, 230V
24 4096471 2 Bracket, pump mounting
25 4096621 2 Hose barb/elbow, nylon
26 4096641 1 Hose, measure for size
27 4093411 1 Hose, 2” X 13,” wire reinforced
28 4092491 1 Quick disconnect, male
29 4096361 2 Clamp, heater mounting
30 4094151 1 Vacuum motor, 230V
31 4096521 1 Gasket, vacuum
32 4096451 4 Caster
33 4096541 1 Solution hose assembly, 10 ft
34 4096351 1 Vacuum hose assembly, 10 ft
Rev 042412
8

ToOrderPartsCall1-888-702-5326-https://monsterfloorequipmentparts.com
9
ALWAYS UNPLUG THE MACHINE BEFORE DISCONNECTING
OR CONNECTING ANY WIRES OR COMPONENTS.
SYMPTOM POSSIBLE CAUSE
No spray solution tank is empty;
solution hose is not completely connected to machine & tool;
spray tip on tool is plugged;
pump is not running;
pump inlet filter is dirty or plugged;
Pump not running no power to pump
• check outlet for power;
• power to cord or switch is bad;
Low suction recovery tank not sealed;
damaged vacuum gasket;
dirty vacuum inlet screen;
recovery hose loose or cracked;
No suction recovery tank is full;
vacuum motor not running;
• check outlet for power
• power cord is bad
• bad switch
• bad vac motor
TROUBLESHOOTING
Always use original equipment replacement parts.
Contact your distributor for additional information or to arrange for service.
Hand Tool
Item Part No. Description
1 4093391 Hand Tool, complete
2 4092491 Quick Couplinig, male, 1/4 X 1/4 fpt
3 4093721 Valve, replacement
4 4093731 Spray tip, replacement
3
4
1
2

ToOrderPartsCall1-888-702-5326-https://monsterfloorequipmentparts.com
10
NSS Enterprises, Inc.
Corporate Headquarters
3115 Frenchmens Rd.
Toledo, OH 43607
419-531-2121
www.nss.com
NOTES:
Predator
CXC and CXH Spotter
Other manuals for Predator CXC
1
This manual suits for next models
1
Table of contents
Popular Ultrasonic Jewelry Cleaner manuals by other brands

Royal Appliance
Royal Appliance NOMAD Operator's manual

Parkside
Parkside PFR 28 A1 Translation of the original instructions

TYROLIT Hydrostress
TYROLIT Hydrostress VCE2500D Series operating instructions

Mania
Mania EASYWINDOW instruction manual

Shark
Shark ION ROBOT Instruction booklet

SciCan
SciCan StatClean user manual