manuals.online logo
Brands
  1. Home
  2. •
  3. Brands
  4. •
  5. Nu-Heat
  6. •
  7. Thermostat
  8. •
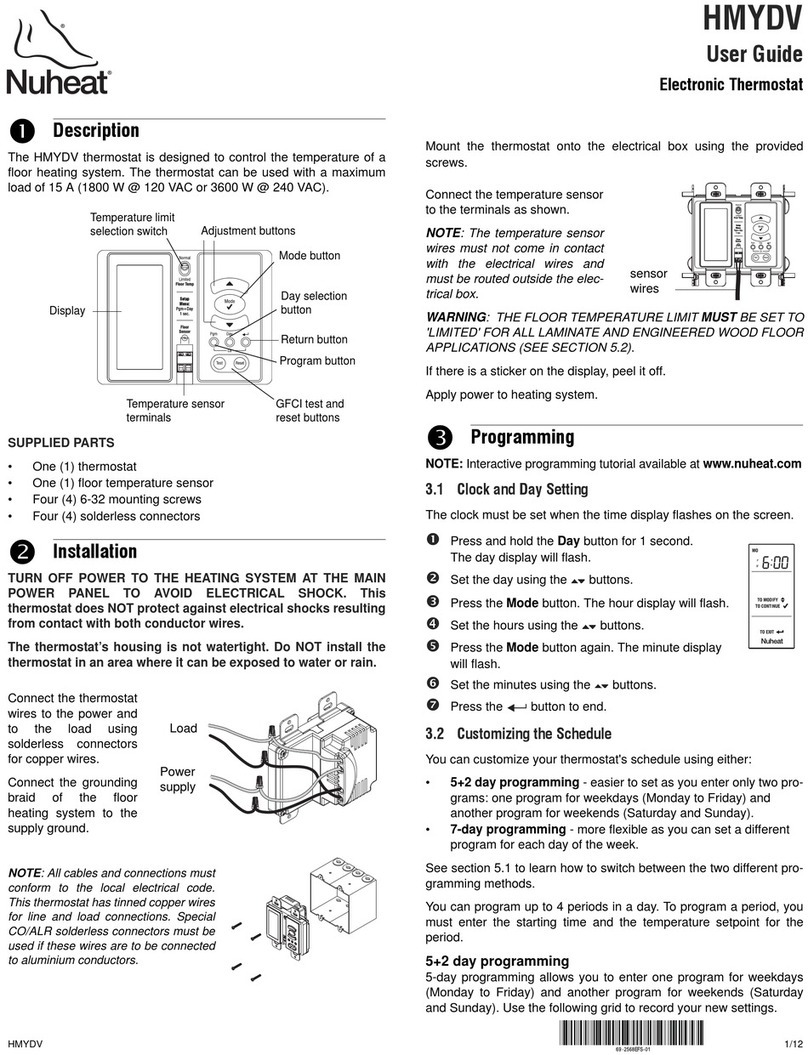
  9. Nu-Heat Siognature User manual

Nu-Heat Siognature User manual

Perform System Tests
Start Using Thermostat
Perform System Tests
Start Using Thermostat
QUICK START GUIDE
GUIDE DE DÉMARRAGE RAPIDE
CLASSIFICATION
The product is a Class II device (enhanced insulation) and must
be connected to the following leads:
Phase L1 (L) 120-240 V ±10%, 50/60 Hz
Neutral L2 (N)
Max. load 15 A (resistive load)
The terminals are suitable for field wiring cables of 12 to 22 AWG.
Heating element in accordance with the supply voltage.
TECHNICAL DATA
Supply .............................................120-240 Vac 50/60 Hz
Load ......................................... max. 15 A (resistive load)
Power ..................................................1800 W at 120 Vac
..................................................3120 W at 208 Vac
..................................................3600 W at 240 Vac
GFCI ............................................ClassA (5 mA trip level)
Temperature range ...................... +5 to +40°C, +41 to +104°F
Amb. temp. range .......................... 0 to +25°C, +32 to +77°F
WIFI ................................................... IEEE 802.11 b/g/n
Contains FCC ID .......................................... S67WSDE-670GN
Contains IC ID........................................11069A-WSDE670GN
CERTIFICATION UL Listed for the US and Canada
According to the following standards:
Thermostat: UL 873
CSA C22.2 No. 24.
UL file number: E157297
GFCI: UL 943 4th ed.
CSA C22.2 No. 144.1-06
CLASSIFICATION
Le produit est un dispositif de classe II (isolation améliorée) et
doit être branché aux broches suivantes :
Phase L1 (L) 120-240 V ±10 %, 50/60 Hz
Neutre L2 (N)
Charge max. 15 A (charge résistive)
Les bornes sont appropriées aux fils de câblage de 12 à 22 AWG.
L’élément chauffant est conforme à la tension d’alimentation.
FICHE TECHNIQUE
Alimentation .........................................120-240 Vac 50/60 Hz
Charge ...................................... max. 15 A (charge résistive)
Puissance ...................................................1800 W à 120 Vac
...................................................3120 W à 208 Vac
...................................................3600 W à 240 Vac
GFCI ...................Classe A (seuil de déclenchement 5 mA)
Plage de température ................. +5 à +40 °C,+41 à +104 °F
Plage de temp. amb. ...................... 0 à +25 °C,+32 à +77 °F
WIFI ................................................... IEEE 802.11 b/g/n
Contient FCC ID ........................................... S67WSDE-670GN
Contient ICID .........................................11069A-WSDE670GN
CERTIFICATION : Homologué UL au Canada et aux États-Unis
Selon les normes suivantes :
Thermostat : UL 873
CSA C22.2 N° 24.
Numéro de dossier UL : E157297
GFCI: UL 943 4eéd.
CSA C22.2 N° 144.1-06
ITEMS/ AFFICHAGES
Change date and time
Pour changer la date et l’heure
Access WiFi settings
Pour accéder aux réglages WiFi
Access weather forecast
(WiFi connection required)
Pour accéder aux prévisions météo
(connexion WiFi requise)
Current temperature
Température courante
HOME SCREEN/ÉCRAN D’ACCUEIL
WARNINGS:
To avoid electric shock, disconnect the heating system power supply at the main
panel before installation and maintenance of the thermostat. Keep thermostat air
vents clean and free from obstruction.This thermostat is an electrical product and
must be installed in compliance with the National and/or Local Electrical Code.
Installation must be performed by qualified personnel where required by law.
AVERTISSEMENTS :
Pour éviter une décharge électrique, coupez l’alimentation du système de
chauffage au panneau de distribution avant l’installation et/ou l’entretien du
thermostat. Gardez toujours les évents du thermostat propres pour éviter
les obstructions. Ce thermostat est un produit électrique et doit être installé
conformément aux codes nationaux et locaux de l’électricité. Lorsque la loi
l’exige, le thermostat doit être installé par du personnel qualifié.
FCC:
This device complies with part 15 of the FCC Rules. Operation is subject to the
following two conditions: (1) this device may not cause harmful interference, and
(2) this device must accept any interference received, including interference that
may cause undesired operation.
IC:
This device complies with Industry Canada licence-exempt RSS standard(s).
Operation is subject to the following two conditions: (1) this device may not
cause interference, and (2) this device must accept any interference, including
interference that may cause undesired operation of the device.
Le présent appareil est conforme aux CNR d’Industrie Canada applicables
aux appareils radio exempts de licence. L’exploitation est autorisée aux deux
conditions suivantes : (1) l’appareil ne doit pas produire de brouillage, et (2)
l’utilisateur de l’appareil doit accepter tout brouillage radioélectrique subi, même
si le brouillage est susceptible d’en compromettre le fonctionnement.
This product uses FreeRTOS (www.FreeRTOS.org) and ChibiOS/RT.
Ce produit utilise FreeRTOS (www.FreeRTOS.org) et ChibiOS/RT.
Target temperature or setpoint
Température visée/point de contrôle
Heating indicator - when visible,
system is heating.
Indicateur de chauffage - si visible, le
chauffage est activé
Access energy use data
Données d’utilisation énergétique
Access Main Menu
Pour accéder au menu principal
GFCI Indicator/Test Button
Bouton de test GFCI
On/Off Button
Press and hold to turn system ON/OFF
Press once to switch between home screen and
screensaver
Bouton MARCHE/ARRÊT
Appuyer et maintenir appuyé
pour MARCHE/ARRÊT
Appuyer une fois pour passer de l’écran
d’accueil à l’économiseur d’écran
Updated May 2014
1
1
4
56
78
9
10
23
2
3
4
5
6
7
8
9
10
Perform System Tests
Start Using Thermostat
Perform System Tests
Start Using Thermostat
Perform System Tests
Start Using Thermostat
Perform System Tests
Start Using Thermostat
Perform System Tests
Start Using Thermostat
Perform System Tests
Start Using Thermostat
Perform System Tests
Start Using Thermostat
Perform System Tests
Start Using Thermostat
Perform System Tests
Start Using Thermostat
Perform System Tests
Start Using Thermostat
Perform System Tests
Start Using Thermostat
Contents/Contenu
Push power base into electrical box. Secure power base to wall.
Pousser la base dans le coffret électrique. Fixer la base au mur.
Loosen screw at the bottom and remove faceplate.
Do not attempt to remove the screw completely.
Desserrer la vis au bas et enlever la plaque avant.
Ne pas enlever complètement la vis.
Make sensor connections. Remount faceplate.
Faire les connexions du capteur. Remettre la plaque avant.
*Refer to instructions included with expansion unit.
*Se reporter aux instructions accompagnant la station d’accueil.
Turn power source OFF at breaker panel. Make electrical
connections on power base. Place small strip of electrical tape
over terminals to prevent contact with ground wire.
COUPER l’alimentation au panneau de distribution. Effectuer les
connexions électriques à la base. Coller une petite bande de ruban
électrique sur les bornes pour empêcher le contact avec le fil de terre.
Perform system tests. Once systems tests are complete,
press “Start Using Thermostat” and complete setup wizard.
Effectuer des tests système. Une fois ces tests complétés,
appuyer sur Start Using Thermostat et suivre l’assistant
de configuration.
Setup your MyNuheat account. The Nuheat SIGNATURE mobile app
is available at the App Store or Google Play.
Configurer votre compte de MyNuheat. La nouvelle appli Nuheat
SIGNATURE est offerte au Apple Store ou à Google Play.
Thread floor sensor through hole in the power base. Push electrical
wires to the back of electrical box.
Passer le capteur à travers le trou dans la base. Repousser les fils
au fond du coffret électrique.
Floor Sensor (no polarity)
Capteur de plancher
(aucune polarité)
To expansion unit*
Vers la station d’accueil*
Thermostat
Thermostat
Floor sensor
Capteur de plancher
Line
(L)
Load (Nuheat)
(no polarity) Load (Nuheat)
(no polarity)
Line
(N)
Screws (2)
Vis (2)
QUICK START GUIDE/GUIDE DE DÉMARRAGE RAPIDE
Go into Settings > WiFi
Settings to connect the
thermostat to your WiFi
network. You will be
prompted to provide an email
address for account setup. A
verification email will be sent
containing a link to complete
your account setup.
The floor sensor must not come in contact with electrical
wires in the wall and must be routed outside
the electrical box.
Le capteur de plancher ne doit pas toucher aux fils
électriques dans le mur; il doit être acheminé à l’extérieur du
coffret électrique.
Ouvrir Réglages > Réglages
WiFi pour connecter
le thermostat à votre
réseau Wifi. Vous devrez
ensuite fournir une adresse
électronique pour configurer
le compte. Vous recevrez enfin
un courriel de vérification
contenant un lien pour
compléter la configuration du
compte.
Floor Sensor
Capteur de plancher
1 3 4
2
5 6 7 8

Other Nu-Heat Thermostat manuals

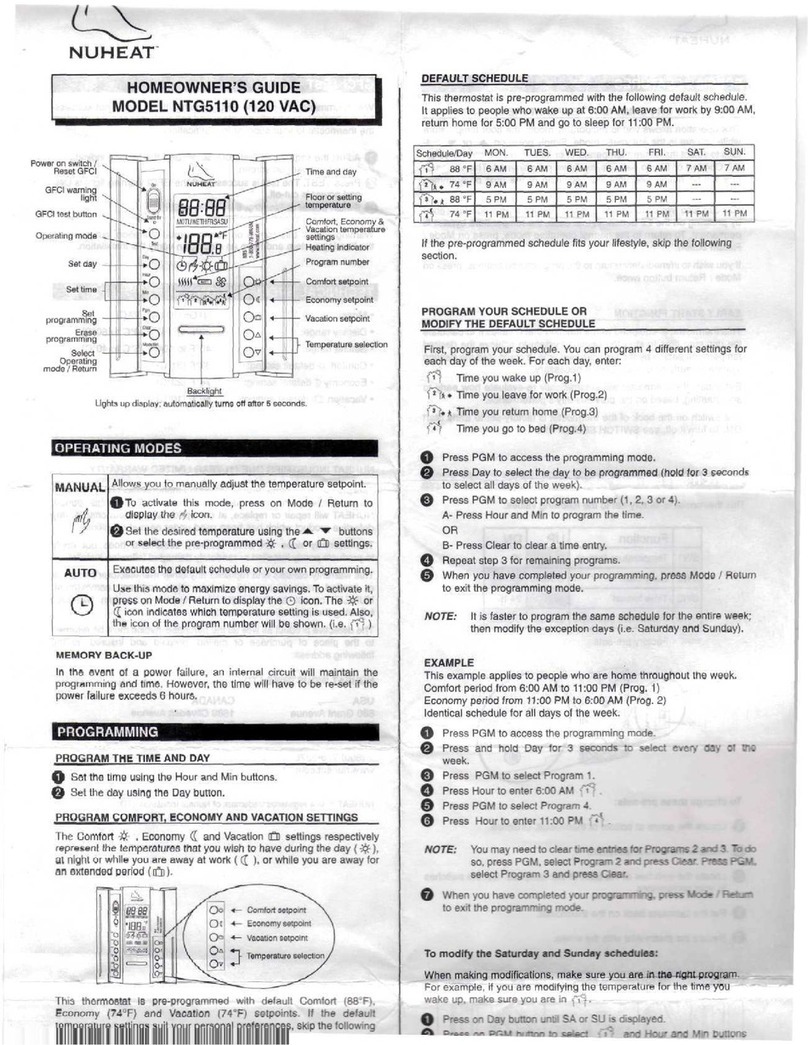
Nu-Heat NTG5110 Assembly instructions

Nu-Heat

Nu-Heat NTG5110 Assembly instructions

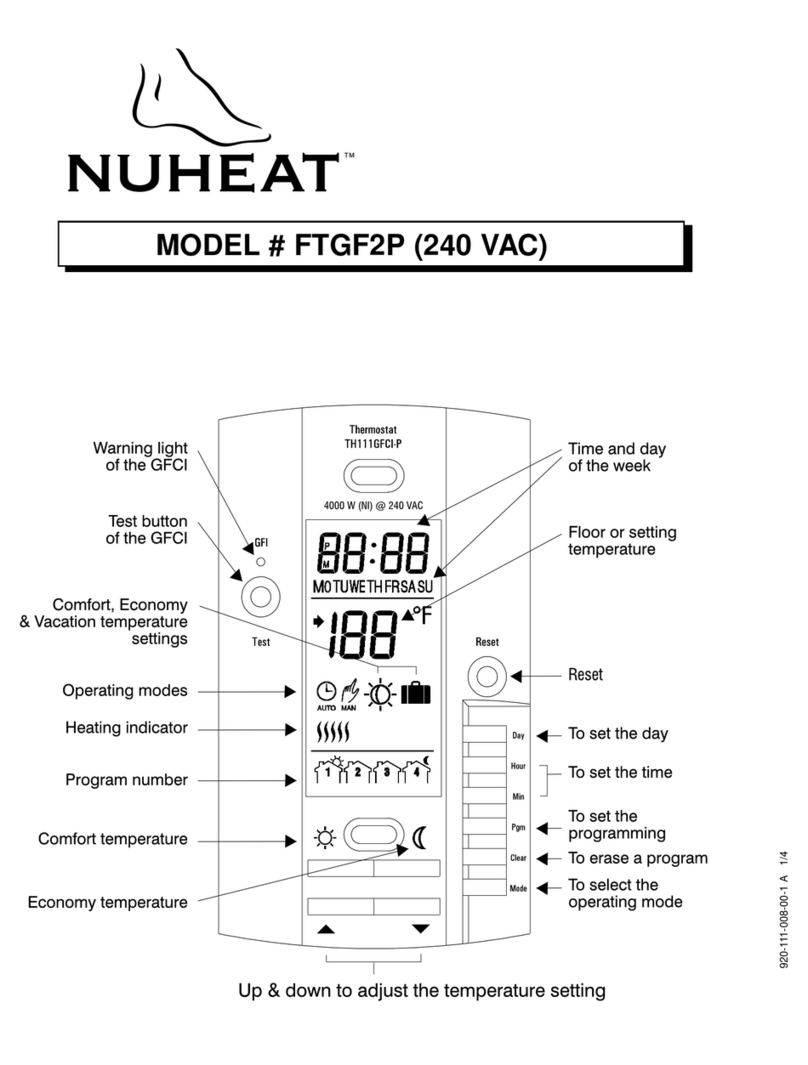
Nu-Heat FTGF1P User manual

Nu-Heat

Nu-Heat FTGF1P User manual

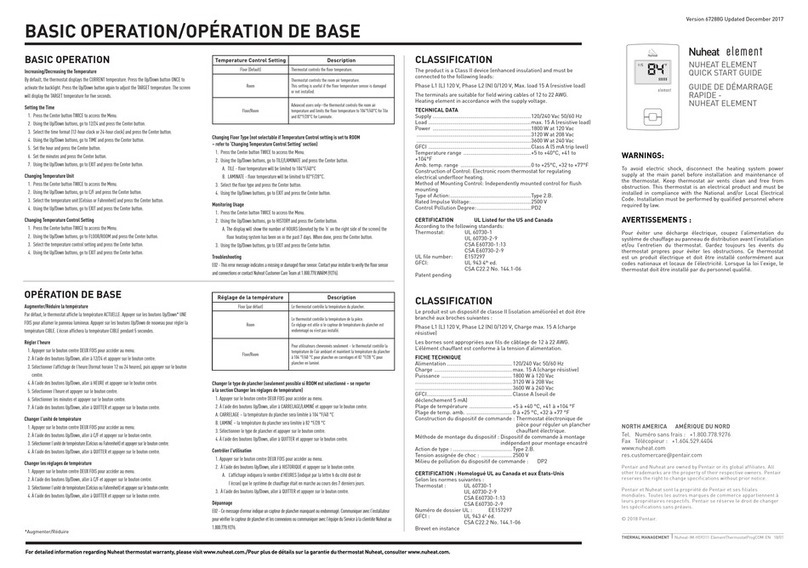
Nu-Heat Element User manual

Nu-Heat

Nu-Heat Element User manual

Nu-Heat HMY110 User manual

Nu-Heat

Nu-Heat HMY110 User manual

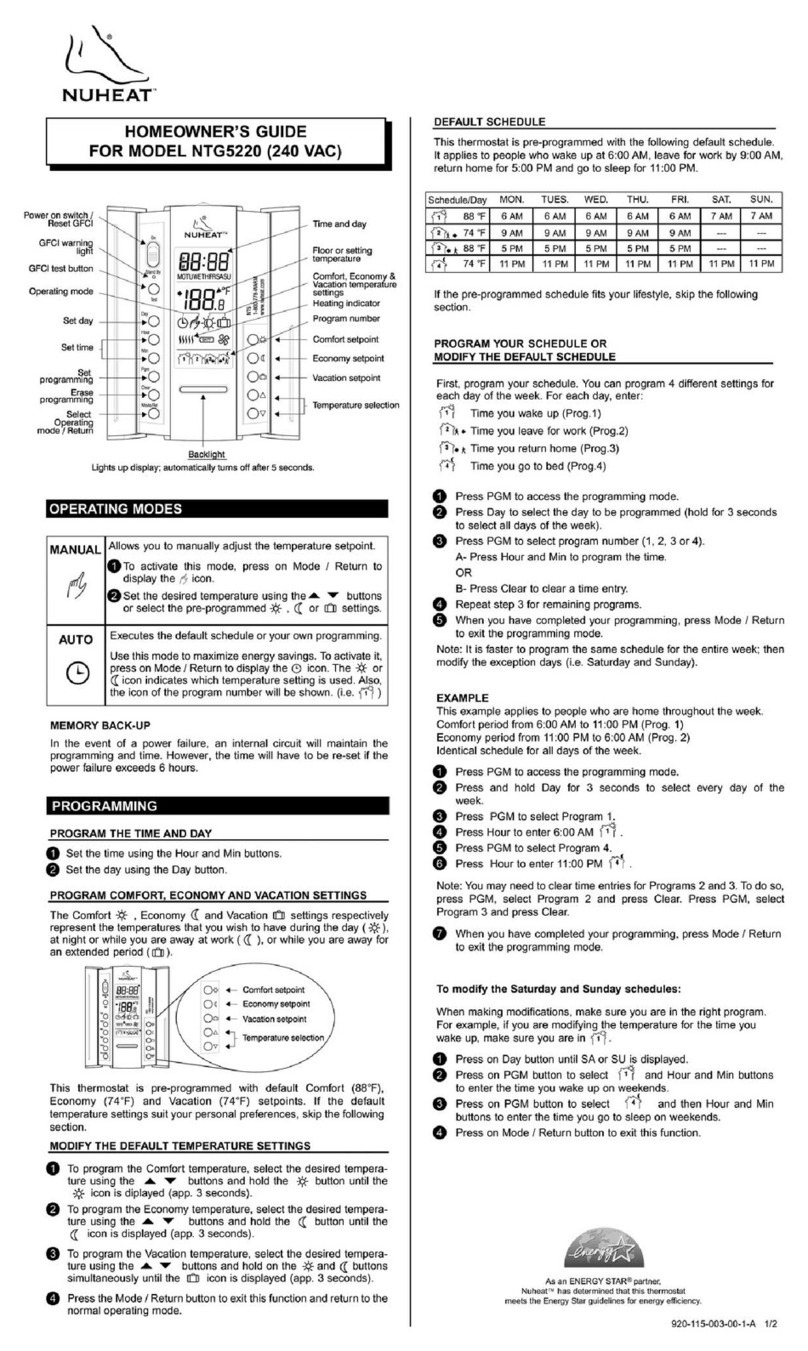
Nu-Heat NTG5220 Assembly instructions

Nu-Heat

Nu-Heat NTG5220 Assembly instructions

Nu-Heat HMYDV User manual

Nu-Heat

Nu-Heat HMYDV User manual

Nu-Heat SIGNATURE User manual

Nu-Heat

Nu-Heat SIGNATURE User manual

Nu-Heat neoAir User manual

Nu-Heat

Nu-Heat neoAir User manual

Nu-Heat SOLO User manual

Nu-Heat

Nu-Heat SOLO User manual

Nu-Heat NTG5110 Assembly instructions

Nu-Heat

Nu-Heat NTG5110 Assembly instructions

Nu-Heat ELEMENT User manual

Nu-Heat

Nu-Heat ELEMENT User manual

Nu-Heat Solo User manual

Nu-Heat

Nu-Heat Solo User manual

Nu-Heat TEMPO User manual

Nu-Heat

Nu-Heat TEMPO User manual

Nu-Heat FTGF2P User manual

Nu-Heat

Nu-Heat FTGF2P User manual

Nu-Heat NTG5110; NTG5220 Assembly instructions

Nu-Heat

Nu-Heat NTG5110; NTG5220 Assembly instructions

Nu-Heat Home User manual

Nu-Heat

Nu-Heat Home User manual

Nu-Heat TH111GFCI-P User manual

Nu-Heat

Nu-Heat TH111GFCI-P User manual

Nu-Heat NTG5110 User manual

Nu-Heat

Nu-Heat NTG5110 User manual

Popular Thermostat manuals by other brands

Radio Thermostat CT102 user guide

Radio Thermostat

Radio Thermostat CT102 user guide

KMC Controls FlexStat Operation guide

KMC Controls

KMC Controls FlexStat Operation guide

IEC E055-71520317 owner's manual

IEC

IEC E055-71520317 owner's manual

Sunsky BHT-1000 user guide

Sunsky

Sunsky BHT-1000 user guide

Radio Thermostat CT80 install guide

Radio Thermostat

Radio Thermostat CT80 install guide

Megmeet MTCV Series quick start

Megmeet

Megmeet MTCV Series quick start

LEGRAND In One 674 40 manual

LEGRAND

LEGRAND In One 674 40 manual

Honeywell T8112D Guide de l'utilisateur

Honeywell

Honeywell T8112D Guide de l'utilisateur

EPH Controls CRTP2 operating instructions

EPH Controls

EPH Controls CRTP2 operating instructions

EUROSTER 2006TXRX Installation and operation manual

EUROSTER

EUROSTER 2006TXRX Installation and operation manual

Venstar T2000 Owner's Manual & Installation Instructions

Venstar

Venstar T2000 Owner's Manual & Installation Instructions

Eurotronic SPARmatic ZERO user manual

Eurotronic

Eurotronic SPARmatic ZERO user manual

Bticino Smarther SX8000 manual

Bticino

Bticino Smarther SX8000 manual

Ecodhome TTDZ2 instruction manual

Ecodhome

Ecodhome TTDZ2 instruction manual

Megmeet MTC-04-NT user manual

Megmeet

Megmeet MTC-04-NT user manual

ECOLEC WCT100TX Fitting instructions

ECOLEC

ECOLEC WCT100TX Fitting instructions

Elesta RTU150B quick start guide

Elesta

Elesta RTU150B quick start guide

Sangamo Choice Rstat 3 Installation & user's instructions

Sangamo

Sangamo Choice Rstat 3 Installation & user's instructions

manuals.online logo
manuals.online logoBrands
  • About & Mission
  • Contact us
  • Privacy Policy
  • Terms and Conditions

Copyright 2025 Manuals.Online. All Rights Reserved.