12. 02. 20. Document Number 671902 2
Nuaire | Western Industrial Estate | Caerphilly | CF83 1NA |nuaire.co.uk
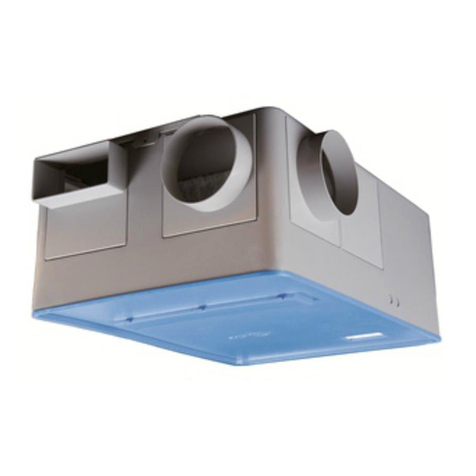
XB-H
Installation Manual
1.2 Important Information
This manual contains important information on the safe and
appropriate assembly, transport, commissioning, operation,
maintenance, disassembly and simple troubleshooting of the product.
While the product has been manufactured according to the accepted
rules of current technology, there is still a danger of personal injury or
damage to equipment if the following general safety instructions and
the warnings contained in these instructions are not complied with.
•Read these instructions completely and thoroughly before
working with the product.
•Keep these instructions in a location where they are accessible
to all users at all times.
•Always include the operating instructions when you pass the
product on to third parties.
1.3 Personal Protective Equipment
The following minimum Personal Protective Equipment (PPE) is
recommended when interacting with Nuaire product:
•Protective Steel Toed Shoes - when handling heavy objects.
•Full Finger Gloves (Marigold PU800 or equivalent) - when
handling sheet metal components.
•Semi Fingerless Gloves (Marigold PU3000 3DO or equivalent)
- when conducting light work on the unit requiring tactile
dexterity.
•Safety Glasses - when conducting any cleaning/cutting operation
or exchanging filters.
•Reusable Half Mask Respirators - when replacing filters which
have been in contact with normal room or environmental air.
Nuaire would always recommend a site specific risk assessment by a
competent person to determine if any additional PPE is required.
2.0 INTRODUCTION
The XB-H range of units shall be manufactured from Aluzinc as a
monocoque design lined with Barafoam for high sound absorption
characteristics and incorporates a high efficiency, low energy EC
blower. The units have the ability to vary the quantity of fresh air
supplied between trickle and maximum output, limiting the CO2 gains
in the classroom.
Three modes of operation are included; Automatic, Boost and Off,
allowing the end user full control over room conditions.
A recirculation path provided within these units ensures adequate
temperature delivery in the supply stream for winter conditions, whilst
a dedicated discharge path provides an escape route for poor quality air
regardless of mode of operation.
Breakout and supply noise levels are maintained under BB93 whilst in
normal operation.
These units are available with a standard metallic Aluzinc finish or with
painted external panels (RAL9003 – Signal White). For further RAL
colour options, please contact Nuaire.
Transition pieces, 250mm spiral ducting kits and LPHW modules with
ambidextrous coil connections are all available as optional ancillaries
which can be retrofitted on site.
General information regarding performance and specifications for
the equipment may be obtained from our technical literature, and/or
project specific documentation.
2.1 Code description: XB-H Hybrid Ventilation Unit
XB-H 130 M - P - D
| | | | |
1 2 3 4 5
1. Range: XB Hybrid
2. Size: 130 (2 units required per system)
260 (1 unit required per system)
3. Control Type: M = Master
S = Secondary
No Suffix = Not applicable for 260 unit sizes
4. Finish: No Suffix = Natural Aluzinc
P = Painted to RAL9003 (Signal White)
5. Outlet No Suffix = Unit for direct room supply.
Connection: D = Unit for use with ducting kits.
2.2 Code description: XB-H Hybrid Ancillaries
XB-H 130 - GS - P
| | | |
1 2 3 4
1. Range: XB Hybrid
2. Size: 130 = Ancillaries to suit XB-H130M or XB-H130S
260 = Ancillaries to suit XB-H260
3. Ancillary: DKIT1 = Ducting Kit
GL = Glazed Louvre
GS = Glazed Sleeve
L= External Weather Louvre
WS = Wall Sleeve
LT = Tempering LPHW, No Valve & Actuator
LP = Primary LPHW, No Valve & Actuator
L2T = Tempering LPHW, 2 Port Valve & Actuator
L2P = Primary LPHW, 2 Port Valve & Actuator
L4T = Tempering LPHW, 4 Port Valve & Actuator
L4P = Primary LPHW, 4 Port Valve & Actuator
4. Finish: No Suffix = Natural Aluzinc
(Heater Module, P= Painted to RAL9003 (Signal White)
GS & WS Only)
XB-H130LXB-H130WS
XB-H130M
XB-H130M Ceiling
Mounting Frame
(inlcuded with unit)
Layout of XB-H130M with wall sleeve and external louvre.
1
Typical unit airflow paths with recirculation damper shut.
2
