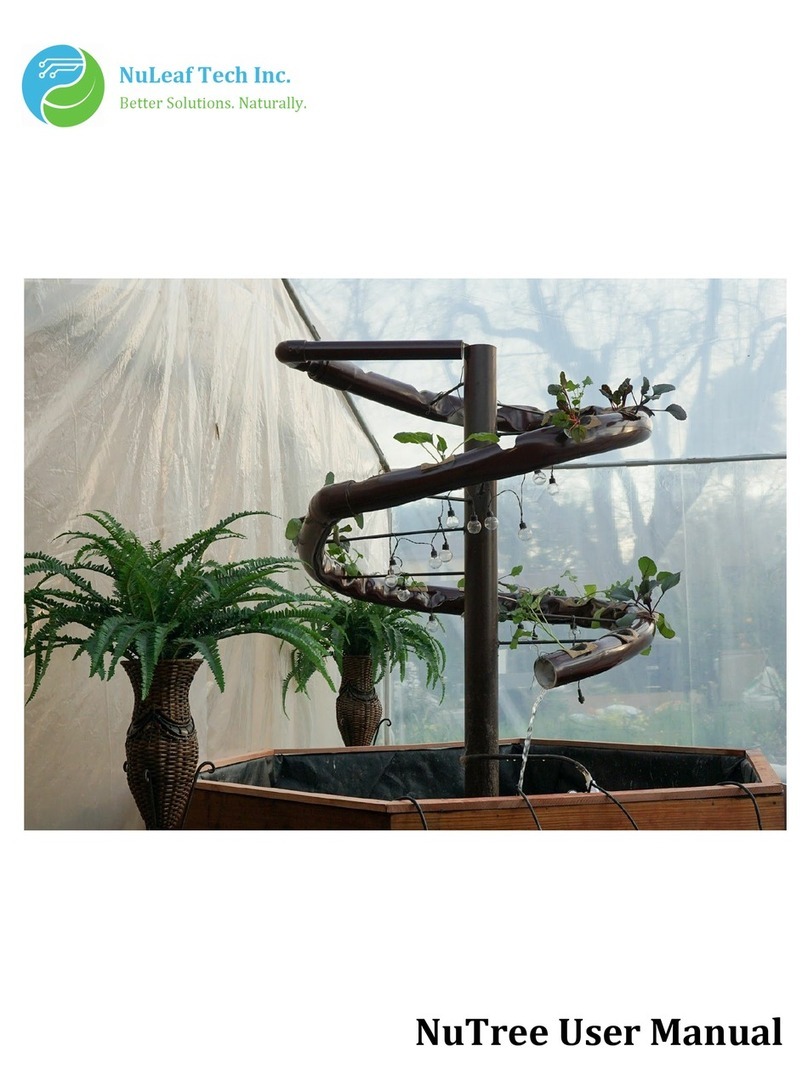
NuLeaf Tech NuTree User manual

NuLeaf Tech Inc.
Better Solutions. Naturally.
NuTree User Manual

Table of Contents
Introduction
2
Aquaponics Overview
3-4
Parts Check
5-6
Building The Basin
7-12
Attaching the Pond Liner
13 -15
Vertical Terrace
16-20
Final Construction
21 - 23
Thank you
24
1

INTRODUCTION
Congratulations on your new NuTree Bonsai aquaponic system! From all of us here at NuLeaf
Tech, we thank you for your support and we welcome you to the rewarding world of home
aquaponics.
As a courtesy, we have included with your purchase this pamphlet providing a brief overview
of the NuTree and Aquaponics in general.
This is the NuTree Construction manual! For more information on general use, maintenance,
how to set up your tank, and what herbs to pick please see our NuTree User Manual.
This can be found on our NuTree Bonsai/DIY Aquaponics Page at:
https://www.nuleaftech.com/diy-aquaponics-landing
Whether you are an experienced gardener or this is your first time exercising your green
thumb, this packet will provide some useful information to getting started so be sure to give it
a read.
2

AQUAPONICS
Your NuTree ecosystem uses a method called aquaponics to grow your plants and raise
your fish. As defined by the OED, aquaponics is:
“a system of aquaculture in which the waste produced by farmed fish or other aquatic
animals supplies nutrients for plants grown hydroponically, which in turn purify the water.”
3

A simpler way to think of aquaponics is as a mix between an aquarium and a garden. In a
traditional garden, the fertilizer and water needed to grow your crops are wasted after use,
and consistent supervision is needed to ensure the ideal environment for your plants.
With aquaponics, the fertilizer for your crops is provided by fish waste and wetland
microbes living in your “aquarium.” After the nutrient-rich water is used to grow crops, the
clean water is recirculated back for the fish. Plants in the fish tank can also provide food for
the fish. The system is constantly circulating so very little maintenance and supervision is
needed to sustain a healthy environment.
This guide will help you construct your Bonsai unit.
Our user manual will instruct you on how to pick the right type of fish and plants for your
goals, as well as how to set up a Walstad Fish Tank. A Walstad Tank is more like a pond in
the sense that the ecological nutrient cycles balance themselves and there is even less
aquarium maintenance. Even less work for you with some tasty herbs!
4

Parts Check
Let’s Build a NuTree!
So you’ve bought a NuTree and you’re ready to start building, congratulations on this first
step in your home gardening adventure!
Please note that each NuTree is handmade and hand painted. There may be small aesthetic
imperfections, but that just makes your NuTree more unique!
Checking Parts
First and foremost let’s make sure you have everything you need. Your kit should include
the following…
For the Wooden Basin:
6 wooden side panels
6 wooden wood covers for side panels
1 wooden hexagonal base
33 Philips head Screws
1 pond liner
For the Center Pipe:
4 Hex Screws
4 washers
1 metal pipe with flange attached
Square wooden piece
Vertical Terrace:
5

6 metal spokes
6 PVC pipes of varying lengths
6 90° PVC joints (large)
3 90° PVC joints (small)
2 smaller PVC pipes (one short and one long)
1 PVC reducer (3” to 1.5”)
Misc:
Water pump
Underwater pump housing (PVC)
6 plant nets
Plastic Tubing
There may be a few extra pieces like washers and wood covers in case of “oops” moments.
(if you are missing any pieces contact us at [email protected])
To complete your build you will also need:
An electric drill with a phillips head attachment
½ inch hex bolt drill bit (wrench or ratchet will also work)
A bottle of wood glue
Marine epoxy
Box Cutter
Staple Gun/Stapler
Small hammer (optional but helpful)
Cheap aluminum locking pliers (optional but helpful)
Timeline And Other Info:
Construction should be done over two days to allow the wood glue to properly dry. Besides
drying, construction will take a few hours.
Marine epoxy may take an additional day or two to dry after construction is complete.
While construction can be done with one person, a second person can be helpful at certain
steps to better hold things in place.
You can place your unit indoors or outdoors, but if it snows in your area we recommend
having it indoors.
6

Building the Basin
Now that you have everything you need, let’s start by building the wetland basin of your
NuTree.
Note: Depending on when your nutree was made you may have numbers or letters
marking the corners. The principles are the same - match up the 2s, or the As, etc.
You’ll notice that your wooden side panels are labeled (A, B, C, D, E, F), each panel has
joints numbered 1 & 2. On panels A, C, and E, you will find 4 pilot holes on the outside face.
On panels B,D, and F, you will find 4 corresponding pilot holes on the inside joint edges.
STEP ONE
Take Panel A and carefully drill the screws into the outside pilot holes on joint 1 until they
are just barely poking through the other side. The screws should be roughly perpendicular
to the angled joint edge of the panel. Repeat this process with the pilot holes on joint A2.
7

Repeat Step One for panels C and E.
STEP TWO
8

Apply glue to the inside edge of joint A2 (where the screws are poking out). Be sure to
thoroughly cover the surface. Repeat this process for the inside edge of joint B1 (where the
pilot holes are).
STEP THREE
Attach joint A2 with joint B1, being sure to line up the screws poking out of A2 with the
pilot holes in B1. Carefully drill the screws in a few turns to help guide the pieces together.
Don’t worry if your alignment is off, just unscrew the screws and try again!
9

Once you are sure you have a proper alignment, slowly tighten the screws on joint A2 all
the way into joint B1. If you have done everything properly, the screw should not poke out
the outside face of panel B. (If this happens simply unscrew, re-align, and try again) Wipe
off any excess glue and save for the next steps.
Repeat Step Three to connect panels C & D, and E & F. You will end up with 3 angled
pieces
10

STEP FOUR
Now that you have your angles ready to go, simply use the same method as before to
connect C1 with B2, E1 with D2, and A1 with F2. You can use the picture above as
reference, the end result should be a wooden hexagon.
Note: This order is important. As mentioned previously, the Bonsai is handmade so each
side may have a slightly different length. Assembling the side pieces properly will ensure
that the bottom hexagonal piece fits well.
11

STEP FIVE
Now it’s time to attach the bottom panel. Simply line up the black mark on the bottom of
your hexagon with the black line on the bottom panel. Make sure the panel is flush and
secure by screwing into the pilot holes on each side of the bottom panel.
This line is pencil lead and can be easily removed after the unit is assembled.
Allow the wood to dry for a day before proceeding to the next steps.
12

Attaching the Pond Liner
Now that you have completed your basin construction and the wood glue is dry, it’s time to
add the pond liner! This is a tarp-like material that will keep your NuTree water tight. It is
very important that you do not tear this liner as it will cause the system to leak.
There is no hardline method for installing this liner but here’s what has worked well for us:
STEP ONE
Note: Your pond liner will have less excess material than the picture above. It has already
been pre-cut for your convenience, but you will still need to trim the edges that poke out
under the wood covers.
First unfold your liner and place it into the basin as pictured above, make sure you have a
decent amount of slack on all sides. Then you will want to fill the basin until it has about an
inch of water on the bottom to keep the liner from moving around too much during
installation.
13

STEP TWO
Now it’s time to smooth the liner out. Flatten the liner against the side walls and bottom of
the basin as best you can with your hands. As you do this you will end up with some excess
in the corners of the basin. The best way to manage this is to simply fold the liner in on
itself such that the crease is along the corner of the inside wall. Do this for each corner.
Although it doesn't need to be perfect you should try to minimize creases along the side as
much as you can. The hardest part is getting the sides to be as flush as you can while still
dealing with minimal folds.
STEP THREE
Once you have the liner flattened out to your liking, check one last time that there are no
tears or rips. Check that the liner sits flat against the bottom of the basin all the way to each
corner.
Use a staple gun or stapler to secure the pond liner in place at the top of the basin, simply
pull it tight over the top edge of the basin and staple directly into the top edge.
At this point, it is a good idea to fill up the basin with water to about ⅔ of the total volume to
check for leaks. This is about where the basin will normally be filled. You can use the pump
and a bucket to move the water around.
STEP FOUR
If everything looks good it’s time to attach the top panels and cut off the excess.
14

The decorative wood covers are labeled, so find the matching side panel.
Place one of the top wood covers over the liner on the top edge of your basin, letting the
excess liner hang down the outside wall of the basin. Make sure your top cover is flush with
both sides of the basin and screw it into place using the 3 pilot holes. (Use the picture above
as a reference).
Repeat this process for each side, making sure the liner remains flat against the bottom and
inside walls of the basin.
Once the top covers are securely in place, use your box cutter to cut off the excess liner on
the outside such that it is flush with the outside wall of the construction.
15

Building the Vertical Garden Terrace
Good news! It’s time to construct your vertical terrace! For this next section we will be
constructing the vertical garden where you will be growing your delicious greens. For this
build we will be using our six metal spokes, PVC pipes, PVC joints, and the center pipe.
You will notice that the spokes are numbered 1 - 6 and the PVC pipes are numbered 1 - 6.
The PVC joints are not labeled as the order for these doesn’t matter.
Note: There is a top coat of paint on the PVC pipes and joints to protect the artwork, but try
to minimize any bumps or scrapes. This is particularly true when pushing the PVC and
spokes together. The good news is small scratches likely won’t be visible once the NuTree
has plants in it, and with some parts of the construction you can simply have these
scratches face inward or downward.
STEP ONE
The flange should already be attached to the center pipe.
Take the square wooden piece and, with the four washers and four screws, attach the
flange to the wooden piece following the pilot holes. You can use a hex screw drill bit
attachment, wrench, or ratchet.
STEP TWO
Thread the plastic tube through the bottom hole on the center pipe until it pokes out at the
top. You’ll use this later.
If you don’t thread the plastic tube through the center pipe now it will become much harder
once the spokes are attached and poking through the internal part of the center pipe. This
step is a bit tricky, and you can use a clothes hanger to make it easier.
STEP THREE
First find spoke 1 and screw it into the highest threaded hole on your pipe construction.
Then find spoke 2 and screw it into the second highest hole and continue this process in
descending order as you progress through step 3 below. (spoke 3 in the next hole down,
etc…) Make sure you check all around the pipe for the next hole down to ensure you are
attaching the spokes in the correct order.
16

Note: If the spokes are perfectly aligned, you can use your hands to put the spokes in. That
being said, you will still likely need to use the pliers at least for final adjustments. The type
of pliers pictured above are ideal, as they are cheap but won’t damage the aluminum and
minimize chipping the paint.
Note: Use a rag in between the pliers and the spokes to not chip the paint.
STEP FOUR
17

Now it’s time to attach the PVC pipes. First find pipe 1 and insert it into a PVC joint. The
rule of thumb is to push the pipe about an inch into the joint but your mileage may vary.
Your PVC pipes are not fully painted at the end, so this gives you a rough guideline. This
lack of paint also helps the pipes slide into the joints with less effort. You can see this as a
light line marked around the outside of the PVC pipes so you can see how far they were
pushed in originally.
Next find pipe 2 and insert it into the other side of the PVC joint.
Once you have the first two pipes attached to the joint, insert spoke 1 into the small hole in
the side of pipe 1.
Note: The vertical garden is supported by tension so you won't be able to let go of the PVC
pipe construction entirely until you make at least 3 points of contact.
Next, without disconnecting the pipes from the first joint, insert spoke 2 into the hole in the
side of pipe 2. If you have trouble getting both the spokes in without disconnecting the
pipes, try pulling the pipes out of the first joint or pushing them in further until the spacing
is right.
Note: This is the hardest part of the build! If you’re having trouble getting things to fit right,
put things down and take a break. These pieces have already been fit together multiple
times so it will work. You don’t want to force anything! If something is wedged or stuck it
can be annoying but it is usually an easy fix.
18

STEP FIVE
Now that the first two pipes are connected to the garden construction, attach the second
joint to pipe 2 and (you guessed it!) attach pipe 3 to the other side of this joint. Once you
have a secure connection insert spoke 3 into the hole in pipe 3.
At this point you should be able to let go of the PVC construction without it coming apart.
Don’t worry if it feels a bit wobbly, the construction will become more secure as you go.
Continue this process as before: Pipe 3 > Joint 3 > Pipe 4 > Joint 4 > Pipe 5 > Joint 5> Pipe 6
> Joint 6
Note: The sixth PVC joint is optional and can be attached to the end pipe . This helps to
direct the water flow downward to prevent splashing.
19
Table of contents
Other NuLeaf Tech Lawn And Garden Equipment manuals