4
September 2019
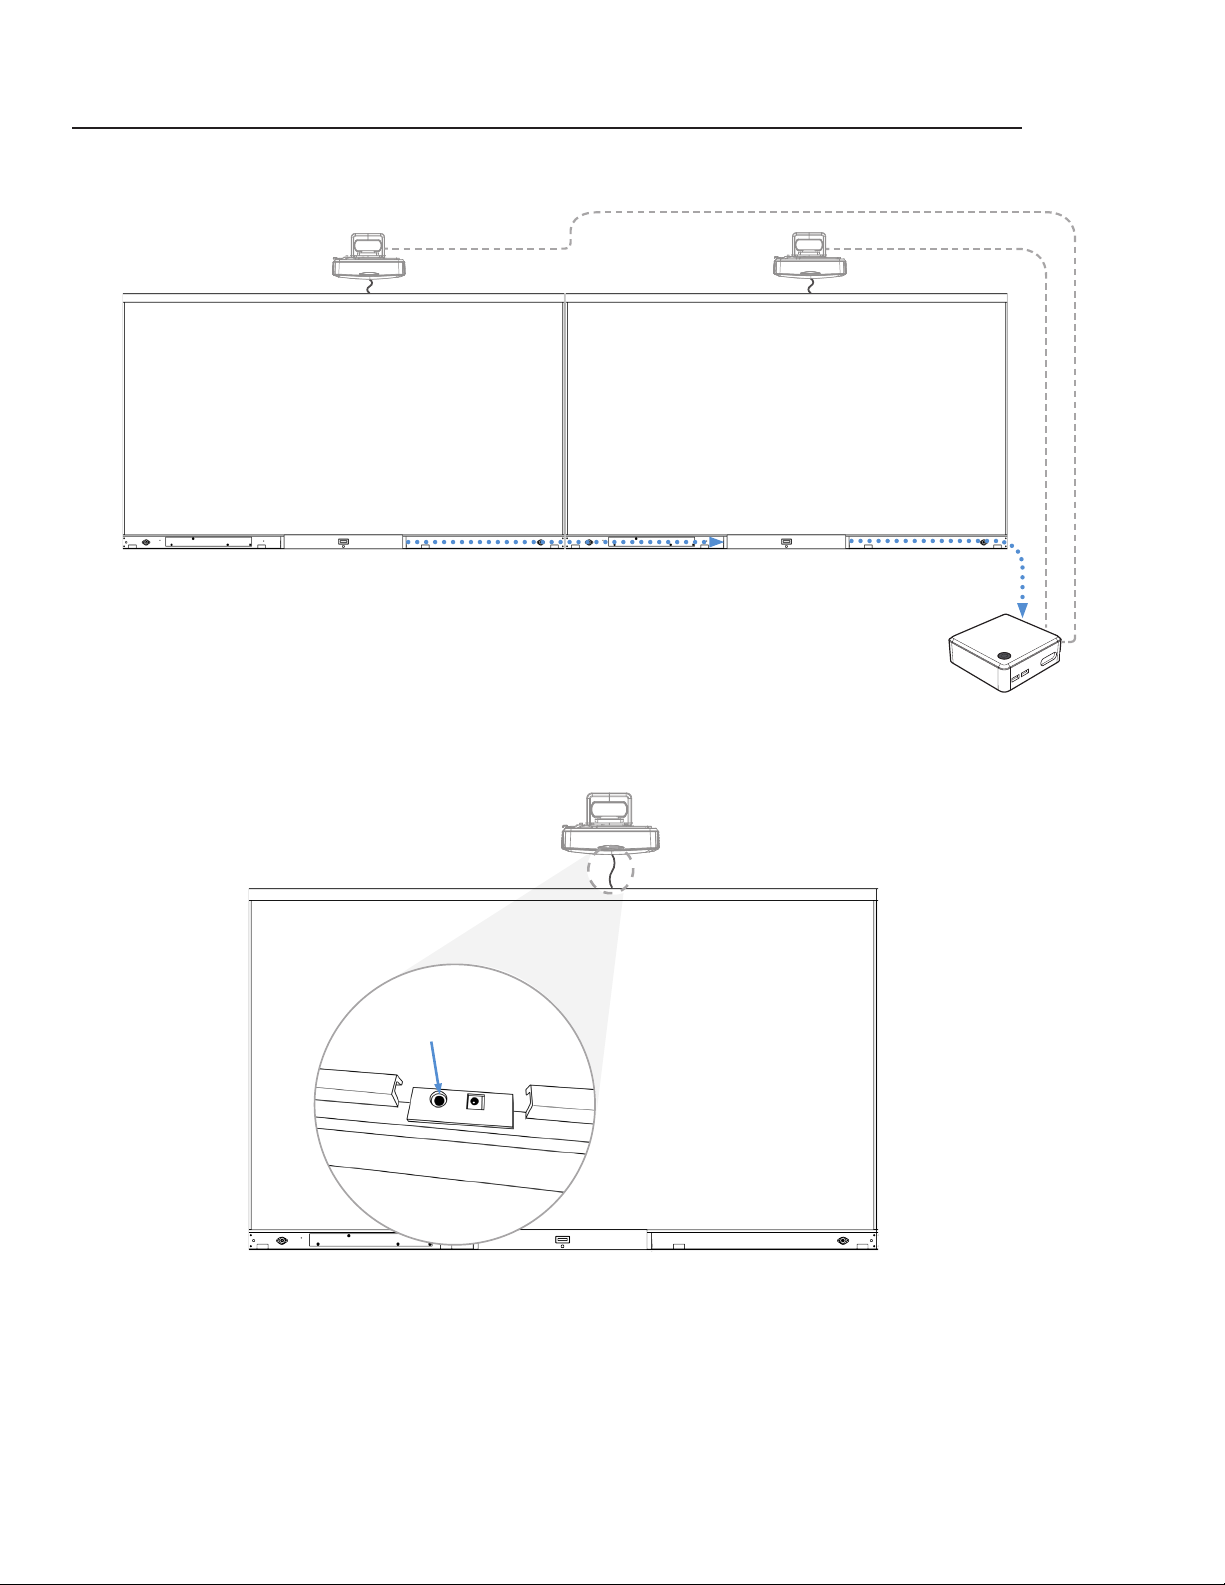
Wall mount adjustments
Image size
Adjusts the image size (diagonal) by moving the
telescopic mount in or out.
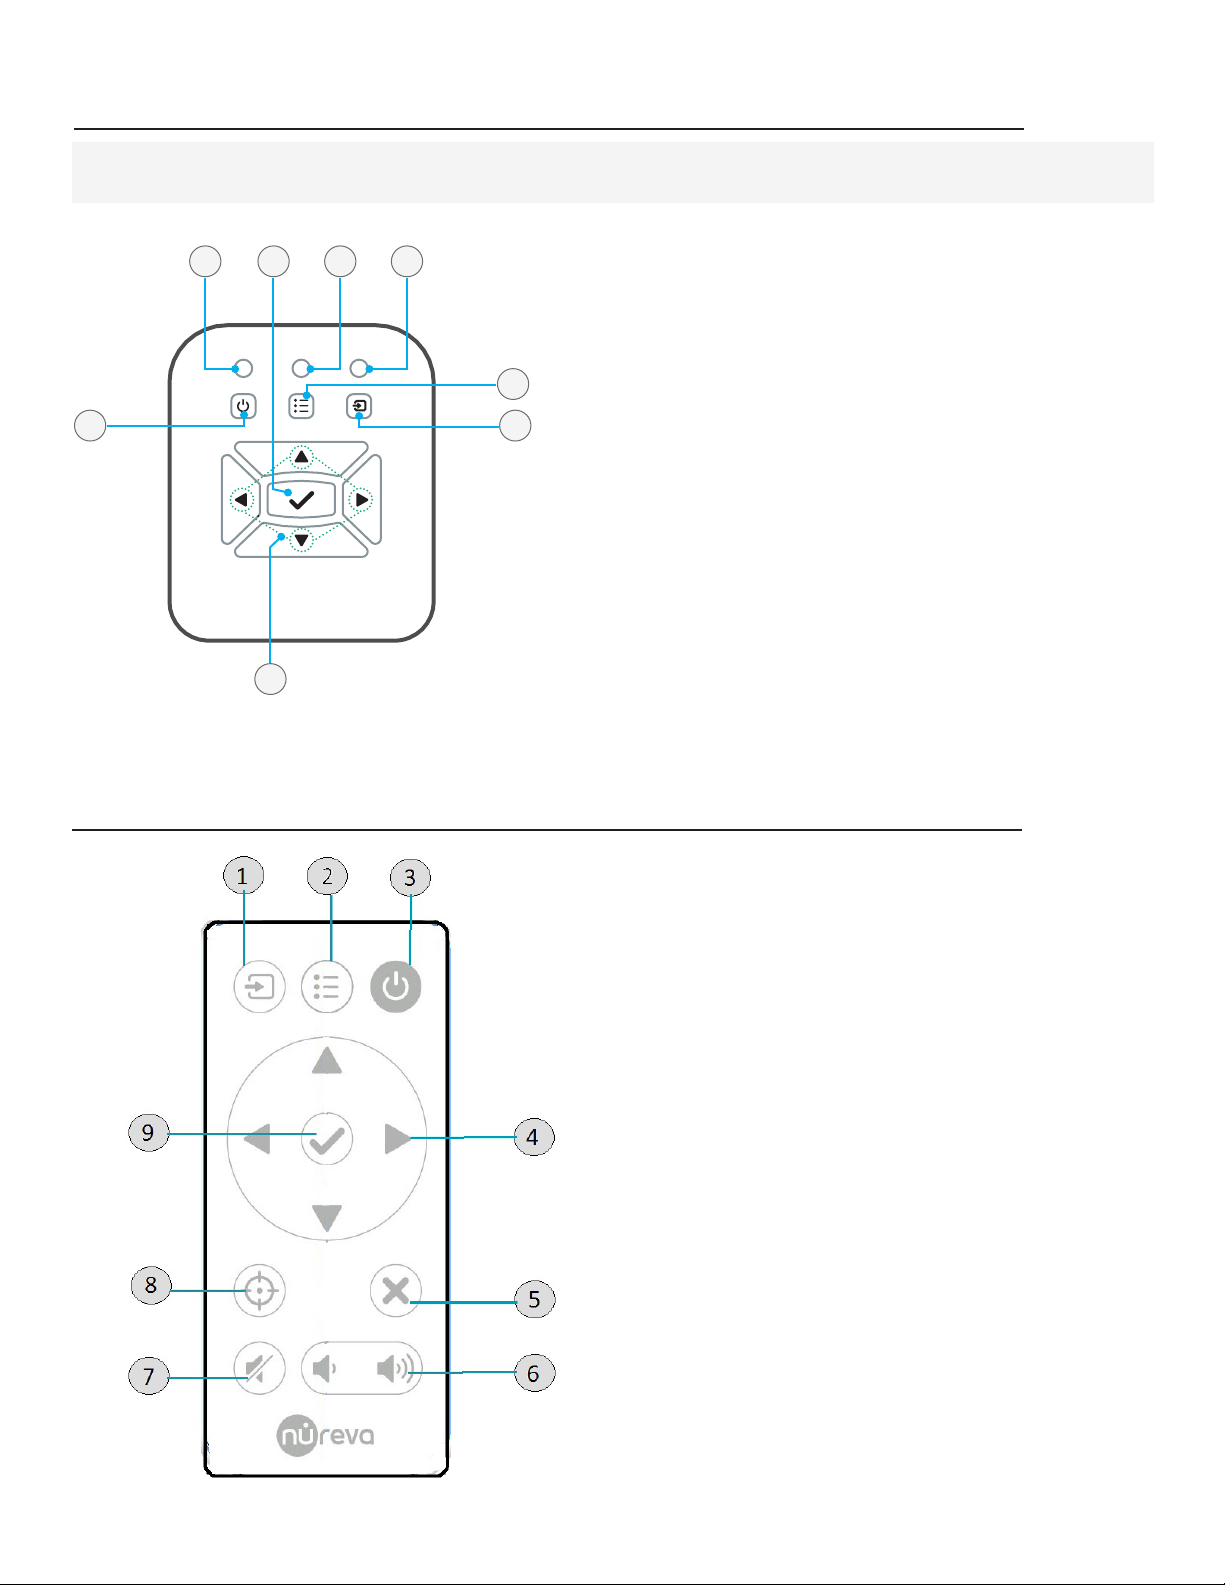
Up/Down
Adjusts the landed image up or down.
Left/Right
Adjusts the left/right position of the landed image.
Pitch
Adjusts the landed image vertical keystone. Use
this adjustment when the top or the bottom of the
image is larger or smaller and in a trapezoid shape.
Roll
Adjusts the landed image tilt or roll. Use this
adjustment when the image appears to be o-level.
Yaw
Adjusts the landed image horizontal keystone.
Use this adjustment when the left or the right of
the image is larger or smaller and in a perspective
shape.
Note:Once the above mechanical adjustments are complete, use the Wall display system tools in the Nureva
Room Manager software to ne-tune the landed image.
UP/DOWN LEFT/RIGHT
IMAG E SIZE I MAGE
ADJUSTMENT
UP/DOWNUP/DOWNUP/DOWN LEFT/RIGHTLEFT/RIGHTLEFT/RIGHT
IMAG E S IZEIMAG E S IZEIMAG E SIZE I MAGE
ADJUSTMENT
IMAG E
ADJUSTMENT
IMAG E
ADJUSTMENT
Image size Pitch/Roll/Yaw
Left/Right
Up/Down
UP/DOWN LEFT/RIGHT
IMAGE SIZE IMAG E
ADJUSTMENT
UP/DOWNUP/DOWNUP/DOWN LEFT/RIGHTLEFT/RIGHTLEFT/RIGHT
IMAGE SIZEI MAGE SIZ EIMAGE SIZE IMAG E
ADJUSTMENT
IMAGE
ADJUSTMENT
IMAGE
ADJUSTMENT
Image size Pitch/Roll/Yaw
Left/Right
Up/Down
UP/DOWN LEFT/RIGHT
IMAGE SIZE IMAG E
ADJUSTMENT
UP/DOWNUP/DOWNUP/DOWN LEFT/RIGHTLEFT/RIGHTLEFT/RIGHT
IMAGE SIZEI MAGE SIZ EIMAGE SIZE IMAG E
ADJUSTMENT
IMAGE
ADJUSTMENT
IMAGE
ADJUSTMENT
Image size Pitch/Roll/Yaw
Left/Right
Up/Down
UP/DOWN LEFT/RIGHT
IMAGE SIZE IMAG E
ADJUSTMENT
UP/DOWNUP/DOWNUP/DOWN LEFT/RIGHTLEFT/RIGHTLEFT/RIGHT
IMAGE SIZEI MAGE SIZ EIMAGE SIZE IMAG E
ADJUSTMENT
IMAGE
ADJUSTMENT
IMAGE
ADJUSTMENT
Image size Pitch/Roll/Yaw
Left/Right
Up/Down
UP/DOWN LEFT/RIGHT
IMAGE SIZE IMAG E
ADJUSTMENT
UP/DOWNUP/DOWNUP/DOWN LEFT/RIGHTLEFT/RIGHTLEFT/RIGHT
IMAGE SIZEI MAGE SIZ EIMAGE SIZE IMAG E
ADJUSTMENT
IMAGE
ADJUSTMENT
IMAGE
ADJUSTMENT
Image size Pitch/Roll/Yaw
Left/Right
Up/Down
UP/DOWN LEFT/RIGHT
IMAGE SIZE IMAG E
ADJUSTMENT
UP/DOWNUP/DOWNUP/DOWN LEFT/RIGHTLEFT/RIGHTLEFT/RIGHT
IMAGE SIZEI MAGE SIZ EIMAGE SIZE IMAG E
ADJUSTMENT
IMAGE
ADJUSTMENT
IMAGE
ADJUSTMENT
Image size Pitch/Roll/Yaw
Left/Right
Up/Down
UP/DOWN LEFT/RIGHT
IMAGE SIZE IMAG E
ADJUSTMENT
UP/DOWNUP/DOWNUP/DOWN LEFT/RIGHTLEFT/RIGHTLEFT/RIGHT
IMAGE SIZEI MAGE SIZ EIMAGE SIZE IMAG E
ADJUSTMENT
IMAGE
ADJUSTMENT
IMAGE
ADJUSTMENT
Image size Pitch/Roll/Yaw
Left/Right
Up/Down