• Use the restraint exactly as shown in the instructions.
• Supervision of children is needed because they may be able to undo
buckles and adjusters.
• DO NOT LEAVE CHILDREN UNATTENDED IN THE CAR.
• Do not alter or modify this restraint, use only recommended parts and
accessories.
• Repairs must only be done by the manufacturer or agent.
• Do not allow the restraint to come into contact with polishes, oils, bleach
and other chemicals.
• Destroy the restraint if it has been in a severe crash, even if no damage is
visible.
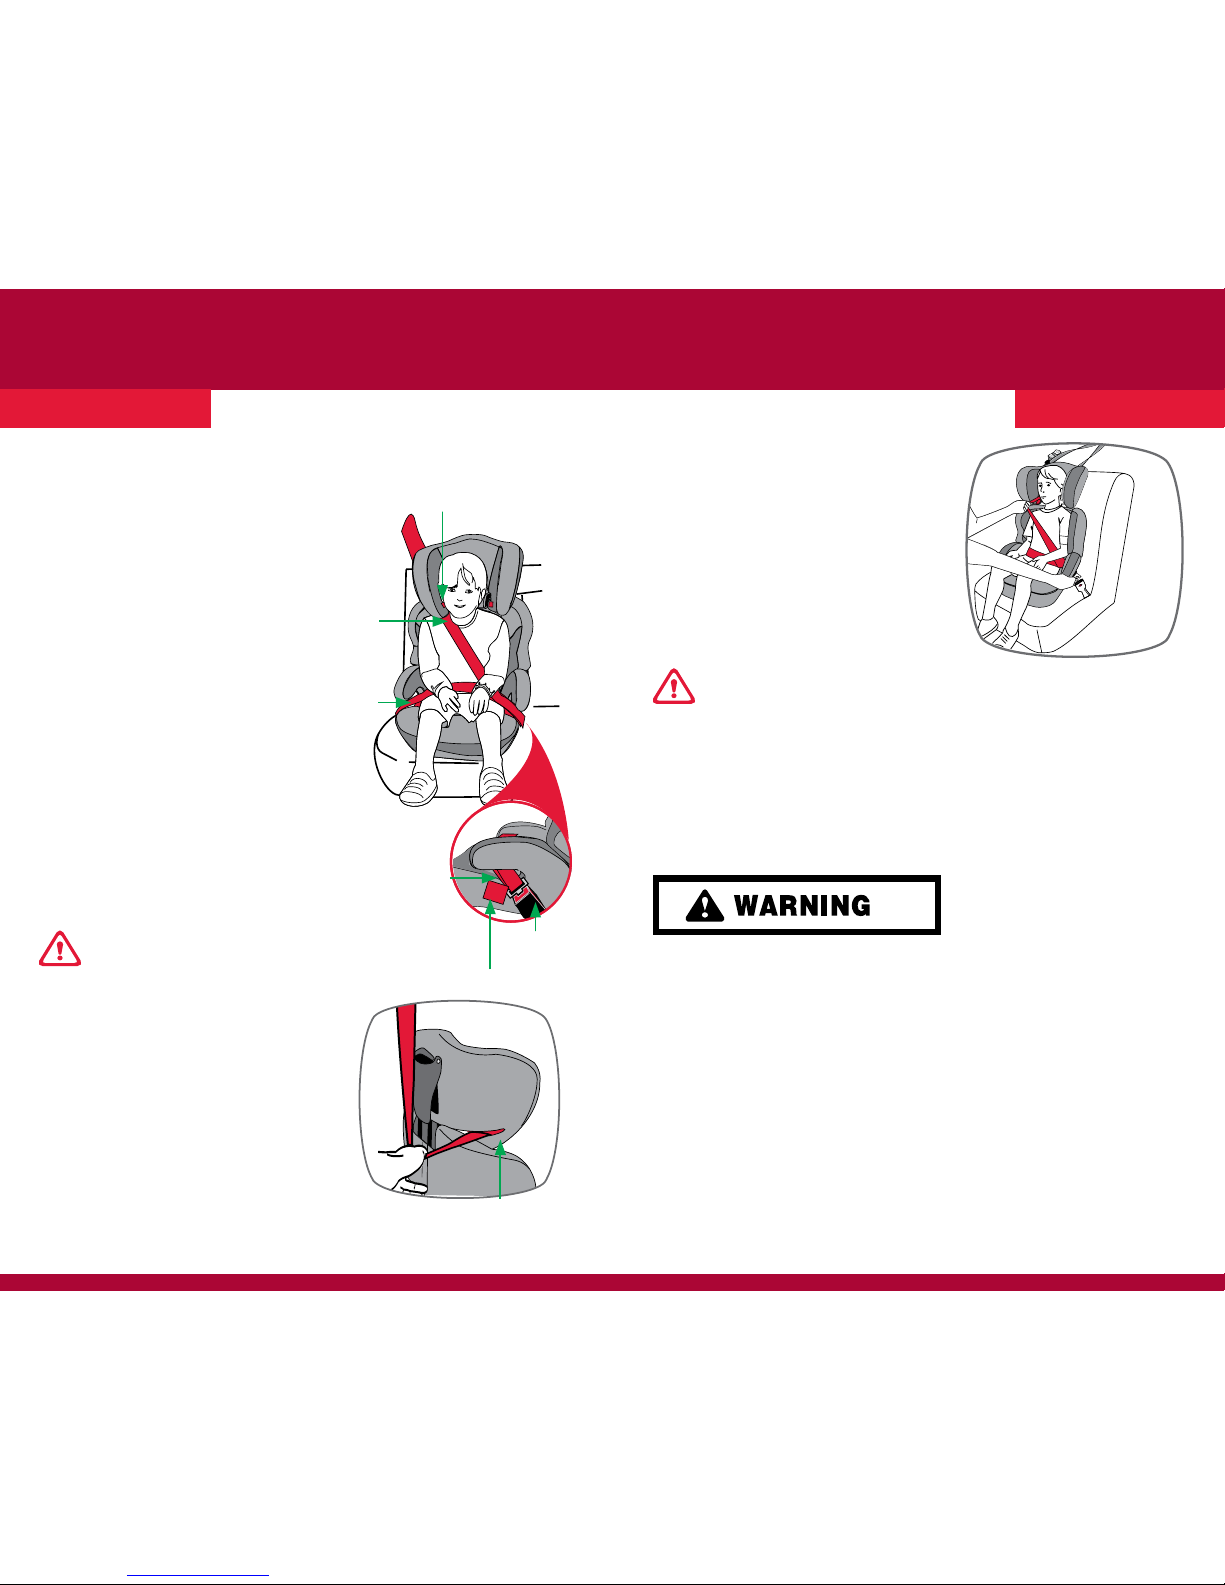
• DO NOT USE WITH JUST A LAP BELT. You must use with lap-sash seat
belt, or with a seat belt and Child Harness.
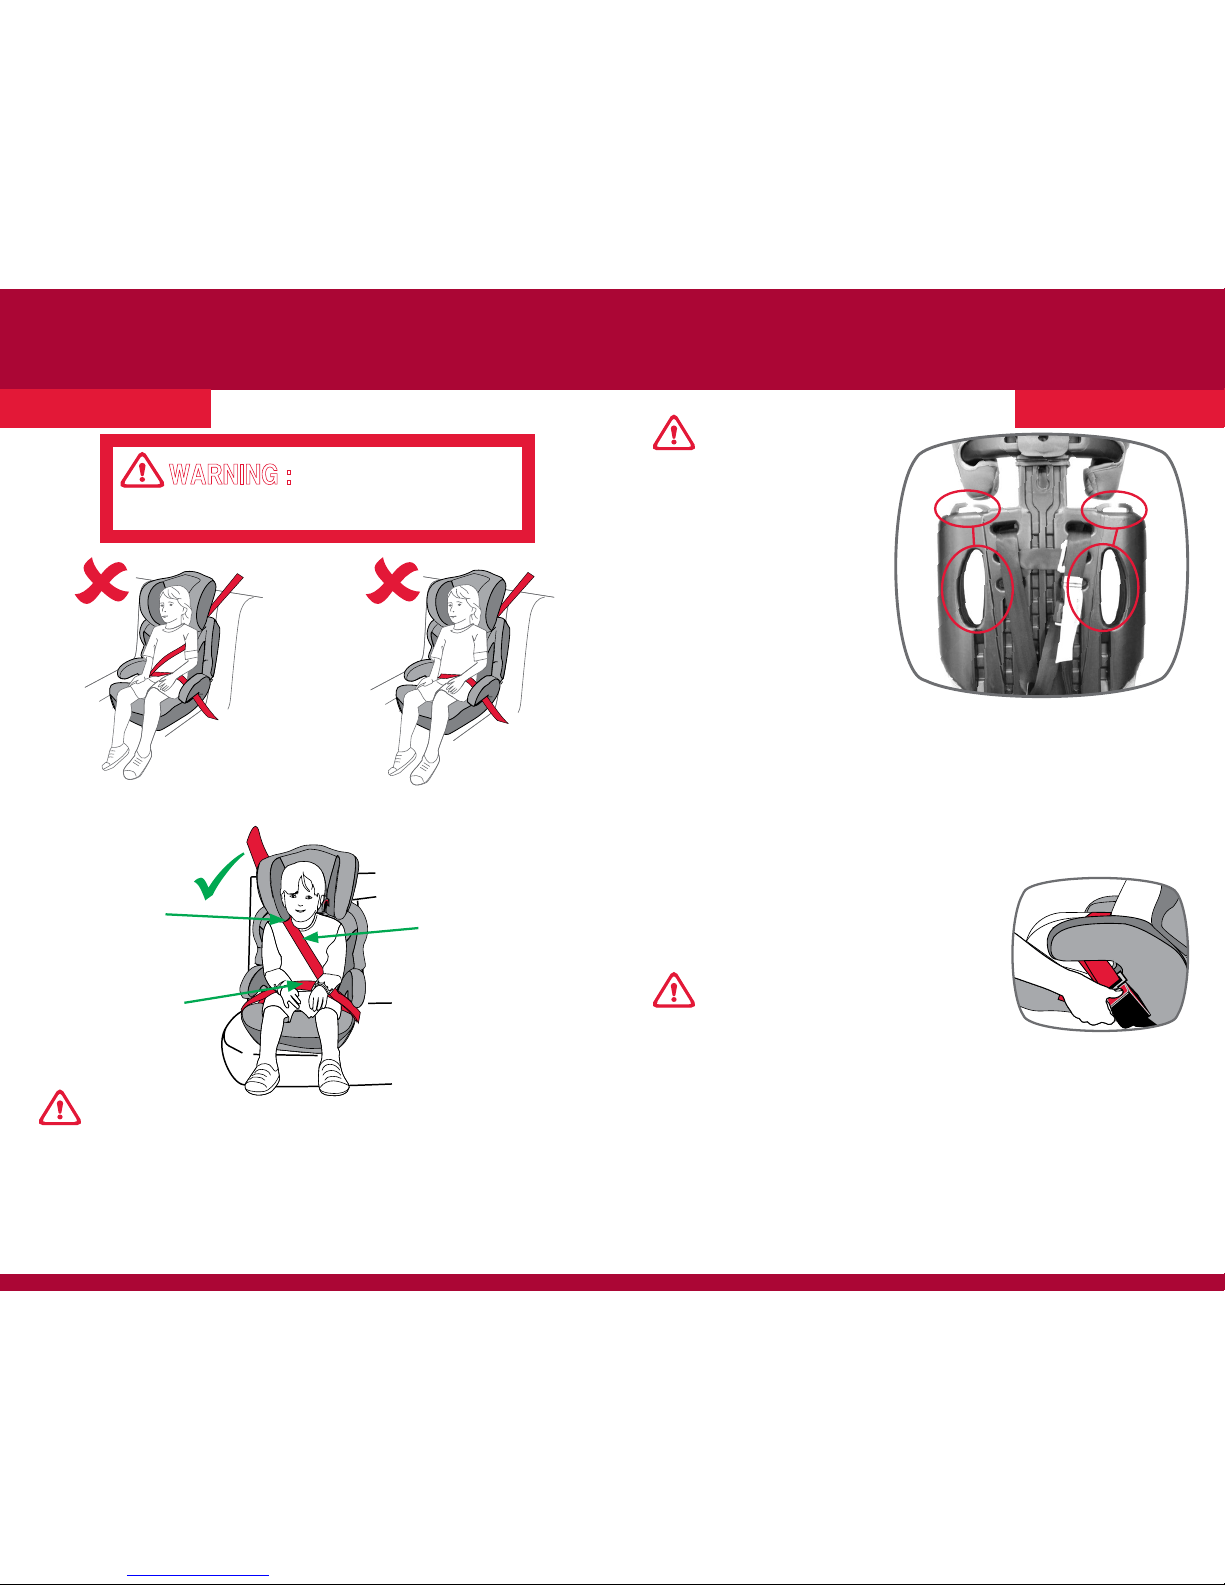
• The lap part of the seat belt must be rmly across the thighs and sash
straps tted diagonally across the chest and on the shoulder.
• If used with a Child Harness, the lap strap of the seatbelt must be adjusted
rmly rst, and then the harness, so that the lap-strap is not lifted off the
child’s lap when the harness is adjusted.
• DO NOT USE THIS RESTRAINT WITHOUT THE COVER.
• IF AN AIRBAG IS FITTED IN THE SEATING POSITION WHERE THE CHILD
RESTRAINT IS TO BE FITTED, FOLLOW THE VEHICLE MANUFACTURER’S
WARNINGS AND INSTRUCTIONS.
• Regularly check the restraint components, straps and other tments for
correct function, cracking & condition. Seek prompt repair.
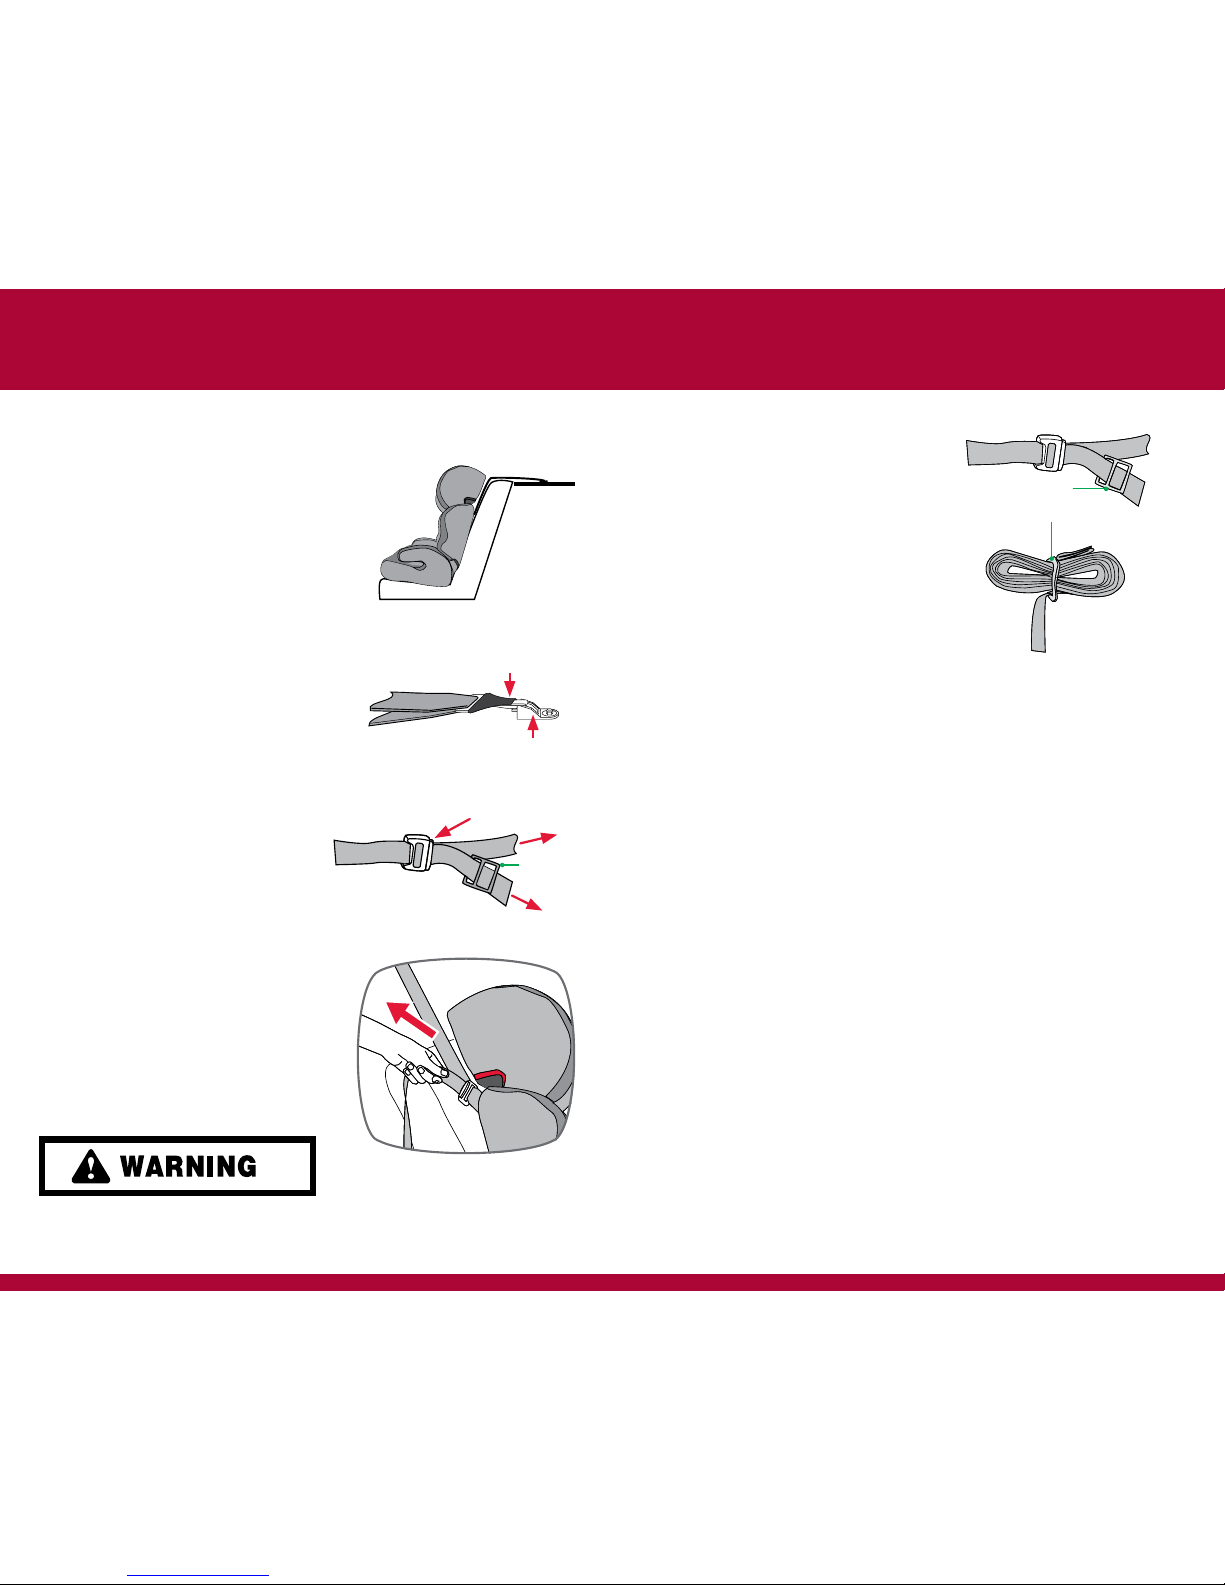
• Straps may be damaged by unsecured cargo in a collision. Secure or
remove hazardous cargo before using this strap. Hatch-back or wagon: Do
not use the child restraint where this strap may fall into a split in the seat
back. Always attach hook and remove slack.
• Securely stow all heavy objects, feeding bottles, cup holders, etc that
could become missiles during an accident and cause injury to any
occupant.
• The restraint should not be purchased or sold as a second hand item.
It is recommended not to use child restraints older than 10 years as the
protection in an accident may be reduced.
• THIS RESTRAINT MUST BE ATTACHED TO A CHILD RESTRAINT
ANCHORAGE POINT IN THE CAR. REFER TO CAR OWNER’S HANDBOOK
FOR LOCATION OF ANCHORAGE POINTS. REFER TO A CHILD RESTRAINT
FITTING STATION IF NO ANCHORAGE POINTS ARE IN THE MOTOR CAR.
• THIS RESTRAINT IS NOT SUITABLE FOR USE WHERE THE ANCHORAGE
STRAP MAY FALL INTO A SPLIT IN THE SEAT BACK. (E.G. HATCHBACK
OR WAGON).
• Do not store in areas that may get hot, like in car boots, roof space, beside
shed walls which get hot in summer. Do not place heavy items on top of
the seat as this may distort the plastic
DO NOT LEAVE CHILDREN UNATTENDED IN THE CAR.
:
5
4