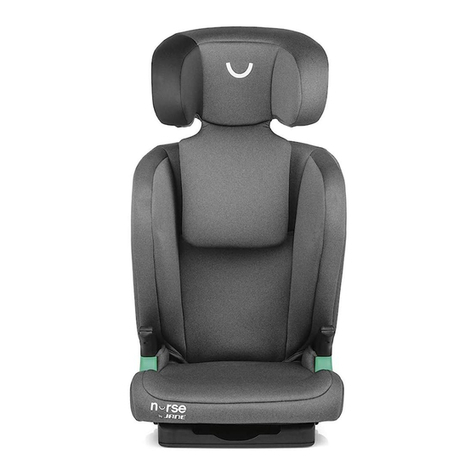
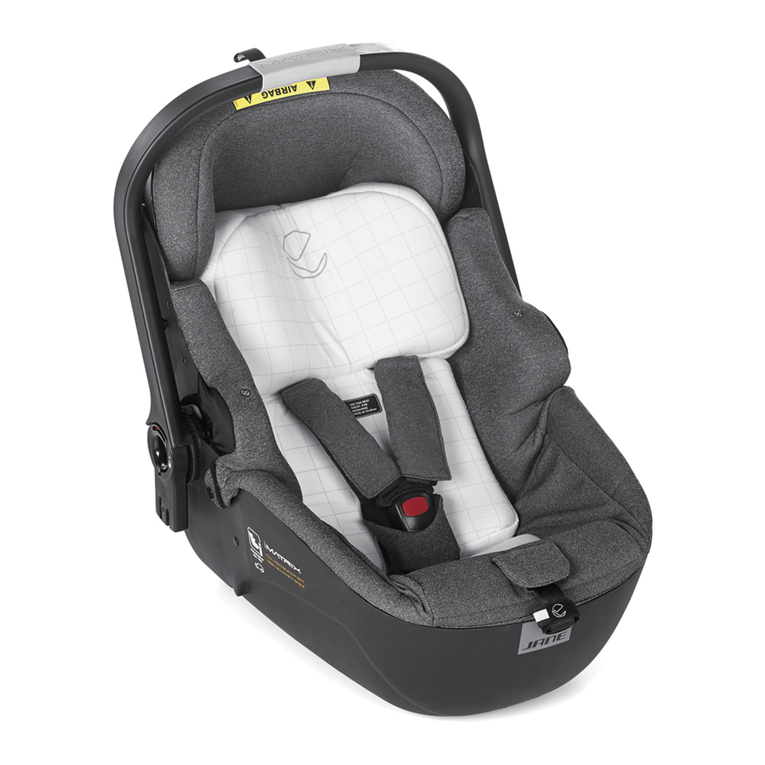
JANE nurse cruiser User manual

cruiser
INSTRUCCIONES
INSTRUCTIONS
ISTRUZIONI
INSTRUCTIONS
INSTRUÇÕES
•
•
•
ECRS Universal con ISOFIX 40-105cm ≤18 kg
Asiento elevador 100-135 cm
Universal ECRS ISOFIX 40-105 cm ≤18 kg
Booster seat 100-135 cm
VIDEO DEMO

2
cruiser
E
ADVERTENCIAS
• IMPORTANTE: Lea con detenimiento y asegúrese de entender todas las instrucciones
de este manual y del manual de usuario del vehículo en relación con las sillas de
seguridad. Instale y utilice la silla de seguridad infantil como se indica en el manual
de instrucciones. Si se instala de forma incorrecta podría provocar serias lesiones al
niño o incluso la muerte. Conserve las instrucciones junto con el ECRS para futuras
consultas.
• IMPORTANTE: Debido a posibles problemas médicos inherentes a los recién nacidos
con bajo peso o prematuros, antes de abandonar el hospital y utilizar el ECRS,
consulte a un médico o personal sanitario sobre la idoneidad del ECRS en estos casos.
• 1. Compruebe que todos los cinturones que sujetan el sistema de retención al
automóvil están tirantes; los que sujetan al niño, ajustados al cuerpo del niño y,
además, que no estén retorcidos.
• 2. Compruebe que el cinturón abdominal esté colocado lo más abajo posible de
forma que la pelvis esté firmemente sujeta para evitar que el niño se salga de la silla
de seguridad.
• 3. Compruebe que el ECRS se sustituye si ha sufrido tensiones bruscas en un accidente.
• 4. Compruebe que el ECRS está colocado de forma que, debido al uso diario, los
elementos rígidos o plásticos no se queden atrapados en las puertas o en las partes
móviles de los asientos.
• 5. Se advierte al usuario del peligro que supone realizar modificaciones o añadidos
en el ECRS sin la autorización del organismo homologador correspondiente; y del
peligro de no seguir correctamente las instrucciones de instalación proporcionadas
por el fabricante del ECRS.
• 6. QUEMADURAS: En caso de que la silla de seguridad no incluya la cubierta de tela,
manténgala alejada de la luz solar ya que podría calentarse y producir lesiones en la
piel de los niños.
• 7. NO deje al niño en la silla de seguridad sin supervisión, incluso durante cortos
periodos de tiempo.
• 8. Compruebe que el equipaje y cualquier otro objeto que pudiera provocar lesiones
en caso de accidente está bien sujeto.
• 9. A) NO utilice el ECRS sin la cubierta. B) NO reemplace la cubierta de la silla por
otra que no sea la recomendada por el fabricante ya que forma parte integral del
sistema de retención.
• 10. NO utilice el ECRS si la posición del anclaje del cinturón de seguridad del vehículo
en los principales puntos de conexión y carga no es correcta. Contacte con el
fabricante si tiene dudas respecto a este punto.
• 11. NO utilice otros puntos de conexión y carga que los indicados en las instrucciones
y los marcados en el ECRS. Contacte con el fabricante si tiene dudas respecto a este
punto.
• 12. Lea el manual de instrucciones del fabricante del vehículo antes de instalar este
ECRS i-Size.

3
cruiser
GB
WARNINGS
• IMPORTANT! Please carefully read and make sure you understand all
instructions in this manual and in the vehicle owner’s manual related to child
safety seats. Install and use the child safety seat as described in the instruction
manual. Failure to do this could result in serious injury or death of your child.
Keep the instructions together with the ECRS for future reference.
• IMPORTANT! Because of potential medical issues inherent to low birth weight
and premature infants, always have a trained professional doctor or hospital
staff member assess the suitability of the ECRS prior to leaving the hospital or
using the ECRS.
• 1. Make sure any straps holding the restraint to the vehicle should be tight.
Any straps restraining the child should be adjusted to the child’s body.Make
sure straps should not be twisted.
• 2. Make sure the lap strap is worn low down, so that the pelvis is firmly
engaged to prevent child from falling out of the safety car seat.
• 3. Make sure the ECRS is changed when it has been subject to violent stresses
in an accident.
• 4. Make sure the rigid items and plastic parts of a ECRS shall be so located
and installed that they are not liable, during everyday use of the vehicle, to
become trapped by a movable seat or in a door of the vehicle
• 5. DO NOT make any alteration or additions to the ECRS without the approval
of the Type Approval Authority, and a danger of not following closely the
installation instructions provided by the ECRS manufacturer.
• 6. HOT! The child seat should be kept away from sunlight if the seat is not
provided with a textile cover, otherwise it may be too hot for the child’s skin.
• 7. DO NOT leave your child unattended in this restraint even for a short time.
• 8. Make sure any luggage or other objects liable to cause injuries in the event
of a collision shall be properly secured.
• 9. A) DO NOT use the ECRS system without the cover. B) DO NOT replace
seat cover with any other than the one recommended by the manufacturer,
because the cover constitutes an integral part of the restraint performance.
• 10. DO NOT use the ECRS system if position of the adult safety-belt buckle to
the main load bearing contact points on the restraint is unsatisfactory, please
• contact the manufacture in doubt about this point.
• 11. DO NOT use any load bearing contact points other than those described in
the instructions and marked in the ECRS. please contact the manufacture in
doubt about this point.
• 12. Please read the car manufacturer’s handbook before installing this i-Size ECRS.

4
cruiser
FR
AVERTISSEMENTS
• IMPORTANT : Lire attentivement ce manuel et celui du véhicule en s’assurant de
comprendre toutes les instructions concernant les sièges auto. Installer et utiliser
le siège auto comme il est indiqué dans le manuel d’utilisation. Une installation
incorrecte pourrait provoquer de graves blessures à l’enfant ou même la mort.
Conservez les instructions avec l’ECRS pour pouvoir vous y reporter ultérieurement.
• IMPORTANT : En raison de problèmes médicaux potentiels inhérents à une
insuffisance pondérale à la naissance ou aux prématurés, avant de quitter l’hôpital
et d’utiliser l’ECRS, il est préférable de consulter un médecin ou le personnel de
santé pour savoir si l’ECRS convient dans ces cas.
• 1. Vérifier que les ceintures qui fixent le système de retenue sur le véhicule sont bien
tendues ; celles qui permettent d’attacher l’enfant, doivent être bien ajustées au
corps de l’enfant, et ne doivent pas être enroulées.
• 2. Veiller à ce que la ceinture abdominale soit placée aussi bas que possible afin que
le bassin soit fermement soutenu pour empêcher l’enfant de glisser hors du siège auto.
• 3. Veiller à remplacer l’ECRS s’il a subi des tensions brusques lors d’un accident.
• 4. Vérifier que l’ECRS est placé de façon que les éléments rigides ou en plastique ne
soient pas coincés dans les portes ou dans les parties mobiles des sièges, lors de son
utilisation quotidienne.
• 5. L’utilisateur est averti du danger d’apporter des modifications ou des ajouts à
l’ECRS sans l’approbation de l’organisme d’homologation compétent ; et du danger
de ne pas suivre correctement les instructions d’installation fournies par le fabricant
de l’ECRS.
• 6. BRÛLURES : Si le siège de sécurité ne contient pas la housse en toile, tenez-le à
l’écart de la lumière solaire car il pourrait chauffer et produire des lésions sur la
peau de l’enfant.
• 7. NE PAS laisser l’enfant dans son siège auto sans surveillance, même pour des
moments courts.
• 8. Il est recommandé de bien attacher les bagages ou tout autre objet dans le
véhicule pour éviter des blessures en cas d’accident.
• 9. A) NE PAS utiliser l’ECRS sans sa housse. B) NE PAS remplacer la housse du siège
par une autre non recommandée par le fabricant, car elle fait partie intégrante du
système de retenue.
• 10. NE PAS utiliser l’ECRS si la position de l’ancrage de la ceinture de sécurité du
véhicule aux points de connexion et de chargement principaux n’est pas correcte.
Veuillez contacter le fabricant en cas de doutes à ce sujet.
• 11. NE PAS utiliser d’autres points de connexion et de charge que ceux qui sont
indiqués dans les instructions et sur l’ECRS. Veuillez contacter le fabricant en cas de
doutes à ce sujet.
• 12. Veuillez lire le manuel d’utilisation du fabricant du véhicule avant d’installer cet
ECRS i-Size.

5
cruiser
PT
ADVERTÊNCIAS
• IMPORTANTE: Leia com atenção e certifique-se de que entende todas as instruções
deste manual e do manual de utilizador do veículo em relação às cadeiras de
segurança. Instale e utilize a cadeira de segurança infantil como indicado no manual
de instruções. Se for instalada de forma incorreta, pode causar lesões graves na
criança ou até a morte. Guarde as instruções juntamente com o ECRS para futuras
consultas.
• IMPORTANTE: Devido a possíveis problemas médicos inerentes aos recém-nascidos
com baixo peso ou prematuros, antes de deixar o hospital e utilizar o ECRS, consulte
um médico ou pessoal de saúde sobre a adequação do ECRS nestes casos.
• 1. Verifique se todos os cintos que prendem o sistema de retenção ao automóvel
estão esticados; os que prendem a criança, ajustados ao corpo desta e, além disso,
se não estão torcidos.
• 2. Verifique se o cinto abdominal está colocado o mais baixo possível de forma que a
pélvis fique firmemente apoiada para evitar que a criança saia da cadeira de segurança.
• 3. Verifique se o ECRS se substitui se tiver sofrido tensões bruscas num acidente.
• 4. Verifique se o ECRS está colocado de modo que, devido ao uso diário, os
elementos rígidos ou plásticos não fiquem entalados nas portas ou nas partes
móveis dos assentos.
• 5. Adverte-se o utilizador sobre o perigo de se realizar modificações ou adições no
ECRS sem a autorização do organismo de homologação correspondente; e sobre
o perigo de não seguir corretamente as instruções de instalação fornecidas pelo
fabricante do ECRS.
• 6. QUEIMADURAS: No caso da cadeira de segurança não incluir a cobertura de
tecido, mantenha-a afastada da luz solar, pois esta poderia aquecer e causar lesões
na pele das crianças.
• 7. NÃO deixe a criança na cadeira de segurança sem vigilância, mesmo durante
curtos períodos de tempo.
• 8. Verifique se a bagagem e qualquer outro objeto que possa causar lesões em caso
de acidente está devidamente preso.
• 9. A) NÃO utilize o ECRS sem a cobertura. B) NÃO substitua a cobertura da cadeira
por outra que não seja recomendada pelo fabricante, já que faz parte integrante do
sistema de retenção.
• 10. NÃO utilize o ECRS se a posição de fixação do cinto de segurança do veículo nos
principais pontos de conexão e carga não for correta. Contacte o fabricante se tiver
alguma dúvida a esse respeito.
• 11. NÃO utilize outros pontos de conexão e carga que os indicados nas instruções e
marcados no ECRS. Contacte o fabricante se tiver alguma dúvida a esse respeito.
• 12. Leia o manual de instruções do fabricante do veículo antes de instalar este ECRS
i-Size.

cruiser
6
cruiser
I
AVVERTENZE
• IMPORTANTE: leggi con attenzione e assicurati di comprendere tutte le istruzioni
riportate nel presente manuale e nel manuale per l’utente del veicolo in relazione ai
seggiolini di sicurezza. Installa e utilizza il seggiolino di sicurezza per bambini come
indicato nel manuale di istruzioni. Se il seggiolino non viene installato in modo
corretto, il bambino potrebbe subire lesioni gravi o persino la morte. Conserva le
istruzioni insieme al sistema di ritenuta per consultazioni future.
• IMPORTANTE: i bambini con basso peso alla nascita o nati prematuri possono
trovarsi in particolari condizioni mediche. In tali circostanze, prima di lasciare
l’ospedale e utilizzare il sistema di ritenuta per la prima volta, consulta un medico o
il personale sanitario per assicurarti che il sistema di ritenuta sia idoneo.
• 1. Verifica che tutte le cinture che fissano il sistema di ritenuta all’auto siano tese,
che quelle che trattengono il bambino siano aderenti al corpo del bambino e che
nessuna cintura sia attorcigliata.
• 2. Verifica che la cintura addominale sia posizionata il più in basso possibile, in
modo tale che il bacino del bambino sia trattenuto fermamente, per evitare che il
bambino esca dal seggiolino di sicurezza.
• 3. Il sistema di ritenuta va sostituito se ha subito forti tensioni in caso in incidente.
• 4. Verifica che il sistema di ritenuta sia installato in modo tale che, durante l’uso
quotidiano, gli elementi rigidi o in plastica non rimangano incastrati nelle porte o
nelle parti mobili dei sedili.
• 5. È pericoloso apportare modifiche o aggiunte al sistema di ritenuta senza
l’autorizzazione dell’apposito organismo omologatore; inoltre, è pericoloso non
seguire correttamente le istruzioni di installazione fornite dal fabbricante del sistema
di ritenuta.
• 6. BRUCIATURE: nel caso in cui il seggiolino di sicurezza non comprenda il
rivestimento in tela, tienilo lontano dalla luce solare, dato che potrebbe surriscaldarsi
e procurare lesioni alla pelle del bambino.
• 7. NON lasciare il bambino sul seggiolino di sicurezza senza supervisione, neanche
per brevi periodi di tempo.
• 8. Verifica che i bagagli e qualsiasi altro oggetto che potrebbe provocare lesioni in
caso di incidente siano ben trattenuti.
• 9. A) NON utilizzare il sistema di ritenuta senza il suo rivestimento. B) NON sostituire
il rivestimento del seggiolino con un altro che non sia raccomandato dal fabbricante,
dato che è parte integrante del sistema di ritenuta.
• 10. NON utilizzare il sistema di ritenuta se la posizione dell’ancoraggio della cintura
di sicurezza del veicolo nei principali punti di connessione e carico non è corretta.
Contatta il fabbricante se hai dubbi rispetto a questo punto.
• 11. NON utilizzare punti di connessione e carico diversi da quelli indicati nelle
istruzioni e sul sistema di ritenuta. Contatta il fabbricante se hai dubbi rispetto a
questo punto.
• 12. Leggi il manuale di istruzioni del fabbricante del veicolo prima di installare
questo sistema di ritenuta i-Size.

7
cruiser

8
cruiser
ISOFIX
Attachment
Point
(If you don’t have ISOFIX
Insert Guide, please
ignore this.)
ISOFIX Insert Guide
ESPAÑOL
LISTA DE COMPONENTES - PARTS LIST - LISTE DES COMPOSANTS -
LISTA DE COMPONENTES - LISTA DEI COMPONENTI
D
C
BA
E
J
I
N
O
P
QY
S
T
U
V
X
W
R
H
M
L
G
K
ENGLISH
A. Belt Guidance (1)
B. Seat Cover
C. Shoulder Pad
D. Shoulder Belt
E. Buckle Tongue
F. Red Button
G. Buckle
H. Crotch Pad
I. Crotch Belt
J. 360° Rotate Adjuster
K. Headrest cushion (Only suitable for babies 8 months ago)
L. Headrest Height Adjuster (back of the headrest)
M. Headrest
N. Sleeping pad
O. Belt Guidance (3)
P. Recline Handle
Q. Base
R. Metal plate
S. Instruction Back Cover(can insert instruction into it)
T. Top Tether Clip
U. Top Tether Adjuster
V. ISOFIX Locking Arms
W. ISOFIX Button
X. ISOFIX Attachment Point
Y. ISOFIX Insert Guide (If you don’t have ISOFIX Insert Guide,
please ignore this)
A. Ranura cinturón (1)
B. Cubierta silla
C. Acolchado hombros
D. Cinturón hombros
E. Hebilla
F. Botón rojo
G. Cierre
H. Acolchado de entrepierna
I. Cinturón de entrepierna
J. Dispositivo de ajuste de rotación 360º
K. Almohada reposacabezas (apta únicamente para bebés de hasta 8 meses)
L. Regulador de altura del cabezal (detrás del cabezal)
M. Cabezal
N. Acolchado para dormir
O. Ranura cinturón (3)
P. Asa de reclinado
Q. Base
R. Eje metálico
S. Cubierta trasera para instrucciones (es posible introducir las instrucciones
dentro)
T. Enganche del Top Tether
U. Regulador del Top Tether
V. Barras de fijación ISOFIX
W. Botón ISOFIX
X. Anillas de anclaje ISOFIX
Y. Guía de inserción ISOFIX (si no dispone de guía ISOFIX, ignore este apartado)
F

9
cruiser
PORTUGUÊS
FRANÇAIS
ITALIANO
A. Passaggio per la cintura (1)
B. Rivestimento seggiolino
C. Spallacci
D. Cintura pettorale
E. Fibbia
F. Pulsante rosso
G. Chiusura
H. Imbottitura cintura spartigambe
I. Cintura spartigambe
J. Dispositivo di regolazione della rotazione a 360º
K. Cuscino poggiatesta (adatto solo per bambini fino a 8 mesi)
L. Regolatore dell’altezza del poggiatesta (dietro il poggiatesta)
M. Poggiatesta
N. Imbottitura per dormire
O. Passaggio per la cintura (3)
P. Maniglia di reclinazione
Q. Base
R. Asse metallico
S. Alloggio posteriore per le istruzioni (è possibile inserirvi le istruzioni)
T. Aggancio del Top Tether
U. Regolatore del Top Tether
V. Barre di fissaggio ISOFIX
W. Pulsante ISOFIX
X. Anelli di ancoraggio ISOFIX
Y. Guida di inserimento ISOFIX (se non disponi di guide ISOFIX, ignora
questo paragrafo)
A. Ranhura cinto (1)
B. Cobertura cadeira
C. Acolchoado ombros
D. Cinto ombros
E. Fivela
F. Botão vermelho
G. Fecho
H. Acolchoado de entreperna
I. Cinto de entreperna
J. Dispositivo de ajuste de rotação 360º
K. Almofada apoio de cabeça (adequada apenas para bebés de
até 8 meses)
L. Regulador de altura da zona da cabeça (atrás da zona da
cabeça)
M. Zona da cabeça
N. Acolchoado para dormir
O. Ranhura cinto (3)
P. Asa de reclinação
Q. Base
R. Eixo metálico
S. Cobertura traseira para instruções (é possível inserir as instru-
ções dentro)
T. Engate do Top Tether
U. Regulador do Top Tether
V. Barras de fixação ISOFIX
W. Botão ISOFIX
X. Pontos de fixação ISOFIX
Y. Guia de inserção ISOFIX (se não dispõe de guia ISOFIX, ignore
este ponto)
A. Rainure ceinture (1)
B. Housse siège
C. Rembourrage épaules
D. Ceinture épaules
E. Boucle
F. Bouton rouge
G. Verrouillage
H. Rembourrage entre-jambes
I. Ceinture entre-jambes
J. Dispositif de réglage de rotation 360º
K. Oreiller appui-tête (apte uniquement pour les bébés jusqu’à 8
mois)
L. Régulateur de hauteur de l’appui-tête (derrière l’appui-tête)
M. Appui-tête
N. Protection pour dormir
O. Rainure ceinture (3)
P. Poignée d’inclinaison
Q. Base
R. Axe métallique
S. Compartiment arrière pour les instructions (on peut ranger les
instructions à l’intérieur)
T. Fixation du Top Tether
U. Réglage du Top Tether
V. Barres de fixation ISOFIX
W. Bouton ISOFIX
X. Anneaux de fixation ISOFIX
Y. Guide d’insertion ISOFIX (si vous ne disposez pas de guide ISOFIX,
ignorez ce point)

10
cruiser
1.1
1.2
1.4
1.5
1.3
Correct/ Proper Wrong/ Improper
A:
B:
a
picture 1 picture 2
picture 3

11
cruiser
DE F
1.6
1.8 - 1.9
1.7
picture 1
a
C
A
metal link
B

12
cruiser
2.2
2.1

13
cruiser
CLICK Ensure the lap
belt is as close as
possible to lower.
Ensure the lap
belt is on the
pelvis, not on the
abdomen.
ISOFIX connector is
optional, you can
ignore this step if
you don't want to
use it.
AB
picture a
2.3
***

14
cruiser
E
1
Correcto/Adecuado Incorrecto/Inadecuado
No podrá instalarse en este lugar si el airbag está activado.
Únicamente podrá instalarse en este lugar si está equipado con cinturón
de seguridad de 3 puntos y anclajes ISOFIX.
Probado y homologado según la normativa ECE R129/03
Dirección de instalación
Sentido contrario a la marcha
Sentido de la marcha
Método de instalación
Isofix+top tether
Isofix+top tether
Cinturón+conector ISOFIX
Cinturón
Tamaño del niño
40-105cm≤18kg
76-105cm≤18kg
100-135cm
I-size
IMPORTANTE: LEA ESTAS INSTRUCCIONES CON DETENIMIENTO ANTES DE UTILIZAR EL PRODUCTO Y
CONSÉRVELAS PARA FUTURAS CONSULTAS
Si no se siguen correctamente las instrucciones la seguridad del niño estaría en grave peligro.
INFORMACIÓN GENERAL
NO UTILICE EL ECRS (Sistema reforzado de retención infantil) EN ASIENTOS EQUIPADOS CON AIRBAG
FRONTAL ACTIVO.
IMPORTANTE - NO LO UTILICE EN EL SENTIDO DE LA MARCHA ANTES DE QUE EL NIÑO TENGA 15 MESES
(consulte las instrucciones).
Información sobre el sistema reforzado de retención infantil de categoría i-Size.
Este producto es un sistema reforzado de retención infantil i-Size.
Está homologado según el Reglamento nº 129/03 (UN) para su uso en asientos de vehículo compatibles con
i-Size como se indica en el manual de usuario del vehículo.
En caso de duda, consulte tanto al fabricante como al vendedor del sistema reforzado de retención infantil.
Información sobre el sistema reforzado de retención infantil de categoría asiento elevador i-Size.
Este producto es un asiento elevador i-Size que pertenece a los sistemas reforzados de retención infantil.
Está homologado según el Reglamento nº 129/03 (UN) para su uso principal en “asientos de vehículo
compatibles con i-Size” como se indica en el manual de usuario del vehículo.
En caso de duda, consulte tanto al fabricante como al vendedor del sistema reforzado de retención infantil.
INFORMACIÓN DEL PRODUCTO
Este producto es un sistema de retención infantil con rotación de 360°.
La información que se muestra a continuación le puede ayudar a entender mejor el producto.
1. MÉTODO SEGURO DE USO DE LA SILLA DE SEGURIDAD
1.1 Lugar de instalación
A Cinturón de seguridad del vehículo-Cinturón diagonal BCinturón de seguridad del vehículo-
Cinturón abdominal C Anclajes ISOFIX
1.1.1 ¿Cuándo se utiliza como i-Size?
El ECRS es apto para los vehículos equipados con todos los requisitos indicados en el Reglamento ECE
R14 y únicamente puede utilizarse cuando está instalado con ISOFIX.
1.1.2 Si se utiliza como asiento elevador i-Size, el ECRS es apto para modelos equipados con cinturones
de seguridad retráctiles de 3 puntos que cumplen con el Reglamento ECE R16 y no es apto para modelos
equipados únicamente con cinturones de seguridad de 2 puntos y únicamente puede utilizarse cuando
está instalado con ISOFIX.
1.2 Cómo utilizar el cierre del arnés
Junte los dos salientes de la hebilla.
Compruebe que la parte derecha está arriba.
Engánchelos antes de introducirlos en la hebilla del arnés. Debería escucharse un CLIC.
Tire de los cinturones de hombros para estirar la sección abdominal y así garantizar que el arnés está
colocado plano y el cierre bloqueado.
Apriete el botón rojo para desabrochar el cierre de la hebilla.
1.3 Ajuste del cabezal
A. Cuando se utiliza para (40-105 cm) (Uso nivel 1-5).
Los cinturones de hombros se ajustan como se indica a continuación:
Afloje los cinturones de hombros de la silla de seguridad infantil lo máximo posible.
Tire del regulador de altura del cabezal hasta seleccionar la altura correcta de los cinturones de
hombros y suelte el regulador para encajarlo en la posición que se adapte al niño.

15
cruiser
E
B. Cuando se utiliza para (100-135 cm) (Uso nivel 6-10)
Cuando el niño crece y supera el metro de altura, el cabezal debería utilizarse en el nivel de altura 6-10.
SACAR Y GUARDAR EL EJE METALICO (1.7 C) y deslice el cinturón izquierdo primero y después el
derecho. Ahora es posible retirar el cinturón de hombros. (Véase 1.7)
Desde la parte delantera de la silla de seguridad, retire los cinturones de hombros a través de las
ranuras y colóquelos debajo de la cubierta de tela.
Después de retirarlos, saque el EJE METALICO de la parte plástica y guárdela. Tire del regulador
de altura del cabezal hasta seleccionar la altura correcta de los cinturones de hombros y suelte el
regulador para encajarlo en la posición que se adapte al niño.
ATENCIÓN:
El ajuste correcto del cabezal de la silla de seguridad garantiza una protección óptima para el niño:
El cabezal debe regularse de forma que los cinturones de hombros estén al mismo nivel que los
hombros del niño.
Regule el cabezal en la posición correcta, de forma que la distancia entre los hombros del niño y la
parte inferior del cabezal sea de un dedo.
PRECAUCIÓN: Los cinturones de hombros nunca deben estar por detrás de la espalda del niño, a la
altura de las orejas o por encima de ellas.
1.4 Ajuste de la longitud del cinturón de seguridad
A. Cómo tensar el cinturón de seguridad
Tire hacia arriba de los cinturones de hombros y el cinturón abdominal se tensará, después tire de la
correa de entrepierna para ajustar el cinturón de seguridad.
Apriete el cinturón de seguridad lo máximo posible pero siempre manteniendo la comodidad del
niño. El cinturón abdominal debe situarse lo más abajo posible sobre las caderas del niño, no sobre
el abdomen.
Tenga en cuenta: Si el cinturón de seguridad no está bien tenso podría ser peligroso. Compruebe
que el regulador del cinturón de seguridad funciona correctamente y después apriete el cinturón de
seguridad. Tras ajustar el cinturón de seguridad, regule el acolchado de hombros hasta la posición
adecuada sobre el pecho.
°·>y>ÀiVÌÕÀ`iÃi}ÕÀ`>`
Al presionar el regulador del cinturón de seguridad, con la otra mano sujete el cinturón de seguridad
por debajo del acolchado de hombros y tire hacia delante para soltar el cinturón de seguridad.
1.5 Ajuste de la rotación de la silla
Tire del dispositivo de ajuste de rotación con el dedo pulgar, después será posible rotar la silla de
seguridad en un ángulo de 360º. (Véase imagen a)
TENGA EN CUENTA: Vuelva a colocar el dispositivo de ajuste de rotación en su lugar después de
utilizarlo, así se asegurará de que la silla está correctamente bloqueada.
A. Sentido contrario a la marcha: (40-105 cm), debe utilizarse en sentido contrario a la marcha (véase
imagen 1).
B. Sentido de la marcha: (76-135 cm), debe utilizarse en el sentido de la marcha (véase imagen 2).
C. Cuando la silla se rota 90 grados, el usuario puede colocar al niño en esta posición, pero no se
puede utilizar este ángulo cuando el vehículo está en marcha (véase imagen 3).
1.6 Ajuste del ángulo de la silla de seguridad infantil
Empuje el asa de reclinado hacia arriba y tire de la silla hacia afuera (véase imagen a), después la silla
podrá regularse.
La silla puede regularse en 4 posiciones para su uso en el sentido de la marcha (véanse imágenes
XYZ[).
Cuando la silla se encuentra en la posición número cuatro, rótela hacia atrás, entonces podrá colocarse
en la posición cinco.
Cada altura necesita una posición de reclinación distinta.
40-105 cm: instalación en sentido contrario a la marcha, utilice la posición 5 (véase imagen \).
76-105 cm: instalación en el sentido de la marcha, utilice las posiciones 1-4 (véanse imágenes X-
[
).
100-135 cm: instalación en el sentido de la marcha, utilice la posición 1 (véase imagen X).
Nota: No utilice la silla de seguridad en sentido de la marcha hasta que el niño supere los 15 meses de edad.
5
Instalación en sentido
contrario a la marcha
18 meses-3 años
0-3 años
100-135 cm
3-12 años
Instalación en el sentido de la marcha
Nota: No utilice la silla de seguridad en sentido de la marcha hasta que el niño supere los 15 meses de edad
Quinto nivel (tumbado) Primer nivel Segundo nivel Tercer nivel Cuarto nivel

16
cruiser
E
2
1.7 Cómo retirar el arnés de 5 puntos y guardar las piezas accesorias
Paso 1: Cómo retirar el acolchado y los cinturones de hombros.
Afloje el arnés de 5 puntos de la silla de seguridad lo máximo posible. Retire el cinturón del enganche de
metal. Retire el acolchado de hombros de los cinturones y guárdelo en un lugar seguro.
Guarde el enganche de metal en la zona habilitada para ello detrás del respaldo. (Imagen A e imagen B).
Coja el EJE METÁLICO de la parte plástica y guárdelo en la zona habilitada para ello detrás del respaldo
(imagen C).
Para finalizar, coloque el cinturón sobrante debajo de la cubierta de tela. (Imagen D)
Paso 2: Cómo retirar y guardar la hebilla
Abra el cierre de la hebilla, saque los salientes del cinturón de hombros. Tire de la hebilla por debajo
de la cubierta de tela.
Después, retire la cubierta y guarde la hebilla en la zona habilitada para ello. (Imágenes E y F)
1.8 Cómo retirar el acolchado para dormir
Cuando el niño alcance los 61 cm de altura, retire el acolchado para dormir.
1.9 Cómo retirar y colocar la cubierta de tela
1. 1. Retire el arnés de 5 puntos.
2. Extraiga la cubierta del respaldo y de la base.
3. Mueva el cabezal de la silla de seguridad del niño hasta la posición más elevada.
4. En primer lugar, extraiga la cubierta desde la base del cabezal y después retire la cubierta del cabezal.
Para volver a colocarla, en primer lugar coloque la cubierta del cabezal y después la cubierta del chasis
de plástico en el orden XYZ
(véase imagen 1))
PRECAUCIÓN: NUNCA utilice la silla de seguridad si no está correctamente instalada.
PRECAUCIÓN: Compruebe que las cintas del arnés no están retorcidas y están correctamente insertadas
en las ranuras para cinturones de la cubierta.
2. INSTALACIÓN
2.1 Instalación en el sentido contrario a la marcha con ISOFIX y top tether (40-105cm)
Coloque las guías de inserción ISOFIX en las dos anillas de anclaje ISOFIX del vehículo.
Si no dispone de guía ISOFIX, ignore este paso.
NOTA: Los puntos de anclaje ISOFIX se sitúan entre la superficie y el respaldo del asiento del vehículo.
Presione el botón ISOFIX para sacar las dos barras de fijación de la parte inferior de la base. Tire de las
barras de fijación hasta escuchar un CLIC que indique que están correctamente encajadas. A ambos
lados de las barras de fijación, el botón se volverá verde, lo que indica que es seguro.
Saque el anclaje top tether, presione el botón de desbloqueo y tire del top tether lo suficiente para
enganchar el seguro en la parte trasera del asiento del vehículo.
Enganche el seguro en el punto fijo. La posición del punto fijo se muestra en la imagen (una de las tres
posiciones). Compruebe que el gancho está bien tirante.
NOTA: Para la seguridad del niño, el top tether debe estar bien tirante cuando el automóvil está en
marcha.
2.2 Instalación en el sentido de la marcha con ISOFIX y top tether (76-105 cm)
IMPORTANTE: No utilice la silla de seguridad en sentido de la marcha hasta que el niño supere los 15
meses de edad.
Coloque las guías de inserción ISOFIX en las dos anillas de anclaje ISOFIX del vehículo.
Si no dispone de guía ISOFIX, ignore este paso.
NOTA: Las anillas de anclaje ISOFIX se sitúan entre la superficie y el respaldo del asiento del vehículo.
Presione el botón ISOFIX para sacar las dos barras de fijación de la parte inferior de la base. Tire de las
barras de fijación hasta escuchar un CLIC que indique que están correctamente encajadas. A ambos
lados de las barras de fijación, el botón se volverá verde, lo que indica que es seguro.
Saque el Top tether y pulse el botón de desbloqueo para alargarlo lo suficiente para poder enganchar
el seguro en la parte trasera del asiento del vehículo
Enganche el seguro en el punto fijo. La posición del punto fijo se muestra en la imagen (una de las tres
posiciones). Compruebe que el gancho está bien tirante.
NOTA: Para la seguridad del niño, el top tether debe estar bien tirante cuando el automóvil está en
marcha.
2.3 Instalación con el conector ISOFIX y el cinturón o únicamente el cinturón del asiento del vehículo
(100-135cm)
NOTA: Si se usa esta silla de seguridad para niños de entre 100 y 135 cm, retire el arnés de 5 puntos.
Consulte el apartado 1.7.
Coloque la silla del niño hacia delante sobre el asiento del automóvil (en el sentido de la marcha).

17
cruiser
INFORMACIÓN SOBRE LA GARANTÍA
- Este artículo dispone de garantía contra defectos de fabricación según lo estipulado en las Directivas
y/o Normativas legales vigentes sobre garantías de bienes de consumo aplicables a la Unión Europea y
propias del país de comercialización.
- Es imprescindible presentar la factura o tique de compra para poder tramitar la garantía a través del
vendedor del artículo o, en su defecto, a través del fabricante.
- La garantía excluye anomalías o averías producidas por un uso inadecuado, por incumplimiento de las
normas de seguridad e instrucciones de uso y mantenimiento proporcionadas, o a causa del desgaste
por uso y manejo normal periódico del artículo.
- La etiqueta que contiene el número de serie de su modelo no debe ser arrancada bajo ningún
concepto ya que contiene información relevante para la garantía.
PARÁMETROS TÉCNICOS
FUNDAMENTALES
Longitud: 500mm
Ancho: 440mm
Altura: 600-800mm
E
Coloque las guías de inserción ISOFIX en las dos anillas de anclaje ISOFIX del vehículo.
Si no dispone de guía ISOFIX, ignore este paso.
NOTA: Los puntos de anclaje ISOFIX se sitúan entre la superficie y el respaldo del asiento del vehículo.
Presione el botón ISOFIX para sacar las dos barras de fijación de la parte inferior de la base. Tire de las
barras de fijación hasta escuchar un CLIC que indique que están correctamente encajadas. A ambos
lados de las barras de fijación, el botón se volverá verde, lo que indica que es seguro.
NOTA: Ignore este paso si no desea utilizar un conector ISOFIX.
Paso 1: En primer lugar, saque el cinturón del ALR (retractor de cierre automático), el cinturón diagonal
a través del mismo lado de la guía M, el cinturón abdominal a través del mismo lado de la guía O, y tire
de ambos a la vez a través del otro lado de la guía O.
NOTA: Mantenga el cinturón diagonal en la posción del hombro, entre la parte exterior del cuello y el
hombro (punto medio entre A y B. Véase imagen A.
Paso 2: Introduzca el saliente metálico del cinturón en el anclaje hasta que escuche un CLIC. Siga la
dirección de la flecha para apretar el cinturón y coloque el cinturón sobrante debajo de la cubierta de
tela. Mueva ligeramente la silla de seguridad para comprobar que está bien sujeta.
PRECAUCIÓN: La sección diagonal del cinturón debe moverse en diagonal hacia atrás. Es posible
ajustar el recorrido del cinturón con la pieza de regulación del cinturón del vehículo en ambos lados.
*El conector ISOFIX es opcional, ignore este paso si no desea utilizarlo.
**Compruebe que el cinturón abdominal está colocado lo más bajo posible. Compruebe que el cinturón
abdominal está colocado sobre la pelvis, no sobre el abdomen.
CUIDADO Y MANTENIMIENTO
Inspeccione periódicamente la silla de seguridad para comprobar que no está desgastada ni tiene
piezas dañadas. Si tiene piezas dañadas, sustituya la silla. Mantenga la silla limpia. No lubrique ninguna
pieza de la silla. Para alargar la vida de este producto, manténgalo limpio y no lo exponga a la luz solar
directa durante largos periodos de tiempo. Las cubiertas de tela y otras partes desmontables pueden
limpiarse con agua templada y jabón o detergente suave. Dejar secar por completo. Preferentemente
alejado de la luz solar directa.
LIMPIEZA DEL CIERRE DEL ARNÉS
Los restos de comida, bebida y otras sustancias pueden acumularse en el cierre del arnés y afectar a
su correcto funcionamiento. Lávelo con agua templada hasta que esté limpio. Para comprobar que el
cierre del arnés funciona correctamente tiene que escuchar un clic.
LIMPIEZA DEL ARNÉS Y DEL CHASIS
Utilice una esponja con agua templada y jabón. No utilice otros productos de limpieza.
INSTRUCCIONES PARA GUARDAR LA SILLA
Guardar en un lugar seguro y seco, alejado de fuentes de calor y de la luz solar directa. Evite colocar
objetos pesados sobre la silla.
No utilizar
lejía No
planchar
No utilizar
secadora
No limpiar
en seco Secar en un
lugar plano y
con sombra
30ºC
Temperatura
máxima de
lavado
440mm 500mm
600-800mm

18
cruiser
GB
1
Correct/ Proper Wrong/ Improper
When front the seat with opened airbag, cannot install in this place
Only with 3-point seat belt and ISOFIX attachments can install in this
place
Tested and approved according to ECE R129/03
Installation direction
rearward facing
forward facing
forward facing
Installation method
Isofix+top tether
Isofix+top tether
Belt+ISOFIX connector
Belt
Body size
40-105cm≤18kg
76-105cm≤18kg
100-135cm
I-size
IMPORTANT: READ THESE INSTRUCTIONS CAREFULLY BEFORE USE AND KEEP FOR FUTURE REFERENCE.
If these instructions are not followed, the safety of a child may be severely endangered.
NOTICE
NOT TO USE REARWARD FACING ECRS (ECRS= Enhanced Child Restraint System)
IN SEATING POSITIONS WHERE THERE IS AN ACTIVE FRONTAL AIRBAG INSTALLED.
IMPORTANT - DO NOT USE FORWARD FACING BEFORE THE CHILD’S AGE EXCEEDS 15 MONTHS
(Refer to instructions).
Notice regarding i-Size category Enhanced Child Restraint Systems (40-105cm)
This is an i-Size Enhanced Child Restraint System.
It is approved according to UN Regulation No. 129/03, for use in, i-Size compatible vehicle seating
positions as indicated by vehicle manufacturers in the vehicle users’ manual.
If in doubt, consult either the Enhanced Child Restraint System manufacturer or the retailer.
Notice regarding i-Size booster seat category Enhanced Child Restraint Systems (100-135cm)
This is a i-Size booster seat Enhanced Child Restraint System.
It is approved according to UN Regulation No. 129/03, for use primarily in “i-Size seating positions” as
indicated by vehicle manufacturers in the vehicle user’s manual.
If in doubt, consult either the Enhanced Child Restraint System manufacturer or the retailer.
3.PRODUCT INFORMATION
This product is a 360°degree rotating child restraint system.
The following information can help you better understand this product.
1.SAFETY SEAT USE METHOD
1.1 Install Location
A Car Safety Belt - Diagonal Belt BCar Safety Belt - Lap Belt C ISOFIX Attachments
1.1.1 When using as i-Size
This ECRS system is suitable for vehicles equipped with the ECE R14 requirements.
And only after installed ISOFIX, then can use on it.
1.1.2 When using as i-Size booster seat
This ECRS system is suitable for seat belt models equipped with the three-point retractor that has
passed the ECE R16 requirement and is not suitable for models only equipped with 2-point seat belts.
And only after installed ISOFIX, then can use on it.
1.2 How to Use the Harness Buckle
Hold the two buckle tongues together.
Make sure the right side is up.
Engage them before putting them into the harness buckle, which should make a CLICK noise.
Pull shoulder straps to remove all slack from the lap section ensuring that the harness is lying flat and
the harness buckle is locked.
Open the hamess buckle by pressing the red button.
1.3 Adjust the Headrest
A. When Use in (40-105cm) (Use 1-5 level)
The shoulder straps are adjusted as follows:
Loosen the shoulder straps of the child seat as much as possible.
Pull the headrest height adjuster, select the correct height of the shoulder straps and engage it in
position that fits your child by releasing the adjuster.

19
cruiser
GB
B. When used for (100-135 cm) (6-10 level use)
When the child grows to a height of over 1 metre, the headrest height should be set to level 6-10.
REMOVE AND STORE THE METAL PLATE AWAY (1.7 C) and slide first the left strap and then the right
strap. Now you can remove the shoulder straps. (See 1.7)
From the front part of the car safety seat, pass the shoulder straps through the slots and place them
underneath the fabric cover.
After removing them, remove the METAL PLATE from the plastic part and store it away. Pull the
headrest height adjuster until reaching the correct height for the shoulder belt and release the
adjuster to set the height in the correct position for the child.
ATTENTION!
A correctly adjusted headrest ensures optimal protection for your child in the safety seat:
The headrest mus t be adjus ted so that the shoulder straps are at the same level as your child’s shoulders.
Adjust the headrest to the proper position, so that the distance between the shoulder of the child and
the bottom of the headrest can be lowered by one finger.
CAUTION! The shoulder straps must not run behind the child’s back, at ear height or above the ears.
1.4 Adjust Safety Belt Lengthen
A Tighten Safety Belt
Pull up shoulder belt and the lap belt will tighten, then pull crotch belt to tighten safety belt.
Tighten the safety belt as much as possible without causing discomfort to the child. The lap belt is as
low as possible and should put near child’s crotch not abdomen.
P.S.: Loose safety belt is dangerous. Please check safety belt adjuster whether work, then tighten
safety belt. After tightening the seat belt, adjust the shoulder pads to the appropriate position on
the chest.
B Loosen Safety Belt
When press the safety belt adjuster, the other hand must grasp the safety belt which under shoulder
pads and pull it forward to release the safety belt.
1.5 Adjust the Rotation of the Seat
Pull the rotation adjuster out with your thumb, then rotate the safety car seat to 360 degree angle.
(see picture a)
ACTION: Each time rebound the rotation adjuster back. To make sure the seat is fixed well.
A. Rearward Direction: (40-105cm), must use rearward direction (see picture 1)
B. Forward Direction: (76-135cm), must use forward direction (see picture 2)
C. When the seat is rotated to 90 degrees, the user can place the child in this position, but he/she
cannot use this angle during driving (see picture 3).
1.6 Adjust the Angle of the Child Safety Car Seat
Push the recline handle up and pull the seat outward (see picture a), then the seat can be adjusted.
It can be adjusted to 4 positions for forward-facing use (see pictureXYZ[).
When the seat is in the position of fourth level, rotate the seat to the rearward direction, and the seat
can be adjusted to fifth level.
Different height need use different recline levels.
40-105cm: rearward facing installation, use fifth level (see picture \)
76-105cm: forward facing installation, use first level to fourth level ( see picture Xto picture [)
100-135cm: forward facing installation, use first level (see picture X)
Note: Do not use forward facing before the child’s age exceeds 15 months.
5
Installation of
rearward facing
18 months-3 years
0-3 years
100-135 cm
3-12 years
Installation of forward facing
Note: Do not use forward facing before the child’s age exceeds 15 months
Fifth Level (Lying Level) First Level Second Level Third Level Fourth Level

20
cruiser
GB
2
1.7 Removing 5-Point Harness and Storage the Accessory Part
Step 1: Removing Shoulder Pads and Belts
Loosen the 5-point harness of the child seat as much as possible. Remove the belt from the metal link.
Remove the shoulder pad from the seat belt and keep it in a safe place.
Storage metal link to metal link area on the behind of the backrest. (Picture A and Picture B)
Take the METAL PLATE out of the plastic part and store it in the place designed for this on the back of
the backrest. (Picture C)
Finally put redundant belt into cloth cover. (Picture D)
Step 2: Storage Buckle
Open the buckle, take out buckle tongues from shoulder belt. Pull down buckle cross cloth cover.
Later pick up the cover in the PE board and storage the buckle. (Picture E and F)
1.8 Removing Sleeping Pads
When your child’s height exceed 61cm, remove the sleeping pads.
1.9 Removing and Putting on the Fabric Cover
1. Remove the 5-point harness.
2. Take off the cover from the backrest and base.
3. Move the headrest of the child seat up to the highest position.
4. First take the cover off base of the headrest, then remove the cover of the headrest.
To re-fit the cover, Firstly put on the headrest’s cover, then put on the plastic shell’s cover in the order of
XYZ
(see picture 1).
CAUTION! Never use the child seat without a correctly installed.
CAUTION! Check that the harness straps are not twisted and that they have been correctly inserted in
the belt slots of the cover.
2.INSTALLATION
2.1 Installed in Rearward Facing Position with ISOFIX and top tether (40-105cm)
Put the ISOFIX insert guide into the two ISOFIX attachment points of your vehicle.
If you don’t have ISOFIX insert guide, please Ignore this step.
NOTE: The ISOFIX attachment points are located between the surface and the backrest of the vehicle
seat.
Press the ISOFIX button to pull out the two locking arms from the base bottom. Pull the locking arm to
and fro until you hear an audible CLICK which indicates they are fully engaged. And on both sides of the
locking arms button turn into green safety color.
Pull out the top tether,and press the release button, pull the top tether long enough to hang the latch
on the back of the car seat.
Fix the latch on the fixed point,and the position of the fixed point are shown in the picture (one of the three
positions). Make sure the top tether clip is tightened up.
NOTE: For the safety of your child, the top tether must be tightened up during driving.
2.2 Installed in Forward Facing Position with ISOFIX and top tether (76-105cm)
IMPORTANT: Do not use forward facing before the child’s age exceeds 15 months.
Put the ISOFIX insert guide into the two ISOFIX attachment points of your vehicle.
If you don’t have ISOFIX insert guide, please ignore this step.
NOTE: The ISOFIX attachment points are located between the surface and the backrest of the vehicle
seat.
Press the ISOFIX button to pull out the two locking arms from the base bottom. Pull the locking arm
to and fro until you hear an audible CLICK which indicates they are fully engaged. And on both sides of
the locking arm’s button turn into green satety color.
Pull out the top tether and press the release button, pull the top tether long enough to hang the latch
on the back of the car seat.
Fix the latch on the fixed point, and the position of the fixed point are shown in the picture (one of the
three positions). Make sure the top tether clip is tightened up.
NOTE: For the safety of your child, the top tether must be tightened up during driving.
2.3 Installed with ISOFIX connector and Belt or only Adult seat belt (100-135cm)
NOTEWhen you use this safety car seat in 100-135cm, please remove the 5-point harness, refer to Chapter
1.7.
Place the child seat forward facing on the vehicle seat (in the direction of travel).
Put the ISOFIX insert guide into the two ISOFIX attachment points of your vehicle.
Other manuals for nurse cruiser
1
Table of contents
Languages:
Other JANE Car Seat manuals

JANE
JANE Nurse Swing User manual

JANE
JANE Be Cool Twister User manual

JANE
JANE be cool Zeus Plus User manual

JANE
JANE nurse GIRO 360 User manual

JANE
JANE Groowy iSize User manual

JANE
JANE Groowy iSize User manual

JANE
JANE Xtend User manual

JANE
JANE CONCORD TRANSFORMER i TECH User manual

JANE
JANE Koos User manual

JANE
JANE QUARTZ User manual

JANE
JANE Xtend User manual

JANE
JANE MATRIX PLATFORM User manual

JANE
JANE Montecarlo R1 User manual

JANE
JANE Nurse Driver 2 User manual

JANE
JANE Nurse Protect User manual

JANE
JANE Balance User manual

JANE
JANE Montecarlo R1 User manual

JANE
JANE DRIVE User manual

JANE
JANE EXO User manual

JANE
JANE Concord iKOAL User manual