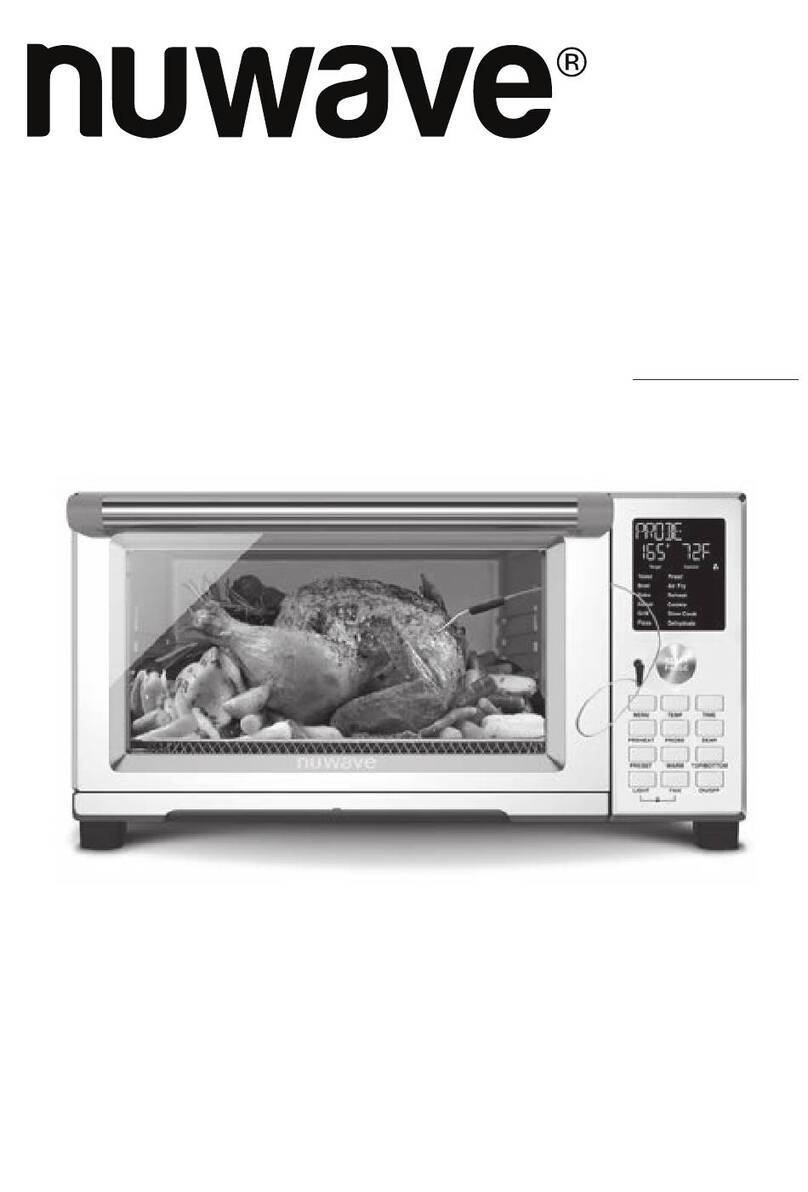
NuWave PRO SMART 20902 User manual

Owner’s Manual
Model 20902
Rev. 2
Questions or Concerns?
Toll Free: 1-877-689-2838 • help@nuwavenow.com
(Mon-Fri 7:30am-4:30pm CST)
CONDUCTION, CONVECTION
& INFRARED • TRIPLE HEAT
ZONES • AIR FRYER • GRILL
PRO SMART OVEN

2
nuwavenow.com
REGISTER
NOW!
Using your smartphone or
smart device, scan the QR code
located on the back of the Pro
Smart Oven.
You will be directed to NuWave’s
product registration page with
your Pro Smart Oven’s unique
serial number automatically
entered in the appropriate eld.
NOTE: If you do not have a
web-enabled smart device,
simply visit nuwavenow.com/QR
and manually enter in your Pro
Smart Oven’s serial number.
Fill out the remaining information
and complete the optional survey.
Once you submit your
information, you will receive
a conrmation email containing
your extended warranty details.
1
2
3
4
*Register your product within 1 year of date of purchase for a free
12-month extension of your limited warranty.
As a special thank-you for registering your NuWave Pro Smart
Oven, you’ll automatically receive an additional 12 months
added to your limited manufacturer’s warranty!*
All you have to do is follow these simple steps.

3
nuwavenow.com
12
for an additional
-month
warranty!
Open your mobile app store
(App Store, Google™Play).
Search for "QR code readers."
Simply download the QR code read-
er to your phone, open it, scan the
code and you are ready to go.
NOTE: You may need to open your
downloaded QR code reader each
time you want to scan a QR code.
1
2
3
QR code readers

4
nuwavenow.com
TABLE OF CONTENTS
Owner’s Manual
Important Safeguards ...............................................................6-8
Parts & Accessories..................................................................... 9
Assembly Guide.................................................................... 10-11
Connectivity/Wi-Fi.................................................................12-13
Getting Started......................................................................14-19
Instructions............................................................................20-34
Cleaning & Maintenance........................................................35-37
Troubleshooting Guide ..........................................................37-39
Limited Warranty ....................................................................40-42
Appendix One: Advanced Functions....................................43-47
Spanish..................................................................................48-101
Replacement Parts .............................................................102-103

5
nuwavenow.com
Congratulations on your NuWave®Pro Smart Oven purchase!
We’re incredibly excited for you as you begin your healthy home
cooking journey with your new Pro Smart Oven.
We want to make sure you get the most out of your Pro Smart Oven
cooking experience, so we have provided detailed instructions
here in this manual for you to know all the ins and outs to be a
successful NuWave® home cook. We have also included a handy
Quick Start Guide and Recipe Book, which contains details on the
preset recipes written and developed by our team of talented chefs
that are already programmed into your Pro Smart Oven.
We want every step of your NuWave® experience to be as easy and
rewarding as possible, so if you have any questions, comments, or
concerns, please don’t hesitate to contact our Customer Service by
calling 1-877-689-2838 • help@nuwavenow.com (Mon-Fri 7:30am-
4:30pm CST).
Visit nuwavenow.com to see our other NuWave products and accessories.
#nuwavenow
Connect with us!
WELCOME
To The NuWave®Family!

6
nuwavenow.com
IMPORTANT SAFEGUARDS
HOUSEHOLD USE ONLY • READ ALL INSTRUCTIONS BEFORE USE
important safeguards
READ ALL INSTRUCTIONS and WARNINGS The failure to follow any of
the important safeguards, warnings, or instructions for safe use is a misuse
of the NuWave Pro Smart Oven that can void your warranty and create
the risk of serious injury. When using the Pro Smart Oven, only use the
appliance as intended and for no other use, and always follow the basic
safety precautions.
1. Read all instructions.
2. Ensure the Pro Smart Oven and all parts are clean and dry before
each use.
3. Do not touch hot surfaces. The appliance’s surfaces may be hot during
and after use. Use handles.
4. Discard the protective plastic covering the power plug before use.
5. Do not let the electrical cord touch hot surfaces or hang over any edge.
6. Do not immerse cord, plug, or appliance in water or other liquid.
7. Close supervision is necessary when any appliance is used near
children. This appliance is not intended for use by persons with
reduced physical, sensory or mental capabilities, children, or persons
with lack of experience or knowledge, unless supervised or instructed
on the use of the appliance by one responsible for their safety.
8. Do not operate if the Pro Smart Oven or cord malfunctions or has
been damaged in any way. Return the unit to the nearest authorized
service facility for examination, repair, or adjustment.
9. Use only on a clean, stable, dry, and level surface.
10. Do not use accessories or attachments not recommended by the
manufacturer.
11. DO NOT USE OUTDOORS. FOR INDOOR USE ONLY.
12. Do not place on or near a hot gas or electric burner, or in a heated oven.
13. Unplug the appliance when not in use and allow the appliance to cool
completely before cleaning or removing/replacing parts.
14. Do not cover or block the intake air vents located in the back and sides
of the Pro Smart Oven, as doing so can prevent proper ventilation.
There should be at least 5 inches of free space behind, to the sides of,
and on top of the Pro Smart Oven.
15. Use aluminum foil to wrap foods that produce oil or juice when
operating and put on the Grill/Griddle to prevent re.
16. To prevent re, do not allow any foil to touch the heating elements.
17. Do not alter or modify any part of the Pro Smart Oven or use
attachments or accessories not recommended by the manufacturer.
ALWAYS KEEP THIS MANUAL
HANDY FOR FUTURE
REFERENCE.
7
nuwavenow.com
18. It is normal for some smoke to escape the Pro Smart Oven when
heating for the rst time.
19. If excess smoke is escaping from the air vent during operation, unplug
the Pro Smart Oven immediately and contact Customer Service at
1-877-689-2838 or email help@nuwavenow.com.
20. During use, steam may be released from the air outlet vents. Keep
your hands and face away from the air outlet openings. Be careful of
hot steam escaping when opening the Pro Smart Oven.
21. Avoid placing your face near the glass door during use.
22. Never touch the insides of the Pro Smart Oven while it is operating.
23. Use extreme caution when moving an appliance containing hot oil or
other hot liquids.
24. Never leave the Pro Smart Oven unattended during use.
25. Do not disassemble the Pro Smart Oven.
26. Allow the Pro Smart Oven to cool before putting in or pulling out items
or before cleaning.
27. Keep this manual handy for future reference.
28. Always make sure your ngers are clean and dry when pressing
the buttons.
Toaster Oven Warnings (UL Standard 1026, Section 71.7):
1. Oversize foods or metal utensils must not be inserted in a toaster-
oven as they may create a re or risk of electric shock.
2. A re may occur if the toaster-oven is covered or touching ammable
material, including curtains, draperies, walls, and the like, when in
operation. Do not store any item on top of the appliance when in
operation.
3. Do not clean with metal scouring pads. Pieces can break off the pad
and touch electrical parts involving a risk of electric shock.
4. Extreme caution should be exercised when using containers
constructed of other than metal or glass.
5. Do not store any materials, other than the manufacturers
recommended accessories, in this oven when not in use.
6. Do not place any of the following materials in the oven: paper,
cardboard, plastic, cloth, wood, ammable materials, sealed
containers, and the like.
7. Do not cover the crumb tray or any part of the oven with metal foil.
This will cause overheating of the oven.
8. Turn off the Pro Smart Oven by pressing ON/OFF before unplugging
the unit from the wall socket.
WARNING
Never use the Pro Smart Oven with loose, damaged,
or missing parts.

8
nuwavenow.com
IMPORTANT SAFEGUARDS
HOUSEHOLD USE ONLY • READ ALL INSTRUCTIONS BEFORE USE
important safeguards
CAUTION
RISK OF ELECTRIC SHOCK
To reduce the risk of electric shock, do not perform any servicing
other than that which is contained in these instructions.
Power-Supply Cords
A short power-supply cord (or detachable power-supply cord)
is provided to reduce the risk of becoming entangled in, or
tripping over, a longer cord. Longer detachable power-supply
cords or extension cords are available and may be used if care
is exercised in their use. If a longer detachable power-supply
cord or extension cord is used:
1. The marked electrical rating of the extension cord should
be at least as great as the electrical rating of the appliance.
2. The longer cord should be arranged so that it will not drape
over any countertop or tabletop where it could be pulled on
or tripped over unintentionally.
3. The Pro Smart Oven should be operated on a separate
electrical outlet from other operating appliances due to
wattage limitations.
4. This appliance is of the 3-pin grounded type, so the cord
set or extension cord should also be a grounding type
3-wire cord.
SAVE THESE INSTRUCTIONS: Read and understand the
entire manual before using the Pro Smart Oven.
WARNING
To disconnect the Pro Smart Oven, turn it off by pressing
ON/OFF and then remove the plug from wall outlet.

9
nuwavenow.com
Wire Rack
Part #: BEA6
Grill/Griddle
Part #: BEA3
Air Fry Basket
Part #: BEA5
Crumb Tray
Part #: BEA7
Temperature Probe
Part #: BEP3
Power Base
Part #: BEA1
To order parts, see page 102, Replaceable Parts, then
contact Customer Service at 877-689-2838 or
help@nuwavenow.com, or visit www.nuwavenow.com.
Grill/Griddle Rack
Part #: BEA4
PARTS & ACCESSORIES
Light Bulb
Part #: BEP1
Light Cover Screw
Part #: BEP4
Light Bulb Cover
Part #: BEP2
Baking and Drip Pan
Part #: BEA8

10
nuwavenow.com
ASSEMBLY GUIDE
assembly guide
BEFORE FIRST USE
1. Remove and discard any packaging material from the unit.
2. Remove all accessories from their packaging and wash
them in warm, soapy water or in the dishwasher, top rack
only. NEVER submerge the main unit in water.
Note: While most of the accessories are dishwasher-safe, the
Probe is not. Hand washing is, therefore, highly recommended.
Frequent dishwasher cleaning may lead to premature wear.
Grill/Griddle
For grilling steaks and roasting vegetables.
Flip it to the Griddle side for baking.
Note: The Grill/Griddle must be used with
the Grill/Griddle Rack.
Grill/Griddle Rack
½-inch depth is ideal for dehydrating.
Air Fry Basket
1-inch depth is perfect for making crispy
chicken, fries, and more.
Wire Rack
Can be used to hold cooking or baking
pans, or simply place your food directly on
the rack.
Crumb Tray
Catches crumbs and drippings and must
remain in the unit at all times while cooking.
Baking and Drip Tray
Ideal for baking, roasting, and as a drip pan
when air frying, protecting the bottom heating
elements from dripping oils and fats.
Temperature Probe
Eliminates the guesswork of cooking.
Consult the temperature guide in the Probe
section for more information.

11
nuwavenow.com
1
2
3
4
4Position 4
3Position 3
2Position 2
1Position 1
The oven has 4 rack positions where most of your accessories can
slide into the unit. When you select a function, the appropriate rack
number(s) will illuminate on the control panel. The numbers on the
control panel will coincide with those on the interior of the unit.
Rack
Level
Air Fry
Grill
Bake
Broil
Air Roast
Toast
Pizza
Proof
Dehydrate
Function+
1
2
3
4
Preheat Ready Stage
Probe Fan Carryover Sear
Rear TopShade Menu Bottom Slice
STAGE
Light
CAUTION
ALWAYS use extreme caution when handling accessories
when cooking. Use oven mitts and allow accessories to cool
before washing.

12
nuwavenow.com
CONNECTIVITY
Wi and Bluetooth
connectivity
With the NuWave Connect App, you can operate your NuWave
Pro Smart Oven with your Smart Device.
Downloading the NuWave Connect App
Using the built-in QR reader in your Camera App:
1. Scan the QR code below. It will take you
to the App’s download page on either the
Google Play Store or the Apple AppStore.
2. Follow the download and installation
instructions.
If your phone does not have that capability built-in, simply download
a 3rd-Party QR Scanning App before scanning the NuWave QR
Codes and you are ready to go.
1. Open your mobile app store (App Store, Google Play).
2. Search for “QR code readers.”
3. Simply download the QR code reader to your phone, open it,
scan the code, and you are ready to go.
WI-FI Set-Up and Activation
1. Download and install the NuWave Connect App.
2. Make sure your phone is connected to your home Wi-Fi 2.4GHz
network. Open the app and follow the in-app instructions for the
verication process. Once verication is complete, begin adding
devices. To add a device, tap “+” then select “Pro Smart Oven.”
• While the Pro Smart Oven is in standby mode, push and
hold WiFi for 1 second. This will activate or deactivate the
built-in Wi-Fi.
• The Wi-Fi icon in the screen will indicate the status of the
Pro Smart Oven’s Wi-Fi connection. Make sure the Pro
Smart Oven Wi-Fi is active and connected with your Wi-Fi
2.4GHz network.
° During rst-time setup, the Wi-Fi icon will blink rapidly
while pairing with the network.
° When the Wi-Fi is connected, the icon will light up and
remain lit.
° When the Wi-Fi is disconnected, the icon will be off.
• If the connection process fails, the Wi-Fi light will turn off.

13
nuwavenow.com
Notes
Some instances may require the user to hold the key button again
to return the Wi-Fi to pairing mode even if there was previously a
successful connection.
• Whenever the Pro Smart Oven is unplugged, the Wi-Fi will
need to be re-paired once it’s plugged back in.
• If the Wi-Fi connection is unsuccessful, the Wi-Fi / Bluetooth
icons turn off, indicating that the NuWave Pro Smart Oven is
not connected to the Wi-Fi.
Bluetooth Connection
The Pro Smart Oven Wi-Fi module also offers back-up Bluetooth
connectivity. If your Wi-Fi network goes down, the Pro Smart Oven’s
Bluetooth signal will automatically pair with your Bluetooth device.
To take advantage of this feature, ensure that your smart device’s
Bluetooth, Wi-Fi and Mobile Data options are all enabled.
Pairing your device with the Pro Smart Oven via Bluetooth takes up
to 5 minutes, but once your device is paired, the NuWave®Connect
App will operate normally within the range.
Extending Control to the NuWave Connect App
Controlling the Pro Smart Oven with a smart device is easy and
convenient.
1. Make sure that the NuWave Connect App is installed on your
smart device.
2. Make sure the Pro Smart Oven Wi-Fi is active and connected
with your Wi-Fi 2.4GHz network.
3. Press WIFI. This will extend control of the Pro Smart Oven to
the NuWave Connect App.
Notes
You will only have to do this once. After control has been extended,
it will remain extended, and to use it, you will only have to bring up
the Pro Smart Oven on the NuWave Connect App.

14
nuwavenow.com
GETTING STARTED
getting started
The easy-to-use functionality of the Pro Smart Oven is divided
into Basic and Advanced functions, with the former offering the full
cooking functionality of the unit and the latter giving you control
over fan and heat strength and allowing you to program different
cooking stages, features you will primarily use to create your own
cooking Presets.
Button Function
Use
Turns the Pro Smart Oven on and off.
The Power button turns the Pro Smart Oven on and off and stops all
cooking functions.
START/
PAUSE &
CLEAR
Starts and pauses the cooking process, and allows you
to clear any selections.
Select a cooking function, press START/PAUSE to begin, pause, or
resume cooking. While you are on the Setting mode, press and hold
START/PAUSE to clear all selections.
Temp & Time Allows you to adjust temperature and time before and
during the cooking process.
Press Temp and use the Select dial to adjust the temperature. Press
Time and use the Select dial to adjust the time.
Menu Gives you access to 100 cooking presets and allows
you to store an additional 50 of your own. Refer to the
100 Presets on the back of the Quick Start Guide.
Press Menu and use the Select dial to choose preset programs (1-100)
to cook. Once you have chosen one, the temperature and time can be
adjusted. Press START/PAUSE to begin the chosen program.
Note: Presets 1-100 can be adjusted, but they will return to the default
temperatures and times after cooking has nished.
Function Choose between 20 cooking options.
Press Function and scroll through the cooking functions. At “Function+”,
press the Select dial for functions 10 – 20. Once you’ve picked a function,
press the Select dial and START/PAUSE to begin cooking.
Probe Helps to accurately cook your food to your preferred
internal temperature. Plugs inside, to the right side.
The default is 165°F. Plug the Probe into the jack in your Pro Smart
Oven. Press and hold Probe for 1 second to set the Probe target internal
temperature for your food using the Select dial. Insert the other end of
the Probe into your food. Press START/PAUSE to begin cooking.
Preheat
Ensures the Pro Smart Oven is at the set cooking
temperature when you insert your food, giving you
crispier results.
The default is 400°F (default cooking temperature). To begin, press
START/PAUSE and adjust the cooking temperature and time. The Pro
Smart Oven will preheat at the set cooking temperature. Once the Pro
Smart Oven has reached the set temperature, the Pro Smart Oven will
beep twice, countdown for 10 seconds, beep once more, and then start
cooking automatically. To deactivate automatic preheat, press Menu +
Preheat prior to cooking. Repeat to reactivate automatic preheat.
Heat/FAN Control the Pro Smart Oven’s heat sources (top, bottom,
and/or rear) and fan speeds
Heat: Press Heat/FAN and adjust the rear, top, and/or bottom heating
using the Select dial. The odd percentage of Top/Bottom heat defaults to
the bottom.
Fan: Adjust the fan speed from 0-3. Press and hold Heat/FAN and use the
Select dial to adjust. Note: If you are using the rear heater, the fan speed
must be 1 or more.
Sear Sear your food before and/or after the cooking process.
Not required for every cooking process.
The defaults are 450°F for 5 minutes. Press Sear. Then, adjust the Sear
temperature and time, if desired, and press START/PAUSE to begin cooking.

15
nuwavenow.com
Button Function
Use
Turns the Pro Smart Oven on and off.
The Power button turns the Pro Smart Oven on and off and stops all
cooking functions.
START/
PAUSE &
CLEAR
Starts and pauses the cooking process, and allows you
to clear any selections.
Select a cooking function, press START/PAUSE to begin, pause, or
resume cooking. While you are on the Setting mode, press and hold
START/PAUSE to clear all selections.
Temp & Time Allows you to adjust temperature and time before and
during the cooking process.
Press Temp and use the Select dial to adjust the temperature. Press
Time and use the Select dial to adjust the time.
Menu Gives you access to 100 cooking presets and allows
you to store an additional 50 of your own. Refer to the
100 Presets on the back of the Quick Start Guide.
Press Menu and use the Select dial to choose preset programs (1-100)
to cook. Once you have chosen one, the temperature and time can be
adjusted. Press START/PAUSE to begin the chosen program.
Note: Presets 1-100 can be adjusted, but they will return to the default
temperatures and times after cooking has nished.
Function Choose between 20 cooking options.
Press Function and scroll through the cooking functions. At “Function+”,
press the Select dial for functions 10 – 20. Once you’ve picked a function,
press the Select dial and START/PAUSE to begin cooking.
Probe Helps to accurately cook your food to your preferred
internal temperature. Plugs inside, to the right side.
The default is 165°F. Plug the Probe into the jack in your Pro Smart
Oven. Press and hold Probe for 1 second to set the Probe target internal
temperature for your food using the Select dial. Insert the other end of
the Probe into your food. Press START/PAUSE to begin cooking.
Preheat
Ensures the Pro Smart Oven is at the set cooking
temperature when you insert your food, giving you
crispier results.
The default is 400°F (default cooking temperature). To begin, press
START/PAUSE and adjust the cooking temperature and time. The Pro
Smart Oven will preheat at the set cooking temperature. Once the Pro
Smart Oven has reached the set temperature, the Pro Smart Oven will
beep twice, countdown for 10 seconds, beep once more, and then start
cooking automatically. To deactivate automatic preheat, press Menu +
Preheat prior to cooking. Repeat to reactivate automatic preheat.
Heat/FAN Control the Pro Smart Oven’s heat sources (top, bottom,
and/or rear) and fan speeds
Heat: Press Heat/FAN and adjust the rear, top, and/or bottom heating
using the Select dial. The odd percentage of Top/Bottom heat defaults to
the bottom.
Fan: Adjust the fan speed from 0-3. Press and hold Heat/FAN and use the
Select dial to adjust. Note: If you are using the rear heater, the fan speed
must be 1 or more.
Sear Sear your food before and/or after the cooking process.
Not required for every cooking process.
The defaults are 450°F for 5 minutes. Press Sear. Then, adjust the Sear
temperature and time, if desired, and press START/PAUSE to begin cooking.

16
nuwavenow.com
GETTING STARTED
getting started
Functions
Grill/Griddle
Grill/Griddle
Rack
Grill/
Griddle
Rack
Air Fry
Basket
Wire
Rack
Air Fry
Grill
Bake*
Broil*
Air Roast
Toast
Pizza*
Proof
Dehydrate
Cookie*
Defrost*
D.I.Y.
Oven Poach*
Rawtarian*
Reheat*
Sanitize*
Slow Cook*
Slow Roast*
Warm*
Whole Roast*
*Use an oven-safe baking/cooking pan when using the Wire
Rack. For best results, use the Grill/Griddle and Grill/Griddle
Rack. Flip the Grill/Griddle to the Griddle side.
Using the Accessories

17
nuwavenow.com
Helpful Hints
1. To add more time during current cooking cycle, turn the
Select dial clockwise. Monitor your food to ensure it doesn’t
overcook.
2. Some moisture may appear on the Pro Smart Oven’s door
during certain cooking cycles. This is normal and no cause for
worry.
3. When air-frying, food can be lightly coated with oil beforehand
to boost crispiness and browning.
Cooking Temperature Selectable Cooking Time
50F - 275F 00:00 - 99:59
280F - 350F 00:00 - 24:00
355F - 400F 00:00 - 04:00
405F - 450F 00:00 - 01:00
455F - 500F 00:00 - 00:30
Functions Buttons
Carry-over cooking function Press Menu + Sear
Mute/unmute Press Sear + STAGE
Slow Cook Press Menu + Probe
Mute door Press and hold Function
Clock Press Preheat + Time
Lock Press Menu + STAGE
Target Probe temperature Press Probe for 1 sec
Time format change to min:sec Press Time for 4 sec
Temperature change F/C Press Temp for 4sec
Sear as independent function Press Sear for 1 sec
Bluetooth Press Wi-Fi for 1 sec
Watts Press Wi-Fi + Light
Basic Key Functions

18
nuwavenow.com
GETTING STARTED
getting started
Rack
Level
Air Fry
Grill
Bake
Broil
Air Roast
Toast
Pizza
Proof
Dehydrate
Function+
1
2
3
4
Preheat Ready Stage
Probe Fan Carryover Sear
Rear TopShade Menu Bottom Slice
STAGE
Light
Rack
Level
Air Fry
Grill
Bake
Broil
Air Roast
Toast
Pizza
Proof
Dehydrate
Function+
1
2
3
4
Preheat Ready Stage
Probe Fan Carryover Sear
Rear TopShade Menu Bottom Slice
STAGE
Light
Heat:
Controls Top,
Bottom and
Rear heat.
FAN:
Choose
between 3
fan levels.*
ON/OFF:
Turns the
oven on.
Wi-Fi:
Connects the
oven to your
home Internet network.
Sear:
Choose
between 3
Sear settings.
STAGE:
Press and
hold Light /
STAGE to
program up
to 5 cooking
stages.
Light:
Press Light
/STAGE
to turn the
oven’s light
on and off.
Rack Level:
The oven
will highlight
a rack
corresponding
to the selected
preset.
Programmed
Settings:
Choose
between 9
programmed
settings, plus
an additional
11 with
Function+.
*When using Rear heat, the fan can't be turned off.

19
nuwavenow.com
Rack
Level
Air Fry
Grill
Bake
Broil
Air Roast
Toast
Pizza
Proof
Dehydrate
Function+
1
2
3
4
Preheat Ready Stage
Probe Fan Carryover Sear
Rear TopShade Menu Bottom Slice
STAGE
Light
Wi-Fi and
Bluetooth:
Operate your
NuWave Pro
Smar Oven
with your Smart
Device.
Watts:
The selected
wattage will
be displayed
on the screen.
Cooking Time:
HOURS:MINUTES
The time format
can be changed,
see page 22.
Cooking Temperature:
The default will be set to
Fahrenheit, but it can be changed
to Celsius, see page 22.
Notes
Preheat, Ready, Stage, Probe,
Fan, Sear, Rear, Top, Bottom,
Shade, Menu, Top, Bottom or
Slice will be displayed once that
function is selected by the user.
Rack
Level
Air Fry
Grill
Bake
Broil
Air Roast
Toast
Pizza
Proof
Dehydrate
Function+
1
2
3
4
Preheat Ready Stage
Probe Fan Carryover Sear
Rear TopShade Menu Bottom Slice
STAGE
Light
Select Dial:
The Select dial adjusts
the cooking time and
temperature, scrolls
between the cooking
functions and menu recipes.
START/PAUSE:
Initiates
and pauses
the cooking
process.
Temp:
Adjusts the
cooking
temperature.
Time:
Adjusts the
cooking time.
Function:
Scrolls
through the
20 functions.
Menu:
Select up to
100 presets and
save up 50 of
your own.
Preheat:
Preheats
your oven for
better results.
Probe:
Cooks by the
food's internal
temperature.

20
nuwavenow.com
INSTRUCTIONS
instructions
Rack
Level
Air Fry
Grill
Bake
Broil
Air Roast
Toast
Pizza
Proof
Dehydrate
Function+
1
2
3
4
Preheat Ready Stage
Probe Fan Carryover Sear
Rear TopShade Menu Bottom Slice
STAGE
Light
Quick Start
1. Plug the power cord into an electrical outlet.
2. Press the Power button to turn the Pro Smart Oven on or off.
When turned on:
• Each function will ash in turn before the Pro Smart Oven
defaults to Air Fry.
• That function’s default cooking time and temperature will be
displayed.
• If that function has Preheat, then “Preheat” will be lit as well.
3. Press and hold Light to turn on the lamp inside the oven and
press and hold it again to turn the lamp off.
4. Press Temp, then turn the Select dial to adjust the cooking
temperature. Press Time and turn the Select dial to adjust the
cooking time.
• Temperature, time, and heating source(s) can be adjusted
before and during the cooking process.
5. Open the oven door and place your food in the Pro Smart Oven.
• While cooking, opening the door will pause the cooking cycle
and turn on the oven light.
• Closing the door again will resume the cooking cycle and turn
off the oven light.
• If the door remains open for 30 minutes or more, the Pro
Smart Oven will turn off.
6. Press START/PAUSE. The Pro Smart Oven will begin cooking
and the screen will show the cooking temperature and
countdown time. “:” will ash.
• Press START/PAUSE again to pause cooking, and again to
resume it.
• Press and hold START/PAUSE to clear all settings and
selections and return the Pro Smart Oven to its default
settings.
7. Once the Pro Smart Oven has nished cooking, the screen will
show “END” and will beep 3 times.
Table of contents
Other NuWave Oven manuals

NuWave
NuWave Bravo 20831 User manual

NuWave
NuWave 20902 User manual

NuWave
NuWave Bravo XL User manual

NuWave
NuWave 20902 User manual

NuWave
NuWave 20008 User manual

NuWave
NuWave BRAVO XL PRO User manual

NuWave
NuWave BRAVO XL PRO User manual

NuWave
NuWave Bravo XL User manual

NuWave
NuWave PRO-SMART 38051 User manual

NuWave
NuWave Pro Plus User manual