Direct Service Done Right
Since 1948, Nystrom has been the go-to manufacturer of specialty building products providing a wide range of floor, roof, wall,
ceiling, and stair access products that create safer, more accessible buildings. We offer hassle-free services including access to
technical experts, REVIT tools for BIM, HPDs for LEED v4, 3-part specifications and AIA-accredited continuing education courses.
Installation, Operation
+ Maintenance Manual
1
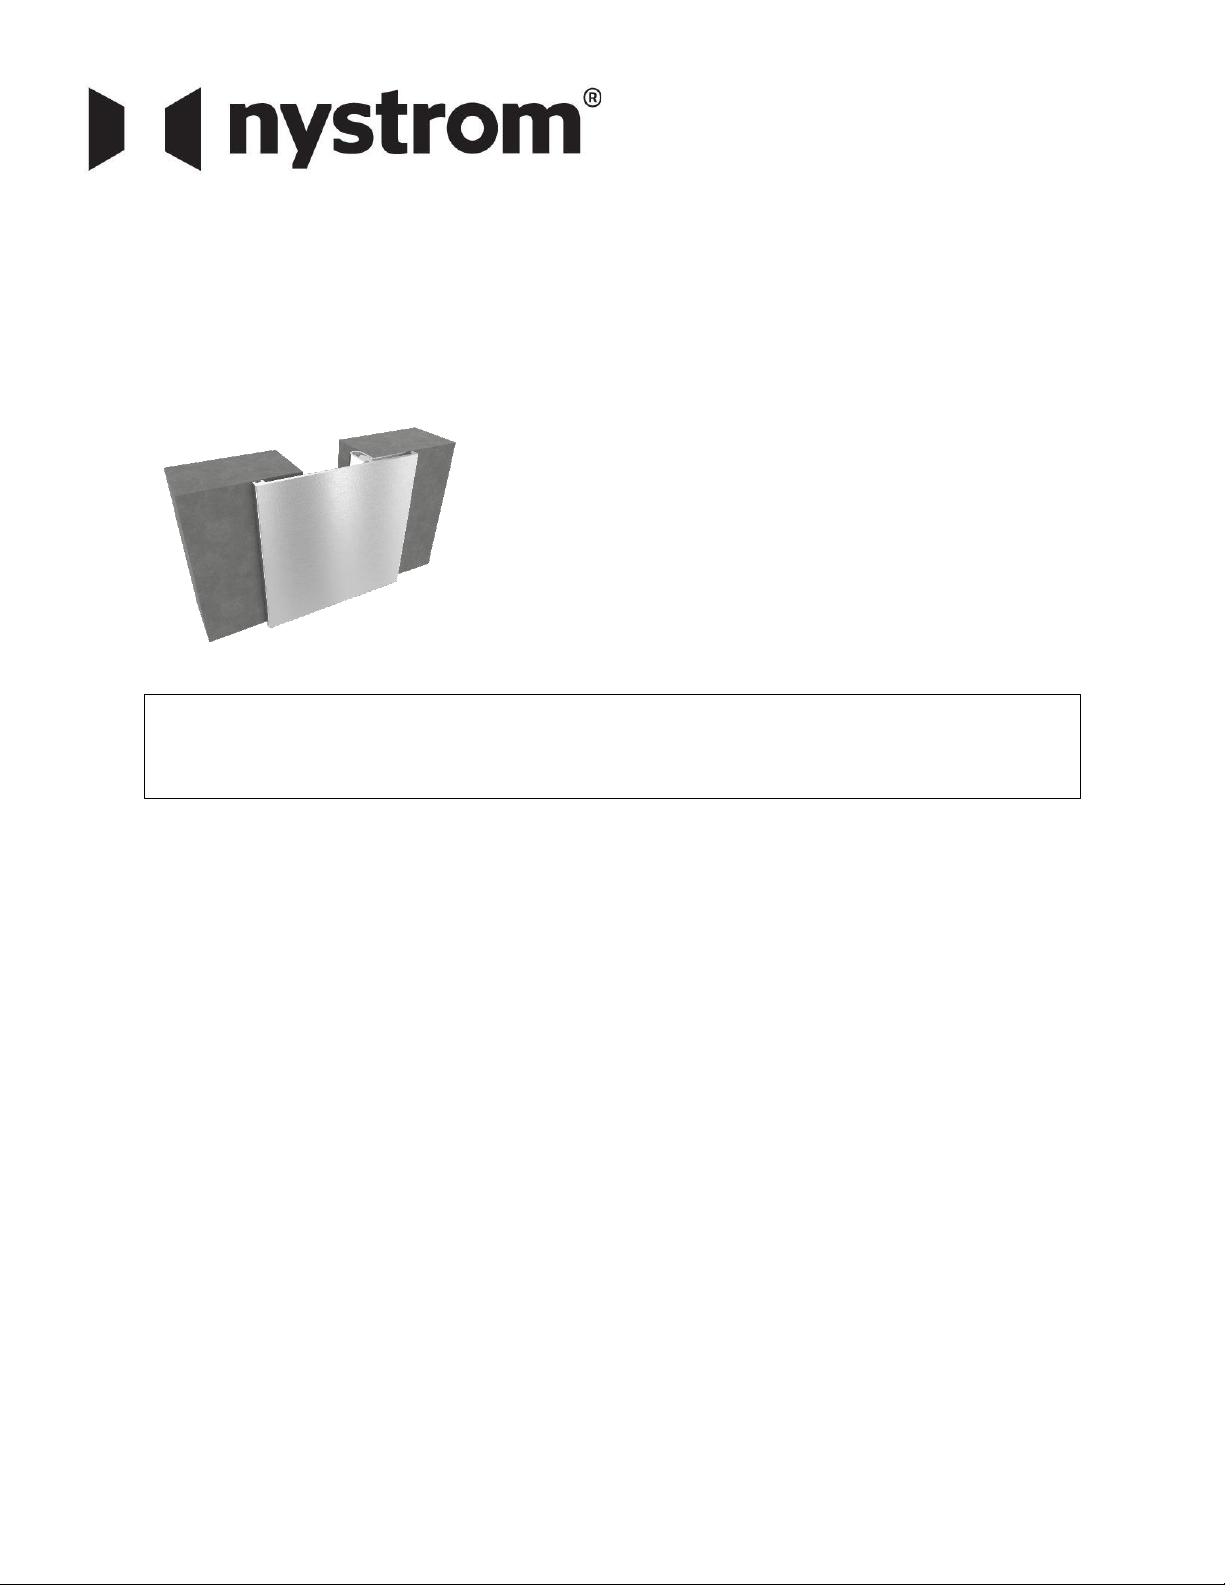
ALUMINUM WALL & CEILING SYSTEM
Model(s): WJ/WJw
WJ Wall to Wall System
GENERAL DESCRIPTION
Nystrom Aluminum Wall and Ceiling system is
designed for interior applications where
minimal maintenance is required. It mounts
easily after final wall surface is complete with
no visible hardware. Standard with a clear
anodize finish. Joint sizes range from 1” to 4”.
Introduction + Safety
Please read the complete instructions carefully before beginning any work. To ensure proper
installation and performance of the product, the following actions must be completed by the
installing contractor. Failure to do so will affect product warranty.
Transportation + Storage
oInspect all shipments and materials for missing or damaged components and
hardware.
oMaterial must be stored in a clean, dry location.
Preparation
•Locate the packing slip(s) and/or shop drawings.
•Verify that all products listed on the packing slip are included in the package.
•Check the products for damage. If products are damaged, report a freight claim
immediately and leave the products in their packaging. If you sign for products
without reporting damage, you waive your right to a freight claim and will be
responsible for their replacement cost.
•Read the instructions thoroughly before beginning installation.
GENERAL SAFETY PRECAUTIONS Improper selection, installation, or use can cause personal injury or property damage.
It is solely the responsibility of the user, through their own analysis, to select products suitable to the specific application
requirements, ensure proper maintenance and use as intended. Follow local, state, and federal regulations for proper
installation and operation requirements.