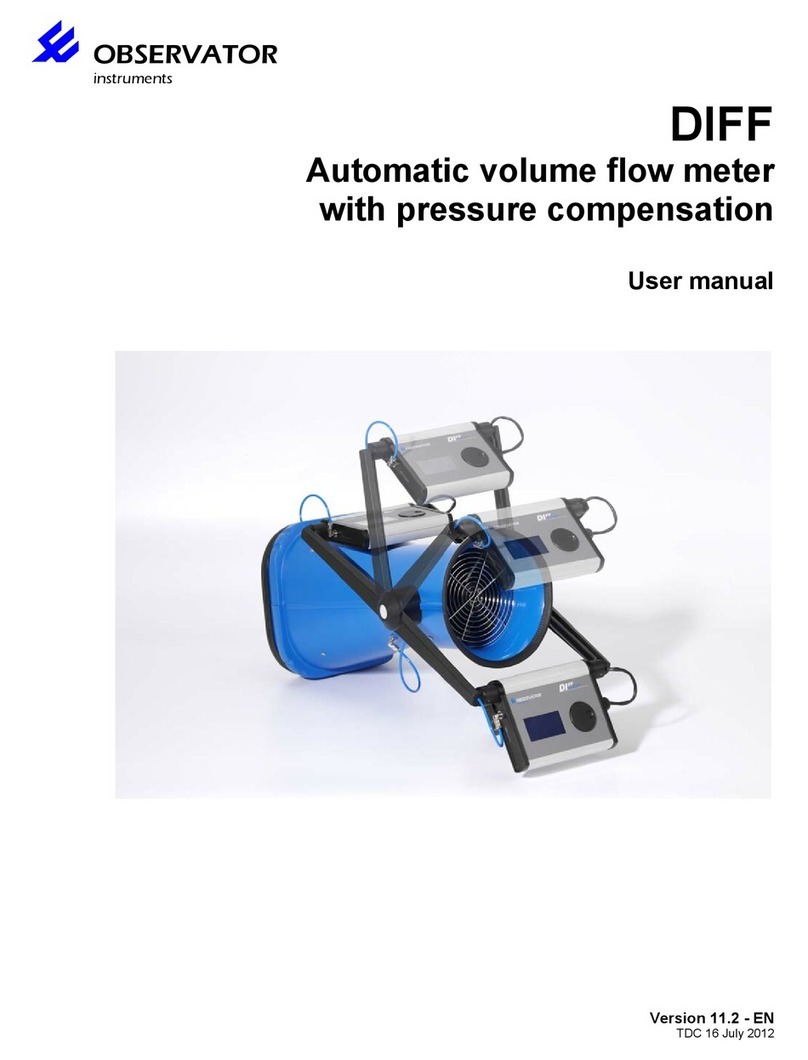
Observator Instruments Diff-Automatic User manual

Version: 12.6 EN
Diff-Automatic
Automatic volume flow meter
with pressure compensation
Art.nr.: AT-DIFF

Version: 12.6 EN Date: 22-09-2020 Page: 2 of 28
User Manual Diff
AT-DIFF
Empty page

Version: 12.6 EN Date: 22-09-2020 Page: 3 of 28
User Manual Diff
AT-DIFF
Index
Index ............................................................................................................................................................. 3
1. Introduction ........................................................................................................................................... 5
2. Description and usage .......................................................................................................................... 6
2.1 Operation comfort and ergonomics .................................................................................................... 7
2.2 Operation ............................................................................................................................................ 7
2.3 Before first use .................................................................................................................................... 7
2.3.1 Inserting the batteries .................................................................................................................. 7
2.3.2 Adjustment of the arms ................................................................................................................ 8
2.3.3 Operation ..................................................................................................................................... 8
3. The menu .................................................................................................................................................. 9
3.1 Calibration ........................................................................................................................................... 9
3.2 Measurement .................................................................................................................................... 10
3.3 Datalogging ....................................................................................................................................... 10
3.4 Settings ............................................................................................................................................. 11
3.4.1 Brightness - Contrast ................................................................................................................. 11
3.4.2 Battery ....................................................................................................................................... 11
3.4.3 Language ................................................................................................................................... 11
3.4.4 Measuring unit / temperature unit .............................................................................................. 12
3.4.5 Technical menu ......................................................................................................................... 12
3.5 Overrange protection ........................................................................................................................ 12
3.6 Off ..................................................................................................................................................... 12
4. Optional Hoods ....................................................................................................................................... 13
5. Batteries .................................................................................................................................................. 14
5.1 First use of the batteries ................................................................................................................... 14
5.2 Compatible batteries ......................................................................................................................... 14
5.3 Battery life ......................................................................................................................................... 14
5.4 Lifetime ............................................................................................................................................. 14
5.5 Warnings ........................................................................................................................................... 14
6. Maintenance ........................................................................................................................................... 15
7. DIFFiner .................................................................................................................................................. 16
7.1 Installing DIFFiner............................................................................................................................. 16
7.2 Adding a project ................................................................................................................................ 17
7.3 The DIFF with a SD-card .................................................................................................................. 18
7.4 Processing the data on a computer .................................................................................................. 20
7.5 SD-card messages ........................................................................................................................... 21
8. Decommissioning ................................................................................................................................... 22
Version: 12.6 EN Date: 22-09-2020 Page: 4 of 28
User Manual Diff
AT-DIFF
8.1 Decommissioning the DIFF (temporary) .......................................................................................... 22
8.2 Disposal of the DIFF ......................................................................................................................... 22
9. Trouble shooting ..................................................................................................................................... 23
9.1 Errors ................................................................................................................................................ 23
9.2 Replacing the fuse ............................................................................................................................ 24
9.3 DIFF Accessory ................................................................................................................................ 24
9.4 DIFF Spare parts .............................................................................................................................. 24
10. Warranty ............................................................................................................................................... 25
11. Declaration of conformity ...................................................................................................................... 26
12. Contact address.................................................................................................................................... 28

Version: 12.6 EN Date: 22-09-2020 Page: 5 of 28
User Manual Diff
AT-DIFF
1. Introduction
The DIFF is a unique instrument developed by
Observator for measuring air flow and air temperature.
The DIFF is commonly used by installers and
controllers in the housing and utility industry. The DIFF
can perform a pressure compensated measurement in
accordance with International Standards. Operating
errors are prevented by an automated measurement
process. The flow reading is digital and clear, this
prevents reading errors. The DIFF is capable of data
storage via SD card and the use of DIFFiner software.
The standard package contains:
DIFF automatic volume flow meter with zero pressure compensation
Battery charger
4 x 1,2V AA NIMH rechargeable batteries
Manual
Calibration report
Transport case
AT-242 Hood 315x315x220 mm, transparent plastic (housing)
Datalogging upgrade incl.:
o SD card 2Gb
o DIFFiner pc-software
Options:
- Fabric Hood (Nylon) incl. aluminum frame and fiber rods 400x400mm, 600x600mm,
310x1234mm or 310x1534mm (Utility and squirrel grilles)
- Extra rechargeable battery set
Specifications
Description
Dimensions (250x250)x510xØ200 mm
Net weight 2.9 kg without batteries and transport case
Operating temperature -10 to +50 ºC, 0-95% RV Not condensing
Range 10-400 m3/h, -15 to +70 ºC (5-158°F)
(2,78-111 l/s and 5,89-235CFM)
Accuracy ±3% of the reading ±1 m3/h, ±0,5ºC
Resolution display 0,1<100>1 m3/h, 0,1 ºC
Resolution zero
pressure sensor
< 0,2 Pa
Power supply 4x 1,2 V AA NiMH 2450 mAh, rechargeable.
Measuring time (nom.) < 30 sec
Material casing ABS
Measuring method Zero-method. In accordance with
International Standards
EMC In accordance with EN60132-1,
IEC61000-5-5 etc.
IP20 accordance IEC-60529
Battery life 8 hour while measuring 75 m3/h

Version: 12.6 EN Date: 22-09-2020 Page: 6 of 28
User Manual Diff
AT-DIFF
2. Description and usage
Nr.
Description
1 Scroll button
2 Information display
3 Measuring side DIFF
4 Air inlet/exhaust
5 Point of pressure measuring
6 Connection temperature sensor/motor

Version: 12.6 EN Date: 22-09-2020 Page: 7 of 28
User Manual Diff
AT-DIFF
2.1 Operation comfort and ergonomics
The DIFF is self-adjusting for inlet and exhaust grilles. The DIFF automatically detects the flow direction,
so the DIFF does not need to be turned around when changing the grill. For your convenience you are
able to set the arms and the display unit in any position. This will make it easy to operate and to read out.
Use of a ladder is mostly unnecessary because of these possibilities.
2.2 Operation
Measuring on a vent will cause a difference in pressure caused by the measuring instrument itself. This
difference in pressure will cause a deviation in the air distribution that causes a faulty measurement. The
DIFF solves this problem by measuring the pressure difference and compensate this with the build-in fan.
The rotation speed of the fan makes the pressure difference zero, this will solve the faulty measurements.
In this situation the volume flow through the grill is exactly the same as it was before the DIFF was in
place. The DIFF gives the right measurement of air flow and temperature after the beep.
2.3 Before first use
Make sure there is no packing material or any other objects in the DIFF.
2.3.1 Inserting the batteries
Charge the SANYO or PANASONIC ENELOOP batteries as described in the manual of the included
charger (we recommend to read this manual carefully). Use the standard charge mode whenever
possible, but definitely the first couple of times. (Please note: our specifications only apply when using the
prescribed battery type)
The batteries are fully charged when the green LED lights continuously lit. The batteries will only reach
their full capacity after fully charge and un-charge them multiple times (see chapter 5).
Make sure the Diff is switched off when replacing the batteries. The batteries
are placed in the battery compartment on the backside of the display housing.
Unscrew the thumb screw complete and move the cover upwards, now you
can remove the cover of the battery compartment. Take out the battery holder
carefully to replace the batteries.
Note the polarity when placing batteries! When placing the batteries in the wrong way, the
electronics of the Diff can be damaged. The battery positions are marked on the black battery
holder. The stud is the + and the flat side is the – of the batteries. The electronics are protected by
means of a fuse, see item 9.2.
Hold the wires on top of the batteries when placing the battery holder back. The wires can be pinched off
when they are positioned below the battery holder. Push the battery holder to the right side of the
compartment and place the cover.

Version: 12.6 EN Date: 22-09-2020 Page: 8 of 28
User Manual Diff
AT-DIFF
2.3.2 Adjustment of the arms
It is possible to adjust the arms of the Diff by pushing both grey buttons at the same time. The arms will
“click” every 30˚. This makes it possible to set a comfortable position for every situation. The display unit
can be rotated to ensure an optimal reading during the measurement.
Make sure that the display of the DIFF is not placed in front of the round opening! Putting the
display in the air flow will cause faulty measurements. All measured values will be out of
specifications.
These pictures show the right position of the arms and the display.
2.3.3 Operation
The DIFF can be operated with only one button. The readings are shown on the display.
The DIFF can be switched on by pushing in the middle of the scroll button. The recess in the scroll button
is intended for scrolling through the menu.

Version: 12.6 EN Date: 22-09-2020 Page: 9 of 28
User Manual Diff
AT-DIFF
3. The menu
The following menu will appear when the DIFF is powered.
You can scroll true the menu by rotating the control button. Push in the middle of the control button to
select the option.
3.1 Calibration
Calibration of the DIFF is necessary after powering. The ultrasensitive pressure sensor will be adjusted to
the environmental temperature.
It is advisable to let the DIFF acclimatize for a minimum of 15 minutes when there are big
differences in temperature. The DIFF has to be calibrated after the acclimatizing. It is
recommended to calibrate the DIFF from time to time during usage.
To ensure the accuracy, it is necessary to calibrate the DIFF at least once every 30 minutes. When the
environmental temperature is changing rapidly, or when the DIFF has a different temperature than the
environment in which it is used, it is necessary to calibrate more often.
Please note that the DIFF has to stand on a flat surface and the room has to be free of air flow, while
calibrating (close doors and windows).
When the DIFF is being calibrated the following screens will show up:
or
The last screen indicates that the calibration failed. The failure can be caused by air flows in the room.
Make sure that the DIFF is calibrated on a flat surface. You can put a flat object on top of the DIFF to
avoid airflow through the DIFF.
Menu
=======================
Measurement
Storage
Calibration
Off
Settings
Calibration
=======================
Calibrating…
Calibration
=======================
Testing…
Calibration
=======================
Successful.
Calibration
=======================
failed!

Version: 12.6 EN Date: 22-09-2020 Page: 10 of 28
User Manual Diff
AT-DIFF
3.2 Measurement
The DIFF starts to measure immediately once the option is selected from the menu. Make sure that the
following is prepared before measuring:
Closed doors and windows, the wind can create pressure waves that influence the measurement.
Put the square opening of the DIFF against the vent. When sure that the vent is fully covered the
measurement can be started. The measurements can be faulty when the measurement is started
before the DIFF is in place.
The DIFF will start with a pre-measurement. You can hear the motor starts running. The pre-
measurement will be followed by the final measurement.
Wait until the measurement is completed. The measurement can take tens of seconds. The
display will show the instantaneous flow and temperature value. This value is not reliable
because the DIFF is still compensating the measurement.
There will sound a beep when the measurement is finished. The value shown on the display is
the measured value. You can remove the DIFF from the vent.
The plus sign indicates that an air inlet is being measured. It is also indicated as SUPPLY on the upper
left of the display.
A negative sign indicates that an air exhaust is being measured. It is also indicated as EXHAUST on the
upper left of the display.
The battery status is indicated by the blocks on the upper right of the display. It is recommended to
charge and/or replace the batteries when the battery status reaches the value of one block.
The air temperature of the air flowing through the DIFF is shown below the battery indication.
You can return to the menu by pressing the selection button. The measured value won’t be available
anymore.
Comments:
The motor can reach a RPM of thousands of rounds per minute, and will create some sound. This can
create a high pitched tone caused by the motor control, which is normal.
Measurement duration:
The duration of the measurement depends on the amount of airflow going through the DIFF. The DIFF
will measure faster when the airflow is higher. The reason for this, is that the accuracy may be lower with
higher airflows.
3.3 Datalogging
We refer to chapter 7 for more information.
Supply ■■■■
Airtemp 24.5˚C
Airflow [M3/H]
+47.6

Version: 12.6 EN Date: 22-09-2020 Page: 11 of 28
User Manual Diff
AT-DIFF
3.4 Settings
You can choose the following options in the settings
menu:
Brightness
Contrast
Battery
Language
Measuring unit
Temperature unit
Technical Menu
3.4.1 Brightness - Contrast
The following screens are shown when selecting the option brightness or contrast.
The screen gives information about the serial number and the driver number of the DIFF. The brightness
or contrast is adjustable by turning the selection button. The setting can be confirmed by pressing the
selection button.
3.4.2 Battery
The option Battery shows the percentage of battery
capacity that is left. It is possible that the percentage
goes up after a measurement.
The battery status is also shown on the display while
measuring. It is indicated with 4 white blocks in the
upper right of the screen.
It is recommended to charge and/or exchange the
batteries when the battery level has dropped to one block.
3.4.3 Language
The screen changes to another language by turning the selection button. You can confirm the selection
by pressing the selection button.
Batterij
=======================
76%
Language
============
English
Sprache
============
Deutsch
Taal
============
Nederlands
Settings
=======================
Brightness
Contrast
Battery
Language
Meas. unit
=======================
Brightness
Driver 4.0.000
DIFF – 00220
=======================
Contrast
Driver 4.0.000
DIFF – 00220

Version: 12.6 EN Date: 22-09-2020 Page: 12 of 28
User Manual Diff
AT-DIFF
3.4.4 Measuring unit / temperature unit
The measuring or temperature unit can be selected by turning the selection button. The setting has to be
confirmed by pressing the selection button. The following units can be selected:
Measuring unit:
M3/H
CFM
L/S
Temperature unit:
Celsius
Fahrenheit
3.4.5 Technical menu
The technical menu is only available by the Observator technicians.
3.5 Overrange protection
The measuring range goes up to 400m3/h. When you
try to measure a value higher then 400m3/h the DIFF
will stop measuring show OVERRANGED and an
incorrect value on the display.
3.6 Off
The option will power the DIFF down. The DIFF will also be turned off when it is not used for 10 minutes
or more. This will prevent unnecessary energy consumption.
Meas. unit
=======================
M3/H
Overranged
=======================
Temp. unit
=======================
Celsius

Version: 12.6 EN Date: 22-09-2020 Page: 13 of 28
User Manual Diff
AT-DIFF
4. Optional Hoods
There are different types of hoods available for vents larger then the
standard opening of 25x25cm. The cross needs to be mounted
(Velcro) when measuring a diffuser/squirrel grill of 40x40 or
60x60cm as used in the utility. The cross avoids that the
measurements are influenced by the vortices created by the diffuser.
To mount the hood, place the round opening of the hood over the square
opening of the DIFF. The pull strings need to be positioned on the left.
Pull the lower pull string and lift the
hood till the lower pull string hooks
behind the edge of the DIFF. With the
lower pull string tightened you can pull
the upper pull string.
Note that the upper pull string needs to
be placed above the edge.
Tighten the hood by placing the fiber poles crosswise. The poles can be
placed in the recesses in the edge inside the DIFF. The fiber poles may
bend about ± 6 cm while placing them.
Check if the pull strings are fit well around the DIFF and pull them tight if
they are still a bit loose.
.
The AT-242 is required for measuring supply and exhaust vents in
residential housing. This light hood simply slides over the top of the Diff
and doesn’t require any additional tightening.

Version: 12.6 EN Date: 22-09-2020 Page: 14 of 28
User Manual Diff
AT-DIFF
5. Batteries
5.1 First use of the batteries
Fully charge the batteries the first time in standard charging mode. The batteries will only reach full
capacity after charging them fully a couple times. The batteries are fully charged when the green
indication LEDs are continuously lit. Using fast charge will reduce the battery life, we advise to use the
standard charge mode whenever possible. For more detailed information we refer to the charger manual.
5.2 Compatible batteries
The DIFF is designed for the usage of SANYO or PANASONIC ENELOOP rechargeable NiMH batteries
with a minimum capacity of 2450mAh. Beware: Different suppliers have different specifications. The
included SANYO or PANASONIC ENELOOP batteries are tested by Observator for the usage with the
DIFF. We recommend to use these batteries only!
Non-chargeable batteries, like the alkaline type, are not suitable for the DIFF. Same counts for
rechargeable batteries with less capacity. If you do use these types of batteries, keep in mind that the
range most likely will be limited to 100 - 300 m3/h. It is also possible that the DIFF will power itself down
due to voltage drop. Non-chargeable batteries have much lower capacity than the included NiMH
batteries.
5.3 Battery life
With the DIFF fully charged you will be able to measure 1 working day (typical 8 hours of usage when the
average measuring is 75 m3/h). The actual operation time depends on the measured flow. When the
maximum measured flow is 100 m3/h or lower, you will be able to measure up to 2 or 3 days before the
batteries need to be replaced.
Tips for optimal use of the batteries:
Cold batteries can deliver less energy. Store the batteries preferably in a room with an ambient
temperature above 5°C. Take care that the batteries have the same temperature as the DIFF, this will
avoid moisture.
5.4 Lifetime
The expected lifetime of the included NiMH batteries is about 1 year when using them daily. It is safe to
assume that the batteries need replacement when they need to be charged more frequently than before.
We recommend replacing the batteries every year or when they are charged / discharged 250 times.
Fast charging cycles will decrease the battery life.
Waste batteries must be disposed in accordance with the currently applicable local laws.
5.5 Warnings
Read the manual of the battery charger before using. Never try to charge non-chargeable batteries. Only
use the (included) SANYO or PANASONIC ENELOOP NiMH (model HR-3U 1.2V) batteries with a
minimum capacity of 2450 mAh.
Only charge the batteries in an ambient temperature of 0…50°Cin the standard battery charger. The fast
battery charger can only be used in an ambient temperature of 10….40°C. Also refer to the manual of the
battery charger.
It’s not possible to use a fixed power supply, usage of a fixed power supply can cause EMC
problems, will void your warranty and CE approval.
Faults and damage caused by other type of batteries then specified, is excluded from the
Observator warranty. Batteries are excluded from the standard warranty terms.

Version: 12.6 EN Date: 22-09-2020 Page: 15 of 28
User Manual Diff
AT-DIFF
6. Maintenance
The DIFF is a precision-instrument. Simple routine checks will ensure that the DIFF will function for many
years:
Remove moisture with a clean moisture absorbent cloth before storing the DIFF.
Always remove the batteries when the DIFF is not used for a long time.
Store and transport the DIFF always in the included transport case.
Store the DIFF in dry conditions.
Always let the DIFF adjust to the ambient temperature. The DIFF will adjust faster when it is hold
against an exhaust vent.
Never remove the grills inside the DIFF.
Check the DIFF periodical for cracks.
Do not expose the DIFF to water.
Do not use aggressive detergents. This will damage the DIFF.
Do not expose the hoods to sharp objects. A damaged hood can give wrong measurements.
The DIFF will be best antistatic, if the instrument will be cleaned with a clean lint-free cloth
frequently. Normally this only applies to air conditions with a low humidity.
It is recommended for this instrument to be calibrated annually. After a repair, this instrument will
also need a calibration. You can request a RMA number on our website. Once you've received,
you can send the instrument with RMA form to us for repair and / or calibration. Note that the
instrument is scheduled when it actually arrives. In order to shorten, you can before you request a
RMA number, contact our service department for Air Technology, lab@observator.com.

Version: 12.6 EN Date: 22-09-2020 Page: 16 of 28
User Manual Diff
AT-DIFF
7. DIFFiner
The software program DIFFiner is available with the DIFF. This program makes it possible to:
Store data on a SD-card and/or a PC
Creating measuring reports
Pre-configuring of measuring points.
This software package requires a pc with Windows XP, Vista, 7 or Windows 10 with a minimum resolution
of 1024X768.
7.1 Installing DIFFiner
Download DIFFiner in the software section of our website:
http://www.observatorair.com/
You can install DIFFiner with the standard settings.
Put the supplied SD-card in the card reader, after the installation.
Start DIFFiner and select the SD-card in the
selection menu.
- DIFFiner needs to run as administrator when using Windows 7 (Right click on the icon and
select run as administrator)
- When the SD-card is not found you should check if the SD-card is formatted as FAT32. Make
sure that the SD-card is always formatted as FAT32.
(My Computer Right click on the SD-card Format)
It is possible that the following message shows up when an external card reader (that can read multiple
types of flash cards) is used.
Click on Cancel and select the SD-card in the following window. DIFFiner will operate normally.

Version: 12.6 EN Date: 22-09-2020 Page: 17 of 28
User Manual Diff
AT-DIFF
7.2 Adding a project
The first time a SD-card is used you will be
asked if the SD-card needs to be prepared
for use with DIFFiner. Click OK. The SD-
card will be prepared for DIFFiner and the
projects that are already on your hard disk
will also be copied to the SD-card.
DIFFiner will boot when the SD-card is
ready.
Click open to create a new project
The screen that opens will show the already
existing projects. Click new to create a new
project.
It is also possible to export projects to a DIFF
file. These files can be send
to engineers on location. The engineer
can import these files onto the DIFF.
Click on new to create a new project.
It is possible to create a database in the newly appeared screen. It is
possible to ad the following items to the database:
Fan setting (position of the HRS switch)
Type of room (e.g. Living room, bedroom)
Grill position (e.g. position 1, position 2, 2mm)
Grill type (e.g. STHXX)
Grill situations (e.g. Clean, unreachable)
The created items can be used in the section Building. You
can fill in as much as possible information of the building that
is going to be measured.

Version: 12.6 EN Date: 22-09-2020 Page: 18 of 28
User Manual Diff
AT-DIFF
Click open to add a building to the project.
You can add a new building or open an already
existing building in the window that opens. Click
new to add a room to the building. The following
parameters are available per room:
Room type
Number of rooms
Amount of air inlets
Amount of air exhausts
The default type of grill
The picture on the right shows what it looks like
when several rooms are added.
Click save to save the project to the SD-card.
It is recommended to use the standard type of SD-card(Sandisk ultra II 2.0GB or an other class
4 SD-card) The time to store the project can increase significantly when a different type of SD-
card is used.
7.3 The DIFF with a SD-card
Put the SD-card into the DIFF and switch it on.
Go to the storage option.
In the next window you will see a list with the stored projects.
Select the project that you are going to measure
Select the building that you are going to measure
Select the room
Select the grill
Menu
=======================
Measurement
Storage
Calibration
Off
Settings
Select project
=======================
Project
Project 2
Project
=======================
Building_1
Building_2
Building_3
Building_1
=======================
Living room
Toilet
Study room
Bath room
Bedroom Living room
=======================
Supply 1
Supply 2
Exhaust 1
Exhaust 2

Version: 12.6 EN Date: 22-09-2020 Page: 19 of 28
User Manual Diff
AT-DIFF
This screen shows the grill information that can be adjusted if
needed. It is also possible to calibrate the DIFF from this screen.
After this the measurement can be started. The measurement data
will be stored after the selection button is pressed. Don’t switch of the
DIFF before the data is saved.
Declaration of symbols:
≈≈D Design flow
≈≈M Measured flow
■■S Grill situation
■■T Grill type
■■P Grill position
After you measured all the rooms you can final check the
measurement in the resultant window. You can select this menu
option in the list with the rooms. This menu shows an overview of
the total flow measurement. The design flow is shown as a
comparison.
Supply 1
=======================
Measurement
Calibration
≈≈D : +53.7
≈≈M : +40.4
■■S : Good
Resultant
=======================
+ ≈≈D : +53.7
- ≈≈D : -53.7
= ≈≈D : +0.0
+ ≈≈M : +40.4
- ≈≈M : -35.4
= ≈≈M : +5.0

Version: 12.6 EN Date: 22-09-2020 Page: 20 of 28
User Manual Diff
AT-DIFF
7.4 Processing the data on a computer
After the measurements are finished you can check the data on the pc.
Put the SD-card in the reader and start DIFFiner.
Open the project.
The project data is now available on the pc.
The measured data can be plotted into a report by clicking print. It is also possible to export a report to
Microsoft Excel. This button is next to the print button.
The pictures below show examples of possible reports.
Table of contents
Other Observator Instruments Measuring Instrument manuals

Observator Instruments
Observator Instruments NEP-9500 Series User manual

Observator Instruments
Observator Instruments Analite NEP-9500-PLUS Series User manual

Observator Instruments
Observator Instruments ANALITE NEP160 User manual

Observator Instruments
Observator Instruments DIFF User manual

Observator Instruments
Observator Instruments MET-LINK User manual

Observator Instruments
Observator Instruments ANALITE NEP-695 User manual

Observator Instruments
Observator Instruments Analite NEP-5000 User manual