Occasions AIRFLOWZ User manual

Safety Information
Please read and understand this entire manual before attempting to assemble, operate or
install the product.
- This item is not a toy and should be used for decorative purposes only.
- For indoors and outdoors use.
CAUTION:
Do not attempt to inflate your inflatable during unusually strong winds. If it becomes too windy for
safe operation, simply allow your inflatable to deflate and wait for better conditions before
re-inflating.
CAUTION:
Protect the electric fan and power cord from direct exposure to water. This precaution will reduce
the risk of electrical shock. When the temperature is below 14°F (-10°C), the motor may tempo-
rarily stop running. The motor will begin functioning again in higher temperatures.
Warning: Read And Understand All Instructions
- Failure to follow all instructions listed below, may result in electric shock, fire and /or serious
personal injury.
WARNING : ELECTRICAL PRODUCT
- Keep away from children. Not recommended for children under 3 years of age. As with all
electrical products, precautions should be observed during handling and use to reduce the risk
of electric shock. If the supply cord is damaged, it must be replaced by the manufacturer, its
service agent or similarly qualified persons in order to avoid a hazard.
DANGER
- To prevent electric shock, do not immerse in water; wipe clean with damp cloth. Immersing this
product can result in an electric shock.
IMPORTANT NOTE:
Periodically examine this product for damage to the cord, housing or other parts that may result
in the risk of fire, electric shock or injury. If the product is damaged, do not use it.
Important Safety
Instructions
Read And Follow All
Safety Instruction
When using electrical products, basic
precautions should always be followed,
including the following:
- This is an electrical product – not a toy! To
avoid risk of fire, burns, personal injury, and
electric shock, it should not be played with or
placed where small children can reach it.
- Do not use seasonal products outdoors unless
marked suitable for indoor and outdoor use.
When products are used in outdoor applica-
tions, connect the product to a Ground Fault
Circuit Interrupting (GFCI) outlet. If one is not
provided, contact a qualified electrician for
proper installation.
- This seasonal use product is not intended for
permanent installation or use.
- Do not mount or place near gas or electric
heaters, fireplaces, candles, or other similar
sources of heat.
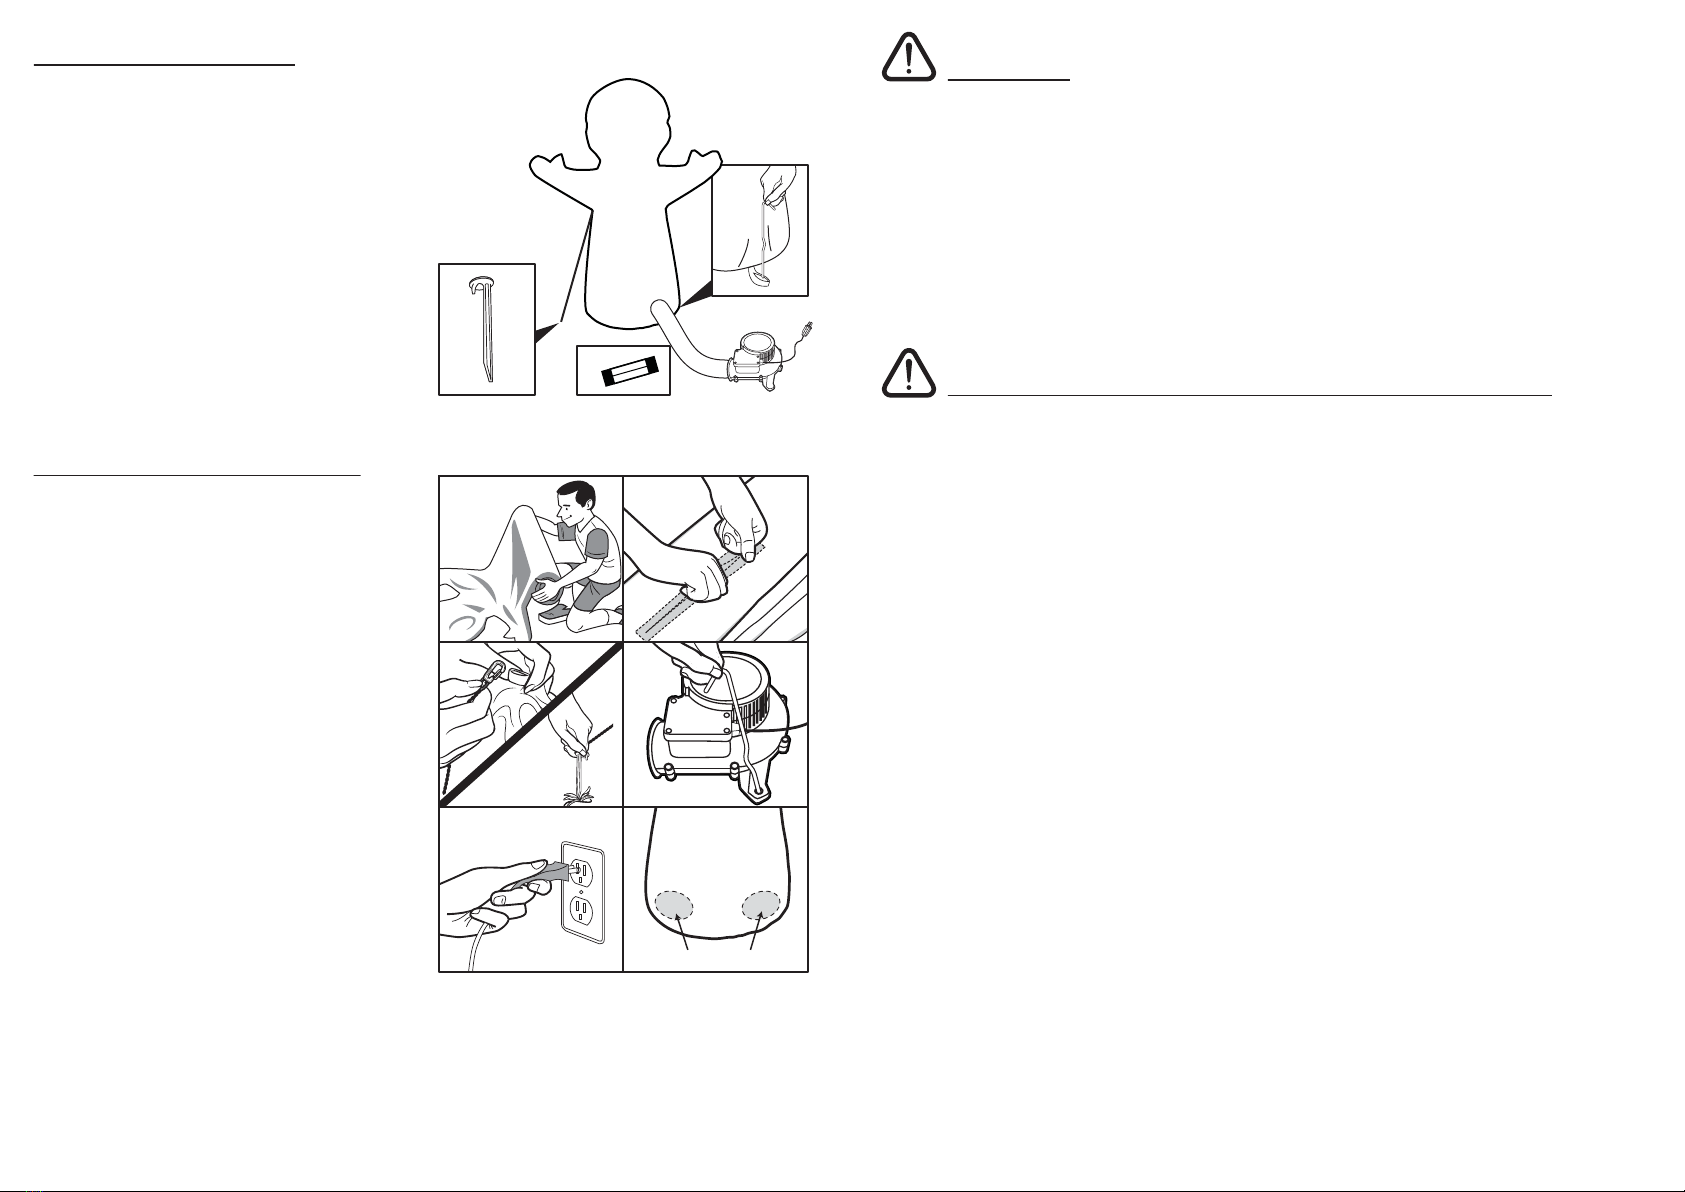
- Do not secure product wiring with staples or
nails or place on sharp hooks or nails.
- Do not let lamps rest on the supply cord or on
any wire.
- Unplug the product when leaving the house,
when retiring for the night, or if left
unattended.
- Do not use this product for other than its
intended purpose.
- Do not hang ornaments or other objects from
cord, wire, or light string.
- Do not close doors or windows on the
product, or extension cords, as this may
damage the wire insulation.
- Do not cover the product with a cloth, paper,
or any material not part of the product when
in use.
1 2
- Do not place the product against carpeting,
furniture, or any other fabric when in use.
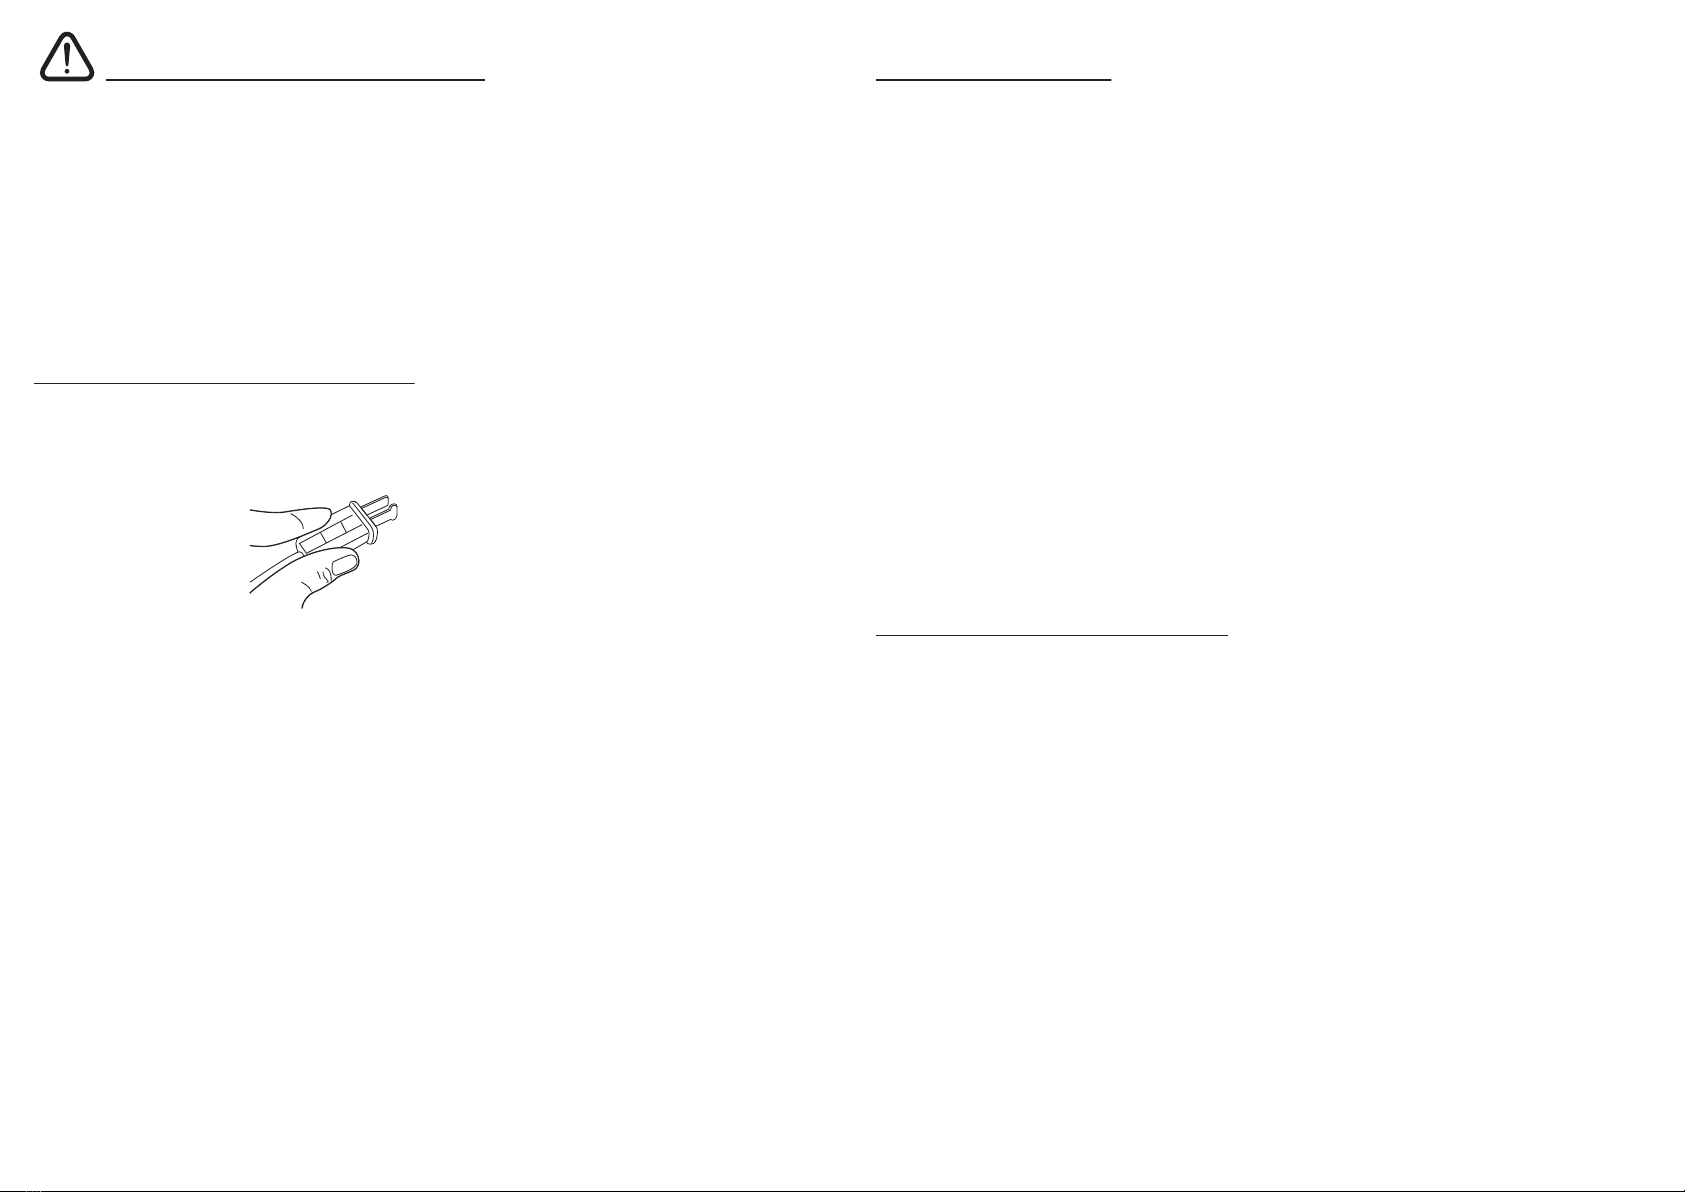
- This product has a polarized plug (one blade
is wider than the other) as a feature to reduce
the risk of electric shock. This plug will fit in a
polarized outlet only one way. If the plug does
not fit fully in the outlet, reverse the plug. If
the plug still does not fit, contact a qualified
electrician. Do not use an extension cord
unless the plug can be fully inserted. Do not
alter or replace the plug.
- Before using and reusing, inspect the product
carefully. Discard any products that have cut,
damaged or frayed wire insulation cords,
cracks, lamp holders or enclosures, lose
connections, or exposed copper wire.
- When storing the product, carefully remove
the product from wherever it is placed,
including trees, branches, or bushes, to avoid
any undue strain or stress on the product
conductors, connections and wires.
- When not in use, store neatly in a cool dry
location protected from sunlight.
- Read and follow all instructions that are on the
product or provided with the product.
SAVE THESE
INSTRUCTIONS
Installation
PREPARING FOR INSTALLATION
1. Remove contents from packaging
2. Remove all plastic fasteners and tags. These
are part of the packaging and should be
discarded.
3. Before beginning assembly of product, make
sure all parts in the contents list are present.
If any part is missing or damaged, do not
attempt to assemble the product.
Light Up
Inflatable
Instructions
WHISPER SYSTEM

FAQ
1. Can I continually run the inflatable?
Yes, you can run the inflatable during the day and at night. It is recommended you turn off the
inflatable when leaving the immediate area and when retiring for the evening. Otherwise, the
inflatable is designed to run continually.
2. Can I leave the inflatable up in extreme weather conditions or freezing temperatures?
It is recommended you take appropriate precautions to protect the unit. The inflatable will
operate at temperatures below freezing, but it is not recommended to operate the inflatable if
temperature drops below 14°F (-10 C˚).
3. What if it is raining or snowing? Will this affect the inflatable?
Operation of the inflatable during light weather conditions such as a gentle rain or snowfall is
intended. However, operation of the inflatable during extreme weather conditions is not
recommended, as your item may become damaged or inundated with moisture. Do not store
the inflatable when it is wet.
4. What if water has soaked my unit while unplugged?
Move the unit to a dry location and plug in the unit. The fan will dry the inflatable.
5. The inflatable has been deflated and it is covered with snow. Can I simply re-inflate it?
If the inflatable is covered in a light dusting of snow, simple re-inflation should not harm the
unit. However, if the deflated unit has been subjected to a large amount of snow and or ice, do
NOT attempt to re-inflate. Rather, carefully remove the item from the extreme condition (i.e.
bring it indoors) and allow the unit to thaw before re-inflating. This helps prevent cracks and or
tears in the material.
6. When I unplug the inflatable, it deflates. Why is this?
The inflatable will not stay inflated unless it is plugged in and the fan is blowing air.
7. How can I clean the inflatable?
Wipes clean with a damp cloth and allow to dry before storing away.
8. What is the best way to store the inflatable?
Store in a bag, box or other storage container and keep in a cool, dry location.
AC - 0.54 - 2 E 2014
7
DO NOT RETURN TO STORE
THIS PRODUCT CANNOT BE RETURNED
FOR A REFUND AFTER
IT HAS BEEN UNPACKED AND USED.
FOR QUESTIONS OR PROBLEMS WITH THIS PRODUCT
PLEASE VISIT BELOW CUSTOMER SERVICE WEBSITE
FOR EXPEDITED ASSISTANCE
www.toysinquiry.com
CONTENTS AND SPECIFICATION MAY VARY FROM THOSE ILLUSTRATED.
125, QI WEN ROAD, HAI SHU, NINGBO, CHINA
ALL RIGHTS RESERVED
MADE IN CHINA
PLEASE RETAIN THIS INFORMATION FOR FUTURE REFERENCE.

Caution:
1. For even better night time illumination, you may choose to place an outdoor approved spotlight
in front of your inflatable. (Outdoor approved spotlight not provided). Do not place the bulb too
close to the inflatable as it may melt or damage the plastic.
2. Do not place any foreign objects inside your inflatable.
3. Do not block air intake area of your inflatable; it will increase the inflation time.
4. During inclement weather conditions such as heavy rain, snow and windstorms, store the
product indoors.
5. Operation of your inflatable during extreme weather conditions is not recommended.
6. Do not store the inflatable when it is wet.
Important Safety Instructions: Power Unit
This power unit is intended to be correctly orientated in a vertical or floor mount position. When
using electrical products, basic precautions should always be practiced including the following:
1. READ AND FOLLOW ALL SAFETY INSTRUCTIONS.
2. Read and follow all instructions that are on the product or provided with the product.
3. For a cord-connected or direct plug-in power unit, do not use an extension cord.
4. Reference the National Electrical Code, ANSI/NFPA 70, specifically for the installation of
wiring and clearances from power and lighting conductors.
5. Installation work and electrical wiring must be done by qualified person(s) in accordance with
all applicable codes and standards, including fire-rated construction.
6. For a cord-connected or direct plug-in power unit, do not install or use within 10 feet of a
pool.
7. For a cord-connected or direct plug-in unit, do not use in a bathroom.
8. For a direct plug-in or cord-connected power unit marked in accordance with 65.2:
WARNING: Risk of Electric Shock. When used outdoors, install only to a covered Class A
GFCI protected receptacle that is weatherproof with the power unit connected to the
receptacle. If one is not provided, contact a qualified electrician for proper installation.
Ensure that the power unit and cord do not interfere with completely closing the recep-
tacle cover.
9. For a permanently connected power unit marked in accordance with 65.2:
WARNING: Risk of Electric Shock. When used outdoors, install only on a circuit protected
by a Class A GFCI.
10. WARNING: Risk of Fire. Installation involves special wiring methods to run wiring through a
building structure. Consult a qualified electrician.
11. For a unit intended to be mounted greater than 0.30 m (1 foot) from the ground surface:
WARNING: Risk of Electric Shock. Mount the unit at a height greater than 1 foot from the
ground surface.
SAVE THESE INSTRUCTIONS – This manual contains important safety and operating
instructions for power units.
Package Contents
Part Description Quantity
A Inflatable Unit 1 PIECE
B Air Blower 1 PIECE
(Input 110-120V
AC 0.54A, 60Hz)
C Tether Ropes 4 PIECES
D Tether Stakes 4 PIECES
E Stakes 7 PIECES
F Extra Fuse 1 PIECE
12
3
4
4
5
weight-bag
6
3 4
E
C
A
B
D
Assembly Introduction
1. Lay out deflated inflatable on a clear and
flat. Make sure the blower is clear of fabric
or other obstructions.
2. Ensure zipper on inflatable is fully closed.
3. For outdoor use, tie tether ropes to the
stakes, clip the nylon loops on the side of
inflatable, then insert stakes to the ground
making sure tethers are taut.
4. Insert 3 stakes through the plastic legs of
the blowers to fix the blower to the ground.
5. Plug the blower into a power unit. Inflatable
will start to inflate.
6. Adjust the sealed weight-bag to position
your inflatable.
7. To deflate, unplug adaptor and the fan will
stop blowing.
8. Unzip the zipper for faster deflation.
F

Use And Care Instructions
1. Before using and reusing, inspect the product carefully. Discard any product that has cut,
damaged or frayed wire insulation cords, cracked lamp holders or enclosures, loose connec-
tions, or exposed copper wire.
2. Wipe the unit with a damp cloth and allow the unit to dry before storing.
3. When storing the product, carefully remove it from wherever it is placed, including trees,
branches, or bushes to avoid any undue stain or stress on the product conductors, connec-
tions and wires.
4. When not in use, store neatly in a cool, dry location protected from sunlight.
User Servicing Instruction
Troubleshooting
Problem: The unit is not inflating.
- The power source is disabled or the cord may be unplugged. Check all power cables to make
sure that they are properly connected to a power source. Ensure that the power outlet has
power.
- Debris may be lodged in the motor. Unplug fan unit and remove any foreign objects or debris
from the motor.
NOTE: Periodically, the inflatable air-intake area may become clogged with grass, leaves or
other debris. For best results, it is recommended to check this air-intake area and clean as
necessary.
- Occasionally, the hanging fabric of a partially inflated inflatable can become attached to the
motor’s air- intake area. Ensure that fabric is not hanging near the motor during inflation.
- The zippers that seal the inflatable may not be completely closed. Make sure the zipper is zipped
closed.
- The temperature may be below 14ºF (-10ºC). Remove the unit from extreme temperatures until
weather conditions improve.
- The connection between the inflatable and fan may not be securely attached.
Problem: The unit is torn.
- You may hand sew rips with any type of thread or use clear packing tape to cover the tear.
Questions or Problems?
Visit our website www.toysinquiry.com or call our customer service department at
1-800-434-6178 for expedited assistance.
65
Replace the fuse:
1. Grasp plug and remove from the receptacle
or other outlet device. Do not unplug by
pulling on the cord.
2. Open the fuse cover.
Slide opens the fuse
access cover on top of
the attachment plug
towards blades. (See
Illustration)
3. Remove fuse carefully.
4. Risk of fire: Replace fuse only with 5 Amp,
125V fuse (provided with product)
5. Close the fuse cover. Slide close the fuse
access cover on top of the attachment
plug.
6. Risk of Fire: Do not replace the
attachment plug. Contains a safety device
(fuse) that should not be removed. Discard
product if attachment plug is damaged.
CAUTION: To reduce the risk of fire or electric
shock, do not attempt to replace lamps or
modify string.
CAUTION: To reduce the risk of fire do not
deliberately reposition either lamp holder
contact.
CAUTION: Do not attempt to inflate your
inflatable during unusually strong winds. If it
becomes too windy for safe
operation, simply allow your inflatable to
deflate and wait for better conditions before
re-inflating.
CAUTION: Protect the electric fan and power
cord from direct exposure to water. This
precaution will reduce the risk of electrical
shock. When the temperature is below 14˚F
(-10˚C), the motor may temporarily stop
running. The motor will begin functioning
again in higher temperatures.
Other Occasions Lighting Equipment manuals
Popular Lighting Equipment manuals by other brands

TEC-MAR
TEC-MAR 1810 Mounting instruction

Dust Free
Dust Free BIO-FIGHTER 4Xtreme Installation & operation manual

Sutter Instrument
Sutter Instrument Lambda 421 Operation manual

WE-EF
WE-EF FLC122LED Installation and maintenance instructions

American DJ
American DJ TRI PHASE User instruction

IKONIX
IKONIX 40417 instruction sheet