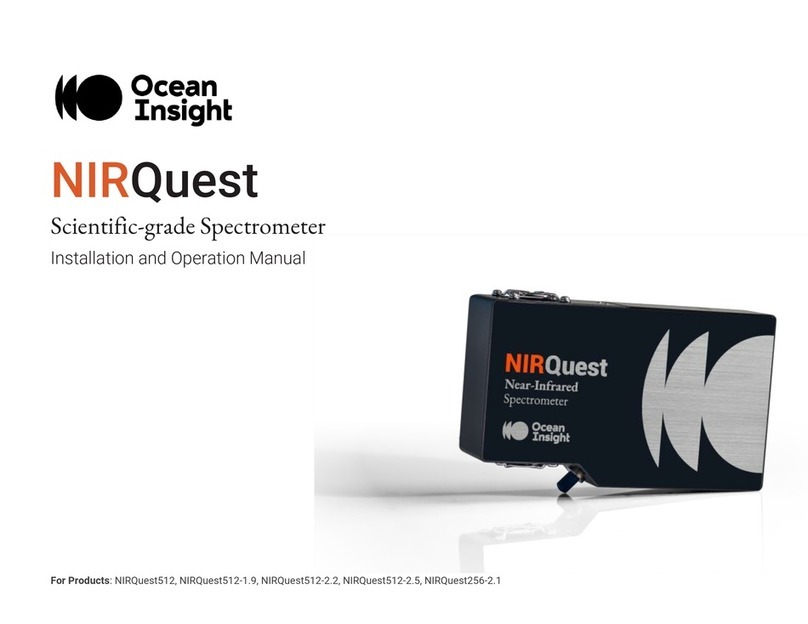
Ocean Insight QE Pro User manual

QE Pro
Scientific-Grade Spectrometer
Installation and Operation Manual
For Product: QE Pro


MNL-1009 REV A
1
Table of Contents
About This Manual........................................... 2
Warnings & Cautions ................................................................... 2
Certifications and Compliance ................................................... 4
Warranty ....................................................................................... 6
Introduction ..................................................... 7
System Requirements ................................................................. 7
Interface Options ......................................................................... 8
Shipment Components................................................................ 9
Installing the QE Pro ...................................... 10
QE Pro Installation ..................................................................... 10
Configuring the QE Pro .............................................................. 11
External Triggering Options ...................................................... 15
Changing the Slit........................................................................ 15
Calibrating the Wavelength of the QE Pro................................ 16
Troubleshooting ............................................ 17
Connected to Computer Prior to Application Installation ....... 17
FPGA Firmware Upgrade........................................................... 18
TEC Readback Accuracy at Temperature Extremes ............... 18
TEC Readback Temperature Not Exactly at Setpoint.............. 18
Baseline Drifts Downward ......................................................... 19
The Timing of Acquiring Spectra .............................................. 19
HR4000 Breakout Board DC Power Input................................. 19
HR4000 Breakout Board RTS and CTS Signals ....................... 19
Specifications ................................................ 20
QE Pro Specifications ................................................................ 20
System Compatibility................................................................. 21
30-Pin Accessory Connector Pinout......................................... 22
HR4-CBL-DB15 Accessory Cable Pinout .................................. 25
Copyright © 2020 Ocean Insight
All rights reserved. No part of this publication may be reproduced, stored in a retrieval system, or transmitted, by any means, electronic, mechanical, photocopying,
recording, or otherwise, without written permission from Ocean Insight.
This manual is sold as part of an order and subject to the condition that it shall not, by way of trade or otherwise, be lent, re-sold, hired out or otherwise circulated
without the prior consent of Ocean Insight, Inc. in any form of binding or cover other than that in which it is published.
Trademarks
All products and services herein are the trademarks, service marks, registered trademarks or registered service marks of their respective owners.
Limit of Liability
Every effort has been made to make this manual as complete and as accurate as possible, but no warranty or fitness is implied. The information provided is on an
“as is” basis. Ocean Insight shall have neither liability nor responsibility to any person or entity with respect to any loss or damages arising from the information
contained in this.

MNL-1009 REV A
2
About This Manual
Warnings & Cautions
This device may cause radio interference or may disrupt the operation of nearby equipment. It may be necessary to take
mitigation measures such as re-orienting, relocating or shielding the location.
Cautions
Caution: Do not let contaminants get into the bench. Keep the protective cap on the slit aperture when not connected to an
accessory, probe or fiber.
Caution: Only change the slit aperture in a clean environment where contaminants including dust cannot enter the bench during the
procedure.
Caution: Substitution of a component or accessory different from that supplied may result in measurement error, equipment
damage, increased emissions or decreased immunity.
Caution: Repairs should be undertaken only by personnel trained or authorized by Ocean Insight. The device does not contain any
user serviceable parts.
Caution: Do not immerse the device in any fluid, place fluids on top of or attempt to clean with liquid detergents or cleaning agents.
This may cause an electrical hazard. Do not use if accidental wetting occurs.

MNL-1009 REV A
3
Caution: Do not remove any covers. Doing so may increase the risk of electrical shock or compromise the integrity of the optical
components.
Caution: Do not gas sterilize or autoclave this device.
Caution: Consult local codes and ordinances for proper disposal of equipment and other consumable goods.
Caution: The device and/or accessories may not operate correctly if used or stored outside the relevant temperature and humidity
ranges described in the Technical Specifications.
Caution: Do not use if device is dropped and/or damaged. Have an authorized service representative check the device before
using again.
Caution: Be sure to install any software BEFORE connecting the spectrometer to your PC or host system. The software installs the
drivers required for spectrometer installation. If you do not install the software first, the system may not properly
recognize the spectrometer.
Caution: To ensure reliable operation, it is recommended that the power supply be attached prior to inserting the USB connector.
Caution: The user of this spectrometer shall have the sole responsibility for any malfunction which results from improper use,
faulty maintenance, improper repair, damage or alteration by anyone other than Ocean Insight or their authorized service
personnel

MNL-1009 REV A
4
Certifications and Compliance
This is an FCC Class A product. In a domestic environment, this product may cause radio interference in which case
the user may be required to take adequate measures
FCC Compliance
This equipment has been tested and found to comply with the limits for a Class A digital device, pursuant to
Part 15 of the FCC Rules. These limits are designed to provide reasonable protection against harmful
interference when the equipment is operated in a commercial environment. This equipment generates uses and
can radiate radio frequency energy and, if not installed and used in accordance with the instruction manual,
may cause harmful interference to radio communications. Operation of this equipment in a residential area is
likely to cause harmful interference in which the user will be required to correct the interference at his own
expense.
The authority to operate this equipment is conditioned by the requirement that no
modifications will be made to the equipment unless the changes or modifications are expressly
approved by the manufacturer.
Warning

MNL-1009 REV A
5
RoHS-compliant
The WEEE symbol on the product indicates that the product must not be disposed of with normal household
waste. Instead, such marked waste equipment must be disposed of by arranging to return to a designated
collection point for the recycling of waste electrical and electronic equipment. Separating and recycling this
waste equipment at the time of disposal will help to conserve natural resources and ensure that the
equipment is recycled in a manner that protects human health and the environment.
WEEE Compliance
TUV CERTIFICATION
This device has been tested and complies with the following standards:
EN 61326-1:2013
CISPR 11:2009+A1:2010

MNL-1009 REV A
7
Introduction
The Ocean Insight QE Pro Spectrometer is a scientific-grade spectrometer with broadband sensitivity, from UV to NIR, making it
suitable for a wide range of applications. Its high sensitivity and thermoelectric cooler enable effective measurements at very low
light levels.
Product Features
Purge Port with Deep UV Option
Interchangeable Slits
2 Indicator Lights for Spectrometer and
Thermoelectric Cooling Status
Optional Internal Shutter
Multi Scan Data Buffering
10 User Programmable Digital I/O Pins
Thermoelectrically Cooled
4 Modes of Triggering
SPI/I2C for Controlling Peripherals
Communications
•USB 2.0 Full Speed
•RS232 up to 460k Baud
Nonvolatile Storage
•Wavelength Cal. Coef.
•Linearity Corr. Coef.
•Optional Absolute Irradiance Cal.
System Requirements
You can use the QE Pro’s USB connectivity with any computer that meets the requirements for the spectroscopy application being
used.
Alternately, the QE Pro has a serial port for connecting to PCs and PLCs. However, this connection method requires an external
power supply to power the QE Pro, called the Breakout Box, and a serial cable.
EEPROM Utilization
Nonvolatile memory in each QE Pro contains wavelength calibration coefficients, linearity coefficients, and a serial number unique to
each individual spectrometer. Ocean Insight’s spectroscopy application reads these values directly from the spectrometer, enabling
the ability to “hot-swap” spectrometers between computers without entering the spectrometer coefficients manually on each
computer.

MNL-1009 REV A
8
About Ocean Insight Software
For the most up to date software, please refer to OceanInsight.com.
OceanView is the general-purpose spectroscopy software for all Ocean Insight spectrometers. It is a completely modular, Java-
based spectroscopy software platform that operates on Windows, Macintosh and Linux operating systems. The software can control
any Ocean Insight spectrometer and device.
OceanView is a user-customizable, advanced acquisition and display program that provides a real-time interface to a variety of
signal-processing functions. With OceanView, you can perform spectroscopic measurements (such as absorbance, reflectance, and
emission), control all system parameters, collect and display data in real time, and perform reference monitoring and time acquisition
experiments. Consult the OceanView manual for hardware requirements when using OceanView.
Interface Options
The QE Pro has both USB and serial port connectors (with the use of an adapter), enabling you to connect the spectrometer to a
desktop or notebook computer via a USB port or serial port.
Computer Interface
Operating System
Requirements
Part Needed
Description of Part
USB Port
For the most current software,
visit https://OceanInsight.com *
USB-CBL-1
(included)
Cable that connects from USB
port on QE Pro to USB port on
desktop or notebook PC
Serial Port
Any 32-bit or 64-bit Windows
operating system
HR4-BREAKOUT
(not included)
Adapter block that enables
connection from serial port on QE
Pro to serial port on desktop or
notebook PC; comes with 5 VDC
power supply (required when
connecting to serial port)
*OceanView may run with previous operating systems but Ocean Insight does not actively support these installations.

MNL-1009 REV A
9
Shipment Components
•QE Pro Spectrometer
•USB Cable
•+ 5VDC power supply
•Wavelength Calibration Data Sheet (please save for future reference)
Optional Breakout Box
Ocean Insight also offers the Breakout Box (HR4-BREAKOUT), a passive module that separates the signals from their 22-pin port to
an array of standard connectors and headers, enabling easy access to a variety of features found in Ocean Insight’s QE Pro
Spectrometer. In addition to the accessory connector, the breakout box features a circuit board based on a neutral breadboard
pattern that allows custom circuitry to be prototyped.
NOTE
Be aware when using the Breakout Box that the signals for hardware flow control (handshaking) are not connected in the QE
Pro.

MNL-1009 REV A
10
Installing the QE Pro
You must install the spectroscopy application prior to connecting the QE Pro Spectrometer to the computer. The Ocean Insight
spectroscopy application installs the drivers required for the QE Pro spectrometer installation. If you do not install the application
first, the system will not properly recognize the QE Pro.
If you have already connected the QE Pro to the computer prior to installing the spectroscopy software, consult Chapter 3:
Troubleshooting for information on correcting a corrupt QE Pro installation.
QE Pro Installation
This section contains instructions for connecting the QE Pro via both USB and serial modes.
USB Mode
QE Pro Spectrometer Device Driver Installation
If the computer is connected to the internet, the device driver installation will occur automatically. If the computer is offline, you will
need to open the device manager and search for the drivers.
Serial Port Mode
1. Plug the 5 VDC external power supply into an outlet and connect it to the QE Pro.
2. Connect the serial cable adapter block to the appropriate pins of the QE Pro’s 30-Pin Accessory Connector.
Connect one end of the 9-pin serial cable to the adapter block on the QE Pro, and then connect the other end to a serial port on the
PC.
Note the number of the serial port (COM Port) to which you connected the QE Pro (some PCs may not have numbered ports;
handheld PCs typically have only one serial port).
LED Operation
The QE Pro features two status LEDs:

MNL-1009 REV A
11
LED Position
Meaning
Top LED
Monitors Spectrometer status:
•Off –spectrometer does not have power
•Flashing orange –spectrometer is booting
•Steady green –spectrometer is ready
Bottom LED
Monitors Thermoelectric Cooling (TEC) status:
•Off: The TEC system is off.
•Orange: The TEC has not yet stabilized at its given setpoint.
•Green: The TEC is stable (has been within 1 °C of the setpoint for at least 15 seconds).
Configuring the QE Pro
The QE Pro can be used with OceanView software when connected to the USB port. If you have followed the previous steps and
started your spectroscopy application, the spectrometer is already acquiring data. Even with no light in the spectrometer, there
should be a dynamic trace displayed in the bottom of the graph. If you allow light into the spectrometer, the graph trace should rise
with increasing light intensity. This means the software and hardware are correctly installed.

MNL-1009 REV A
12
Configuring QE Pro in OceanView
If you have followed the previous steps and started OceanView, your
spectrometer appears in the Schematic and Graph Views:
OceanView QE Pro Acquisition Controls
In OceanView, the Acquisition Parameter Controls allow you to set the desired
parameters for QE Pro.

MNL-1009 REV A
13
TE Cooler
To control the TE Cooler,
1. Right-click on the QE Pro in the Schematic View.
2. Select New Acquisition | Thermo-Electric Cooling.
Buffering
To control buffering,
1. Right-click on the QE Pro in the Schematic View.
2. Select New Acquisition | Data Buffer.

MNL-1009 REV A
14
Data buffering can also be set using the Acquisition Parameter Controls.
To add data buffering controls to the Acquisition Parameter Controls,
1. Click on the Add/Remove Controls tab.
2. Select Data Buffer. The Data Buffer controls appear on the Main
Controls tab.
3. Select the data buffering capacity (the total number of scans the device
can store at once).
4. Click Clear Buffer to set the buffer to zero and start over.
Optional Shutter
To enable the optional shutter,
1. In the Acquisition Group window, click on the Add/Remove Controls
tab.
2. Select GPIO. The GPIO controls appear on the Main Controls tab.
3. Check the Out box for Index 4. This makes the GPIO an output.
4. Check the Value box for Index 4 to close the shutter. You can now take
your dark measurement.

MNL-1009 REV A
15
5. Uncheck the Value box to open the shutter.
External Triggering Options
You can trigger the QE Pro using a variety of External Triggering options through the 30-pin Accessory Connector on the
spectrometer. See the External Triggering Options document located at https://www.oceaninsight.com/support/documents-
manuals/manuals-operating-instrs/. The document contains instructions for configuring External Triggering options for the QE Pro.
Changing the Slit
QE Pro has an interchangeable slit feature allow you to move rapidly between different measurement types without changing your
spectrometer.
For instructions on how to change the slit on your spectrometer, visit OceanInsight.com.
Ocean Insight recommends that a calibration always be performed after changing the slit on a spectrometer as it will optimize the
performance of the device.
NOTE
Make sure the ALT checkbox for the GPIO (Index 4) is not selected, which would prevent the shutter from triggering.
The activation time of the internal shutter is 11 ms.

MNL-1009 REV A
16
Calibrating the Wavelength of the QE Pro
Each spectrometer is calibrated before it leaves Ocean Insight, however the wavelength for all spectrometers will drift slightly as a
function of time and environmental conditions.
For instructions on how to calibrate the QE Pro, visit OceanInsight.com.

MNL-1009 REV A
17
Troubleshooting
Connected to Computer Prior to Application Installation
Windows Operating Systems
If you connected your Ocean Insight QE Pro device to the computer prior to installing your spectroscopy application (OceanView) on
a Windows platform, you may encounter installation issues that you must correct before your Ocean Insight device will operate
properly.
Follow the applicable steps below to remove the incorrectly installed device, device driver, and installation files.
Remove the Unknown Device from Windows Device Manager
1. Open Windows Device Manager. Consult the Windows operating instructions for your computer for directions, if needed.
2. Locate the Other Devices option and expand the Other Devices selection by clicking on the "+" sign to the immediate left.
3. Locate the unknown device (marked with a large question mark). Right-click on the Unknown Device listing and select the
Uninstall or Remove option.
4. Click the OK button to continue. A warning box appears confirming the removal of the Unknown Device. Click the OK
button to confirm the device removal.
NOTE
If these procedures do not correct your device driver problem, you must obtain the Correcting Device Driver Issues document
from the Ocean Insight website: OceanInsight.com
NOTE
Improperly installed USB devices can also appear under the Universal Serial Bus Controller option. Be sure to check this
location if you cannot locate the unknown device.

MNL-1009 REV A
18
5. Disconnect the QE Pro from your computer.
6. Re-plug the spectrometer into your computer.
The system should now be able to locate and install the correct drivers for the USB device.
Apple Mac OSX Operating Systems
Since there are no device files for the QE Pro Spectrometer in a Mac operating system, you should not encounter any problems if you
installed the spectrometer before the operating software.
Linux Operating Systems
For Linux operating systems, all you need to do is install the software, then unplug and re-plug in the spectrometer. Technically, the
driver files for Linux simply give nonprivileged users permission to use newly connected hardware. There isn’t any long-term harm to
plugging in the device before installing the software.
FPGA Firmware Upgrade
The FPGA firmware in the QE Pro should be upgraded using the USB bus. Upgrading the FPGA firmware in the QE Pro via the RS-232
serial bus produces unpredictable results.
TEC Readback Accuracy at Temperature Extremes
The TEC temperature is read back by a thermistor embedded in the detector. As with most thermistors, the relationship between
resistance and temperature is non-linear. However, the QE Pro uses a piecewise linear interpolation to convert from resistance to
temperature. This linearization is targeted at the range from -20 °C to 40 °C. Accuracy will deteriorate beyond the edges of this range.
TEC Readback Temperature Not Exactly at Setpoint
The settled TEC readback temperature is slightly different from the TEC setpoint temperature, typically by ~0.2 °C. However, on other
Ocean Insight products (and some competitive products), the TEC temperature appears to settle exactly at the TEC setpoint
(generally when the TEC control loop uses a common ADC for both control and readback). The QE Pro uses an ADC that is
independent of the control loop, resulting in a more reliable value. Although TEC accuracy is typically not very important to users, TEC
stability (outstanding on the QE Pro) is critical.
Table of contents
Other Ocean Insight Laboratory Equipment manuals
Popular Laboratory Equipment manuals by other brands

CURIOSIS
CURIOSIS Celloger Mini Plus instruction manual

Stanford Research Systems
Stanford Research Systems SIM985 Operation and service manual

Becton Dickinson
Becton Dickinson SERO-FUGE 2000 Series Operator's manual

CORNING
CORNING Spin-X UF 500 Technical data and operating instructions

cytiva
cytiva BR-1008-23 Instructions for use

Hioki
Hioki 8826 instruction manual