manuals.online logo
Brands
  1. Home
  2. •
  3. Brands
  4. •
  5. Odyssey
  6. •
  7. Motorized Toy Car
  8. •
  9. Odyssey Spy Rover Mini FPV User manual

Odyssey Spy Rover Mini FPV User manual

This manual suits for next models

1

Popular Motorized Toy Car manuals by other brands

Reely Dune Fighter 3S operating instructions

Reely

Reely Dune Fighter 3S operating instructions

REVELL 1970 Chevelle SS 454 manual

REVELL

REVELL 1970 Chevelle SS 454 manual

Team Losi Micro Rally Car Operation guide

Team Losi

Team Losi Micro Rally Car Operation guide

Jamara Mercedes-AMG GLE 63 Instruction

Jamara

Jamara Mercedes-AMG GLE 63 Instruction

Eduard Humber Scout Car Mk.I exterior quick start guide

Eduard

Eduard Humber Scout Car Mk.I exterior quick start guide

Jamara VW T1 Bus Instruction

Jamara

Jamara VW T1 Bus Instruction

REVELL 68 CHEVY CHEVELLE SS 396 manual

REVELL

REVELL 68 CHEVY CHEVELLE SS 396 manual

Schumacher Pro Cat instruction manual

Schumacher

Schumacher Pro Cat instruction manual

Tamiya TT-01 TYPE E instruction manual

Tamiya

Tamiya TT-01 TYPE E instruction manual

Eduard Krupp Protze 6x4 1/48 quick start guide

Eduard

Eduard Krupp Protze 6x4 1/48 quick start guide

New Bright 61072UEP quick start guide

New Bright

New Bright 61072UEP quick start guide

Team Durango DEX410v5 manual

Team Durango

Team Durango DEX410v5 manual

Jamara Mercedes Actros Muldenkipper 2,4 GHz Instruction

Jamara

Jamara Mercedes Actros Muldenkipper 2,4 GHz Instruction

PLAYMOBIL 9536 manual

PLAYMOBIL

PLAYMOBIL 9536 manual

Atomic BZ3 instruction manual

Atomic

Atomic BZ3 instruction manual

Jamara McLaren Senna 2,4GHz instructions

Jamara

Jamara McLaren Senna 2,4GHz instructions

Aiyaplay 370-290V00 user manual

Aiyaplay

Aiyaplay 370-290V00 user manual

ZEROTRIBE Zetricks ZT1144 instruction manual

ZEROTRIBE

ZEROTRIBE Zetricks ZT1144 instruction manual

manuals.online logo
manuals.online logoBrands
  • About & Mission
  • Contact us
  • Privacy Policy
  • Terms and Conditions

Copyright 2025 Manuals.Online. All Rights Reserved.

1
INSTRUCTION MANUAL: SPY ROVER MINI 8+
NOTE: This equipment has been tested and found to comply with the limits for a Class B digital device,
pursuant to part 15 of the FCC Rules. These limits are designed to provide reasonable protection against
harmful interference in a residential installation. This equipment generates uses and can radiate radio
frequency energy and, if not installed and used in accordance with the instructions, may cause harmful
interference to radio communications. However, there is no guarantee that interference will not occur in a
particular installation. If this equipment does cause harmful interference to radio or television reception,
which can be determined by turning the equipment off and on, the user is encouraged to try to correct
the interference by one or more of the following measures:
- Reorient or relocate the receiving antenna.
- Increase the separation between the equipment and receiver.
- Connect the equipment into an outlet on a circuit different from that to which the receiver is connected.
- Consult the dealer or an experienced radio/TV technician for help
Changes or modifications not expressly approved by the party responsible for compliance could void the
user's authority to operate the equipment. This device complies with Part 15 of the FCC Rules. Operation
is subject to the following two conditions:
(1) this device may not cause harmful interference, and
(2) this device must accept any interference received, including interference that may cause undesired
operation.
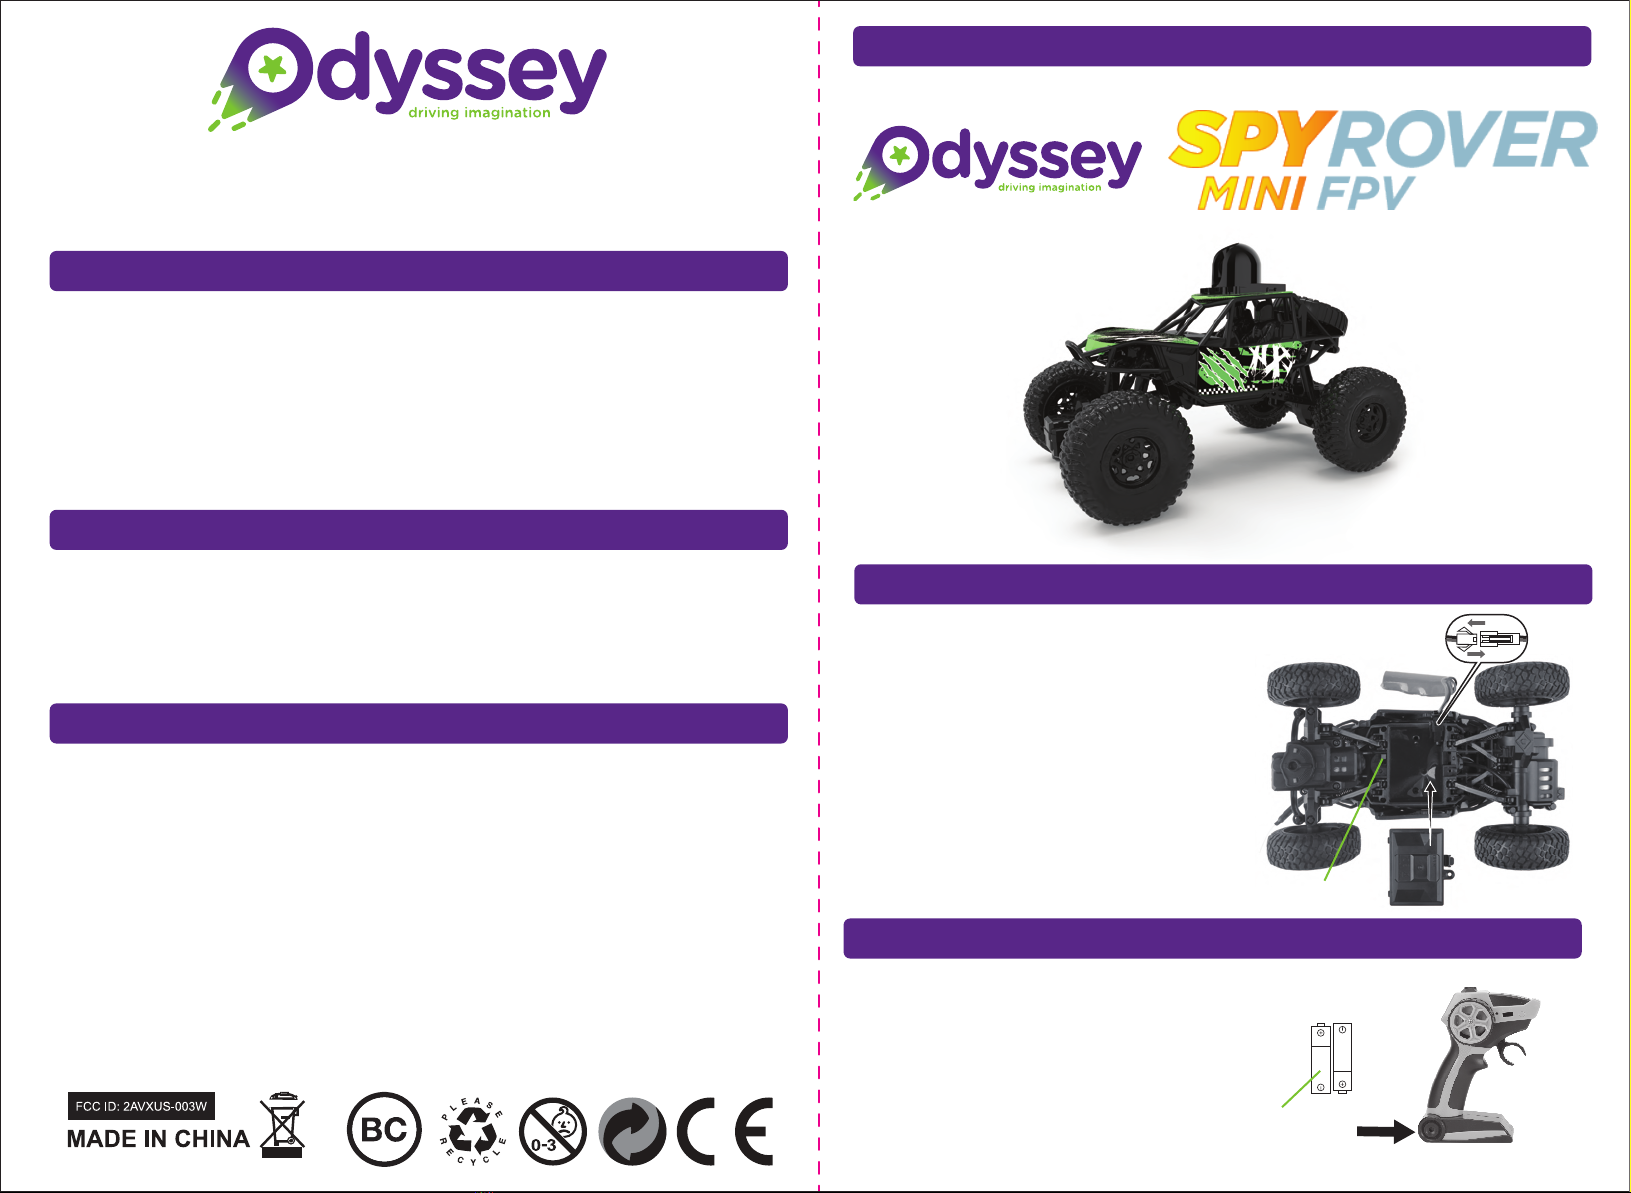
SETTING UP THE SPY ROVER MINI
SETTING UP THE REMOTE CONTROL
1. Turn off the power switch.
2. Using a phillips screwdriver
open the battery compartment.
3. Connect the battery wire to the Spy Rover
Mini’s connector as shown on the diagram.
4. Close the battery compartment and
switch the power switch to On.
FOR
AGES
1. Using a phillips screwdriver open the
battery cover on the base of the
controller.
2. Install 2x new AA batteries taking care
to match the correct polarity (+/-).
3. Close the battery cover.
Power Switch
AA Batteries
4
CARE & MAINTENANCE
NOT FOLLOWING THESEPRECAUTIONS WILL VOID YOUR WARRANTY
CAUTIONS & WARNINGS
•Suitable for ages 8 and up. Adult supervision is always recommended.
•This product contains small parts which are a choking hazard. Keep away from small children.
•Manufacturers and dealers disclaim all responsibility for damage caused by misuse.
•Keep hair and loose clothing away from the Spy Rover Mini when powered on.
• If Spy Rover Mini will be stored and unused for an extended period of time, please remove the batteries.
• Check the batteries regularly for potential leakage or corrosion that may occur.
• When installing the batteries carefully follow the polarity marking +/-.
• Do not mix different battery types.
•Remove exhausted or drained batteries.
•Do not exceed charging volts and amps of 5v1a.
•Do not leave charger connected or charge for more than 1hr.
• Do not submerge the unit in any liquids.
• Keep the unit dry.
•Do not place the unit near powerful, un-shielded magnets.
•Do not expose the unit to extreme hot or cold temperatures.
•Do not hit, drop, or smash the unit with extreme force.
•Do not disassemble the unit for any reason.
NOT FOLLOWING THESE PRECAUTIONS WILL VOID YOUR WARRANTY.
For Customer Service please email:
Care@OdysseyToys.com
Please note the units model number and name in your email:
Model no. ODY-110C •Spy Rover Mini
www.OdysseyToys.com
2 3
CHARGING THE SPY ROVER MINI’S BATTERY OPERATING THE SPY ROVER MINI
USING WIFI FPV
Tip. For best results the car needs to be within a 66 foot range of the controller.
Tip. If your Spy Rover Mini
pulls to the left or right when
driving forwards without
steering from the controler,
you should adjust the
steering trim.
Tip. Full charge takes up to 1.5hrs
iOS Google
1. Remove the battery from the Spy
Rover Mini as shown in the setting up
instructions.
2. Connect the Spy Rover Mini battery to
the USB charging cord connector.
3. Plug the USB cord into a 5v1a USB charger.
4. The charger light will turn on to indicate charging. When the charger light
goes out charging is complete and you can reinstall the battery in the Spy Rover
Mini.
Vehicle Functions Controller Functions
Spy Rover Mini Movement
Spy Rover Mini Steering Trim Adjusment
If the vehicle pulls to the left
adjust the trim setting to the
right until the vehicle travels
in a straight line.
If the vehicle pulls to the
right adjust the trim setting
to the left until the vehicle
travels in a straight line.
Tip 1. The camera will automatically disconnect when the battery is low.
Tip 2. The camera signal range is approx. 66ft max.
The Spy Rover Mini comes equipped with a WIFI
enabled First Person Video (FPV) camera. Follow these
steps to set up:
1. Install the phone holder on the top of the remote
controller.
2. Use the QR link to download the “Spy Rover Mini” app
from the Android or iTunes store.
3. Turn the Spy Rover Mini on, open WIFI
settings on your phone and connect to the
“SpyRoverFPV_xxxx” network.
4. Once connected open the app and drive!
Exit
Take Photo
Record Video
View Photo/Video
Split Screen VR
Drive Car
Flip Image
Tilt to Drive
Zoom
Image Fx
Gesture
photography
Forward: Pull down on the throttle
to drive the vehicle forwards.
Adjust the throttle position to
control the speed of the vehicle.
Forward & Turn Left: Pull down on
the throttle while turning the
steering wheel to the left.
Reverse & Turn Left: Push up on the
throttle while turning the steering
wheel to the left.
Forward & Turn Right: Pull down on
the throttle while turning the
steering wheel to the right.
Reverse & Turn Right: Push up on
the throttle while turning the
steering wheel to the right.
Reverse: Push up on the throttle to
drive the vehicle in reverse.
Adjust the throttle position to
control the speed of the vehicle.
Steering Trim
Adjustment
Vehicle
On/Off Switch
Steering Wheel
(Left & Right Turning)
Forward & Reverse Throttle
Controller
On/Off Switch
Transmit
Indicator Light
USB Charging Cord
Spy
Rover
Mini
LiPo
400mAh 3.7V