OEG 310773010 User manual

www.oeg.net
D
IT
NL
FR
GB
PL
Feuchtemessgerät
Gebrauchsanweisung
Moisture analyser
Operating Instructions
Hygromètre
Mode d’emploi
Wilgotnościomierz
Instrukcja użytkowania
Igrometro portatile
Istruzioni per l’uso
Vochtigheidsmeter
Gebruikshandleiding

Inhalt
Allgemeine Informationen
Sorgfältiger Umgang und
Gebrauch von Batterien
Lieferumfang
Teilebezeichnung
Technische Daten
Bestimmungsgemäße
Verwendung
Vorbereitung für die
Inbetriebnahme
Batterien einsetzen/wechseln
Überprüfen der Kalibrierung
Inbetriebnahme
Ein- und Ausschalten
Symbole am Display
.
.
.
.
.
.
.
.
.
.
.
.
Messen der Materialfeuchte
Richtwerttabelle für
Holzfeuchte
Baustofftabelle
Gürtel-Clip
Temperaturmessung
Ausleuchtung dunkler
Messstellen
Automatische Ausschaltung
Batteriewechsel
Wartung, Reinigung und
Entsorgung
Reinigung
Verbrauchte Batterien
Recycling
.
.
.
.
.
.
.
.
.
.
.
.
OEG Feuchtemessgerät
D
2

1.0 Allgemeine Informationen
Achtung Verletzungsgefahr! Die Messspitzen sind scharf.
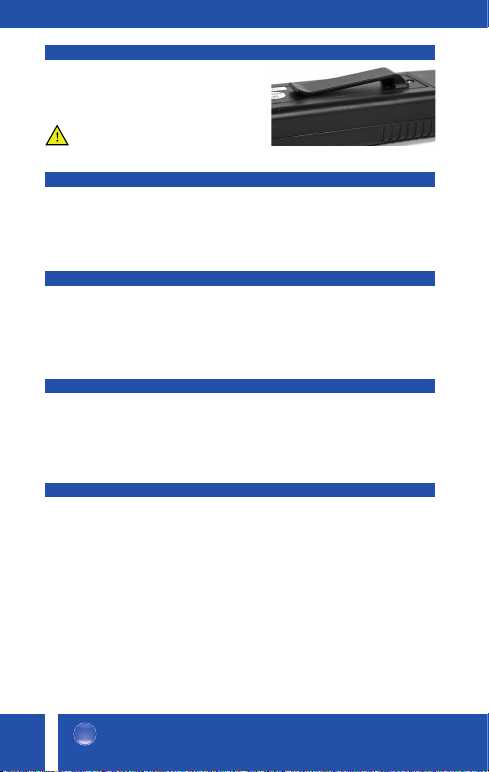
• Tragen Sie das Gerät niemals ohne Schutzkappe am Gürtel.
• Lesen Sie diese Anleitung sorgfältig, um einen sicheren Umgang mit dem Gerät zu gewähr-
leisten. Bewahren Sie die Anleitung mit dem Gerät auf.
• Kontrollieren Sie das Gerät vor jedem Gebrauch auf einwandfreien Zustand.
Sollten Sie Zweifel haben, kontaktieren Sie bitte einen Fachmann oder den Hersteller.
• Benutzen Sie niemals ein fehlerhaftes Gerät.
• Im Falle von Beschädigungen lassen Sie das Gerät nur von autorisiertem Fachpersonal
und nur mit Originalteilen reparieren. Damit erhalten Sie die Garantieansprüche und die
Sicherheit des Messgerätes.
• Legen Sie niemals elektrische Spannung an das Gerät an, da dies zur Beschädigung des
Gerätes führen kann.
•In Umgebungen mit explosiven oder entflammbaren Gasen darf das Gerät nicht benutzt
werden.
• Gehen Sie sorgsam mit dem Messgerät um. Vermeiden Sie harte Stöße oder Schläge. Las-
sen Sie das Gerät nicht fallen.
• Zerlegen Sie das Gerät nicht.
•Bewahren Sie das Gerät an einem sauberen und trockenen Ort auf.
• Bringen Sie das Gerät nicht in Kontakt mit Wasser, Schmutz und Staub.
• Zur Reinigung des Gerätes benutzen Sie ein trockenes oder leicht feuchtes Tuch und nur
milde Reinigungsmittel, keinesfalls Scheuer- oder Lösungsmittel.
• Schauen Sie nicht in das LED-Licht, es kann Ihre Augen blenden und schädigen.
• Dieses Gerät ist nicht dafür bestimmt, von Personen mit eingeschränkten physischen,
sensorischen oder geistigen Fähigkeiten und/oder ohne Fachkenntnis
benutzt zu werden. Das Gerät gehört nicht in Kinderhände.
2.0 Sorgfältiger Umgang und Gebrauch von Batterien
•Bei falscher Anwendung kann Batterieflüssigkeit aus der Batterie austreten. Vermeiden
Sie den Kontakt. Bei zufälligem Hautkontakt mit Wasser abspülen. Wenn austretende Flüssig-
keit in die Augen kommt, nehmen Sie zusätzlich ärztliche Hilfe in Anspruch. Austretende Bat-
terieflüssigkeit kann zu Hautreizungen und Verbrennungen führen.
• Nicht mit dem Hausmüll entsorgen. Zur Wiederverwertung oder umweltverträglichen Ent-
sorgung, geben Sie Batterien nur bei einer Wertstoffsammelstelle ab.
• Batterien nicht ins Feuer werfen, Explosionsgefahr.
• vor Hitze (z. B. Heizung) oder Sonneneinstrahlung schützen.
• niemals wieder aufladen! Explosionsgefahr!
• von Kindern fernhalten! Sofort einen Arzt aufsuchen, wenn eine Batterie verschluckt wurde.
• nicht ins Feuer werfen, kurzschließen oder auseinander nehmen.
• Batterie- und Gerätekontakte vor dem Einlegen bei Bedarf reinigen.
• Nur Batterien des gleichen Typs einsetzen, keine unterschiedlichen Typen oder
gebrauchte und neue Batterien miteinander verwenden.
OEG Feuchtemessgerät D3

3.0 Lieferumfang
• Feuchtemessgerät
• x Batterien R/AAA , V
• Bedienungsanleitung
6.0 Bestimmungsgemäße Verwendung
Das Gerät ist zur Messung der Restfeuchte von Holzwerkstoffen und Baumaterialien vorgese-
hen, wie zum Beispiel Schnittholz, Mauerwerk, Beton oder Estrich. Dazu werden die beiden
Messspitzen an das Material gehalten bzw. gedrückt, der Messwert erscheint auf der Anzeige.
Das Gerät darf baulich nicht verändert werden.
Beachten Sie unbedingt die Sicherheitshinweise und lesen Sie diese vor Gebrauch sorgfältig
durch. Bewahren Sie die Bedienungsanleitung gut auf, sie ist bei Weitergabe des Gerätes mit
weiterzureichen.
Eine andere Verwendung als zuvor beschrieben ist nicht bestimmungsgemäß und kann zu
Sach- bzw. Personenschaden führen.
OEG Feuchtemessgerät
D
4
4.0 Teilebezeichnung
Messspitzen
Display
Einschalttaste (ON / SET)
Taste für LED-Licht
LED-Licht
Schutzkappe
Kontakte zum Gerätetest
Batteriefach und Gürtel-Clip (Geräterückseite)
5.0 Technische Daten
1
234
5
6
7
8
Messbereiche bis % für Holzwerkstoffe, Baumaterialien siehe
„Baustofftabelle“ bis °C für Temperatur (oder °F bis °F)
Auflösung % für Holzwerkstoffe, , % vom Anzeigewert für Baumaterialien,
°C bzw. °F für die Temperatur
Genauigkeit Holzwerkstoffe: ± % im Bereich bis %,
± % im Bereich ab %
Baumaterial: , vom Anzeigewert
, vom Anzeigewert ab ,
Stromversorgung Batterien ,V R/AAA
Arbeitsbereich Temperatur: bis °C
(Umgebung) Luftfeuchte < %
Lagerbedingungen Temperatur: - bis °C
Luftfeuchte < %
Beleuchtung LED, weiß, freie Gruppe (Risikogruppe ) nach EN

7.1 Batterien einsetzen / wechseln
OEG Feuchtemessgerät D5
7.1 Vorbereitung für die Inbetriebnahme
Das Bau- und Holzfeuchte-Messgerät ist batteriebetrieben. Bei der ersten Inbetriebnahme,
wenn die Batterieanzeige aufleuchtet oder falls sich das Gerät mangels Spannung nicht mehr
einschalten lässt, sind die Batterien einzusetzen bzw. zu erneuern. Gehen Sie wie folgt vor:
• Lösen Sie die Schraube am Batteriefachdeckel
und entfernen Sie den Deckel.
• Setzen Sie vier neue , V R/AAA Batterien
ins Batteriefach ein. Achten Sie dabei auf die
Polaritätsmarkierung im Batteriefach. Verpolen
Sie die Batterien nicht.
• Legen Sie den Batteriedeckel wieder auf und
befestigen Sie diesen mit der Schraube.
Wenn das Gerät längere Zeit nicht verwendet wird,
sollten die Batterien entnommen werden.
Wir empfehlen stets alle vier Batterien gleichzeitig zu wechseln. Bei der Verwendung von alten
und neuen Batterien kann eine gegenseitige Entladung stattfinden.
Verwenden Sie stets Batterien des angegebenen Typs.
Weitere Hinweise zur Verwendung und Pflege von Batterien finden Sie im Abschnitt
Wartung und Reinigung.
7.2 Überprüfen der Kalibrierung
An der Schutzkappe sind vier Kontakte integriert, zwei sind mit „B“ und zwei sind mit „T“
bezeichnet. Mithilfe dieser Kontakte kann die richtige Funktion des Geräts überprüft werden.
• Schalten Sie das Gerät ein, indem Sie die
Einschalttaste (ON / SET) drücken.
• Entfernen Sie die Schutzkappe.
• Berühren Sie mit den Prüfspitzen die beiden
Kontakte „T“, sollte die Anzeige auf der
linken Skala % ± sein.
• Berühren Sie die Kontakte „B“, sollte die
gesamte Balkenanzeige blinken. Sind diese
Bedingungen erfüllt, kann das Messgerät für
weitere Messungen verwendet werden.
• Setzen Sie die Schutzkappe wieder auf das Gerät.

OEG Feuchtemessgerät
D
6
8.1 Ein- und Ausschalten
8.1 Inbetriebnahme
• Drücken Sie die Einschalttaste (ON/SET)
um das Gerät einzuschalten. Im Display
erscheinen die Messskalen und die
Temperaturanzeige.
• Um die LED-Beleuchtung einzuschalten
halten Sie die LED-Licht-Taste ca. Sekunden
gedrückt.
• Um die LED-Beleuchtung auszuschalten drücken
Sie noch einmal die LED-Licht-Taste.
• Das Gerät schaltet sich ca. Sekunden nach der
letzten Messung, bzw. Sekunden nach ausschalten
des LED-Lichtes, automatisch aus.
Wenn das Gerät längere Zeit nicht verwendet wird, entfernen Sie die Batterien.
8.2 Symbole im Display
Anzeige bei zu schwacher
Batterie
Linke Skala zur Messung
der Holzfeuchte in %
Leicht ablesbare
Balkenanzeige
Anzeige der Temperatur
in
°C oder °F
Rechte Skala zur Messung
der Feuchte in Baustoffen

8.3 Messen der Materialfeuchte
• Schalten Sie das Gerät ein (Taste ON / SET),
entfernen Sie die Schutzkappe und drücken
Sie die Messspitzen in bzw. an das zu messende
Material. Achtung! Schlagen Sie die Messspitzen
nicht mit Schwung ein.
• Lesen Sie den Messwert auf der entsprechenden
Skala ab, links für Holz und rechts für Mauerwerk.
Die Feuchte der Baumaterialien entspricht der
nachfolgenden Tabelle.
• Auf der linken Skala für Holzwerkstoffe entspricht
jeder Teilstrich der Balkenanzeige einem Prozent,
auf der rechten Skala ist die Unterteilung , %.
• Ist die zu messende Feuchte außerhalb des Bereichs,
so blinkt die gesamte Balkenanzeige.
• Nach abgeschlossener Messung setzen Sie
die Schutzkappe wieder auf das Gerät.
Der Brennwert von Holz variiert je nach Holzart. Um mit dem bestmöglichen Brennwert der
jeweiligen Holzart zu Heizen, ist das Holz ausreichend abzulagern und zu trocknen.
8.4 Richtwerttabelle für Holzfeuchte
OEG Feuchtemessgerät D7
– % gut abgelagertes Holz, gut zum Heizen geeignet
– % bedingt zum Heizen geeignetes Holz
– % zum Heizen nicht geeignet. Holz muss weiter abgelagert /
getrocknet werden
8.5 Baustofftabelle (Feuchtewerte in %)
Anzeigewert Zement- Zement- Beton Gips- Gasbeton
rechte Skala mörtel estrich B putz (Hebel)
,
, , , ,
, , ,
, , , ,
, , , ,
, , , ,
, , , , ,
, , , , , ,
, ,
, ,
Nass Trocken
Anmerkung: Verschiedene Faktoren wie Temperatur und Eindringtiefe
der Messspitzen können den Messwert beeinflussen. Verwenden Sie das
Messgerät nicht für gewerbliche oder industrielle Referenzmessungen.

8.6 Gürtel-Clip
Das Gerät ist mit einem praktischen
Clip ausgestattet, der das Tragen am
Gürtel ermöglicht.
Achtung! Scharfe Messspitzen!
Tragen Sie das Gerät niemals ohne
Schutzkappe am Gürtel.
8.7 Temperaturmessung
Nach dem Einschalten des Gerätes wird im Display oben die aktuelle Temperatur angezeigt.
Durch Drücken und Halten der Einschalttaste (ON / SET) für etwa Sekunden kann die An-
zeige der Temperatur zwischen °C und °F umgeschaltet werden.
8.8 Ausleuchtung dunkler Messstellen
Mit der roten Taste (Symbol LED) kann jederzeit das LED-Licht eingeschaltet werden.
Dazu drücken und halten Sie die Taste für etwa Sekunden. Um das Licht auszuschalten,
drücken Sie die Taste noch einmal.
8.9 Automatische Ausschaltung
Wird das Gerät für ca. Sekunden nicht benutzt, so schaltet es sich automatisch aus. Das
Wiedereinschalten erfolgt durch Drücken der Einschalttaste (ON / SET). Bei eingeschaltetem
LED-Licht bleibt das Gerät eingeschaltet, die automatische Abschaltung ist unterbunden.
8.10 Batteriewechsel
Erscheint das Batterie-Symbol links oben in der Anzeige, so wechseln Sie bitte die Batterien
aus. Dazu gehen Sie wie beim Einlegen der Batterien vor, siehe Seite . Beim Auswechseln der
Batterien tauschen Sie immer alle vier Batterien zugleich aus, um ungleichmäßige Entladung
und eventuelle Beschädigungen durch Auslaufen einer Batterie zu vermeiden.
OEG Feuchtemessgerät
D
8

OEG Feuchtemessgerät D9
9.1 Reinigung
9.1 Wartung, Reinigung und Entsorgung
Reinigen Sie das Gerät bei Bedarf mit einem weichen, leicht feuchten Tuch. Halten Sie das
Gerät sauber und trocken. Verwenden Sie keine scheuernden oder chemischen Reinigungsmit-
tel. Wenn Sie das Gerät länger nicht benutzen, so entfernen Sie die Batterien, um eventuelle
Schäden durch Auslaufen der Batterien zu vermeiden. Ansonsten ist das Gerät wartungsfrei.
9.2 Verbrauchte Batterien
Verbrauchte Batterien sollten nicht im Gerät verbleiben, da sie korrodieren und ggf.
Chemikalien freigesetzt werden können, die gesundheitsschädlich sind und das Gerät
beschädigen können.
Beschädigte oder ausgelaufene Batterien können bei Berührung mit der Haut Verätzungen
verursachen, tragen Sie daher geeignete Handschuhe und eine Schutzbrille.
9.3 Recycling
Dieses Symbol weist darauf hin, dass dieses Produkt gemäß Richtlinie über Elektro- und
Elektronik-Altgeräte (//EU) und nationalen Gesetzen nicht über den Hausmüll
entsorgt werden darf. Dieses Produkt muss bei einer dafür vorgesehenen Sammelstelle
abgegeben werden. Dies kann z.B. durch Rückgabe beim Kauf eines ähnlichen Produkts
oder durch Abgabe bei einer autorisierten Sammelstelle für die Wiederaufbereitung von
Elektro- und Elektronik-Altgeräten geschehen. Der unsachgemäße Umgang mit Altgerä-
ten kann aufgrund potentiell gefährlicher Stoffe, die häufig in Elektro- und Elektronik-
Altgeräten enthalten sind, negative Auswirkungen auf die Umwelt und die menschliche
Gesundheit haben. Durch die sachgemäße Entsorgung dieses Produkts tragen Sie au-
ßerdem zu einer effektiven Nutzung natürlicher Ressourcen bei. Informationen zu Sam-
melstellen für Altgeräte erhalten Sie bei Ihrer Stadtverwaltung, dem
öffentlich-rechtlichen Entsorgungsträger, einer autorisierten Stelle für die Entsorgung
von Elektro- und Elektronik-Altgeräten oder Ihrer Müllabfuhr. Entsorgen Sie auch die
Produktverpackung umweltgerecht.
Entsorgen Sie verbrauchte Batterien nicht über den normalen Hausmüll, sondern geben
Sie diese an den dafür vorgesehenen Sammelstellen (Fachhandel, Wertstoffhof) ab.
Entsorgen Sie die Verpackung in Übereinstimmung mit dem Materialtyp sowie den ört-
lichen, in Ihrem Gebiet geltenden Vorschriften.

Content
General information
Careful handling and
use of batteries
Delivery package
Parts
Technical data
Intended use
Preparation for commissioning
Inserting and replacing batteries
Checking the calibration
Commissioning
Switching on and off
Symbols on the display
Measuring the material
moisture content
.
.
.
.
.
.
.
.
.
.
.
.
.
Reference value table
for wood moisture
Material table
(Moisture values in %)
Belt clip
Temperature measurement
Illumination of dark measuring
points
Automatic switch-off
Battery replacement
Maintenance, cleaning
and disposal
Cleaning
Used batteries
Recycling
.
.
.
.
.
.
.
.
.
.
.
OEG moisture analyser
GB
10

1.0 General information
Attention: Danger of injury! The measuring tips are sharp.
• Never wear the device without a protective cap on the belt.
• Read this manual carefully to ensure safe handling of the device. Keep the Operating
Instructions together with the device.
• Check that the device is in perfect condition before use.
If in doubt, please contact an expert or the manufacturer.
• Never use a faulty device.
• In case of damage, have the device repaired by authorized service personnel and only
with original parts. This provides you with the warranty claims and the safety of the
measuring instrument.
• Never apply electrical voltage to the device as this may damage the device.
• The device must not be used in environments with explosive or flammable gases.
• Treat the meter with care. Avoid hard shocks or blows.
• Do not drop the device.
• Do not disassemble the unit.
• Store the device in a clean and dry place.
• Do not bring the unit into contact with water, dirt or dust.
• To clean the unit, use a dry or slightly damp cloth and only mild detergents,
under no circumstances abrasives or solvents.
• Before exposing the device to different room temperature, allow the device to cool
down.
• Turn off the device and let it adjust to the room temperature. The possible formation of
condensation may damage the unit under unfavourable conditions.
• Do not look into the LED light, it can dazzle and damage your eyes.
• This device is not intended for use by persons with limited physical, sensory or mental
abilities and/or without specialist knowledge. Keep out of reach of children.
2.0 Careful handling and use of batteries
• If used incorrectly, battery fluid may leak out of the battery. Avoid contact. In case of
accidental skin contact, rinse with water. If fluid leaks into your eyes, seek additional medical
attention. Leaking battery fluid can cause skin irritation and burns.
• Do not dispose of with household waste. To recycle or dispose of batteries in an
environmentally friendly manner, you should only hand them in at a recycling collection
point.
• Do not throw batteries into fire, danger of explosion.
• Protect them from heat (e. g. heating) or solar radiation.
• Do not recharge the batteries! Risk of explosion!
• Keep away from children! Immediately seek medical attention if a battery is swallowed.
• Do not throw into fire, short circuit or disassemble.
• If necessary, clean battery and device contacts before inserting.
• Use only batteries of the same type; do not use different types or used and new batteries
together.
OEG moisture analyser GB 11

3.0 Delivery package
• Moisture analyser
• x batteries R/AAA; . V
• Operating Instructions
6.0 Intended use
The device is designed for measuring the residual moisture of wood-based materials and buil-
ding materials, such as sawn timber, masonry, concrete or screed. To do this, the two measu-
ring tips are held or pressed against the material. The measured value appears on the display.
The device must not be modified.
Observe the safety instructions and read them carefully before use. Keep the operating in-
structions in a safe place and pass them on with the device.
Any use other than that described above is not in accordance with the intended purpose and
may result in damage to property or personal injury.
OEG moisture analyser
GB
12
4.0 Parts
Measuring tips
Display
Power button (ON / SET)
Button for LED light
LED light
Protective cap
Contacts for device test
Battery compartment and belt clip (rear panel)
5.0 Technical data
1
234
5
6
7
8
Measuring ranges to % for wood-based materials, for building materials,
see "Materials table". to °C for temperature (or °F to °F)
Resolution % for wood-based materials, .% of the display value for building
materials, °C or °F for the temperature
Accuracy Wood-based materials: ±% in the range up to %,
±% in the range from % onwards
Building material: . of the indicated value
. of display value from .
Power supply batteries .V R/AAA
Operating range Temperature: to °C
(environment) Humidity < %
Storage conditions Temperature: - to °C
Humidity < %
Illumination LED, white, free group (risk group ) according to EN

7.1 Inserting and replacing batteries
OEG moisture analyser GB 13
7.1 Preparation of commissioning
The moisture analyser is battery operated. The batteries must be inserted at the first use,
when the battery indicator lights up or replaced if the unit cannot be switched on due to a lack
of voltage.
Proceed as follows:
• Loosen the screw on the battery compartment and remove
the cover.
• Insert four new . V R/AAA batteries into the battery
compartment. Pay attention to the polarity marking in the
battery compartment. Do not reverse the polarity.
• Replace the battery cover and secure it with the screw.
If the unit will not be used for a
long period of time, remove the batteries.
We always recommend changing all four batteries at the same time. The use of old and new
batteries may cause mutual discharge.
Always use batteries of the specified type.
Further information on the use and care of batteries can be found under Maintenance and
cleaning.
7.2 Checking the calibration
Four contacts are integrated in the protective cap; two are marked with "B" and two with "T".
These contacts can be used to check that the device is operating properly.
• Switch on the unit by pressing the ON / SET button.
• Remove the protective cap.
• If you touch the two contacts "T" with the probes,
the display on the left scale should be %±.
• If you touch the "B" contacts, the entire bar
graph should flash. If these conditions are met,
the meter can be used for further measurements.
• Put the protective cap back onto the analyser.

OEG moisture analyser
GB
14
8.1 Switching on and off
8.1 Commissioning
• Press the power button (ON/SET) to turn on
the analyser. The display indicates the
measuring scales and the temperature.
• To switch on the LED lighting, press the
LED light button for about seconds.
• To turn off the LED lighting, press the LED light
button again.
• The analyser switches off automatically approx.
seconds after the last measurement or seconds
after switching off the LED light.
• If the unit will not be used for a long period of time,
remove the batteries.
8.2 Symbols on the display
Low battery indicator
Left scale for measuring the
wood moisture in %.
Easy-to-read bar graph
Display of temperature in
°C or °F
Right scale for measuring
the moisture of building
materials

8.3 Measuring the material moisture content
• Switch on the instrument (ON / SET button),
remove the protective cap and push the measuring
tips in or on the material to be measured. Attention!
Do not force the measuring tips into the wood.
• Read the measured value from the corresponding
scale, on the left for wood and on the right for
masonry. The moisture content of the building
materials corresponds to the following table.
• On the left-hand scale for wood-based material,
each graduation line of the bar graph corresponds
to one percent, on the right-hand scale the
subdivision is . %.
• If the moisture to be measured is outside the range,
the entire bar will flash.
• Place the protective cap back on the analyser after
the measurement.
The heating value of wood varies depending on the type of wood. In order to use a certain
type of wood at its best possible heating value, the wood must be sufficiently stored and
dried.
8.4 Reference value table for wood moisture
OEG moisture analyser GB 15
– % Well dried wood, suitable for heating
– % Only partly suitable for heating
– % Not suitable for heating.
Further drying required.
8.5 Material table (moisture values in %)
Display values Cement- Cement- Concrete Gypsum- Aerated
right scale mortar screed B plaster concrete
.
. . . .
. . .
. . . .
. . . .
. . . .
. . . . .
. . . . . .
. .
. .
Wet Dry
Note: Various factors such as temperature and penetration depth of the
measuring tips can influence the measured value. Do not use the analyser
for commercial or industrial reference measurements.

8.6 Belt clip
The device is equipped
with a practical clip that allows it
to be worn on the belt.
Attention! Sharp measuring tips!
Do not wear the device on a belt
without a protective cap.
8.7 Temperature measurement
After switching on the unit, the current temperature is shown in the top corner of the display.
By pressing and holding the ON/SET button for about seconds, the temperature display can
be switched between °C and °F.
8.8 Illumination of dark measuring points
Use the red button (symbol LED) to switch on the LED light. Press and hold the button for
about seconds. Press the button again, to turn off the light.
8.9 Automatic switch off
If the device is not used for approx. seconds, it will switch off automatically.
Press the ON/SET button to switch it on again. With the LED light on, the analyser remains
switched on and automatic switch-off is disabled.
8.10 Battery replacement
If the battery symbol appears in the upper left corner of the display, please replace the
batteries. When replacing the batteries, always replace all four batteries at the same time to
avoid uneven discharge and possible damage caused by battery leakage.
OEG moisture analyser
GB
16

OEG moisture analyser GB 17
9.1 Cleaning
9.1 Maintenance, cleaning and disposal
If necessary, clean the unit with a soft, slightly damp cloth. Keep the unit clean and dry.
Do not use abrasive or chemical cleaners. If you do not use the unit for a longer period of time,
remove the batteries to avoid damage caused by battery leakage. Otherwise, the device is
maintenance-free.
9.2 Used batteries
Used batteries should not remain in the analyser as they can corrode and may release
chemicals that are harmful to health and can damage the device. Remove the batteries
from the analyser if you do not use it for a longer period of time. Damaged or leaking
batteries may cause acid burns if they come into contact with skin, therefore wear suitable
gloves and safety goggles.
9.3 Recycling
This symbol indicates that this product may not be disposed of with household waste in
accordance with the Waste Electrical and Electronic Equipment (WEEE) Directive
(//EC) and national laws. This product must be delivered to a designated
collection point. This can be done, for example, by returning the product when a similar
product is purchased or by returning it to an authorised collection point. Improper use
of WEEE can have a negative impact on the environment and human health due to
potentially hazardous substances often present in WEEE. By disposing of this product
properly, you also contribute to the effective use of natural resources. Information on
collection points for waste equipment can be obtained from your city administration,
the public waste management authority, an authorised information point for the
disposal of WEEE or your waste disposal company. Dispose of the product packaging in
an environmentally friendly manner.
Do not dispose of used batteries with normal household waste, but return them to the
designated collection points (shop, recycling centre).
Dispose of the packaging in accordance with the type of material and local regulations
applicable in your area.

Contenu
Informations générales
Utilisation soigneuse des piles
Fournitures
Représentation de l’appareil
Caractéristiques techniques
Utilisation prévue de l’appareil
Préparations pour la mise
en service
Insertion/remplacement
des piles
Vérification du calibrage
Mise en service
Allumer/Eteindre l’appareil
Symboles sur l’écran
.
.
.
.
.
.
.
.
.
.
.
.
Mesure de l’humidité
des matériaux
Tableau des données de
référence pour l’humidité du bois
Tableau des matériaux de
construction (humidité
résiduelle en %)
Clip ceinture
Mesure de température
Eclairage de points de mesure
sombres
Désactivation automatique
Changement des piles
Entretien, nettoyage et
élimination des déchets
Nettoyage
Piles usagées
Recyclage
.
.
.
.
.
.
.
.
.
.
.
.
OEG Hygromètre
FR
18

1.0Informations générales
Attention! Risque de blessure! Les pointes de mesure sont acérées.
• Ne portez jamais l’appareil sur la ceinture sans le capot de protection.
• Lisez attentivement ce manuel pour une maîtrise sûre de cet appareil. Conservez ce manuel
avec l’appareil.
• Vérifiez le bon fonctionnement de l’appareil avant chaque utilisation.
En cas de doute, contactez un professionnel ou le revendeur.
• N’utilisez jamais un appareil défectueux.
• En cas de dégâts de l’appareil, seul du personnel qualifié doit réparer l’appareil en
utilisant des pièces originales. Ceci préserve vos droits de garantie et la sécurité de votre
appareil de mesure.
• Ne mettez jamais l’appareil sous tension, car ceci peut endommager l’appareil.
• N’utilisez pas l’appareil dans des milieux à risque avec présence possible de gaz explosifs
ou inflammables.
• Manipulez l’appareil avec précaution. Evitez des chocs. Ne laissez pas tomber l’appareil.
• Ne désassemblez pas l’appareil.
• Conservez l’appareil dans un endroit propre et sec.
• N’exposez pas l’appareil à l’eau, aux salissures ni à la poussière.
• Utilisez un chiffon sec ou légèrement humide et des détergents doux pour nettoyer
l’appareil. N’utiliser en aucun cas des nettoyants abrasifs ou des dissolvants.
• Avant d’exposer l’appareil à une variation de température ambiante, maintenez
l’appareil à la température ambiante en état éteint. Dans des circonstances défavorables,
la formation éventuelle d’eau de condensation peut endommager l’appareil.
• Ne regardez pas dans la lumière LED, ceci peut éblouir et endommager vos yeux.
• Cet appareil n’est pas destiné à être utilisé par des personnes de capacité physique,
sensorielle ou mentale limitée et/ou sans connaissances spécialisées. L’appareil ne doit
pas être laissé à la portée des enfants.
2.0 Utilisation soigneuse des piles
• En cas d’une utilisation incorrecte, il se peut que du liquide sorte de la pile. Evitez le
contact avec ce liquide. En cas de contact avec la peau, rincez à l’eau. En cas de contact du
liquide avec les yeux, veuillez consulter en plus un médecin. Du liquide de pile peut
provoquer des irritations de peau et des brûlures.
• Ne jetez pas les piles avec les ordures ménagères. Vous pouvez ramener les piles usagées
au point de collecte conformément à la réglementation locale pour le recyclage et
l’élimination respectueuse de l’environnement.
• Ne jetez pas les piles au feu, risque d’explosion.
• Tenez les piles à l’abri de la chaleur (par ex. le chauffage) et des rayons de soleil.
• Ne rechargez jamais les piles! Risque d’explosion!
• Tenir hors de la portée des enfants! En cas de d’ingestion d’une pile, faites appel à un
médecin.
• Ne jetez pas les piles au feu, ne faites pas de court-circuit sur les piles, ne désassemblez
pas les piles.
• Si nécessaire, nettoyez les contacts des piles et de l’appareil avant d’insérer les piles.
• Utilisez des piles de même type uniquement, n’utilisez pas des piles de types différents ni
des piles usagées. N’utilisez pas des piles usagées avec des piles neuves.
OEG Hygromètre FR 19

3.0 Fournitures
• Hygromètre
• x piles R/AAA; , V
• Mode d’emploi
6.0 Utilisation prévue de l’appareil
L’appareil est utilisé pour mesurer l’humidité résiduelle dans les matériaux en bois ou
matériaux de construction, comme par exemple le bois de sciage, la maçonnerie, le béton
ou la chape. Pour mesurer, tenez ou poussez les deux pointes de mesure au matériau, la valeur
mesurée est affichée.
Aucune modification technique ne doit être effectuée sur l’appareil.
Respectez et lisez attentivement les consignes de sécurité avant la mise en service de
l’appareil. Conservez le présent mode d’emploi et donnez-le lors d’une transmission de
l’appareil à un tiers.
N’utilisez jamais l’appareil pour un usage différent de celui pour lequel il a été conçu.
Ceci peut entrainer des dommages matériels et corporels.
OEG Hygromètre
FR
20
4.0 Représentation de l’appareil
. Pointes de mesure
. Ecran
. Touche d’allumage (ON/SET)
. Touche pour lumière LED
. Lumière LED
. Capot de protection
. Contacts pour vérification de l’appareil
. Compartiment à piles et clip ceinture (dos de l’appareil)
5.0 Caractéristiques techniques
1
234
5
6
7
8
Plages de mesure – % pour matériaux en bois Matériaux de construction voir
«Tableau des matériaux de construction»
– °C pour la température (ou °F – °F)
Résolution % pour matériaux en bois, , % de la valeur d’affichage pour
matériaux de construction, °C ou °F pour la température
Précision Matériaux en bois: ±% dans la plage jusqu’à %,
±% dans la plage à partir de %
Matériaux de construction: , de la valeur d’affichage,
, de la valeur d’affichage à partir de ,
Alimentation électrique piles ,V R/AAA
Plage de travail Température: bis °C
(ambiance) Humidité d’air: < %
Conditions de stockage Température: - bis °C
Humidité d’air: < %
Eclairage LED, blanche, groupe libre (groupe de risque ) selon EN
Table of contents
Languages:
Other OEG Measuring Instrument manuals
Popular Measuring Instrument manuals by other brands

brennenstuhl
brennenstuhl FL Duo operating instructions

Extech Instruments
Extech Instruments 451112 user guide

INTEGRA Metering
INTEGRA Metering AMTRON S3 Installation and operating instructions

Apera Instruments
Apera Instruments LabSen 243-6 user manual

JB Systems
JB Systems Polar Operation manual

Hilti
Hilti HILTI PD-C manual