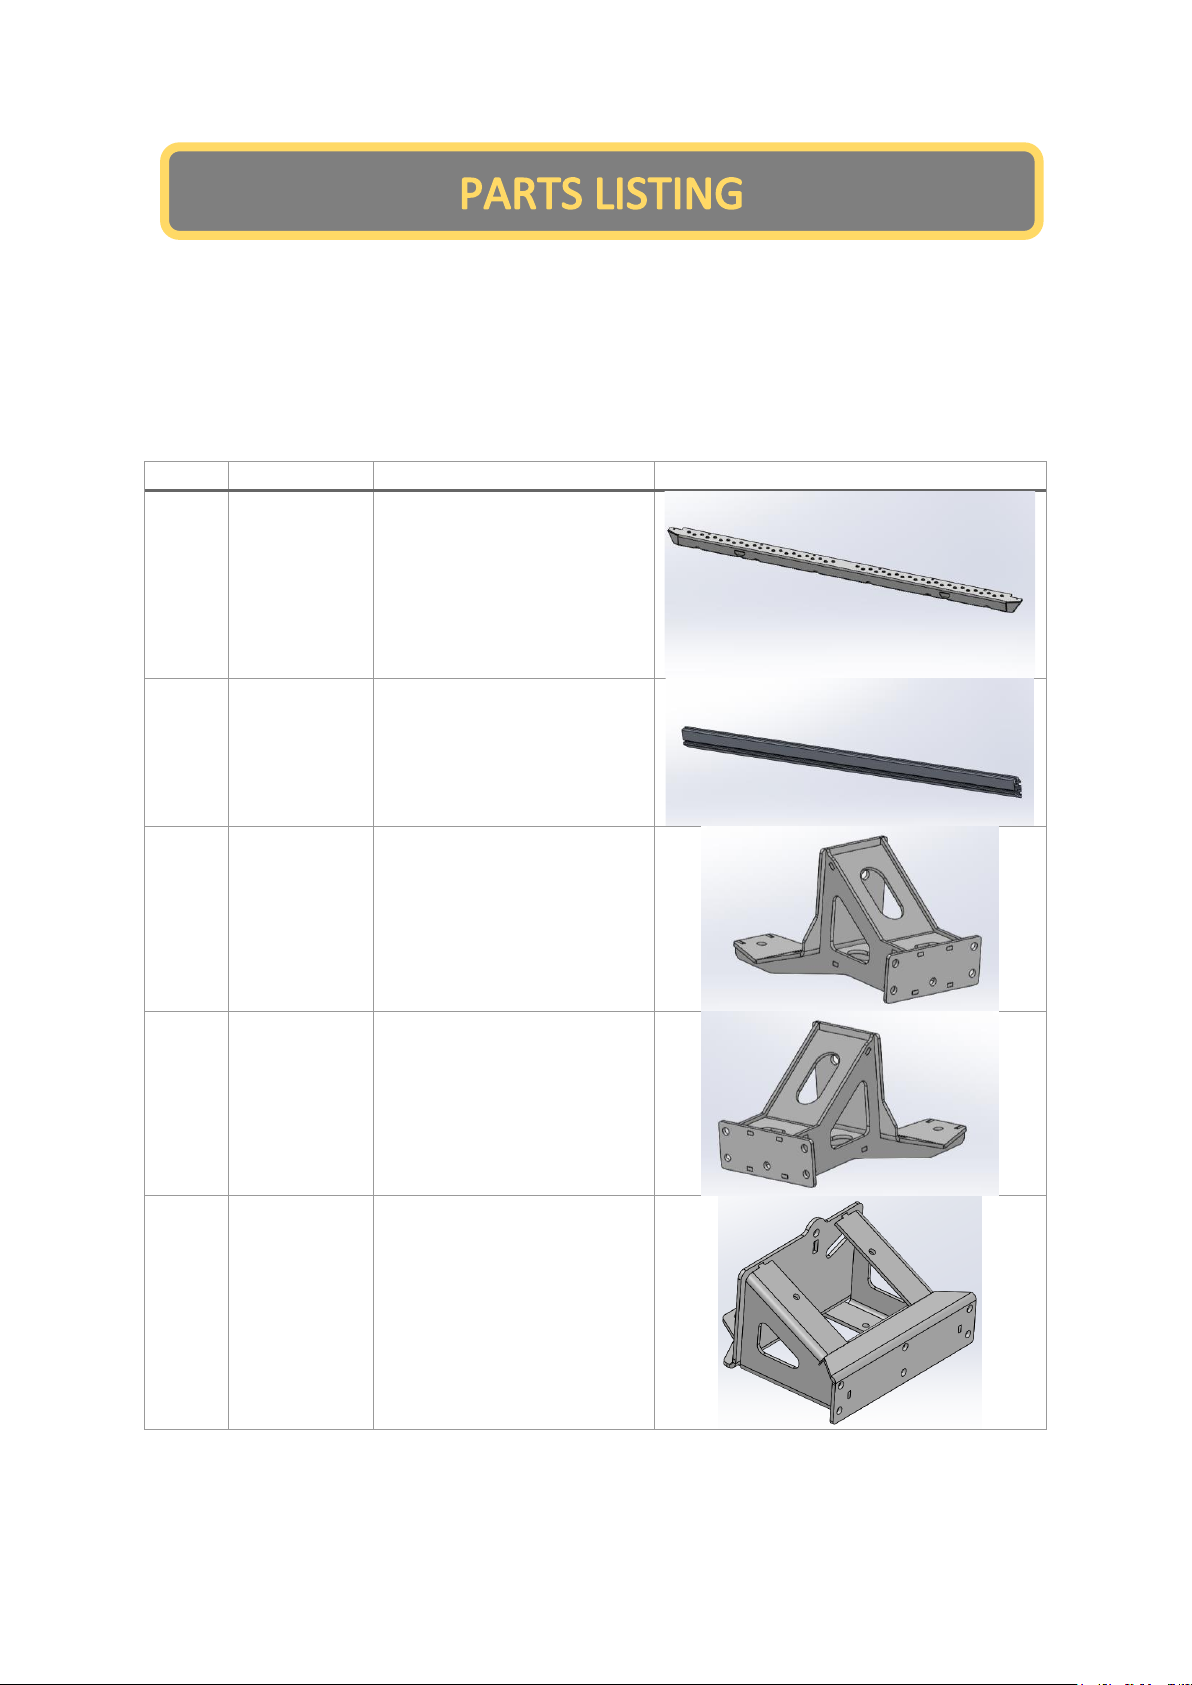
Offroad Animal RS-TLC-200-15-ASM0 2015+ Toyota Landcruiser 200 Series
Fitting Instruction Rock Sliders
REV B 13/5/20 Page 1of 30
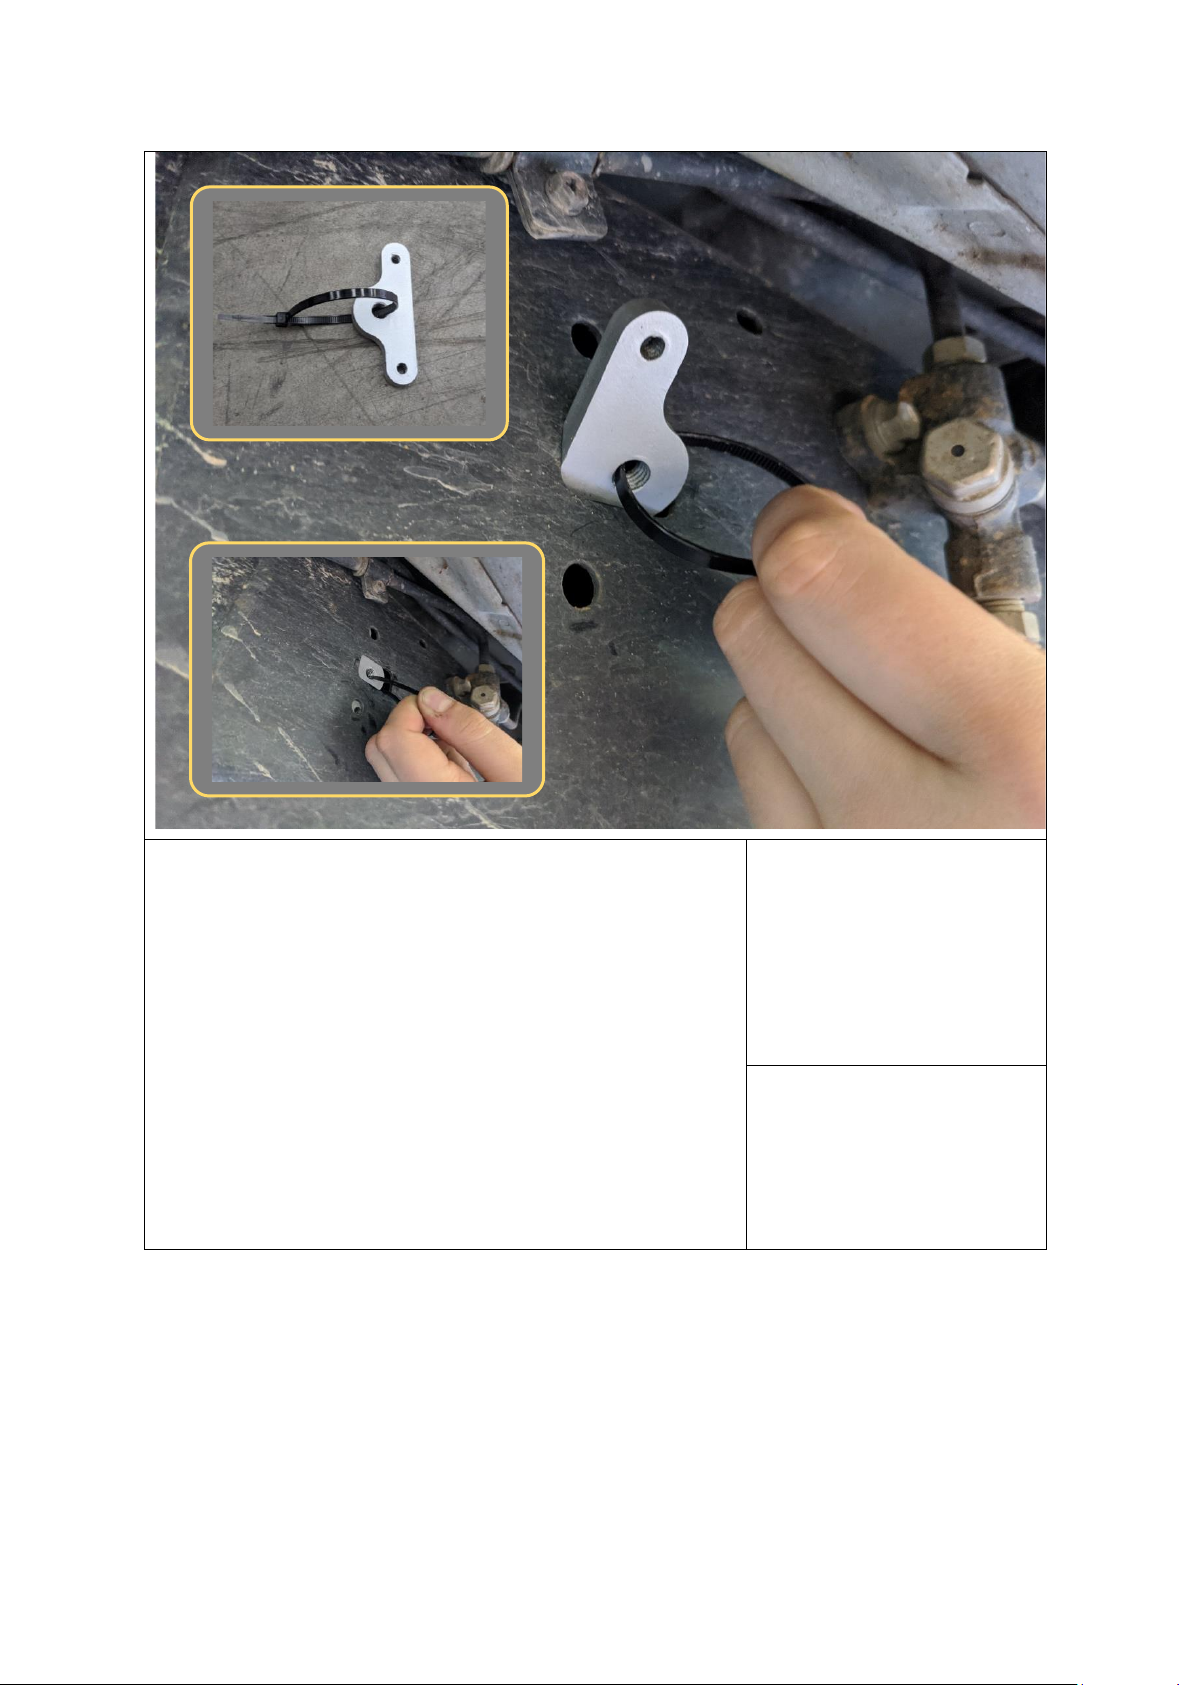
IMPORTANT! –READ BEFORE INSTALLATION
When installed in accordance with these instructions, the front protection bar does
not affect the operation of the vehicles SRS airbags.
•
This product must be installed exactly as per these instructions using only
hardware supplied.
•
Take a few moments to read instructions thoroughly before beginning work.
•
In the event of damage to any bar component please contact OFFROAD ANIMAL
to arrange repair/replacement of components.
•
Do not use this product for any vehicle make or model other than that specified on
these instructions.
•
Do not remove labels from this product.
•
This product and its fixings must not be modified in any way unless stated in these
fitting instructions.
•
The installation of this product is recommended for trained personnel.
•
These instructions are correct at time of publication. OFFROAD ANIMAL cannot
be held responsible for the impact of any changes subsequently made by the
vehicle manufacturer. If you find something has changed please contact us to let
us know!
•
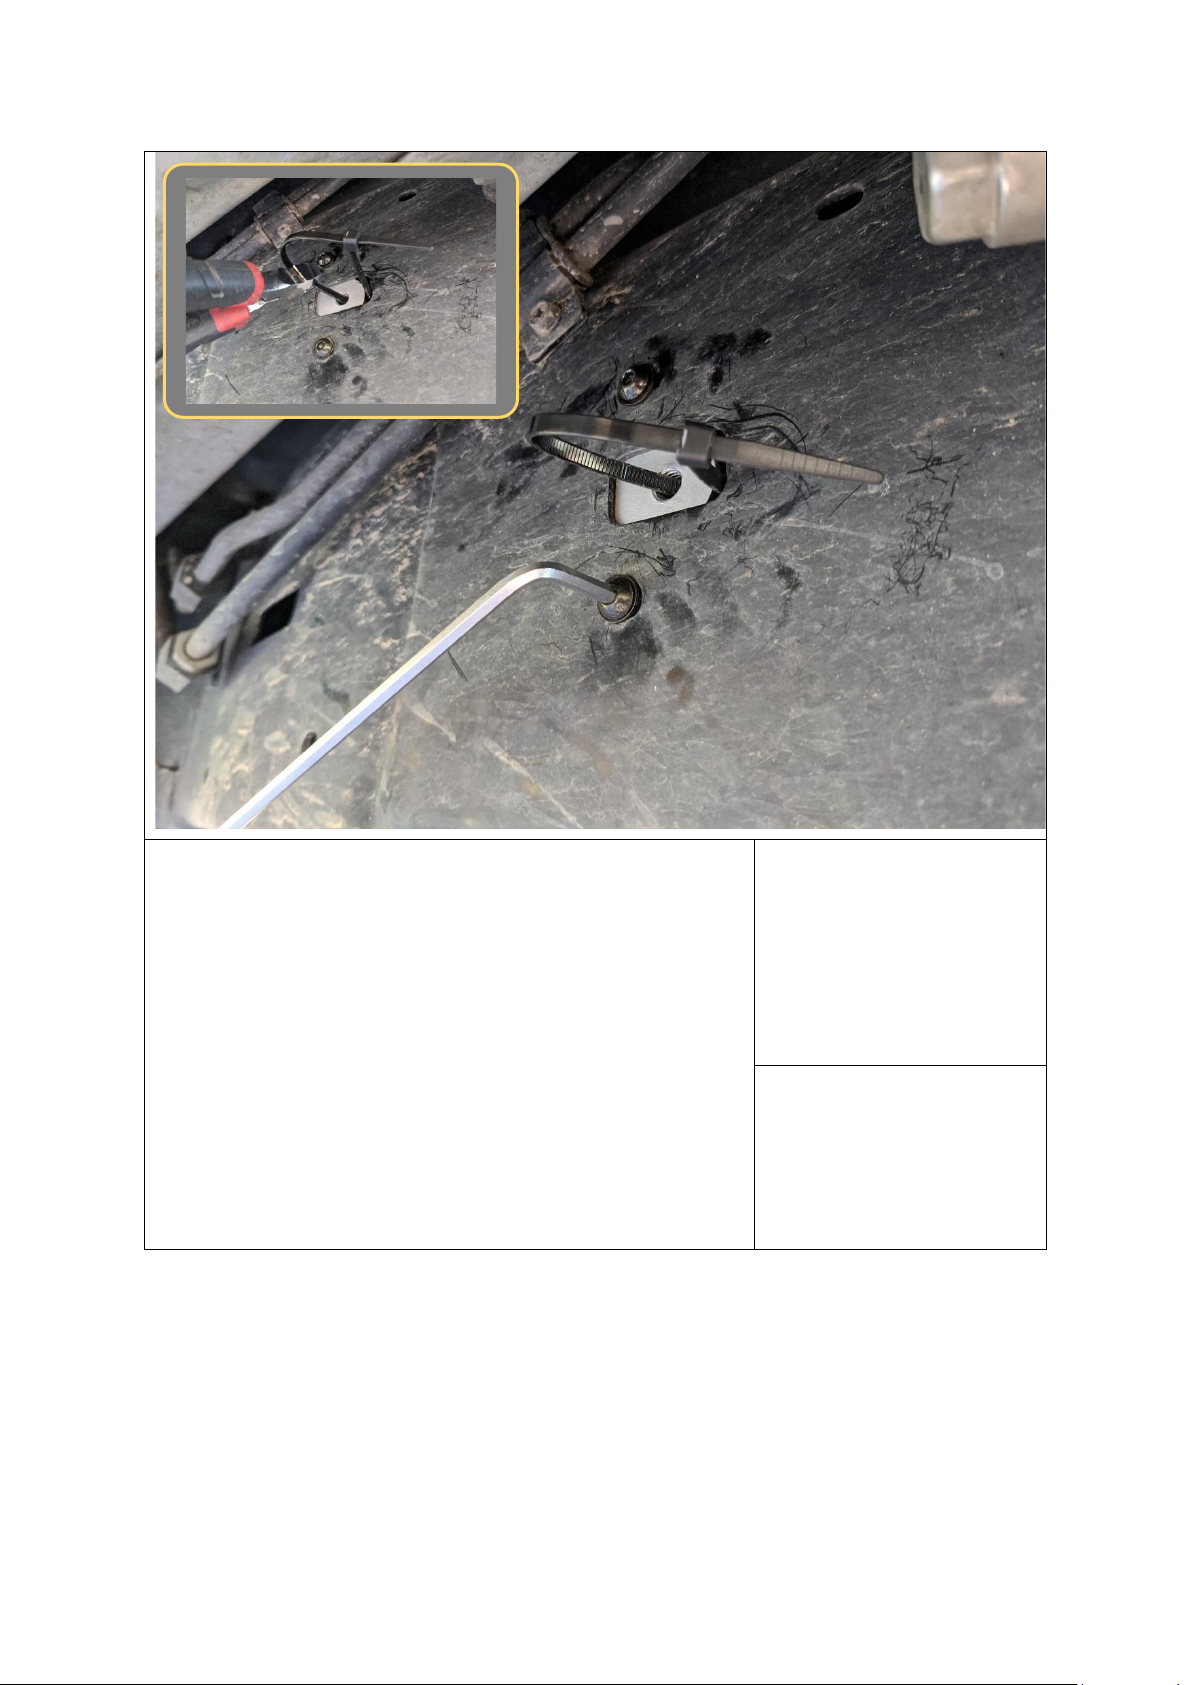
During installation it is the duty of the installer to check correct
operation/clearances of all components.
•
If Instructions are to be printed for reference in the workshop, it is recommended
that they are printed in colour, for best legibility.
•
Fitting time estimated 1-2 hours