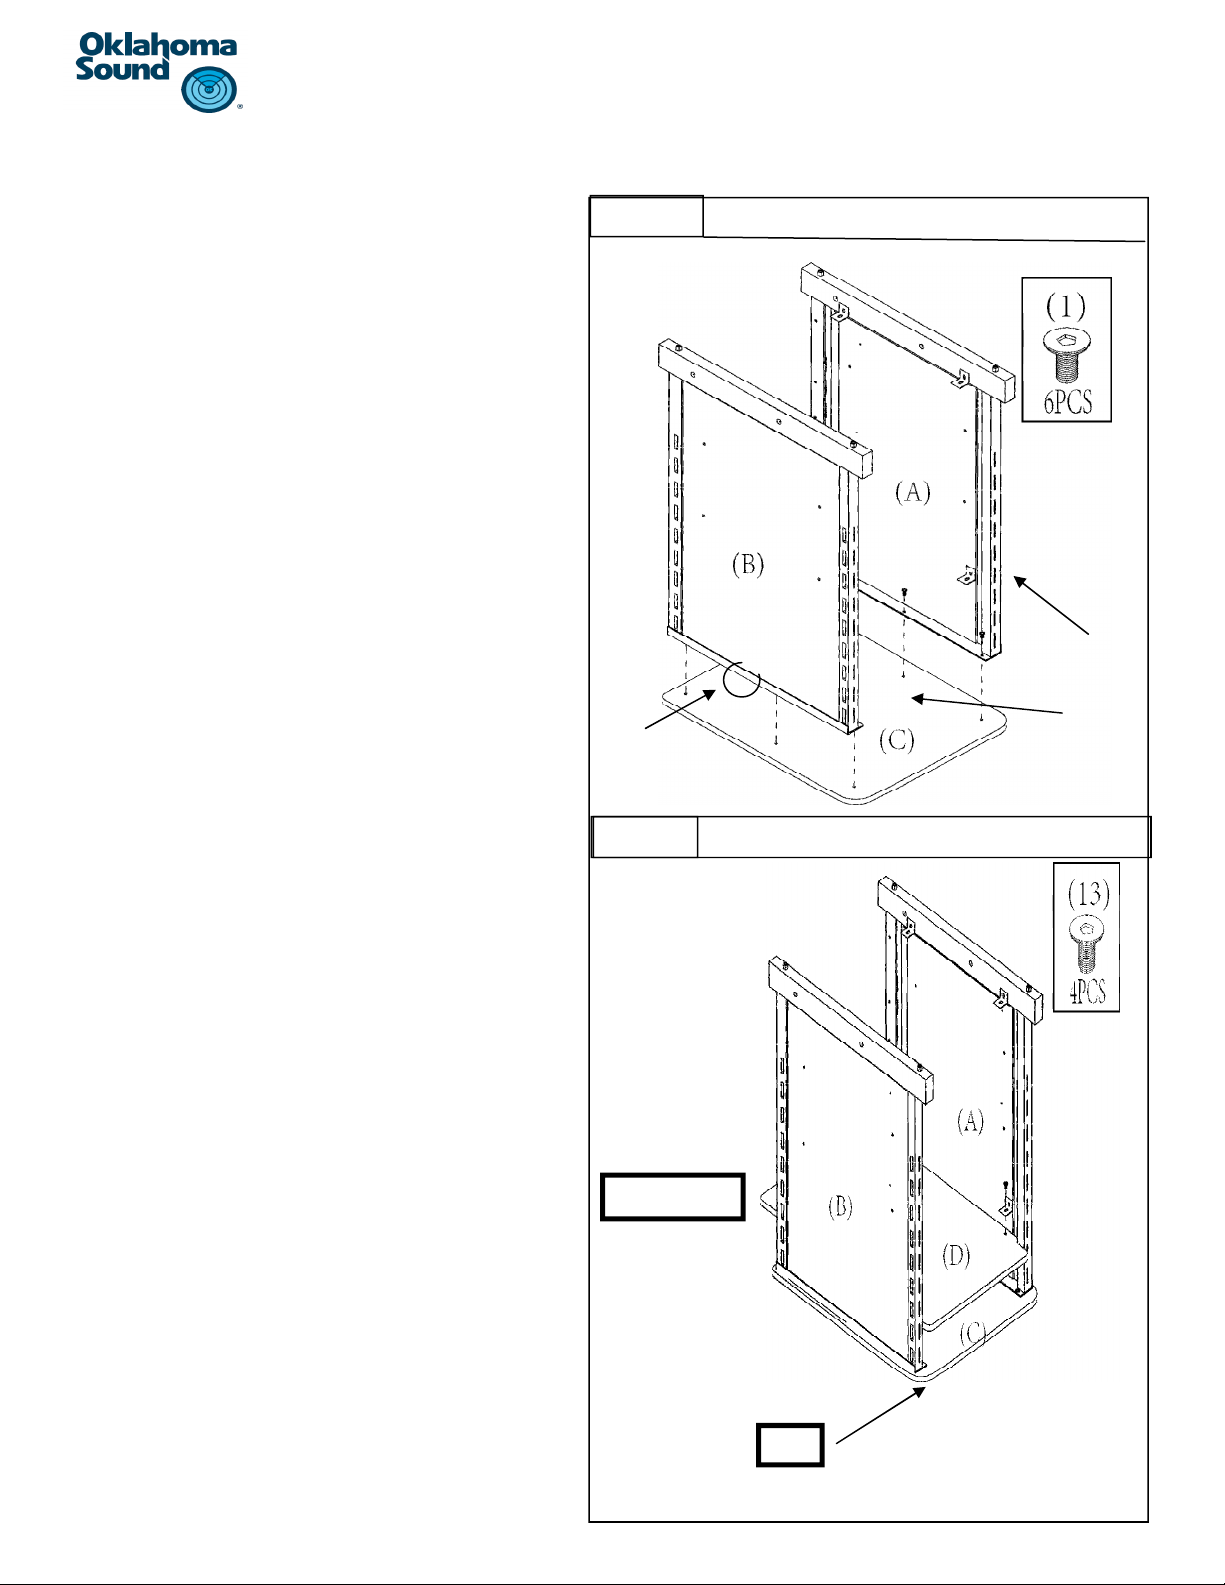
Step 9:
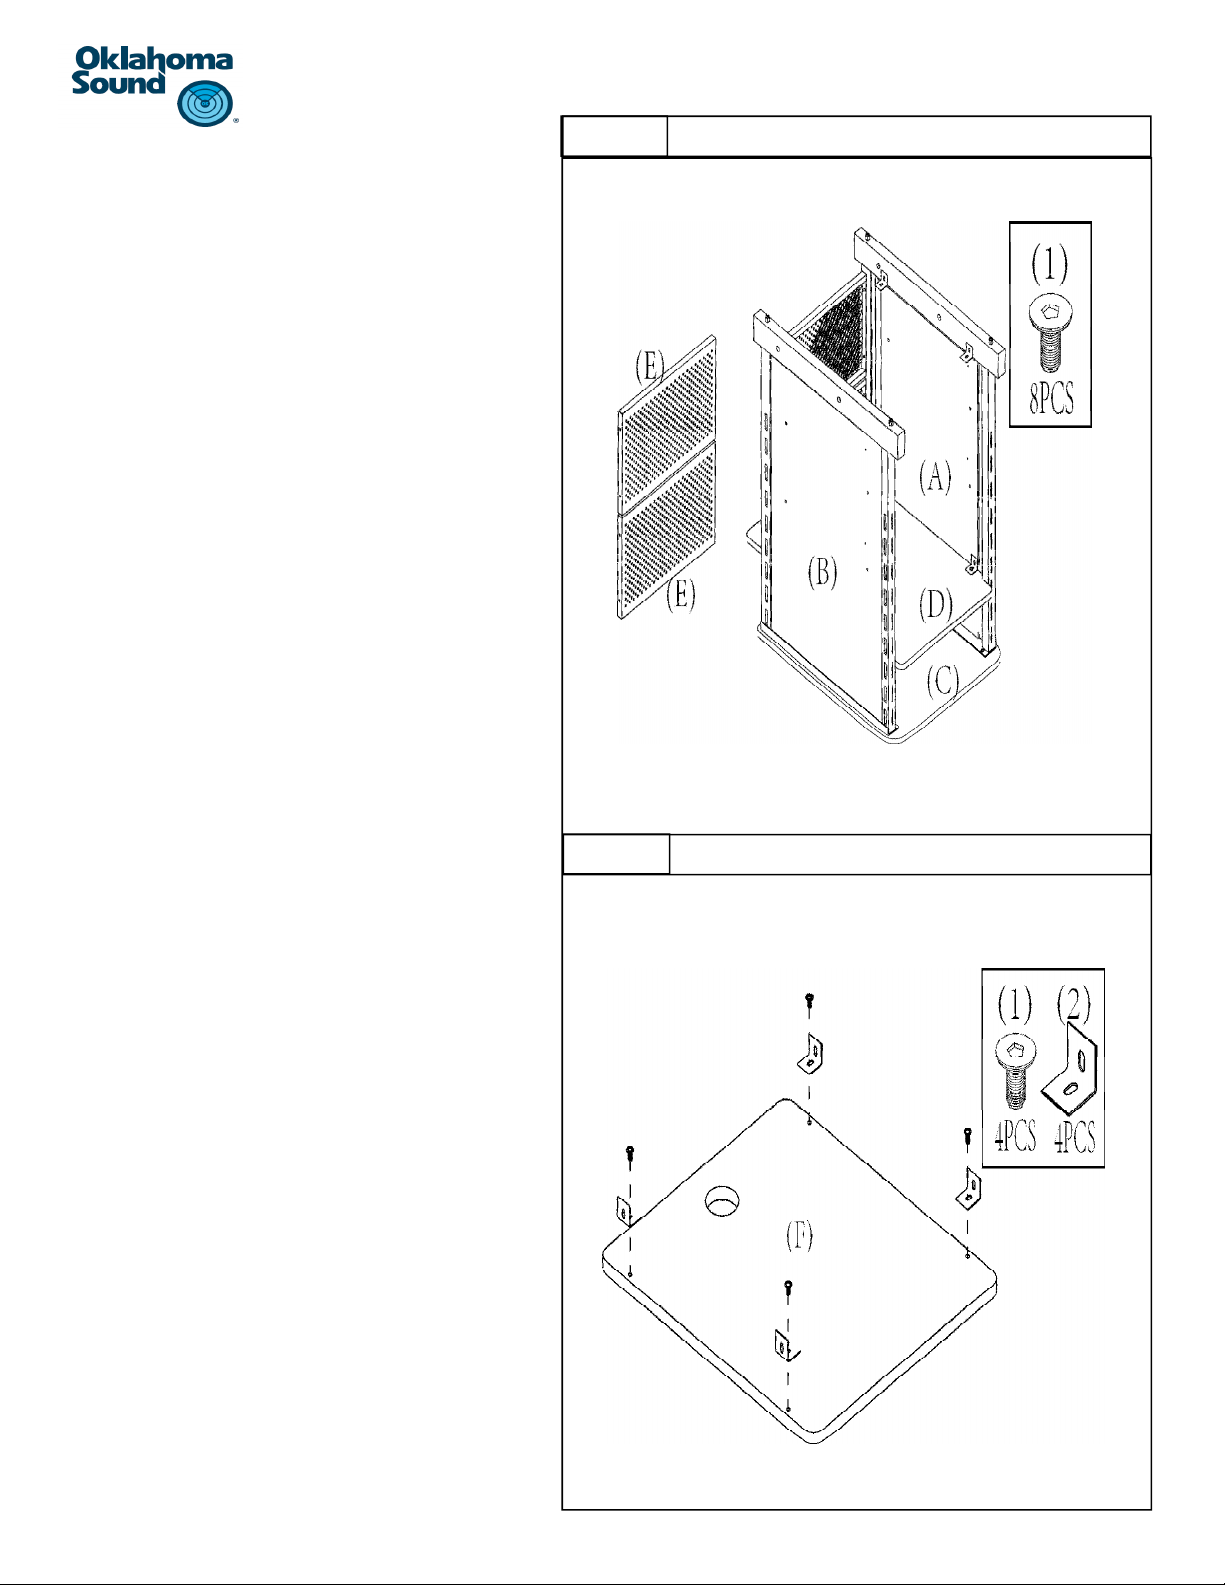
Step 10:
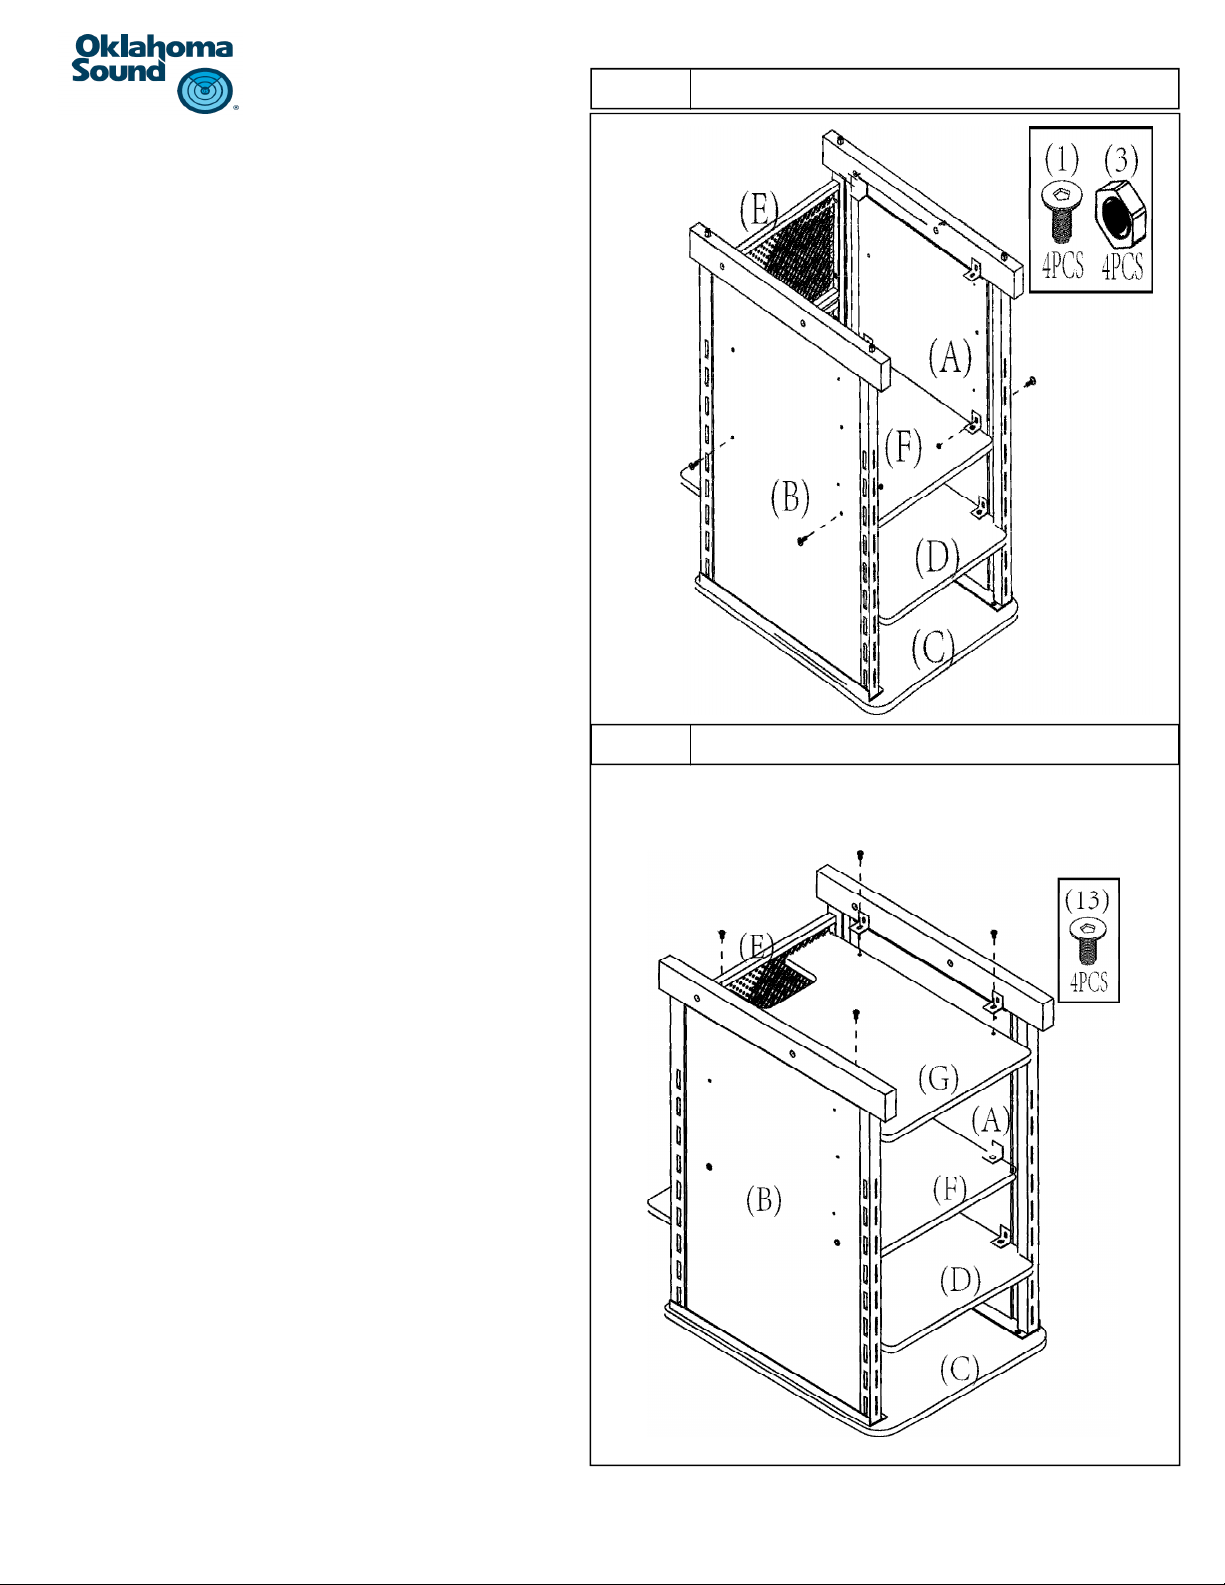
Step 11:
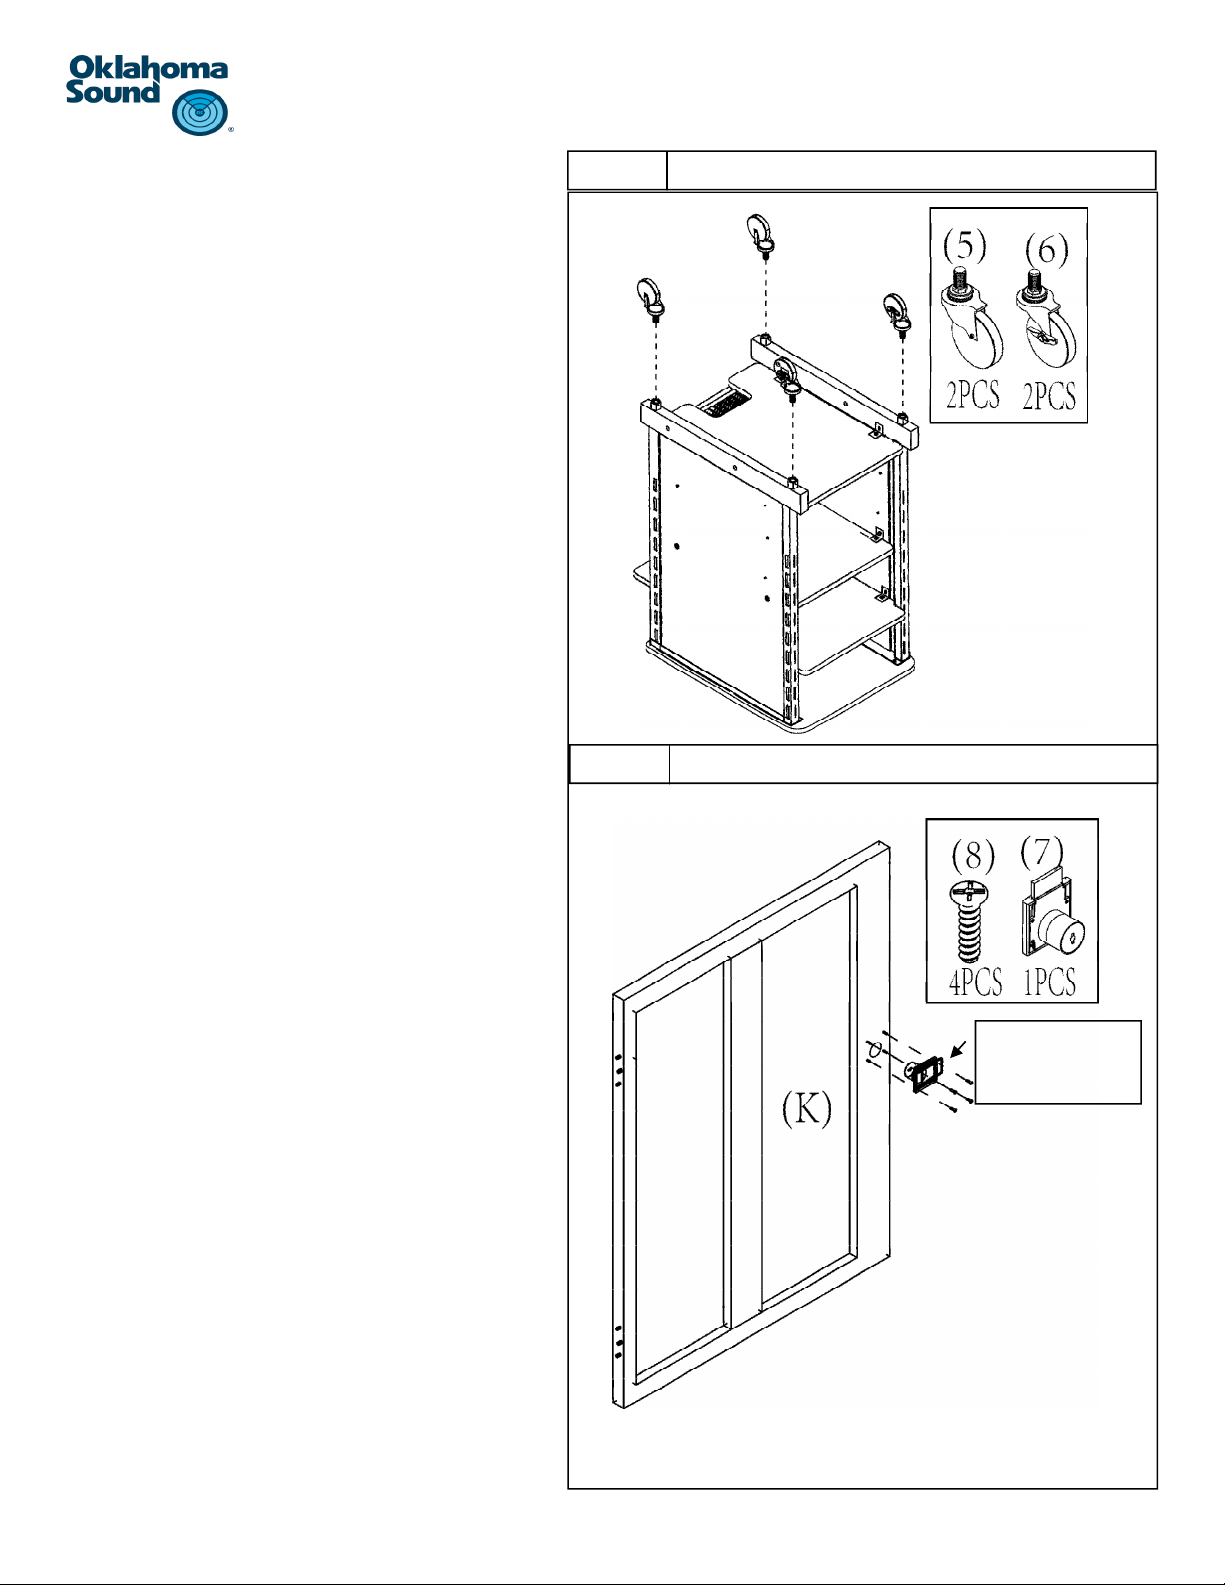
STEP 9
STEP 10
STEP 11
Congratula'ons!!! Your PRC 400 is
now fully assembled!!